Follow Me On Pinterest!
One Pan Honey Garlic Chicken

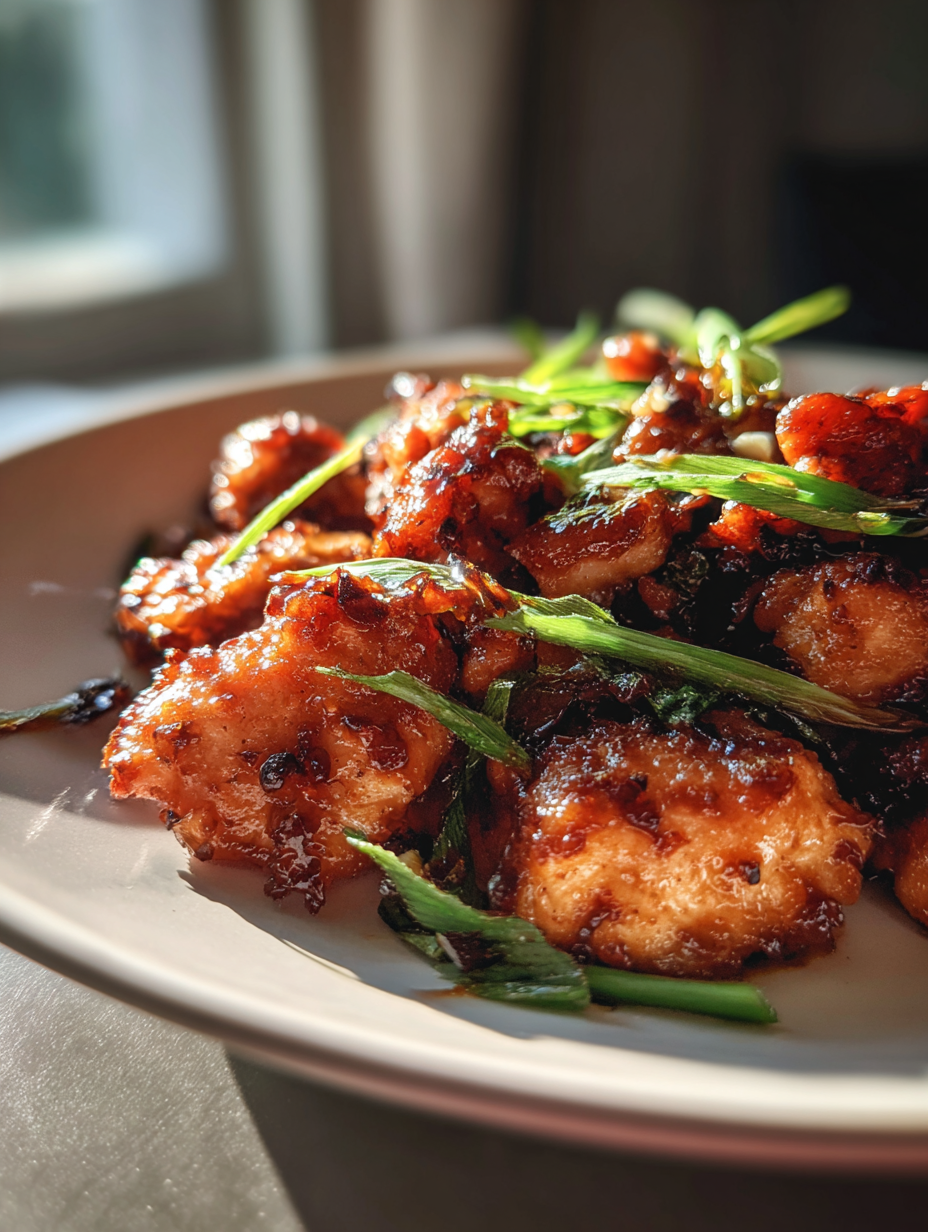
One Pan Honey Garlic Chicken: A Simple Yet Exquisite Dish That Delivers Comfort in Every Bite
—
Introduction
There’s a special place in my heart for dishes that whisk me back to the comfort of home, and One Pan Honey Garlic Chicken is one of those culinary treasures. I vividly recall the first time I made this dish, filling my kitchen with an intoxicating aroma that mingled sweet and savory in perfect harmony. It was a rainy evening, the kind that begged for warmth and coziness, and I found myself dancing around my kitchen with a wooden spoon in hand, stirring the rich, golden sauce that would blanket the chicken. The sound of sizzling chicken in a hot pan was almost musical, each pop and crackle a note of anticipation.
As I watched the honey caramelize and the garlic turn a beautiful golden brown, I was struck by the colors that played together in the pan—deep browns, glistening golds, and a hint of vibrant green from the parsley I had just chopped. The textures were equally inviting; the chicken would emerge tender and juicy, enveloped in a glossy sauce that promised a delightful contrast with the fluffy rice I planned to serve it over.
This dish quickly became a staple for me, not just for its deliciousness but also for how it embodies the essence of home cooking—simple, nourishing, and incredibly satisfying. Every time I whip up this one-pan wonder, I’m reminded of those cozy evenings, and I know I’m not just feeding myself; I’m creating memories.
Now, let’s dive into this delectable recipe that transforms everyday ingredients into a feast for the senses.
—
Why This Recipe Works
At the heart of One Pan Honey Garlic Chicken lies a beautiful balance of flavors and textures that elevate it above the ordinary. The sweetness of honey plays against the sharpness of garlic, creating a symphony of taste that dances on your palate. The soy sauce adds a depth of umami, while the acidity from a splash of vinegar or lemon juice brightens the dish, cutting through the richness and rounding out the flavors beautifully.
Texture is key in this recipe as well. You’re aiming for perfectly cooked chicken—juicy on the inside with a slightly crisp exterior. The technique is straightforward: sear the chicken in a hot pan to develop a lovely golden crust, then simmer it gently in the honey garlic sauce. This not only infuses the chicken with flavor but also allows the sauce to thicken and cling to the meat, creating a luscious coating that’s nothing short of irresistible.
Each ingredient plays a crucial role in the final outcome. The chicken is the star, of course, providing protein and heartiness. The honey acts as a natural sweetener that caramelizes beautifully, while garlic adds an aromatic punch. The soy sauce functions as a flavor enhancer, while any additional vegetables you choose to include—like bell peppers or snap peas—bring freshness and crunch to the dish.
What separates this version from generic recipes is the way the ingredients are harmonized. Rather than relying on overly complex seasonings, this recipe keeps it simple, allowing the quality of each ingredient to shine through. It’s a celebration of what food can be when you respect its natural flavors.
—
What Makes It Special
This One Pan Honey Garlic Chicken recipe stands out for several reasons.
– Freshness: Unlike restaurant or store-bought versions, making this dish at home means you’re in control of every ingredient. You can ensure that everything is fresh, from the garlic to the chicken itself, resulting in a dish that bursts with flavor and nutrition.
– Cost-Effectiveness: Preparing this dish at home is kinder to your wallet. You can buy ingredients in bulk and create several servings, making it a fantastic option for meal prepping or feeding a family without breaking the bank.
– Customization: This recipe is incredibly versatile. Feel free to twist it to your liking—add your favorite veggies, adjust the sweetness of the sauce, or even toss in some red pepper flakes for an added kick. The possibilities are endless, allowing you to cater to your taste preferences or dietary needs.
– Surprising Elements: One surprising element that elevates this dish is the use of fresh herbs at the end—think parsley or cilantro—adding a pop of color and a fresh, vibrant note that contrasts beautifully with the rich sauce. Additionally, a drizzle of sesame oil before serving can impart a hint of nuttiness, taking the dish to new heights.
—
Ingredient Breakdown
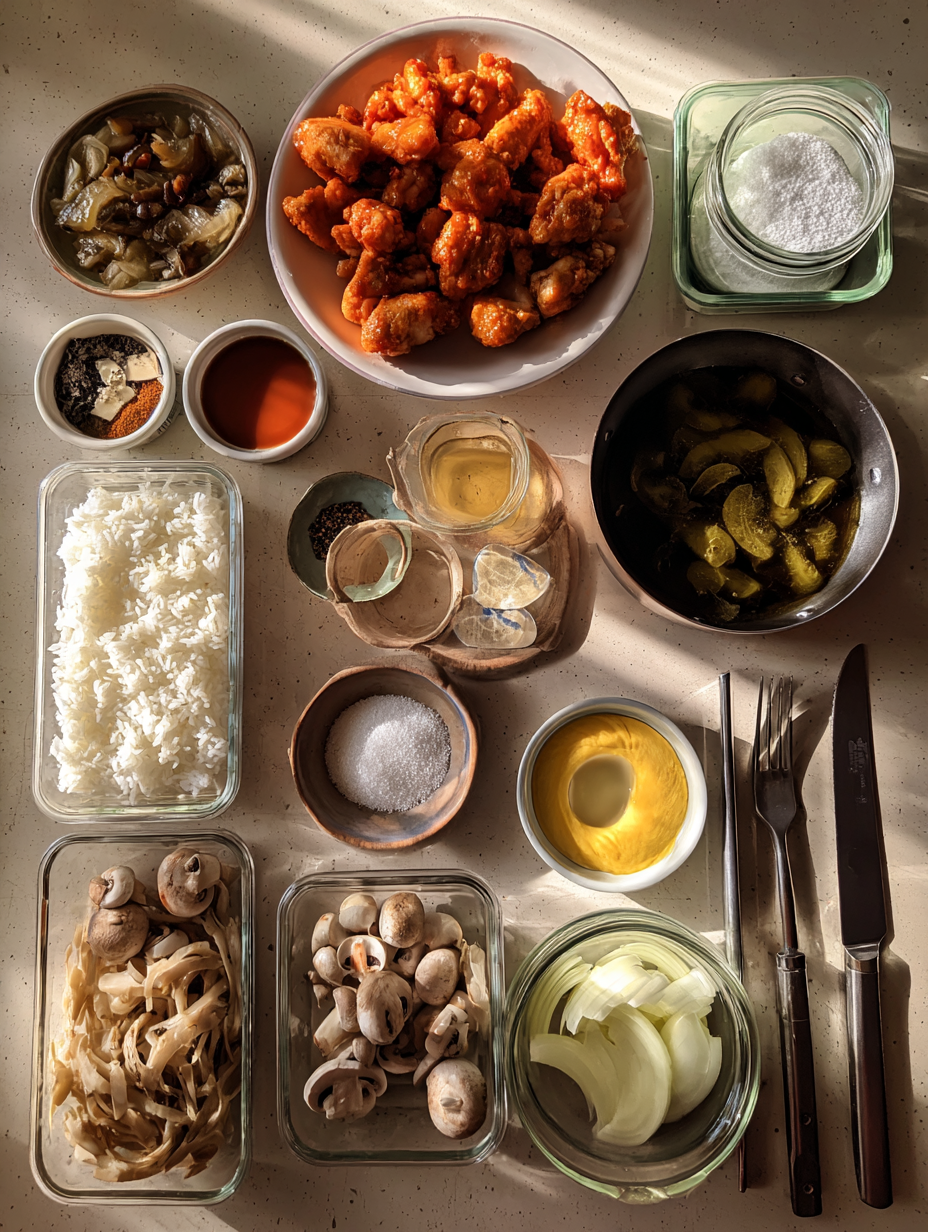
1. Chicken: The star of the dish. You can use bone-in, skin-on thighs for richer flavor and juiciness, or boneless, skinless breasts for a leaner option. Each choice will affect the cooking time slightly, so adjust accordingly.
2. Honey: This is your natural sweetener and thickening agent. The quantity matters because it balances the savory elements; too much, and it can overpower, too little, and the sauce will be too salty. Opt for raw honey if possible for a more complex flavor.
3. Garlic: Fresh garlic is essential here. It infuses the dish with aromatic richness. Use whole cloves, smashed or minced, depending on your flavor preference.
4. Soy Sauce: A key player for umami flavor. If you’re gluten-free, opt for tamari instead. The saltiness of soy sauce helps to enhance the sweetness of honey and the aromatic garlic.
5. Vegetable Oil: This is necessary for sautéing the chicken. Choose a neutral oil with a high smoke point, like canola or grapeseed.
6. Cornstarch: This acts as a thickening agent for the sauce, giving it that luxurious, glossy finish. If you want a gluten-free option, use arrowroot powder or simply omit it if you prefer a thinner sauce.
7. Optional Add-ins: Fresh herbs, sesame oil, or even a splash of vinegar for acidity can elevate the dish.
Finding specialty ingredients is simple; most can be sourced from your local grocery store. If you’re looking for raw honey or specific oils, consider visiting health food stores or local farmers’ markets for the freshest options.
—
Equipment Needed
– Large Skillet or Frying Pan: An essential tool for this recipe, as it allows you to sear the chicken properly and combine all ingredients in one pan for easy cleanup.
– Wooden Spoon or Spatula: Perfect for stirring and scraping the bottom of the pan to ensure all those delicious browned bits get incorporated into the sauce.
– Measuring Cups and Spoons: Accurate measurements will ensure the flavors are balanced, especially with ingredients like honey and soy sauce.
– Tongs: These are helpful for flipping the chicken without piercing it, preserving the juices and keeping the meat tender.
– Cutting Board and Knife: Necessary for chopping garlic and any vegetables or herbs you plan to add.
Affordable alternatives for the skillet could include a non-stick pan, but ensure it can withstand high heat. Optional tools might include a meat thermometer for checking the chicken’s doneness, but it’s not strictly necessary if you’re comfortable with visual cues.
Step-by-Step Instructions
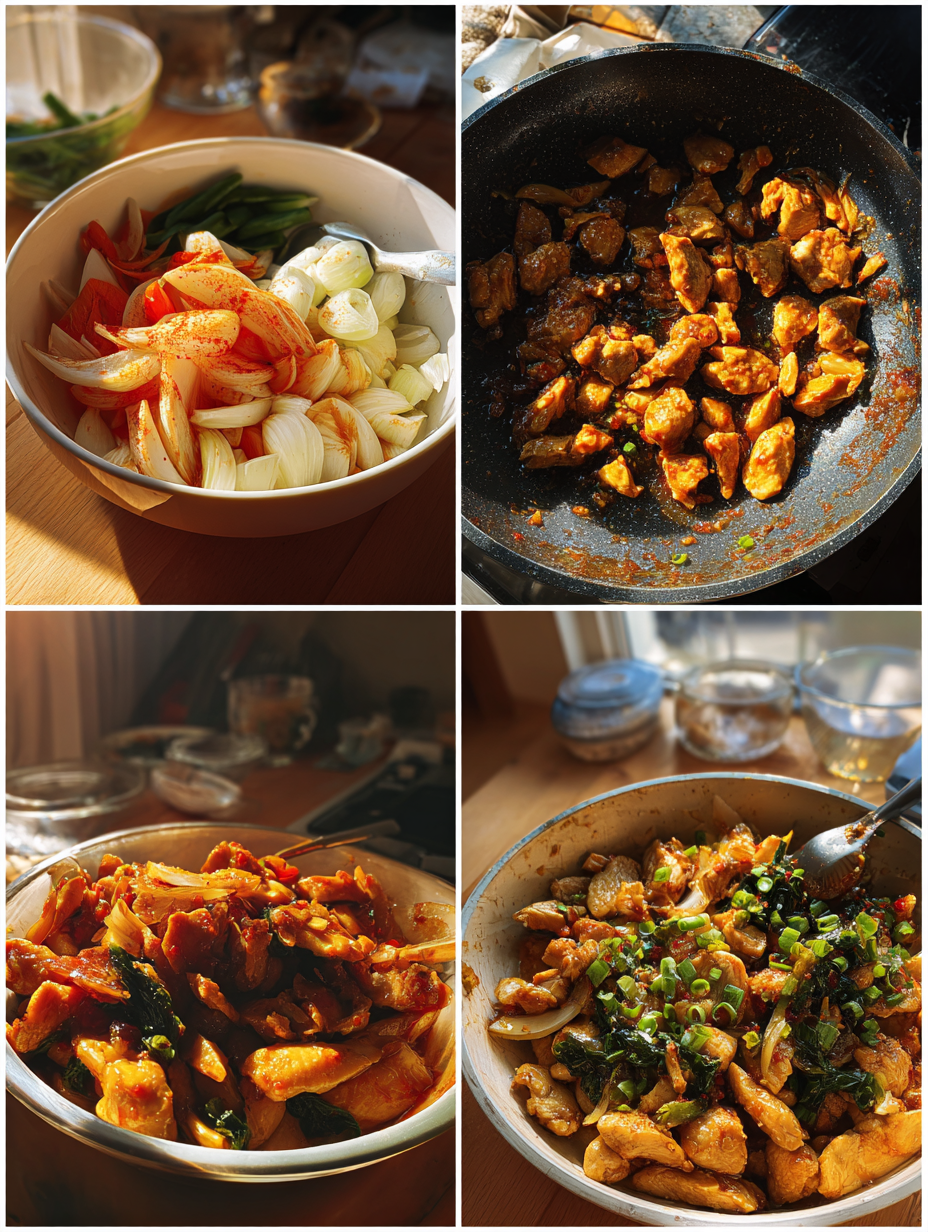
1. Prepare Your Ingredients
Start by gathering all your ingredients: chicken thighs or breasts, honey, soy sauce, garlic, ginger, and some vegetables of your choice, like broccoli or bell peppers. This is crucial for maintaining a smooth cooking process. Chop the garlic and ginger finely and set them aside. You should smell the freshness of the garlic and the zing of the ginger at this point. This prep should take about 10 minutes.
2. Marinate the Chicken
In a large bowl, combine the honey, soy sauce, minced garlic, and grated ginger. Add your chicken pieces to the marinade, ensuring they are well-coated. Chef’s Note: Allow the chicken to marinate for at least 15 minutes for maximum flavor. If you have the time, marinating for an hour in the fridge will yield even better results. You should see the chicken glistening with the marinade, and the aroma of garlic and ginger should fill the air.
3. Sear the Chicken
Heat a large, heavy-bottomed skillet over medium-high heat and add a tablespoon of oil. Once the oil is shimmering (about 2 minutes), carefully place the marinated chicken into the skillet. Sear the chicken for about 5-7 minutes on each side until it develops a golden-brown crust. Listen for that satisfying sizzle as the chicken hits the pan; this sound indicates a good sear. If you see any smoke, lower the heat slightly.
4. Add the Vegetables
Once the chicken is browned, it’s time to add your choice of vegetables to the skillet. Pour them directly around the chicken in the pan. Chef’s Note: Opt for vegetables that cook quickly, like bell peppers and snap peas, to ensure they stay vibrant and crisp. Cook for an additional 5 minutes, tossing occasionally, until the veggies are tender but still maintain their crunch. You should smell the sweet aroma of caramelizing vegetables mingling with the garlic.
5. Create the Sauce
After the chicken is cooked through (internal temperature should reach 165°F), pour the remaining marinade over the chicken and vegetables in the skillet. Chef’s Note: If you desire a thicker sauce, let it simmer for an extra 3-4 minutes until it reduces and becomes syrupy. As it cooks, the sauce will bubble and thicken, filling your kitchen with an inviting aroma.
6. Serve and Garnish
Once the sauce has reached your desired consistency, remove the pan from heat. Transfer the chicken and vegetables to a serving platter and drizzle any remaining sauce on top. Garnish with sesame seeds or sliced green onions for an added touch. The dish should glisten, and you’ll be welcomed by the sweet and savory scent of honey garlic as you serve it hot.
Pro Tips for the Best Results
1. Use Bone-In Chicken
For the juiciest results, consider using bone-in chicken thighs instead of boneless. The bones add flavor and moisture, resulting in chicken that is tender and succulent.
2. Adjust the Sweetness
If you prefer a less sweet dish, feel free to reduce the amount of honey. This can also help balance out the salty soy sauce, especially if you’re using a sweeter variety.
3. Preheat Your Skillet
Always preheat your skillet before adding oil. This prevents the chicken from sticking and ensures a great sear, which enhances the overall flavor profile of the dish.
4. Don’t Crowd the Pan
If you’re making a larger batch, cook the chicken in batches rather than overcrowding the pan. This way, each piece will sear properly, ensuring all sides are beautifully browned.
5. Monitor Cooking Temperature
After searing, turn the heat down to medium-low when adding the sauce. This helps prevent burning while allowing the flavors to meld beautifully without overcooking the chicken.
6. Experiment with Fresh Herbs
Add fresh herbs like cilantro or basil as a garnish to elevate the dish. The freshness will provide a delightful contrast to the sweet and savory flavors.
7. Let It Rest
Allow the chicken to rest for a few minutes after cooking before slicing. This helps the juices redistribute, leading to a more flavorful and juicy bite.
Common Mistakes to Avoid
1. Using Old Garlic
Mistake: Using garlic that has sprouted or is dried out can lead to a bitter flavor.
Correction: Always use fresh garlic for a robust and aromatic taste. When minced, it should smell pungent and fresh.
2. Skipping the Marinade
Mistake: Not marinating the chicken enough time results in bland meat.
Correction: Aim for at least 15 minutes, or ideally an hour, to let the flavors penetrate the chicken.
3. Overcooking the Chicken
Mistake: Cooking the chicken too long can dry it out.
Correction: Always use a meat thermometer to check for doneness. The internal temperature should reach 165°F for perfectly cooked chicken.
4. Not Searing Properly
Mistake: Placing chicken in the pan before it’s hot can cause it to steam instead of sear.
Correction: Ensure the skillet is hot and the oil is shimmering before adding the chicken.
5. Using the Wrong Vegetables
Mistake: Adding vegetables that require longer cook times can result in mushy textures.
Correction: Choose quick-cooking vegetables, such as bell peppers, zucchini, or snap peas.
6. Ignoring Sauce Consistency
Mistake: Not allowing the sauce to reduce can lead to a watery dish.
Correction: Let the sauce simmer until it thickens to your desired consistency, enhancing the overall flavor.
Creative Variations
1. Seasonal Variation: Honey Citrus Chicken
Replace the honey with a mixture of orange or lemon juice and zest for a refreshing twist. Add seasonal veggies like asparagus or baby carrots for a bright, vibrant dish.
2. Dietary-Friendly Version: Keto Honey Garlic Chicken
Substitute honey with a sugar-free sweetener like erythritol or stevia. Use coconut aminos instead of soy sauce to keep it low-carb while still enjoying a delicious taste.
3. Gourmet Elevated Version: Honey Garlic Chicken with Truffle Oil
After plating, drizzle a small amount of truffle oil over the chicken. Serve with sautéed mushrooms and a sprinkle of fresh herbs like thyme for a luxurious touch.
4. Quick 15-Minute Version: One-Pan Honey Garlic Shrimp
Swap chicken for shrimp; they cook much faster! Use pre-chopped garlic and ginger from the grocery store to save time, and sauté for just 2-3 minutes until shrimp are pink and opaque.
5. Kid-Friendly Version: Honey Garlic Chicken Tenders
Cut chicken into strips and coat them in the marinade. Bake in the oven at 425°F for 12-15 minutes for crispy chicken tenders that kids will love, served with a side of sweet dipping sauce.
6. International Twist: Honey Garlic Chicken with a Thai Flair
Add a tablespoon of Thai red curry paste to the marinade for a spicy kick. Serve with jasmine rice and garnish with cilantro and lime for an aromatic, flavorful dish that transports you straight to Thailand.
Serving Ideas
Transform your One Pan Honey Garlic Chicken into a stunning centerpiece with thoughtful plating. Here are a few ideas to inspire you:
1. Layered Presentation: Serve the chicken over a bed of fluffy jasmine rice or quinoa, allowing the grains to absorb the delightful honey garlic sauce. Use a large spoon to create a small well in the center, making room for the chicken pieces to sit high.
2. Colorful Contrast: Pair the chicken with vibrant steamed broccoli or sautéed rainbow carrots. The green and orange will pop against the golden chicken, creating an appetizing contrast. Garnish with freshly chopped parsley or cilantro for a touch of freshness.
3. Elegant Plating: Use a wide, shallow bowl to plate the chicken, drizzling extra sauce artfully around the edges. Adorn the dish with thinly sliced green onions and toasted sesame seeds, adding depth and visual appeal.
4. Family Style: For a cozy gathering, serve the chicken directly from the pan, with dishes of roasted baby potatoes or grilled corn on the side. This encourages sharing and creates a warm atmosphere.
5. Garnish with Zest: Just before serving, sprinkle a little zesty lemon or lime zest over the chicken for a bright finish. This not only enhances the flavor but also adds a beautiful contrast to the golden hue of the honey garlic glaze.
What to Serve With
To elevate your One Pan Honey Garlic Chicken, consider these delightful pairings:
1. Miso Glazed Eggplant: The umami richness of miso complements the sweetness of the honey garlic sauce, while the eggplant adds a soft, silky texture that contrasts with the chicken.
2. Cucumber Salad: A light cucumber salad with rice vinegar, sesame oil, and a sprinkle of sesame seeds brings a refreshing crunch, cutting through the richness of the chicken.
3. Sesame Ginger Noodles: These noodles add a delightful chewiness and flavor depth that harmonizes beautifully with the honey garlic notes, offering a satisfying mouthfeel.
4. Chardonnay: A chilled glass of Chardonnay with its crisp acidity and hints of stone fruit works wonders, balancing the sweetness of the dish while enhancing its flavor.
5. Pineapple Upside-Down Cake: A slice of this classic dessert rounds out the meal with a tropical sweetness that echoes the chicken’s glaze, making for a joyful finale.
6. Garlic Bread: The crunchy, buttery garlic bread provides a delightful vessel to scoop up any remaining sauce, creating a delicious blend of flavors and textures.
Storage Guide
To keep your One Pan Honey Garlic Chicken fresh for later enjoyment, follow these storage tips:
– Container Type: Use an airtight glass container to prevent moisture loss and keep flavors intact. Avoid plastic containers that may absorb odors.
– Temperature: Store the chicken in your refrigerator at or below 40°F (4°C).
– Shelf Life: Properly stored, it will keep for 3–4 days. After that, the quality may start to decline.
– Signs of Spoilage: Look for an off smell, discoloration, or a slimy texture as indicators that the chicken has gone bad.
– Refreshing Before Serving: When ready to enjoy your leftovers, consider sautéing them on the stovetop with a splash of chicken broth or water. This will not only reheat the chicken but also help revive its original moisture and flavor.
Freezing Tips
Your One Pan Honey Garlic Chicken can successfully be frozen, making it a convenient option for meal prep.
– Portioning: Divide the chicken into individual servings to make thawing easier.
– Wrapping Method: Wrap each portion tightly in plastic wrap, then place it in a freezer-safe bag or container to prevent freezer burn.
– Labeling: Always label your containers with the date, so you know when to use them.
– Freezer Life: It can be stored in the freezer for up to 3 months without significant quality loss.
– Quality After Thawing: Expect slight changes in texture; it may be a bit softer but should still taste delicious.
– Best Thawing Method: Thaw overnight in the refrigerator for optimal flavor preservation.
Reheating Guide
To enjoy your One Pan Honey Garlic Chicken the next day, here’s how to properly reheat it:
– Microwave: Place the chicken in a microwave-safe dish, covering it with a microwave-safe lid or damp paper towel to trap steam. Heat on medium power for about 2-3 minutes or until heated through.
– Oven: Preheat your oven to 350°F (175°C). Place the chicken in an oven-safe dish, cover it with aluminum foil, and heat for about 15-20 minutes until warmed through. The foil helps retain moisture.
– Stovetop: Heat a skillet over medium-low heat. Add a splash of chicken broth or water, then add the chicken. Stir occasionally for about 5-7 minutes until heated through, which will help restore some moisture.
– Texture and Flavor Tips: For best results, add a little fresh garlic or ginger while reheating to bring back that vibrant flavor profile.
Nutrition Overview
Each serving of One Pan Honey Garlic Chicken roughly contains:
– Calories: 350
– Protein: 30g
– Carbohydrates: 25g
– Fat: 15g
– Fiber: 1g
– Sugar: 12g
This dish is a great source of lean protein from the chicken, which is essential for muscle repair. The honey not only adds sweetness but also provides antioxidants, while garlic is known for its immune-boosting properties. Enjoying this meal can help you feel satisfied without compromising your nutritional goals.
Frequently Asked Questions
Q: Can I use a different protein besides chicken?
A: Absolutely! This recipe works well with chicken thighs, shrimp, or even tofu for a vegetarian option. Just adjust cooking times accordingly; shrimp cooks much faster, while tofu should be pressed to remove excess moisture.
Q: Is there a way to make this dish gluten-free?
A: Yes! Simply use gluten-free soy sauce or tamari instead of regular soy sauce to keep the honey garlic flavor intact without gluten.
Q: How long does it take to cook the chicken?
A: Cooking time can vary based on the thickness of the chicken. Generally, boneless chicken breasts take about 20-25 minutes to cook through at medium heat. Ensure the internal temperature reaches 165°F (74°C).
Q: Can I double the recipe?
A: You can double the ingredients; just be mindful not to overcrowd the pan. Cooking in batches may be necessary to ensure even cooking and caramelization.
Q: How do I make the sauce thicker?
A: If you prefer a thicker sauce, mix a tablespoon of cornstarch with two tablespoons of water to create a slurry. Add this to the sauce during the last few minutes of cooking to achieve your desired consistency.
Q: Can I marinate the chicken beforehand?
A: Definitely! Marinating the chicken for at least 30 minutes or even overnight will infuse it with flavor and tenderness, making the dish even more delicious.
Q: What type of honey should I use?
A: Use high-quality, raw honey for the best flavor. Local honey is ideal as it often contains unique floral notes, adding depth to your dish.
Q: How can I make this dish spicier?
A: To add some heat, consider incorporating red pepper flakes or a splash of sriracha into the sauce. Adjust the amount according to your spice tolerance!
Final Thoughts
As you dive into making your One Pan Honey Garlic Chicken, remember to take your time with the sauce. Letting it simmer until thick and bubbly is key to achieving that rich flavor. I’m genuinely excited for you to bring this dish to your table; it’s sure to impress family and friends alike! The best part? You can effortlessly create a meal that’s both beautiful and delicious without the fuss. So, gather your ingredients and start cooking — I can’t wait to hear how it turns out!