Follow Me On Pinterest!
Mini Chocolate Cheesecake Cups


Mini Chocolate Cheesecake Cups: **Indulgence in Every Bite**
Introduction
Imagine walking into a cozy kitchen, the rich aroma of melting chocolate wafting through the air, wrapping around you like a warm hug. This is the scene that transports me back to my childhood, where weekend baking sessions were filled with laughter and the sweet sounds of mixing bowls clinking together. My grandmother was the maestro of desserts, and her love for chocolate was nothing short of legendary. One of her signature treats was a decadent cheesecake, but in our family, we had a penchant for making things smaller, cuter, and even more delightful. Thus, the birth of the Mini Chocolate Cheesecake Cups.
These little cups of bliss became a family tradition, perfectly sized for indulging without guilt (or so we told ourselves). Each spoonful was a delightful harmony of creamy cheesecake and rich chocolate, balanced perfectly by a crunchy crust that crumbled just enough to add texture. I still remember the first time I made them on my own—how the chocolate melted into the batter, creating a glossy mixture that was almost too tempting to resist.
As you prepare these Mini Chocolate Cheesecake Cups, let their charm take you back to those warm, memory-filled kitchens. Each cup promises a taste of nostalgia, a dash of creativity, and a whole lot of love. Whether you’re baking for a special occasion or simply indulging your sweet tooth, these little delights are a celebration in every bite.
Why This Recipe Works
The secret to a perfect Mini Chocolate Cheesecake Cup lies in the balance of flavors and textures that come together in an effortless dance. This recipe combines the richness of cream cheese and the deep, comforting notes of semi-sweet chocolate, creating a decadent filling that is both creamy and satisfying. Here’s why this recipe is not just another dessert, but rather a reliable, delectable treat.
1. Cream Cheese Foundation: The base of this cheesecake is high-quality cream cheese, which provides a smooth and velvety texture. When beaten well, it becomes light and airy, ensuring that your cheesecake cups don’t feel heavy but rather melt in your mouth.
2. Chocolate Magic: The incorporation of semi-sweet chocolate chips elevates the flavor profile. As they melt into the cream cheese, they infuse the mixture with a luxurious chocolate depth that is irresistible. Their sweetness strikes a perfect balance against the tangy cream cheese.
3. Texture Contrast: The crust, made from crushed chocolate cookies mixed with melted butter and sugar, adds a delightful crunch that contrasts beautifully with the creamy filling. Pressing the crust down firmly ensures it holds together, providing a sturdy base that enhances the overall experience.
4. Controlled Baking: Baking at a moderate temperature ensures that the edges set perfectly while keeping the center slightly jiggly. This gentle baking technique prevents the cheesecake from cracking, resulting in a smooth finish that looks as good as it tastes.
With these elements in play, you can trust that your Mini Chocolate Cheesecake Cups will turn out perfectly every time, making them a reliable go-to for gatherings or a special treat just for you.
What Makes It Special
What sets these Mini Chocolate Cheesecake Cups apart from the average cheesecake or store-bought dessert? Here are a few qualities that elevate them to a whole new level:
– Individual Portions: Serving desserts in individual cups not only adds a touch of elegance but also makes portion control a breeze. You can enjoy the delightful experience of cheesecake without the guilt of overindulging. Plus, they are easy to serve at parties or gatherings, allowing your guests to grab and go!
– Simplicity of Ingredients: Unlike many restaurant desserts that are laden with preservatives and artificial flavors, this recipe focuses on simple, high-quality ingredients you can feel good about. Each component plays a vital role in creating that rich, satisfying flavor that you crave.
– Customizable Flavors: While the classic chocolate flavor is divine, this recipe serves as a canvas for creativity. You can easily customize it by adding a swirl of raspberry puree, a hint of espresso, or even a layer of caramel for a unique twist. Your imagination is the only limit!
– Homemade Charm: There’s something undeniably special about homemade desserts. The time and care you put into making these mini cheesecake cups infuse them with love and warmth, something that store-bought versions can never replicate. They become not just a treat, but a heartfelt gift for friends and family.
These unique qualities ensure that your Mini Chocolate Cheesecake Cups will not only impress your taste buds but also create lasting memories for everyone who enjoys them.
Ingredient Breakdown
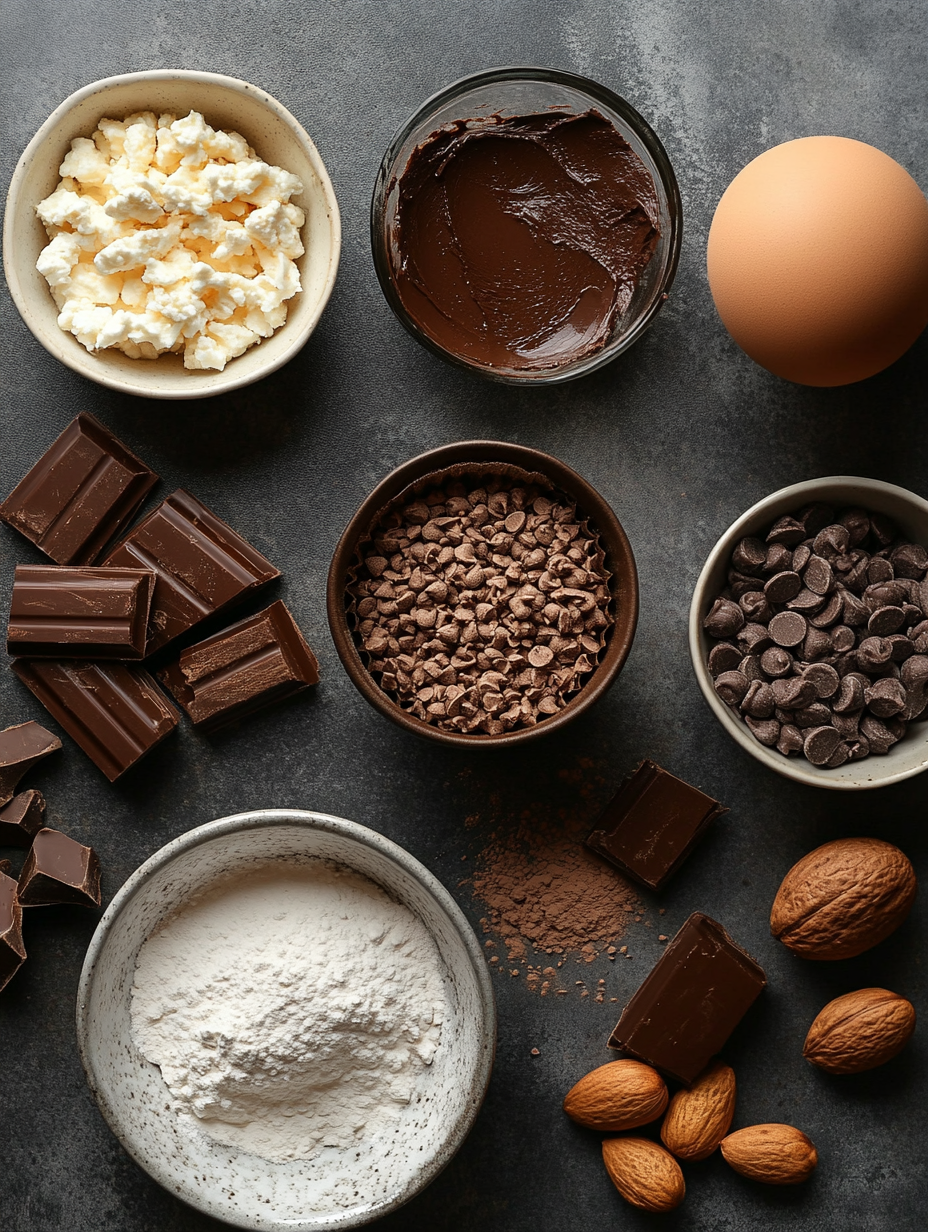
When it comes to making the perfect Mini Chocolate Cheesecake Cups, each ingredient plays a crucial role in achieving that decadent flavor and texture. Let’s break it down:
– Chocolate Cookie Crumbs: The crust is made from chocolate cookie crumbs, which provide a rich, chocolatey base that complements the filling perfectly. You can use store-bought chocolate sandwich cookies or make your own by crushing chocolate graham crackers. If you’re looking for a gluten-free option, crushed gluten-free cookies work just as well.
– Granulated Sugar: This ingredient sweetens the crust and helps bind the crumbs together. It’s essential for balancing the flavors, especially since the filling has its own sweetness from the powdered sugar and chocolate.
– Unsalted Butter: Adding melted butter to the cookie crumbs creates a cohesive crust that holds its shape once baked. Using unsalted butter allows you to control the saltiness of your dessert, ensuring that the focus remains on the sweetness and richness.
– Cream Cheese: The star of the filling! Cream cheese adds a smooth, creamy texture and a slight tang that balances the sweetness of the sugar and chocolate. Make sure to use full-fat cream cheese for the best results; it contributes to the richness and prevents the cups from becoming too dense.
– Powdered Sugar: This finely powdered sugar dissolves easily into the cream cheese, creating a smooth and luscious filling. The sweetness from the powdered sugar is essential to balance the slight bitterness of the chocolate.
– Semi-Sweet Chocolate Chips: These chips are what bring the chocolate flavor to life. They melt beautifully into the cream cheese mixture, creating a rich chocolate filling. If you prefer a darker chocolate flavor, feel free to substitute with dark chocolate chips or bittersweet chocolate.
– Vanilla Extract: A touch of vanilla adds depth to the cheesecake filling, enhancing the overall flavor without overpowering the chocolate. Always opt for pure vanilla extract for the best taste.
– Eggs: Eggs are crucial for binding the filling together and providing structure. They help the cheesecake set without making it too firm. Adding them one at a time allows for better incorporation into the mixture, ensuring a smooth and creamy texture.
Feel free to explore substitutions for any dietary needs. For a vegan version, you could try plant-based cream cheese and egg substitutes like flax eggs. And if you’re looking to reduce sugar, there are plenty of sugar alternatives on the market that can be used in place of granulated and powdered sugar.
Equipment Needed
Creating your Mini Chocolate Cheesecake Cups requires just a few essential tools. Each piece of equipment plays a vital role in ensuring your dessert turns out perfectly.
– Mixing Bowls: A set of mixing bowls in various sizes is essential for combining your ingredients. Glass or stainless steel bowls are great options as they are durable and easy to clean.
– Electric Mixer: While you can certainly mix by hand, an electric mixer (stand or handheld) will save you time and effort, especially when it comes to beating the cream cheese until creamy. It helps achieve that smooth texture without lumps.
– Measuring Cups and Spoons: Accurate measurements are key to a successful recipe. Invest in a good set of measuring cups and spoons for both dry and liquid ingredients.
– Mini Dessert Cups: These are the stars of the show! You can use disposable plastic cups, glass jars, or even ramekins. Just ensure they are oven-safe if you choose to bake them in the same vessel.
– Baking Sheet: A sturdy baking sheet is essential for placing your dessert cups in the oven. It ensures even cooking and makes it easier to handle the cups as they bake.
– Spatula: A silicone spatula is perfect for scraping down the sides of bowls and for gently folding in ingredients. It’s a handy tool that helps you get every last bit of batter!
– Cooling Rack: Once your cheesecake cups are baked, a cooling rack allows them to cool evenly without trapping moisture. This helps prevent soggy bottoms!
You don’t need to break the bank to gather these tools; many of them are kitchen essentials that you may already have! Investing in good-quality items will make your baking experience smoother and more enjoyable.
Now that you have a comprehensive understanding of the delightful journey ahead, it’s time to roll up your sleeves and indulge in these Mini Chocolate Cheesecake Cups!
Step-by-Step Instructions
1. Preheat the Oven
– WHAT: Start by preheating your oven to 325°F (160°C).
– HOW: This initial step ensures that your cheesecakes will bake evenly. While the oven heats up, you can prepare your crust and filling.
– WHAT TO LOOK/SMELL/HEAR: You’ll hear the oven fan kick on, and as it heats, you might catch a whiff of any lingering aromas from previous baking.
2. Prepare the Crust
– WHAT: In a mixing bowl, combine 1 cup of chocolate cookie crumbs, 2 tablespoons of granulated sugar, and 4 tablespoons of melted unsalted butter.
– HOW: Mix the ingredients until the crumbs are evenly coated with butter. This mixture should feel damp and hold together when pressed.
– WHAT TO LOOK/SMELL/HEAR: The mixture will smell sweet and chocolatey. When you press it together, it should feel slightly sticky, indicating it’s ready for the next step.
3. Form the Crust in Cups
– WHAT: Divide the crust mixture evenly among 4 mini dessert cups.
– HOW: Use your fingers or the back of a spoon to press down firmly, ensuring an even, compact layer that will hold up when you add the filling.
– WHAT TO LOOK/SMELL/HEAR: As you press, you might hear a satisfying crunch from the crumbs, and you should see a solid base forming in each cup.
4. Cream the Cream Cheese
– WHAT: In a separate bowl, beat 8 ounces of softened cream cheese until smooth and creamy.
– HOW: Use an electric mixer on medium speed for about 2-3 minutes. Make sure there are no lumps left.
– WHAT TO LOOK/SMELL/HEAR: The cream cheese should be silky and spreadable; you’ll notice a slight tangy aroma as it transforms.
5. Incorporate the Sweetness
– WHAT: Gradually add 1 cup of powdered sugar while continuing to beat the cream cheese.
– HOW: Mix on low speed to prevent sugar from flying everywhere. Once incorporated, add 1 cup of melted semi-sweet chocolate chips and 1 teaspoon of vanilla extract.
– WHAT TO LOOK/SMELL/HEAR: The mixture should turn a luscious chocolate brown and smell heavenly. You’ll hear a smooth whir as the ingredients blend together.
6. Add the Eggs
– WHAT: Add 2 large eggs, one at a time, mixing on low speed until just incorporated.
– HOW: Avoid overmixing at this stage as it can lead to cracks in your cheesecake. Just mix until you no longer see streaks of egg.
– WHAT TO LOOK/SMELL/HEAR: The batter will become slightly thicker and glossy. You might hear the mixer slowing down, indicating the eggs are blended in.
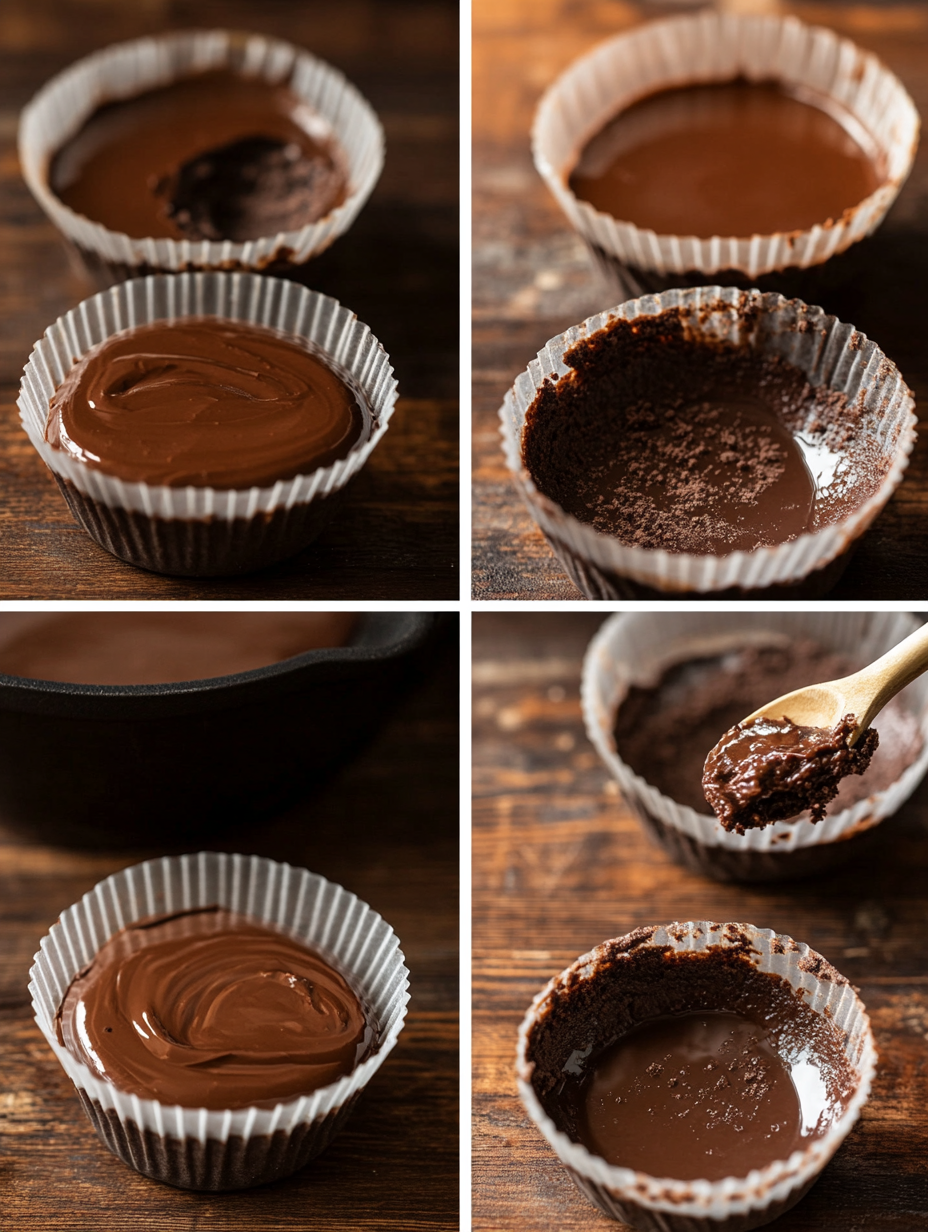
7. Fill the Cups
– WHAT: Pour the cheesecake mixture over the crust in each cup, filling them about three-quarters full.
– HOW: Use a spoon or a small measuring cup for precision, ensuring an even distribution.
– WHAT TO LOOK/SMELL/HEAR: The filling should settle nicely over the crust, creating a layered effect. You’ll see a smooth top form, and the rich chocolate aroma will fill your kitchen.
8. Bake and Cool
– WHAT: Bake the cups in the preheated oven for about 20 minutes.
– HOW: Keep an eye on them; the edges should be set but the center slightly jiggly. Once done, remove them and let cool at room temperature before refrigerating for at least 2 hours.
– WHAT TO LOOK/SMELL/HEAR: You’ll notice a gentle puffing up of the cheesecakes as they bake. The aroma will be irresistibly rich, making it hard to wait!
Chef’s Note: Be patient when cooling; this step is crucial for achieving the perfect texture!
Pro Tips for the Best Results
1. Use Room Temperature Ingredients: Ensuring your cream cheese and eggs are at room temperature helps create a smoother batter. Cold ingredients can lead to lumps that are difficult to blend.
2. Melt the Chocolate Carefully: When melting chocolate chips, do so gently either in a microwave in short bursts or over a double boiler. This prevents burning and maintains a silky texture.
3. Don’t Overmix: When adding eggs, mix just until incorporated. Overmixing can introduce too much air, leading to cracks in your cheesecakes as they cool.
4. Check for Doneness: A slight jiggle in the center is normal; it will firm up as it cools. If it looks too set, it may have overbaked, which can lead to a dry texture.
5. Chill Thoroughly: Patience pays off! Chilling your cheesecakes for at least 2 hours allows them to set properly and enhances the flavor.
6. Garnish Creatively: Top with whipped cream, chocolate shavings, or fresh berries just before serving for an eye-catching presentation.
7. Use a Water Bath for Extra Creaminess: If you want to elevate your cheesecakes, consider placing your cups in a larger baking dish filled with hot water during baking. This creates a gentle heat environment that helps prevent cracking.
Common Mistakes to Avoid
1. Using Cold Ingredients: Baking with cold cream cheese or eggs can lead to a lumpy batter. Always let them come to room temperature beforehand.
2. Not Preheating the Oven: Baking in a cold oven can cause uneven cooking. Preheat your oven to ensure consistent temperatures throughout the baking process.
3. Overbaking: Baking your cheesecakes too long can result in a dry texture. Check for doneness by looking for a slightly jiggly center.
4. Skipping the Cooling Step: Cooling at room temperature before refrigerating is essential. Don’t rush this step as it allows the cheesecakes to set properly.
5. Improper Mixing Techniques: Overmixing after adding eggs can lead to cracks. Mix gently and only until just combined to avoid incorporating too much air.
6. Ignoring the Serving Temperature: Serving these cheesecakes straight from the fridge can mask their rich flavors. Let them sit out for a few minutes before serving for the best taste experience.
7. Not Greasing the Cups: If your cups are not non-stick, they may stick and break when you try to remove the cheesecakes. Lightly grease the cups with cooking spray or butter to ensure easy removal.
Creative Variations
1. Seasonal Pumpkin Spice: For fall, add 1/2 cup of pure pumpkin puree and 1 teaspoon of pumpkin pie spice to the cheesecake mixture. This adds a seasonal twist and pairs beautifully with the chocolate crust.
2. Dietary-Friendly Vegan Option: Swap out the cream cheese for a vegan cream cheese alternative and replace eggs with flax eggs (1 tablespoon of ground flaxseed mixed with 2.5 tablespoons of water per egg). Use coconut oil instead of butter for a dairy-free treat.
3. Gourmet Elevated: Enhance the chocolate flavor by using dark chocolate instead of semi-sweet. Top with a drizzle of chocolate ganache and a sprinkle of sea salt for a sophisticated touch.
4. Quick 15-Minute No-Bake Version: For a speedy dessert, use store-bought chocolate mousse instead of baking. Simply layer the mousse over your crust and chill for 30 minutes before serving.
5. Kid-Friendly Peanut Butter Cups: Swirl in 1/4 cup of creamy peanut butter into the cheesecake batter before baking. This adds a delightful flavor that kids will love.
6. International Twist – Tiramisu Style: Substitute espresso powder for the vanilla extract and layer in a bit of coffee-flavored whipped cream. This will give you a beautiful Italian-inspired treat with every bite.
7. Fruit-Infused Chocolate: Incorporate pureed raspberries or strawberries into the cheesecake mixture for a fruity twist. This not only adds flavor but also a pop of color to your desserts.
Serving Ideas
When it comes to serving your Mini Chocolate Cheesecake Cups, presentation can elevate the experience. Here are some delightful ideas:
1. Whipped Cream Swirl: Top each mini cheesecake with a generous dollop of freshly whipped cream. You can use a piping bag for an elegant swirl, adding a touch of sophistication.
2. Chocolate Shavings: Garnish with dark chocolate shavings or curls for a decadent touch. Not only does this enhance the visual appeal, but it also intensifies the chocolate flavor.
3. Fresh Berries: Serve with a few fresh raspberries or strawberries on top. The tartness of the berries complements the rich chocolate, creating a delightful balance.
4. Mint Leaves: A sprig of fresh mint on top adds a pop of color and a refreshing aroma, making your dessert visually stunning and inviting.
5. Miniature Chocolate Bars: Consider adding a small square of chocolate on top as a fun garnish. This can also serve as a lovely surprise for chocolate lovers.
Portion sizes are perfect with these mini cups, as they allow for indulgence without overwhelming your guests. Each cup is just the right size for a sweet finish to any meal!
What to Serve With
Pairing your Mini Chocolate Cheesecake Cups with complementary flavors can enhance the overall dessert experience. Here are some delicious suggestions:
1. Coffee: The rich, robust flavor of coffee provides a perfect counterbalance to the sweet, creamy cheesecake. Whether it’s a cappuccino or a simple black brew, coffee enhances the chocolate’s depth.
2. Dessert Wine: A sweet dessert wine, like a Ruby Port or a late-harvest Riesling, pairs beautifully. The sweetness of the wine matches the cheesecake’s richness, creating a harmonious experience.
3. Vanilla Ice Cream: A scoop of vanilla ice cream alongside your cheesecake cups adds a creamy texture and a contrasting temperature that elevates the dessert.
4. Chocolate Sauce: Drizzling a warm chocolate sauce over the cheesecake before serving adds an extra layer of indulgence, making every bite even more decadent.
5. Nuts: Serve with crushed nuts like almonds or hazelnuts. Their crunchiness and nutty flavor provide a delightful texture contrast to the creamy cheesecake.
6. Fruit Compote: A berry compote can add a fruity, tangy flavor that cuts through the richness of the chocolate, creating a balanced palate.
Choosing any of these pairings will create a more rounded dessert experience that your guests will appreciate!
Storage Guide
To keep your Mini Chocolate Cheesecake Cups fresh and delicious, proper storage is key. Here’s how to do it:
– Container Type: Store the cheesecake cups in an airtight container. If you don’t have one, you can also cover them with plastic wrap to prevent exposure to air.
– Temperature: Keep your cheesecake cups in the refrigerator. They should be stored at a consistent temperature of 35°F to 40°F (2°C to 4°C).
– Days It Keeps: Properly stored, these cheesecake cups will last about 3 to 5 days in the fridge.
– Signs Gone Bad: Check for any off smells or discoloration. If you notice any excess moisture on the cover or surface of the cheesecake, it’s best to discard them.
– How to Refresh: If the cheesecakes seem a bit dry after storage, you can revive them by adding a dollop of whipped cream on top just before serving to restore some moisture and creaminess.
Following these guidelines ensures that your decadent mini cheesecakes retain their divine taste and texture!
Freezing Tips
If you want to enjoy your Mini Chocolate Cheesecake Cups at a later time, freezing is a great option!
– Does It Freeze Well?: Yes, these cheesecake cups freeze very well. Just be sure to package them properly to avoid freezer burn.
– Portioning: It’s best to freeze them in individual portions. Use small airtight containers or wrap each cup tightly in plastic wrap, then place those in a larger freezer bag for added protection.
– How Long: They can be frozen for up to 2 months without compromising flavor.
– Thawing Method: To thaw, simply transfer the cheesecake cups from the freezer to the refrigerator and let them defrost overnight. This slow thawing helps maintain their creamy texture.
With these tips, you can enjoy your delightful cheesecakes at your convenience!
Reheating Guide
While these Mini Chocolate Cheesecake Cups are best served chilled, if you prefer them slightly warm, here’s how to reheat them:
– Microwave: Place a cheesecake cup in the microwave and heat on low power for 10-15 seconds. Check if it’s warmed to your liking, and be careful not to overdo it, as you don’t want to cook the cheesecake.
– Oven: Preheat your oven to 250°F (120°C). Place the cheesecake cups on a baking sheet and warm them for about 10 minutes. This method ensures an even heat without altering the texture too much.
– Stovetop: If you’re looking to warm them gently, you can set a small pot of water on the stove to simmer. Place the cheesecake cup in a heatproof dish and set it on top of the pot, using the steam to warm the dessert for about 5-10 minutes.
These methods will help you enjoy a warm slice of cheesecake without sacrificing its delicious texture!
Nutrition Overview
Each serving of your Mini Chocolate Cheesecake Cups contains approximately 350 calories. Here’s a breakdown of the macronutrients per cup:
– Fat: 24g
– Carbohydrates: 34g
– Protein: 6g
Health Benefits:
– Cream Cheese: Provides calcium which is essential for strong bones and teeth.
– Dark Chocolate: Rich in antioxidants, dark chocolate may improve heart health by increasing circulation and lowering blood pressure.
– Eggs: A great source of protein and essential nutrients such as vitamin B12, which is important for energy metabolism.
These cups are a delicious treat that can provide some nutritional benefits when enjoyed in moderation!
Frequently Asked Questions
Q: Can I use a different type of cookie for the crust?
A: Absolutely! While chocolate cookies create a rich flavor, you can substitute with graham crackers, Oreos, or even gluten-free cookies for a different twist.
Q: Can I make these cheesecake cups ahead of time?
A: Yes, you can prepare the cheesecake cups a day or two in advance. Just make sure to store them in the refrigerator until you’re ready to serve.
Q: What can I use instead of cream cheese?
A: If you’re looking for a lighter option, consider using Greek yogurt or mascarpone cheese. However, the flavor and texture will differ slightly from traditional cream cheese.
Q: How do I prevent cracks in my cheesecake?
A: To prevent cracks, avoid overmixing the batter and make sure to bake at a low temperature. Don’t open the oven door during baking to keep the temperature consistent.
Q: Can I add flavors or toppings to the cheesecake?
A: Definitely! You can add flavors like espresso powder, peanut butter, or even citrus zest to the batter. Toppings such as caramel sauce or toasted nuts can also add delightful variations.
Q: How do I know when the cheesecake is done baking?
A: The edges should be set while the center remains slightly jiggly. It will firm up as it cools, so avoid overbaking.
Q: Can I make these cheesecakes without eggs?
A: Yes, you can substitute eggs with flax eggs or a commercial egg replacer for a vegan version. Keep in mind that the texture may adjust slightly.
Q: How should I store leftovers?
A: Store your cheesecake cups in an airtight container in the refrigerator, where they will last for about 3 to 5 days.
Final Thoughts
Creating these Mini Chocolate Cheesecake Cups is an enjoyable and rewarding experience that will surely impress your guests. Remember to keep the mixing gentle and avoid overbaking for the best texture.
One key tip is to allow them to chill properly before serving; this sets the flavors beautifully. You’ll find that each bite is a delightful burst of chocolatey goodness!
So gather your ingredients, channel your inner pastry chef, and don’t hesitate to indulge in this delightful treat. You deserve it! Happy baking!