Follow Me On Pinterest!
Mini Cheesecake Pops

Mini Cheesecake Pops: A Fun Twist on a Classic Dessert
Introduction
Imagine a warm summer evening filled with laughter, the sound of kids playing in the background, and the enticing aroma of freshly baked goods wafting through the air. This scene brings me back to my childhood when my mom would host neighborhood gatherings and surprise us with her delicious treats. Among the array of desserts she served, her mini cheesecakes were always the star of the show. Their creamy texture, rich flavor, and buttery crust were irresistible, making them a favorite among both kids and adults alike.
As I grew older and ventured into the world of cooking, I couldn’t help but reminisce about those delightful bites of cheesecake. However, I wanted to give them a fun twist that would elevate the experience. After many trials and taste tests, I created Mini Cheesecake Pops—the same creamy cheesecakes you love, but perfectly portioned on a stick, making them a delightful treat for any occasion.
With each bite, you get a perfect blend of rich cream cheese and tangy sour cream, balanced by the sweetness of sugar and the warmth of vanilla. And the graham cracker crust? It’s the cherry on top, giving that lovely crunch that contrasts beautifully against the smooth filling. These pops are not just a dessert; they evoke memories of joy, laughter, and togetherness, making every bite feel special. Whether it’s a birthday party, a summer barbecue, or just a sweet treat at home, these Mini Cheesecake Pops will undoubtedly bring a smile to your face.
Why This Recipe Works
Creating the perfect cheesecake can be an art form, and understanding the techniques and science behind it can make all the difference. The key to achieving that velvety texture lies in the balance of your ingredients. By using cream cheese as the base, you ensure a rich and creamy filling that melts in your mouth. The addition of sour cream not only enhances the flavor but also provides a slight tang that offsets the sweetness, creating a well-rounded dessert.
In this recipe, the eggs play a crucial role as they act as a binding agent, helping to set the cheesecake as it bakes. You’ll want to beat them into the mixture until just combined, avoiding overmixing to prevent air bubbles, which can lead to cracks in your cheesecake. Baking at a lower temperature of 325°F (160°C) is essential as it allows for even cooking without burning the top, resulting in a beautifully smooth texture.
The graham cracker crust is another element that elevates these pops. By mixing the crumbs with melted butter, you create a base that is both crumbly and cohesive, providing the perfect foundation for your cheesecake filling. Pressing the crust firmly into the bottom of each liner ensures that they hold their shape when you insert the lollipop stick.
With these techniques and the right balance of ingredients, you’ll have reliable, delicious Mini Cheesecake Pops that are sure to impress!
What Makes It Special
What sets these Mini Cheesecake Pops apart from standard restaurant or store-bought options? Here are a few unique qualities that make them a standout treat:
– Customization: Unlike store-bought cheesecakes, these pops can be customized to suit your taste. Want a hint of strawberry or a swirl of chocolate? Feel free to add your favorite flavors or toppings.
– Portion Control: These pops are perfectly portioned for easy serving, making them ideal for parties or gatherings. No more cutting slices and dealing with messy plates; just grab a stick and enjoy!
– Fun Presentation: The presentation of these cheesecake pops is a game-changer. Sticking a lollipop stick into each mini cheesecake makes them fun for all ages. They are not only a dessert but also an engaging treat that sparks conversation.
– Easy to Make: With simple ingredients and straightforward steps, these pops are easy to whip up, even for novice bakers. You’ll impress your friends and family without spending hours in the kitchen!
Ingredient Breakdown
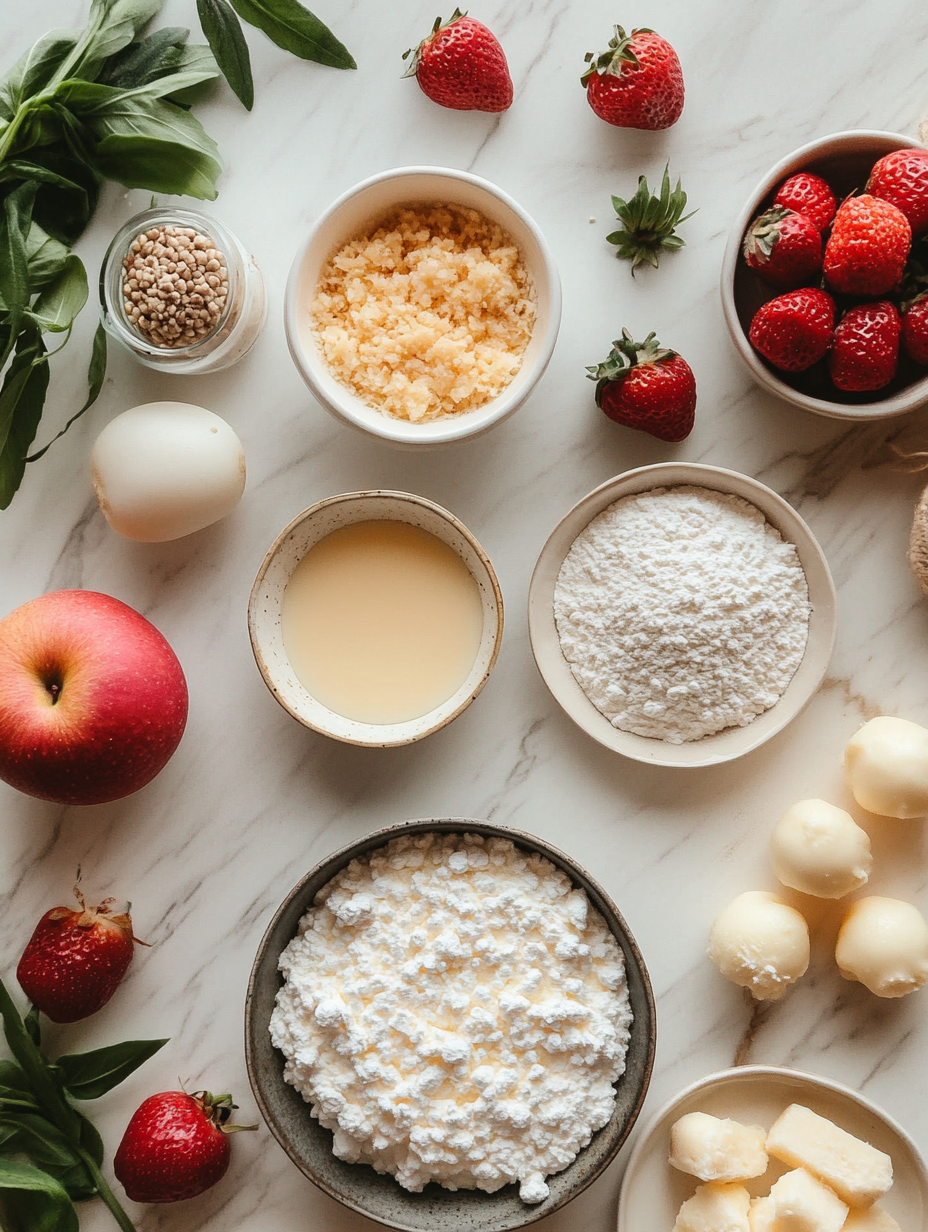
Let’s dive into the key ingredients that make these Mini Cheesecake Pops so delightful, and explore their roles in the recipe along with some substitutions for dietary needs:
– Cream Cheese (8 ounces): The star of the show! Cream cheese provides the rich and creamy base for your cheesecake. If you’re looking for a lighter option, consider using a low-fat cream cheese or even a vegan cream cheese alternative for a dairy-free version.
– Sugar (1 cup): This sweetener balances the tanginess of the cream cheese and sour cream. If you’d like a healthier option, you can substitute granulated sugar with coconut sugar or a sugar substitute like stevia, keeping in mind that it may alter the texture slightly.
– Vanilla Extract (1 teaspoon): Pure vanilla extract adds a warm, aromatic flavor that enhances the overall taste of the cheesecake. For a unique twist, try using almond extract or a flavored extract of your choice.
– Sour Cream (1 cup): Sour cream contributes to the cheesecake’s creaminess and adds a subtle tang. If you’re looking for a dairy-free alternative, you can use coconut yogurt or cashew cream as substitutes.
– Eggs (2 large): Eggs are essential for binding the ingredients together and helping the cheesecake set during baking. For a vegan alternative, consider using flax eggs (1 tablespoon of ground flaxseed mixed with 2.5 tablespoons of water per egg) or a commercial egg replacer.
– Graham Cracker Crumbs (1 cup): These crumbs form the base of your cheesecake pops. If you’re gluten-free, you can use gluten-free graham crackers or even crushed nuts like almonds or pecans for a different flavor profile.
– Butter (0.5 cup): Melted butter is mixed with graham cracker crumbs to create the crust. If you’re looking for a healthier or dairy-free option, coconut oil can work well as a substitute.
– Lollipop Sticks (12): These sticks are essential for the pop presentation. If you can’t find lollipop sticks, thin wooden skewers can also do the trick.
Each ingredient plays a vital role in creating a deliciously creamy, perfectly balanced treat that is sure to become your new favorite dessert!
Equipment Needed
To make these delightful Mini Cheesecake Pops, you’ll need a few essential tools that will help you achieve the best results:
– Mini Muffin Pan: This pan is crucial for shaping your cheesecake pops. If you don’t have one, you can use a regular muffin pan, but the pops will be larger.
– Mini Cupcake Liners: These liners make for easy removal and add a touch of color to your presentation. If you’re in a pinch, you could also use parchment paper to line the muffin pan.
– Mixing Bowls: Having a couple of mixing bowls on hand is important for combining your ingredients. Opt for glass or stainless steel for easy mixing and cleaning.
– Electric Mixer: For a smooth and creamy filling, an electric mixer is highly recommended. If you don’t have one, a whisk can work, but it will require more effort.
– Spatula: A spatula will help you scrape down the sides of the bowl and ensure everything is well combined. A rubber spatula is preferred for its flexibility.
– Cooling Rack: After baking, you’ll want to cool your cheesecakes properly. A cooling rack allows for even cooling, preventing condensation from forming.
– Freezer-safe Container: Once you’ve inserted the lollipop sticks, you’ll need a container to store the pops while they freeze. Make sure it’s deep enough to keep the pops from tipping over.
With these essential tools, you’ll be well-equipped to create your delicious Mini Cheesecake Pops with ease!
Step-by-Step Instructions
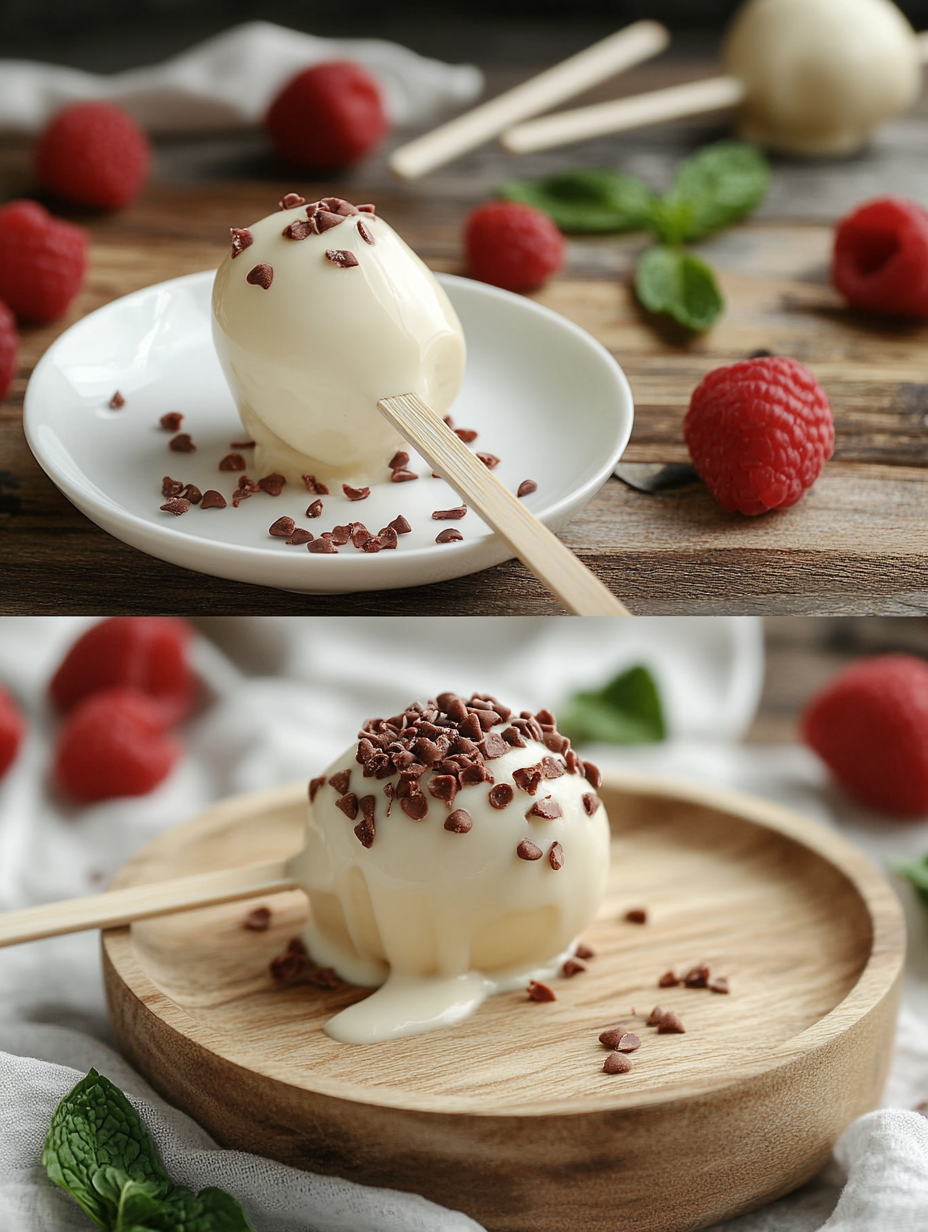
1. Preheat the Oven
– What: Begin by preheating your oven to 325°F (160°C).
– How: This ensures that your mini cheesecakes bake evenly and achieve a lovely texture.
– What to look/smell/hear: You’ll hear the gentle hum of the oven as it warms up, and you may catch a faint smell of the heating elements.
2. Prepare the Cream Cheese Mixture
– What: In a mixing bowl, combine the softened cream cheese, sugar, and vanilla extract.
– How: Using an electric mixer, beat the mixture on medium speed until smooth and creamy—about 2 minutes.
– What to look/smell/hear: The mixture should be free of lumps and resemble a silky batter. You should smell the sweet aroma of vanilla as it blends in.
3. Incorporate Sour Cream and Eggs
– What: Add the sour cream and beaten eggs to the creamy mixture.
– How: Blend until fully combined, ensuring there are no streaks of egg visible.
– What to look/smell/hear: The batter should appear glossy and smooth. You may hear a soft whirring sound as the mixer incorporates everything together.
4. Make the Crust
– What: In another bowl, mix the graham cracker crumbs with melted butter.
– How: Stir with a fork until the mixture resembles wet sand.
– What to look/smell/hear: The crumbs should clump together when squeezed in your hand. You’ll notice the sweet, buttery scent permeating the air.
5. Assemble the Cheesecake Pops
– What: Press about 1 tablespoon of the graham cracker mixture into the bottom of each mini muffin liner.
– How: Use your fingers or the back of a spoon to press down firmly for a sturdy base.
– What to look/smell/hear: The crust should feel compact and firm under your fingers. The sweet aroma of graham crackers will fill your kitchen.
6. Fill with Cheesecake Batter
– What: Pour the cheesecake batter over the crust in each liner.
– How: Fill them about 3/4 full, leaving a little room for expansion during baking.
– What to look/smell/hear: The batter should flow easily over the crust. You might hear a gentle splatter as you pour.
7. Bake the Cheesecakes
– What: Place the mini muffin pan in the preheated oven and bake for approximately 20 minutes.
– How: Watch for the cheesecakes to be set but still slightly jiggly in the center.
– What to look/smell/hear: The kitchen will fill with an irresistible aroma of baking cheesecake. When you gently shake the pan, there should be a slight jiggle in the center.
8. Cool and Freeze
– What: Once baked, allow the mini cheesecakes to cool completely.
– How: After cooling, insert a lollipop stick into the center of each cheesecake and freeze for at least 1 hour.
– What to look/smell/hear: They should feel firm to the touch. You’ll notice a rich, creamy scent lingering, signaling that they are ready to be enjoyed.
Chef’s Note: To ensure your cheesecakes come out perfectly, always let the cream cheese soften at room temperature before mixing. This step is critical for achieving a smooth batter.
Pro Tips for the Best Results
1. Softening Cream Cheese: Ensure your cream cheese is at room temperature before mixing. Cold cream cheese can lead to lumps in your batter. Simply leave it out for about 30 minutes before you start.
2. Using Fresh Ingredients: Always opt for fresh eggs and high-quality vanilla extract. This will enhance the flavor of your cheesecakes significantly.
3. Avoiding Overmixing: When adding the eggs, mix until just combined. Overmixing can incorporate too much air, leading to cracks as the cheesecakes bake.
4. Even Baking: Rotate the muffin pan halfway through baking. Oven temperatures can vary, and this ensures even cooking throughout.
5. Cooling Properly: Allow the cheesecakes to cool in the pan for about 10-15 minutes before transferring them to a wire rack. This prevents condensation from forming.
6. Freezing for Firmness: If you want a firmer texture, you can freeze the cheesecakes for longer. They can hold well in the freezer for up to a month—just wrap them tightly.
7. Serving Suggestions: For an added touch, dip the frozen cheesecake pops in melted chocolate and sprinkle with crushed nuts or sprinkles to make them even more festive!
Common Mistakes to Avoid
1. Using Cold Ingredients: Using cold cream cheese or eggs can lead to a lumpy batter. Always let them come to room temperature first for the smoothest results.
2. Not Measuring Properly: Baking is a science, and improper measurements can ruin your cheesecakes. Use a kitchen scale for accuracy, especially with the cream cheese and sugar.
3. Skipping the Lollipop Sticks: Forgetting to insert the sticks before freezing can lead to a messy situation. Make sure to insert them as soon as they’re cool enough to handle!
4. Overbaking: Baking for too long will result in dry cheesecakes. Look for a slight jiggle in the center as a sign they’re done.
5. Not Allowing to Cool: Removing the cheesecake pops from the pan too early can cause them to break apart. Allow them to cool completely before proceeding.
6. Using Old Graham Crackers: Stale graham crackers can lead to a less-than-ideal crust texture. Always check for freshness before using.
7. Skipping the Freezing Step: These pops need to be frozen to hold their shape. Skipping this step will lead to soft cheesecakes that fall off the stick.
Creative Variations
1. Seasonal: Embrace seasonal flavors by adding pumpkin puree and spices (cinnamon, nutmeg) for a fall twist, or substitute mashed strawberries for a refreshing summer treat.
2. Dietary-Friendly: For a gluten-free version, use gluten-free graham crackers or ground nuts as a crust. You can also substitute cream cheese with dairy-free options to cater to lactose intolerant guests.
3. Gourmet Elevated: Elevate your pops with gourmet ingredients such as a swirl of raspberry coulis or a topping of salted caramel. Use high-quality chocolate for dipping.
4. Quick 15-Minute: If you’re short on time, make a no-bake version. Simply mix the ingredients and spoon them into cups, refrigerating until set—no baking required!
5. Kid-Friendly: Let the kids get involved! Use colorful sprinkles or mini chocolate chips folded into the batter for a fun, playful appearance that they will love.
6. International Twist: Infuse flavors from around the globe by adding a hint of matcha for an Asian flair, or incorporate almond extract and cherry for a nod to classic Black Forest cake.
By following these steps and tips, you’ll create delightful Mini Cheesecake Pops that will impress at any gathering or simply satisfy your sweet tooth. Enjoy crafting these treats!
Serving Ideas
When it comes to serving your Mini Cheesecake Pops, presentation can elevate your delicious treats from delightful to extraordinary. Here are a few ideas to inspire you:
1. Colorful Sprinkles: Roll the frozen cheesecake pops in colorful sprinkles or crushed nuts for a fun and festive touch that’s perfect for parties.
2. Chocolate Drizzle: Melt some chocolate and drizzle it over the cheesecake pops for an elegant look. Dark, milk, or white chocolate all add a delightful contrast to the creamy cheesecake.
3. Fresh Berries: Serve the pops with a side of fresh berries like strawberries, blueberries, or raspberries. Their tartness balances the sweetness of the cheesecake beautifully.
4. Mini Dessert Platter: Create a dessert platter with a variety of mini treats, including your cheesecake pops, brownies, and fruit tarts. This inviting display will impress your guests and keep them coming back for more.
5. Garnish with Mint: A sprig of fresh mint can add a refreshing touch and a pop of color, making your cheesecakes look even more appealing.
With these serving ideas, your Mini Cheesecake Pops will not only taste divine but also look irresistible on the table!
What to Serve With
Pairing your Mini Cheesecake Pops with complementary treats can enhance the overall dessert experience. Here are some delicious options:
1. Coffee: The rich flavors of coffee, whether brewed or in a latte, create a delightful contrast to the sweetness of the cheesecake pops, making for an indulgent afternoon treat.
2. Hot Chocolate: A warm cup of hot chocolate, especially during colder months, pairs wonderfully with the cool cheesecake pops. The creaminess of both desserts creates a luxurious experience.
3. Fruit Salad: A light and refreshing fruit salad can balance the richness of the cheesecake. The natural sweetness and acidity from the fruits bring brightness to your dessert spread.
4. Ice Cream: Try serving your cheesecake pops alongside a scoop of vanilla or chocolate ice cream. The combination of textures and flavors will be a hit among guests of all ages.
5. Whipped Cream: A dollop of freshly whipped cream can add extra creaminess and a fluffy texture that complements the cheesecake pops beautifully.
6. Sparkling Water or Lemonade: For a refreshing beverage option, serve your cheesecake pops with sparkling water or lemonade. The fizz and acidity will cleanse the palate between bites.
These pairings are sure to enhance your dessert experience, making your Mini Cheesecake Pops truly unforgettable!
Storage Guide
To store your Mini Cheesecake Pops, follow these guidelines to keep them fresh and delicious:
– Container Type: Use an airtight container to prevent any freezer burn and to maintain their creamy texture. If you have a large batch, consider stacking them carefully with parchment paper between layers.
– Temperature: Store your cheesecake pops in the freezer at 0°F (-18°C) to ensure they remain frozen solid.
– Days It Keeps: When stored properly, your cheesecake pops can last up to 2 months in the freezer without significant loss of flavor or texture.
– Signs Gone Bad: If you notice any ice crystals forming on the pops or a change in texture (such as a grainy feel), it may be time to discard them. A sour smell is also a clear sign they have gone bad.
– How to Refresh: If you find your cheesecake pops have lost some creaminess after thawing, a quick dip in melted chocolate can refresh their flavor and texture, giving them a delightful new twist.
By following these storage tips, you can enjoy your Mini Cheesecake Pops for weeks to come!
Freezing Tips
Yes, your Mini Cheesecake Pops freeze exceptionally well, making them a convenient treat to have on hand! Here are some tips for freezing:
– Portioning: After inserting the lollipop sticks, allow the pops to freeze in the mini muffin liners for about an hour. Once frozen, carefully remove them and place them in a single layer in your airtight container.
– How Long: For the best quality, aim to enjoy your cheesecake pops within 2 months of freezing. While they may be safe to eat beyond this time, the texture may begin to degrade.
– Thawing Method: To thaw, simply transfer the cheesecake pops from the freezer to the fridge for a few hours before serving. If you’re in a hurry, you can leave them at room temperature for about 15-20 minutes, but be cautious not to let them sit out too long.
With these tips, your Mini Cheesecake Pops will remain a delightful treat even after freezing!
Reheating Guide
Unlike traditional cheesecakes, Mini Cheesecake Pops do not require reheating. However, if you want to achieve a softer texture before serving, you can use the following methods:
– Microwave: If you prefer a slightly softened cheesecake pop, place it on a microwave-safe plate and heat it in the microwave for 10-15 seconds. Keep a close eye on it to avoid melting.
– Oven: Preheat your oven to a low setting (around 175°F or 80°C). Place the cheesecake pops on a baking sheet and warm them for about 5 minutes. This method will gently warm them without compromising their structure.
– Stovetop: For a more adventurous approach, place a small non-stick skillet over low heat. Add the cheesecake pops for about 2-3 minutes, turning them gently until they soften slightly.
Remember, these pops are best enjoyed frozen, but these methods can help if you or your guests prefer a softer bite!
Nutrition Overview
Each Mini Cheesecake Pop packs a delightful punch in terms of flavor and nutrition! Here’s what you need to know:
– Calories: Approximately 150-200 calories per pop, making them a sweet indulgence that won’t break your calorie bank.
– Macros: Each pop typically contains around 8 grams of fat, 15 grams of carbohydrates, and 2 grams of protein, providing a satisfying balance of flavors and textures.
– Health Benefits: The cream cheese used in the recipe is a source of calcium, which is essential for healthy bones and teeth. Sour cream also contributes to your daily calcium intake while enhancing the creaminess of the pops. Finally, the eggs provide high-quality protein and essential nutrients like vitamin D.
With these nutrition insights, you can enjoy these pops responsibly, knowing they can be part of a balanced diet!
Frequently Asked Questions
Q: Can I use low-fat cream cheese for this recipe?
A: Yes, you can substitute low-fat cream cheese in this recipe. However, keep in mind that the texture and flavor might differ slightly, resulting in a less creamy cheesecake.
Q: How can I make these cheesecake pops gluten-free?
A: To make gluten-free cheesecake pops, substitute traditional graham cracker crumbs with gluten-free options, such as almond flour or gluten-free graham crackers. Just ensure that all other ingredients are also gluten-free.
Q: Can I add flavorings to the cheesecake mixture?
A: Absolutely! You can incorporate flavorings like lemon zest, chocolate, or fruit purees into the cheesecake mixture for a unique twist. Just be sure not to add too much liquid to maintain the right texture.
Q: What variations can I try for the crust?
A: While graham cracker crust is traditional, you can experiment with cookie crumbs like Oreos, vanilla wafers, or even crushed nuts for a different flavor profile.
Q: How do I know when the cheesecake pops are done baking?
A: The cheesecake pops are done when they are set but still slightly jiggly in the center. They will firm up as they cool. Avoid overbaking, as this can lead to a dry texture.
Q: Can I add toppings after freezing?
A: Yes, you can add toppings like chocolate drizzle or whipped cream after the pops have been frozen. Just make sure to add any toppings right before serving for the best presentation and taste.
Q: How can I make these pops dairy-free?
A: To make dairy-free cheesecake pops, you can use dairy-free cream cheese and sour cream alternatives. Make sure to check that these substitutes have a similar consistency for the best results.
Q: What’s the best way to serve these at a party?
A: For a party, place the cheesecake pops in a decorative container or stand. You might also want to provide small dessert plates or napkins to make it easy for guests to enjoy them.
Final Thoughts
Your journey to creating Mini Cheesecake Pops is bound to be a delightful one! Remember, the key to perfecting these pops lies in balancing the flavors and textures. Use high-quality ingredients and feel free to get creative with flavors and toppings. Your friends and family will be impressed by not just the taste but also the beautiful presentation of your dessert.
As you enjoy making and sharing these treats, don’t forget to have fun with it! They are perfect for gatherings, parties, or simply as a sweet treat after a long day. Grab your ingredients, put on your apron, and dive into this delicious adventure! You’ll be so glad you did!