Follow Me On Pinterest!
Strawberry Shortcake Cheesecake


Strawberry Shortcake Cheesecake: A Decadent Twist on a Timeless Classic
Introduction
There’s something magical about dessert that takes you back to cherished moments, isn’t there? For me, it all started on warm summer afternoons at my grandmother’s house. The air was filled with the sweet scent of strawberries bursting with flavor, and the laughter of family gathered around the old oak table. My grandmother would whip up her famed strawberry shortcake, layering fluffy biscuits with freshly whipped cream and glistening strawberries. Each bite felt like a hug, soft and comforting, reminding me of simpler times.
As I grew older, my love for these flavors blossomed into an obsession with crafting desserts that evoke similar sentiments. One summer, while experimenting in the kitchen, I stumbled upon the idea of combining my beloved classic strawberry shortcake with the creamy richness of cheesecake. The result? A Strawberry Shortcake Cheesecake that promises to transport you back to those nostalgic moments while introducing an utterly delightful twist.
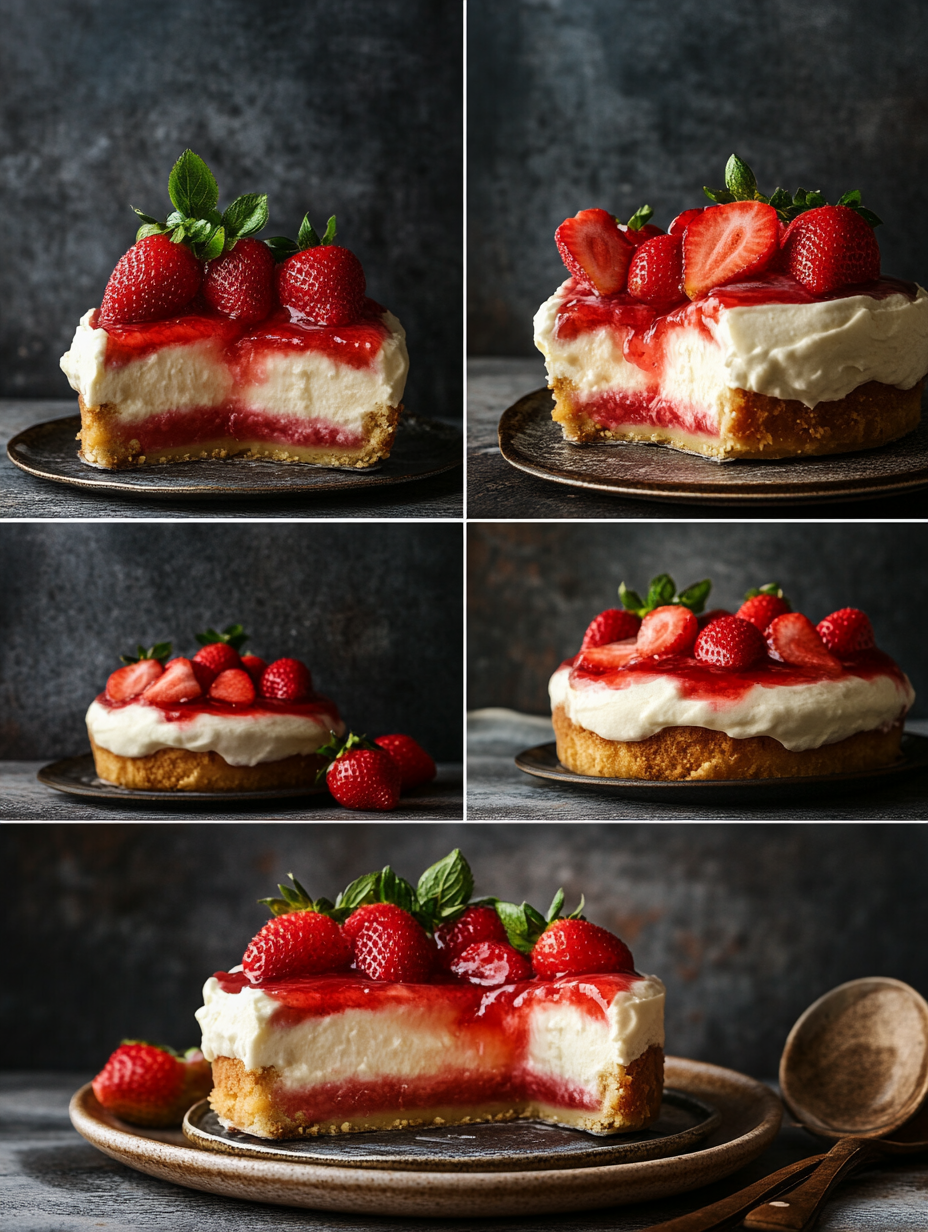
Imagine slicing through a velvety cheesecake, revealing a luscious layer of strawberries atop a buttery graham cracker crust. Each forkful is a harmonious blend of creamy and fruity flavors, making this dessert a true showstopper at any gathering. Whether it’s a family celebration or a simple weeknight treat, this cheesecake is bound to leave your taste buds dancing with joy.
Why This Recipe Works
When it comes to baked goods, the science of balance is critical—especially when blending two beloved desserts into one. This Strawberry Shortcake Cheesecake is an exemplary case of culinary harmony, where textures and flavors marry beautifully. The creamy texture of the cheesecake filling is achieved through the perfect ratio of cream cheese and sugar, which creates a rich yet smooth consistency that melts in your mouth.
The graham cracker crust serves not only as a sturdy base but also adds a hint of sweetness and crunch. By combining melted butter with the crumbs, you create a crust that holds its shape while providing a contrasting texture to the creamy filling. The added vanilla extract ties everything together with its fragrant warmth, enhancing the overall flavor profile.
Additionally, the fresh strawberries play a pivotal role, bringing brightness and a natural sweetness that balances the richness of the cheesecake. They’re a nod to the classic shortcake, reminding you of those sun-soaked summers. The combination of baking and refrigeration allows the flavors to meld, ensuring that every bite is as delightful as the last. This recipe is not just reliable; it’s a celebration of flavors, textures, and memories.
What Makes It Special
This Strawberry Shortcake Cheesecake stands out from the typical restaurant or store-bought versions for several reasons:
1. Homemade Freshness: The use of fresh strawberries makes a significant difference. Unlike store-bought versions that often rely on artificial flavors or syrups, this cheesecake showcases the vibrant, unadulterated taste of ripe strawberries.
2. Creamy Texture: Store-bought cheesecakes can sometimes be overly dense or overly sweet. This recipe strikes the perfect balance, offering a creamy texture that is rich but not cloying, thanks to the careful ratio of ingredients.
3. Personal Touch: When you make this dessert at home, you can adjust the sweetness and flavors to your liking. Want it a bit sweeter? Add more sugar. Prefer a hint of lemon zest? Go for it! This adaptability makes your cheesecake uniquely yours.
4. Versatile Presentation: This cheesecake not only tastes divine but also looks stunning. The simple yet elegant presentation of the strawberries on top elevates your dessert, making it perfect for any occasion, from casual family dinners to fancy gatherings.
Ingredient Breakdown
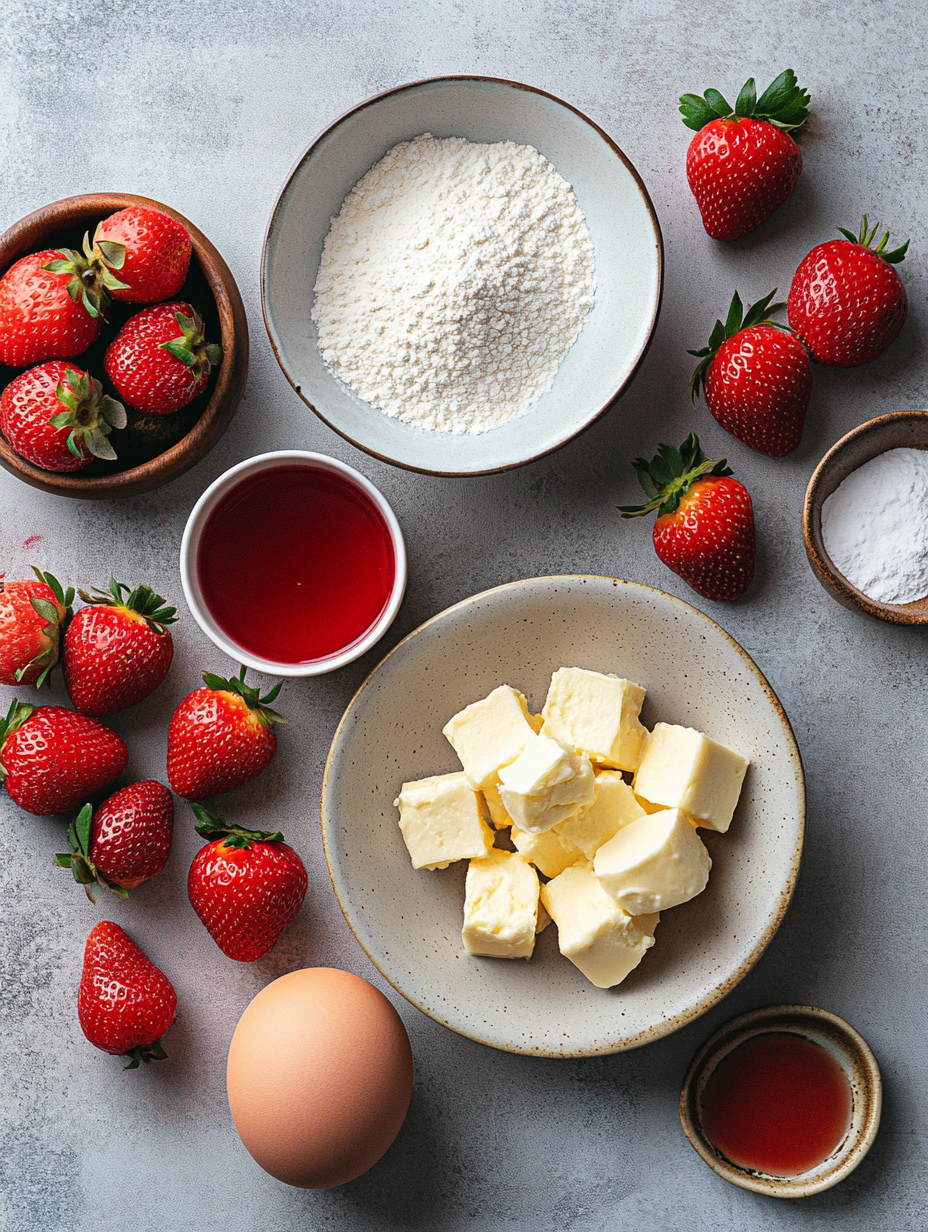
Understanding each ingredient in your Strawberry Shortcake Cheesecake is key to achieving the perfect balance of flavor and texture. Let’s dive into what makes each component essential:
– Graham Cracker Crumbs (1 cup): These form the foundation of your cheesecake. They provide a crunchy texture and a slightly sweet flavor. If you’re looking for a gluten-free option, you can substitute with crushed gluten-free cookies or almond flour.
– Unsalted Butter (0.5 cup): Butter adds richness and helps bind the crumbs together for the crust. Unsalted is preferred here, as it allows you to control the overall saltiness of the dessert. If you’re looking for a dairy-free alternative, coconut oil works well.
– Cream Cheese (2 packages): The star of the show, cream cheese provides that characteristic creaminess and tang. Make sure to use full-fat cream cheese for the best results. For a lighter version, you can opt for reduced-fat cream cheese, but it may alter the texture slightly.
– Granulated Sugar (1 cup): This is your sweetener, balancing the tanginess of the cream cheese. You can substitute with cane sugar or even a sugar alternative like coconut sugar or agave nectar, keeping in mind that it may affect the texture.
– Large Eggs (2): Eggs act as a binding agent, helping the cheesecake set properly. If you’re looking for an egg-free alternative, try using unsweetened applesauce or a commercial egg replacer.
– Vanilla Extract (1 teaspoon): This enhances the overall flavor, adding warmth and depth to the cheesecake. For an even more intense flavor, consider using vanilla bean paste.
– Fresh Strawberries (1 cup): Essential for that fresh, fruity layer, strawberries add vibrancy and natural sweetness. You can substitute with other berries like blueberries or raspberries for a different flavor profile.
– Whipped Cream (0.5 cup): Topping your cheesecake with whipped cream adds a fluffy texture that complements the dense cheesecake. You can make your own from heavy cream or use store-bought, but always look for one with minimal additives for the best flavor.
With these ingredients, you’re well on your way to creating a dessert that not only looks stunning but tastes like a dream. Each component plays a vital role, ensuring that every bite is a delightful experience.
Step-by-Step Instructions
1. Preheat Your Oven
What: Start by preheating your oven to 325°F (160°C).
How: Turn the dial or press the buttons on your oven until it reaches the desired temperature.
What to Look/Smell/Hear: You’ll hear a slight hum as the oven kicks into gear. This is the perfect time to prepare the crust while the oven warms up.
2. Make the Graham Cracker Crust
What: In a mixing bowl, combine 1 cup of graham cracker crumbs with 0.5 cup of melted unsalted butter.
How: Pour the melted butter over the crumbs and mix with a fork until it resembles wet sand.
What to Look/Smell/Hear: The buttery aroma should be enticing, and you’ll want the mixture to clump together when pressed. This is a key step for a sturdy crust.
3. Press the Crust into the Pan
What: Take the graham cracker mixture and press it firmly into the bottom of a 9-inch springform pan.
How: Use the back of a measuring cup or your fingers to evenly distribute the crumbs, creating a solid base.
What to Look/Smell/Hear: You’ll feel the mixture compact as you press it down. The sound of crumbs crunching under your fingers is a good sign!
4. Prepare the Cheesecake Filling
What: In a separate bowl, beat 2 packages of softened cream cheese and 1 cup of granulated sugar until smooth and creamy.
How: Use an electric mixer on medium speed for about 2-3 minutes, scraping down the sides of the bowl as needed.
What to Look/Smell/Hear: The mixture should be velvety and have a sweet, creamy scent. You’ll hear the mixer whirring as it incorporates the ingredients.
5. Incorporate the Eggs and Vanilla
What: Add in 2 large eggs, one at a time, mixing well after each addition, then stir in 1 teaspoon of vanilla extract.
How: Mix on low speed until just combined; overmixing can lead to cracks in your cheesecake.
What to Look/Smell/Hear: The filling should be smooth and slightly thickened. The aroma of vanilla will fill your kitchen, making it irresistible.
6. Pour and Bake
What: Carefully pour the cream cheese mixture over the prepared crust and gently smooth the top with a spatula.
How: Ensure an even layer, avoiding bubbles by tapping the pan gently on the counter.
What to Look/Smell/Hear: You’ll see a beautiful, creamy layer forming over the crust. As it bakes, listen for the gentle bubbling of the cheesecake—a reassuring sound that it’s cooking nicely.
7. Cool and Chill
What: Bake in the preheated oven for about 45 minutes, until the center is set but slightly jiggly.
How: After baking, turn off the oven, crack the door, and let it cool for 10 minutes before transferring to the fridge for at least 4 hours.
What to Look/Smell/Hear: As it cools, the cheesecake will settle. If done correctly, you’ll see a slight jiggle in the center, indicating it’s perfectly baked!
Chef’s Note: Make sure to let your cheesecake cool gradually in the oven; this reduces the chances of cracking.
Pro Tips for the Best Results
– Use Room Temperature Ingredients: Ensure that your cream cheese and eggs are at room temperature before starting. This helps achieve a smoother filling without lumps.
– Don’t Overmix: Mix only until ingredients are combined to avoid incorporating too much air, which can lead to cracks during baking.
– Water Bath Method: For an ultra-creamy texture, consider using a water bath. Wrap the springform pan in aluminum foil and place it in a larger pan filled with hot water before baking.
– Prevent Cracking: Cool the cheesecake gradually in the oven (with the door slightly ajar) after baking. This minimizes temperature shock, which is a common cause of cracks.
– Quality Ingredients Matter: Use high-quality vanilla extract and fresh strawberries for the best flavor. Fresh strawberries will enhance the overall taste of your dessert.
– Chill Overnight: If you can, refrigerate your cheesecake overnight. This allows the flavors to meld beautifully, making each bite even more delicious.
– Whipped Topping: For a light and airy topping, make your own whipped cream instead of using store-bought. Just whip heavy cream with a bit of sugar until soft peaks form.
Common Mistakes to Avoid
1. Using Cold Cream Cheese: Cold cream cheese can lead to lumps in your mixture. Always allow it to soften at room temperature for at least an hour before you start.
2. Skipping the Crust Step: Some might think they can skip the crust, but this is where all the flavor begins! A solid crust provides a delicious base for your rich cheesecake.
3. Overbaking: If you bake the cheesecake until it’s completely firm, it may become dry. Look for a slight jiggle in the center as an indicator of doneness.
4. Not Cooling Gradually: Rapid temperature changes can cause cracks. Allow the cheesecake to cool in the oven with the door ajar to prevent this.
5. Using a Non-Springform Pan: A springform pan is essential for easy removal. If you use a regular pan, you might ruin the cheesecake trying to get it out!
6. Skipping the Cooling Time: Trying to cut the cheesecake too soon will result in a gooey mess. Patience is key—let it chill fully for the best texture.
7. Incorrect Measurements: Baking is a science, so be precise with ingredient measurements. Too much sugar or eggs can alter the texture and flavor dramatically.
Creative Variations
1. Seasonal Strawberry Shortcake Cheesecake: Swap out strawberries for other seasonal fruits like peaches in the summer or apples in the fall. Adjust the amount of sugar based on the sweetness of the fruit.
2. Dietary-Friendly Options: For a gluten-free version, use gluten-free graham cracker crumbs. If you have lactose intolerance, substitute cream cheese with a non-dairy cream cheese alternative.
3. Gourmet Elevated: Enhance your cheesecake by adding a layer of lemon or raspberry curd on top before chilling. The tartness will complement the sweetness beautifully, giving it a gourmet twist.
4. Quick 15-Minute Version: In a pinch? Use store-bought cheesecake filling and simply layer it with whipped cream and strawberries in a trifle bowl for a quick and easy dessert.
5. Kid-Friendly Version: Let the kids get creative by allowing them to decorate the top with sprinkles, chocolate shavings, or mini chocolate chips along with strawberries.
6. International Twist: Infuse your cheesecake with a bit of coconut milk and layer with tropical fruits like mango or pineapple for a taste of the tropics. You can even add a pinch of cardamom for an exotic flavor profile.
7. Chocolate Lovers Delight: Incorporate melted chocolate into the cream cheese mixture and top with chocolate shavings and strawberries for a decadent treat that chocolate lovers will adore.
These variations will keep your Strawberry Shortcake Cheesecake fresh and exciting, allowing you to adapt it to any occasion or craving!
Serving Ideas
When it comes to serving your Strawberry Shortcake Cheesecake, presentation is key! Here are some delightful ways to plate your cheesecake:
1. Classic Slice: Cut a generous slice and serve on a white plate. Drizzle some homemade strawberry sauce over the top for a pop of color and flavor.
2. Layered Parfait: For a fun twist, crumble a slice of cheesecake and layer it in a glass with whipped cream and fresh strawberries. This not only looks stunning but also adds a textural element.
3. Mini Cheesecake Cups: If you’re looking for individual servings, pour the cheesecake batter into muffin tins lined with cupcake liners. Once baked, top each mini cheesecake with a dollop of whipped cream and a strawberry half.
4. Garnish Galore: Add a few mint leaves or edible flowers on top of each slice for a touch of elegance. A light dusting of powdered sugar can also elevate its appearance.
5. Cheesecake Board: Create a dessert board by slicing the cheesecake into bite-sized pieces and arranging them with strawberries, whipped cream, and chocolate shavings. This makes for a fun interactive dessert at gatherings.
Each of these serving ideas allows you to showcase the beauty and deliciousness of your cheesecake, making it a hit at any occasion!
What to Serve With
Pairing your Strawberry Shortcake Cheesecake with the right accompaniments can enhance the overall experience. Here are some delightful pairings:
1. Fresh Mint Tea: The refreshing notes of mint tea cleanse the palate, complementing the rich creaminess of the cheesecake.
2. Sparkling Wine: A glass of bubbly, such as Prosecco or Champagne, provides a delightful contrast to the creamy texture and adds a festive touch to your dessert.
3. Coffee: A rich, dark coffee balances the sweetness of the cheesecake, making it an excellent after-dinner choice.
4. Fruit Salad: A simple fruit salad with seasonal fruits can provide a refreshing counterpoint to the cheesecake’s richness.
5. Chocolate Sauce: Drizzling a bit of warm chocolate sauce over your cheesecake can create a deliciously indulgent experience.
6. Ice Cream: Vanilla or strawberry ice cream serves as a delightful sidekick, intensifying the dessert’s strawberry flavor while adding a cold, creamy texture.
These pairings not only enhance the flavors of the cheesecake but also create a well-rounded dessert experience that your guests will love!
Storage Guide
To keep your Strawberry Shortcake Cheesecake fresh and delicious, proper storage is crucial. Here’s how to do it:
– Container Type: Use an airtight container or cover the cheesecake with plastic wrap to prevent it from absorbing any odors from your refrigerator.
– Temperature: Store the cheesecake in the refrigerator at a temperature of 35°F to 40°F (1.5°C to 4°C).
– Shelf Life: When stored properly, your cheesecake will last for about 5-7 days in the fridge. However, it’s best enjoyed within the first few days for optimal flavor and texture.
– Signs It’s Gone Bad: Look for any signs of mold, an off smell, or a change in texture. If the cheesecake has developed a watery surface, it’s best to discard it.
– Refreshing: If your cheesecake seems a bit dry after a few days, you can refresh it by adding a dollop of whipped cream or serving it with a scoop of ice cream.
By following these storage tips, you can enjoy your cheesecake at its best for days to come!
Freezing Tips
If you want to save your Strawberry Shortcake Cheesecake for later, freezing is a great option. Here are some helpful tips:
– Freezing Well: This cheesecake freezes quite well, allowing you to enjoy it at a later date without significant loss of texture or flavor.
– Portioning: Consider slicing the cheesecake into individual portions before freezing. This way, you can easily grab a slice whenever you have a craving.
– How Long: Wrapped tightly in plastic wrap and then in aluminum foil, your cheesecake can last in the freezer for 2-3 months.
– Thawing Method: To thaw, simply move the cheesecake from the freezer to the refrigerator and let it thaw overnight. If you’re in a hurry, you can leave it at room temperature for about 2-3 hours, but make sure not to let it sit out too long.
By following these freezing tips, you can enjoy your cheesecake whenever the mood strikes!
Reheating Guide
While your Strawberry Shortcake Cheesecake is best served chilled, reheating can bring out its creamy texture and flavors. Here’s how to do it:
– Microwave: Place a slice on a microwave-safe plate and heat it in 10-15 second increments until warmed through. Be cautious not to overheat, as it can affect the texture.
– Oven: Preheat your oven to 325°F (160°C). Wrap the cheesecake in foil to prevent it from drying out and bake for about 10-15 minutes or until warmed to your liking.
– Stovetop: This method isn’t common but can work in a pinch. Place a slice in a skillet over low heat, cover, and let it warm gently. Keep a close eye on it to avoid burning.
These reheating methods will ensure your cheesecake maintains its creamy goodness while being enjoyed warm!
Nutrition Overview
Indulging in a slice of Strawberry Shortcake Cheesecake can be a delightful treat, but it’s good to know what you’re consuming. Here’s a quick breakdown:
– Calories: Each serving contains approximately 320-350 calories.
– Macros per Serving:
– Fat: 22g
– Carbohydrates: 30g
– Protein: 5g
– Health Benefits:
– Strawberries: Rich in antioxidants and vitamin C, strawberries can help boost your immune system and improve heart health.
– Cream Cheese: While it’s a source of fat, cream cheese provides calcium and can add a creamy texture to your desserts.
– Graham Crackers: Whole grain options provide fiber, making them a better choice for a crust.
Enjoying this cheesecake in moderation can be part of a balanced diet, allowing you to savor the delicious flavors while benefiting from some nutritious ingredients!
Frequently Asked Questions
Q: Can I use frozen strawberries?
A: Yes, you can use frozen strawberries in your cheesecake; however, make sure to thaw and drain them well to avoid excess moisture that could affect the texture.
Q: Can I make this cheesecake ahead of time?
A: Absolutely! This cheesecake can be made a day or two ahead of time, making it perfect for gatherings or celebrations. Just store it in the refrigerator until you’re ready to serve.
Q: Why did my cheesecake crack?
A: Cracks can occur due to rapid temperature changes or overbaking. To prevent this, ensure your oven temperature is accurate and consider baking in a water bath for even heat distribution.
Q: Can I use a different crust?
A: Yes, feel free to experiment with different crusts, such as an Oreo crust or a gluten-free option like almond flour mixed with butter. Just ensure you press it firmly into the pan.
Q: How do I know when my cheesecake is done?
A: The cheesecake is done when the edges are set, but the center should still have a slight jiggle. It will continue to set as it cools.
Q: Can I add other fruits?
A: Definitely! Feel free to top your cheesecake with berries, bananas, or even a layer of chocolate ganache for a unique twist.
Q: What if I don’t have a springform pan?
A: If you don’t have a springform pan, you can use a regular round cake pan, but be sure to line it with parchment paper for easy removal.
Q: Can I make mini cheesecakes instead?
A: Yes! You can pour the batter into muffin tins for mini cheesecakes. Just adjust the baking time to about 20-25 minutes for smaller portions.
Final Thoughts
Creating a Strawberry Shortcake Cheesecake is not just about the end result; it’s about the joy of baking and sharing with loved ones. Remember, the key to a perfect cheesecake is patience—allow it to cool and set properly for the best texture.
As you dig into this creamy dessert, don’t forget to savor every bite and share it with those who matter most. Whether it’s a special occasion or simply a treat for yourself, you’re sure to impress with this delightful fusion of flavors. Happy baking, and