Follow Me On Pinterest!
Quick 30-Minute Creamy Garlic Chicken

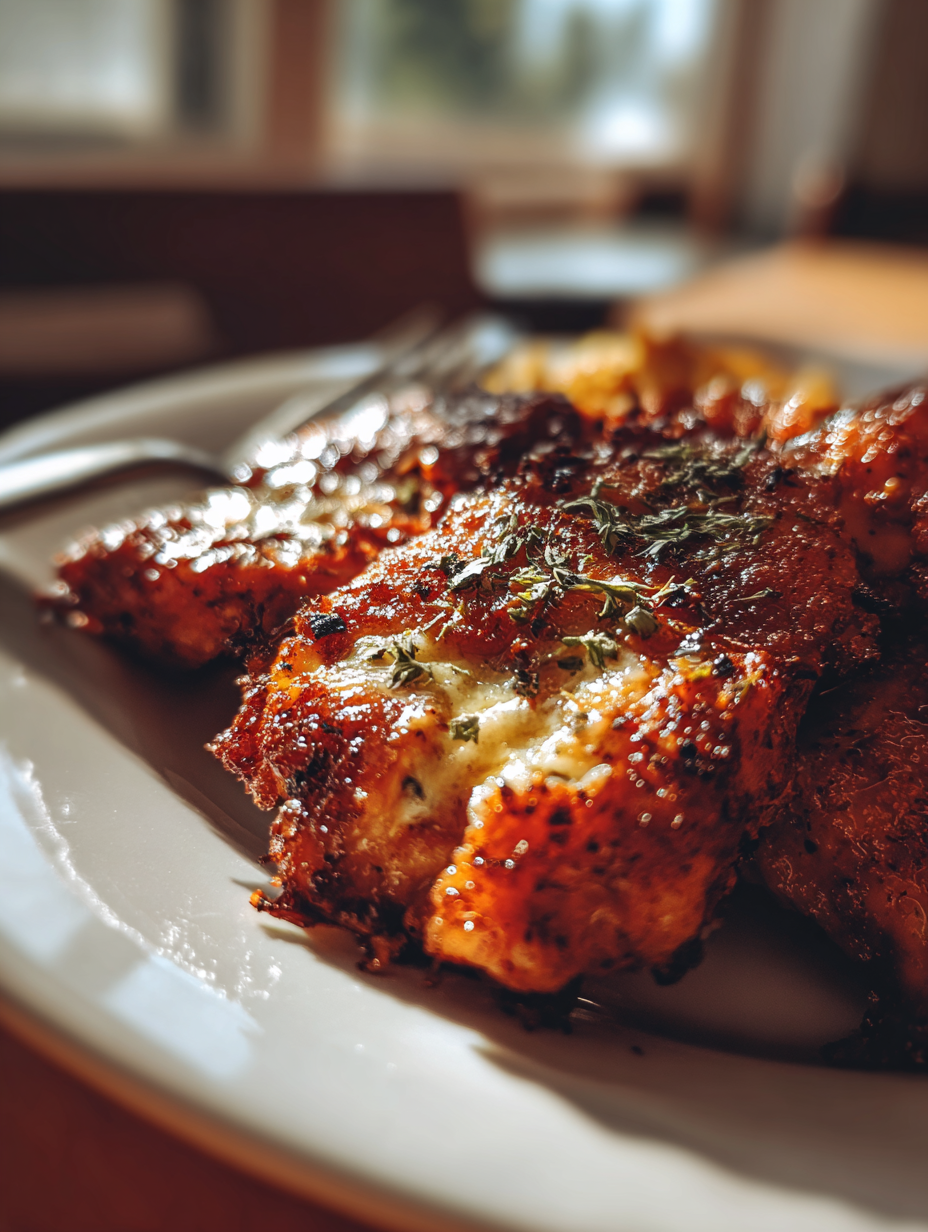
A Whirlwind of Flavor in Just Half an Hour
—
Introduction
There’s something undeniably comforting about the aroma of garlic sizzling in a pan. It takes me back to my childhood kitchen, where I would watch my mom prepare her special chicken dish on busy weeknights. The sound of her wooden spoon scraping against the skillet, mixed with the golden hue of sautéing garlic, was a symphony of home. I remember the first time I experienced that dish fully—how the creamy sauce enveloped the tender chicken, creating a luscious pairing that seemed to melt away the stresses of the day.
As I sat at the dinner table, the steam rising from the dish, the contrasting textures of crispy chicken and smooth sauce caught my attention. The rich, savory scents wafted through the air, captivating my senses and making my mouth water in anticipation. This was not just food; it was a moment of warmth and love, shared over laughter and stories.
Fast forward to my adult life, where I often find myself in a similar whirlwind of work and commitments. I’ve created a quick version of that beloved recipe—my Quick 30-Minute Creamy Garlic Chicken—that captures all the nostalgia without the hours of cooking. It’s a dish that brings friends and family together, perfect for those nights when time escapes you but you want something rich and satisfying.
With just a handful of ingredients, you’ll find that this recipe is simple yet indulgent, proving that deliciousness doesn’t have to take forever. Let’s dive into the flavors and techniques that make this dish a must-try.
—
Why This Recipe Works
At its core, this Quick 30-Minute Creamy Garlic Chicken is a balance of flavor, texture, and simplicity. The foundation of its deliciousness lies in the harmonious combination of garlic, cream, and chicken, which together create a dish that is both comforting and sophisticated.
Key Flavor Combinations
The use of garlic is crucial; it provides a robust flavor that infuses the dish with warmth. When you sauté the garlic until fragrant, it releases essential oils that enhance every bite. Pairing it with a splash of white wine or chicken broth adds acidity, cutting through the richness of the cream and creating a depth of flavor that keeps the palate intrigued.
Texture Contrasts
Texture is where this recipe shines—the tender chicken breasts contrast beautifully with the creamy sauce. By searing the chicken at a high temperature first, you achieve a golden crust that locks in moisture. The sauce, with its silky consistency, envelops the chicken, delivering a delightful mouthfeel with each forkful.
Ingredient Roles
– Chicken Breasts: The main protein, chosen for its quick cooking time and ability to absorb flavors.
– Heavy Cream: Offers richness and creaminess, turning the sauce into a luxurious coating.
– Garlic: The aromatic backbone of the dish, providing depth and warmth.
– White Wine or Broth: Adds brightness that balances the creaminess, enhancing the overall flavor profile.
What Sets This Version Apart
Unlike generic versions you might find in restaurants or frozen dinners, this recipe is made from scratch, allowing you to control the ingredients and flavors. It’s fresher, with no preservatives, and customizable to suit your preferences. You can adjust the garlic level, spice it up with red pepper flakes, or even add herbs to your liking.
—
What Makes It Special
This Quick 30-Minute Creamy Garlic Chicken stands out for several reasons that elevate it above store-bought or restaurant alternatives:
– Freshness: Made with fresh ingredients, this dish bursts with flavor that frozen or pre-packaged meals simply can’t replicate. You get to experience the vibrant aromas and tastes that come from cooking it yourself.
– Cost-Effectiveness: Cooking at home not only saves money compared to dining out, but it also allows you to make a substantial dinner for a fraction of the price. With just a few ingredients, you’ll create a dish that feels gourmet without breaking the bank.
– Customization: This recipe serves as a fantastic base that you can easily modify. Want to add spinach for a pop of color and nutrition? Or perhaps throw in some sun-dried tomatoes for a tangy twist? The choice is yours!
– Surprising Elevation: A hint of lemon juice or a sprinkle of fresh parsley just before serving can take this dish to new heights. These small additions add brightness that complements the richness of the sauce, ensuring a well-rounded bite every time.
—
Ingredient Breakdown
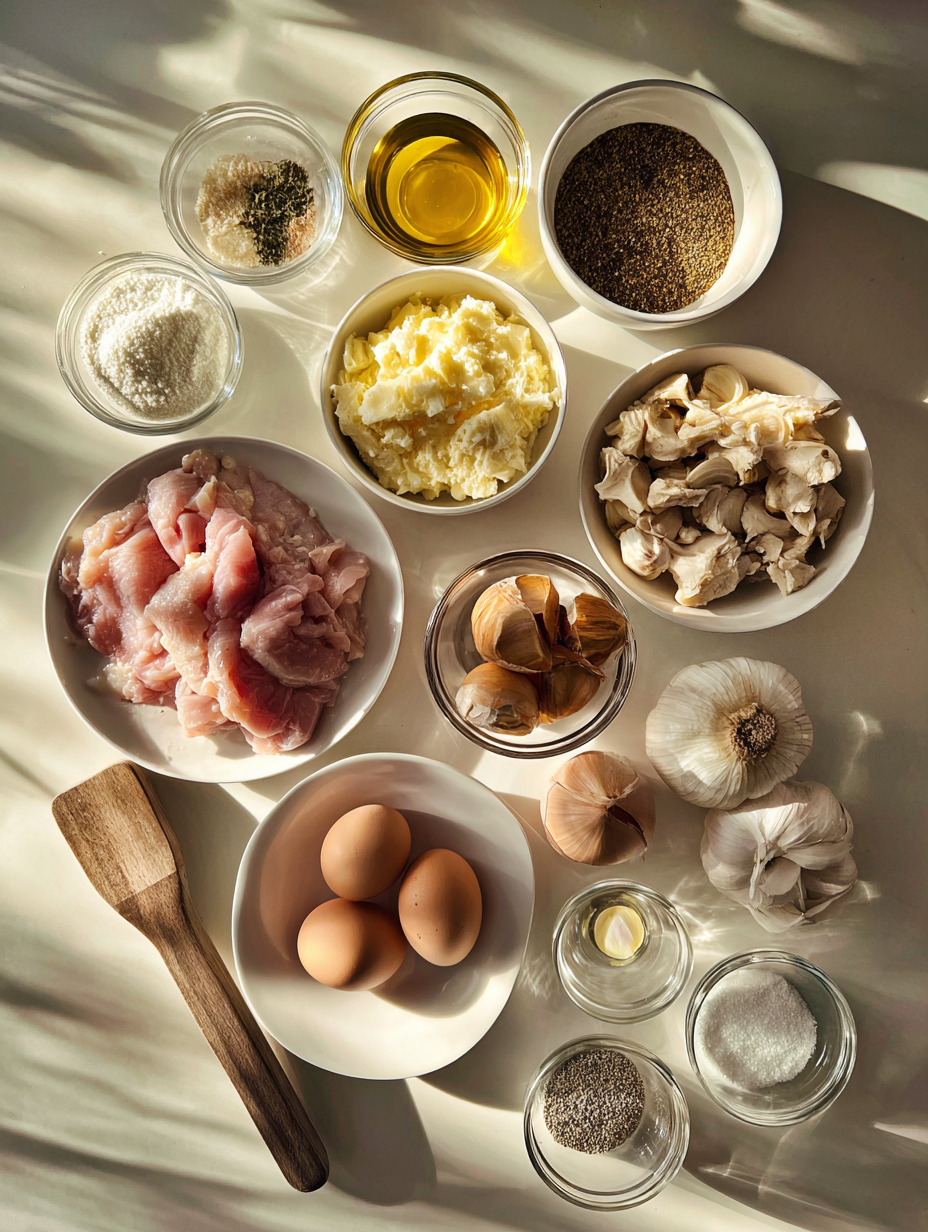
1. Chicken Breasts (2-4 pieces): The backbone of your dish, chicken breasts are quick to cook and allow for a juicy, tender result when cooked properly. Look for boneless, skinless breasts for ease. If using larger pieces, consider butterflying them for faster cooking.
2. Garlic (4-6 cloves): Fresh garlic is crucial for that rich flavor base. The quantity can be adjusted based on your preference for garlic intensity. If you don’t have fresh garlic, garlic powder can be used, but the flavor won’t be as robust.
3. Heavy Cream (1 cup): This is what gives your sauce its velvety texture. You can substitute with half-and-half for a lighter option, or use coconut cream for a dairy-free version, but keep in mind it will impart a slightly different flavor.
4. White Wine (½ cup): Adds acidity and depth to the dish. If you prefer not to use wine, you can substitute with chicken broth or a splash of lemon juice for brightness.
5. Olive Oil (2 tablespoons): Used for sautéing the chicken and garlic, olive oil contributes healthy fats and a hint of flavor. You can also use butter for a richer taste.
6. Salt & Pepper (to taste): Essential for seasoning, these basic spices bring out the flavors of all the other ingredients. Always taste as you go!
7. Fresh Parsley (for garnish): This isn’t just for decoration; fresh parsley adds a pop of color and a refreshing herbal note that complements the richness of the dish.
Substitution Options
– Dairy-Free: Use coconut cream or cashew cream as a substitute for heavy cream.
– Gluten-Free: Ensure that any broth or wine used is labeled gluten-free.
– Vegan: Substitute chicken with tofu or chickpeas and use plant-based cream alternatives.
Specialty Ingredients
Most of these ingredients are easily found in your local grocery store. However, if you’re looking for high-quality olive oil or specialty wine, a local market or specialty food store may provide better options. For fresh herbs, consider visiting a farmers’ market for the freshest selections.
—
Equipment Needed
1. Skillet or Frying Pan: An essential tool for searing the chicken and creating the sauce. A non-stick skillet works well, but a cast-iron frying pan adds a nice sear.
2. Wooden Spoon or Spatula: Perfect for stirring the garlic and sauce without scratching your pan. It also helps you scrape up any flavorful bits stuck to the bottom.
3. Meat Thermometer: This is not strictly necessary but highly recommended to ensure your chicken is cooked perfectly without drying it out.
4. Cutting Board: A sturdy board is essential for slicing your chicken and mincing garlic.
5. Knife: A sharp chef’s knife will make quick work of chopping garlic and slicing chicken.
6. Measuring Cups and Spoons: Accurate measurements are key to replicating the recipe successfully, so have these handy.
7. Serving Dish: Once your dish is ready, a beautiful serving dish can elevate the presentation, making it even more inviting.
Consider investing in quality tools to make your cooking experience smoother, but don’t hesitate to use what you have at home. A basic skillet and a good knife can go a long way!
Step-by-Step Instructions
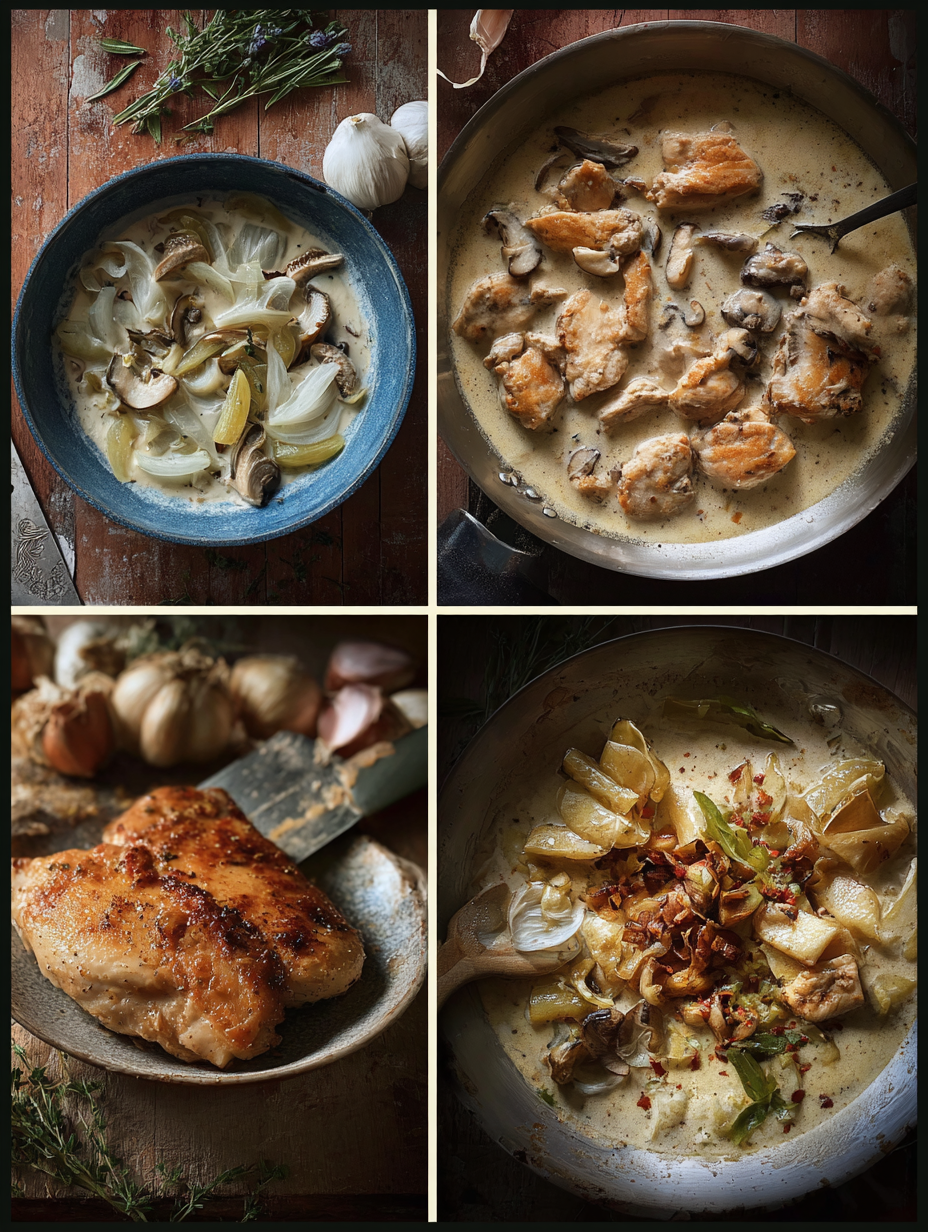
1. Prepare the Chicken: Start by taking your chicken breasts and patting them dry with paper towels. Make sure they are completely dry, as moisture will prevent a good sear. Once dried, season both sides liberally with salt and pepper. You should hear a slight sizzle when you sear the chicken, indicating the skillet is hot enough.
2. Sear the Chicken: Heat a large skillet over medium-high heat and add 2 tablespoons of olive oil. When the oil is shimmering (about 2 minutes), carefully place the chicken breasts in the skillet. Do not overcrowd the pan; if necessary, cook in batches. Let them sear for 5-7 minutes on one side until they develop a golden-brown crust. You’ll know they are ready to flip when they easily release from the skillet and have a nice caramelized color.
3. Flip and Cook Through: Flip the chicken breasts over and cook for an additional 5-7 minutes. To ensure they are cooked through, you can check for an internal temperature of 165°F. The chicken should feel firm yet springy when pressed lightly. If you don’t have a meat thermometer, a juices running clear is a good indicator.
4. Remove Chicken and Make Sauce: Once cooked, remove the chicken from the skillet and place them on a plate to rest. Lower the heat to medium and add 4 cloves of minced garlic to the same skillet. You should smell the garlicky aroma filling the air in about 30 seconds. Be cautious not to let the garlic brown too much, as it can turn bitter.
5. Add Cream and Seasonings: Pour in 1 cup of heavy cream to the skillet with the garlic, scraping the bottom to deglaze any flavorful bits stuck to the pan. Stir gently to combine everything, and let the mixture simmer for about 3-4 minutes, until it thickens slightly. You’ll notice the sauce will coat the back of a spoon when it’s ready. This is the time to add a pinch of nutmeg, salt, and black pepper to taste.
6. Combine and Serve: Add the chicken back into the skillet, spooning the creamy sauce over the top. Let the chicken simmer in the sauce for another 2-3 minutes to absorb the flavors. The sauce should be creamy and luscious, glistening around the chicken. Serve immediately, ideally over a bed of pasta or rice to soak up that delicious sauce.
Chef’s Note: If the sauce is too thick, you can thin it out with a splash of chicken broth or water. On the other hand, if it’s too thin, let it simmer a bit longer to reduce.
Pro Tips for the Best Results
1. Use a Cast Iron Skillet: Nothing beats a cast iron skillet for searing chicken. It retains heat evenly, giving you that perfect crust while ensuring the chicken stays juicy. If you don’t have one, ensure your non-stick skillet is well-heated.
2. Let the Chicken Rest: Allowing the chicken to rest for 5 minutes after cooking helps the juices redistribute throughout the meat. This keeps the chicken moist and prevents it from drying out when you slice it.
3. Fresh Garlic is Key: For the best flavor, always use fresh garlic instead of pre-minced or jarred options. Freshly minced garlic offers a potent flavor that elevates the dish, while jarred can often taste bland.
4. Adjust Creaminess Based on Preference: Feel free to adjust the amount of cream based on your taste. If you prefer a lighter sauce, you can substitute half of the cream with chicken broth. This will keep the flavor while reducing the richness.
5. Season Your Sauce: When adding salt and pepper, taste the sauce before serving. Remember that the chicken adds its flavors to the sauce, so wait until the end to adjust seasoning. This will ensure you don’t over-salt your dish.
6. Sauté Vegetables for Added Flavor: For a burst of color and nutrition, consider sautéing some spinach or kale in the garlic-infused oil before adding the cream. They will wilt beautifully and add a lovely texture to the dish.
7. Pair with the Right Wine: If you enjoy wine with dinner, a crisp white wine such as Pinot Grigio or Sauvignon Blanc complements the creamy sauce beautifully. Enjoy a glass while cooking for a delightful experience!
Common Mistakes to Avoid
1. Skipping the Drying Step: Not drying the chicken can lead to steaming instead of searing. This results in a pale, rubbery exterior instead of a nice golden-brown crust. Always pat the chicken dry with paper towels before seasoning.
2. Overcrowding the Pan: Placing too many chicken breasts in the skillet at once can lower the pan’s temperature, resulting in uneven cooking and less browning. Cook in batches if needed, allowing enough space for each piece.
3. Not Using Enough Seasoning: Many home cooks under-season their chicken, leaving it dull in flavor. Generously season both sides of the chicken with salt and pepper before cooking to enhance its natural flavors.
4. Ignoring Internal Temperature: Cooking chicken without checking the internal temperature can lead to undercooked or overcooked meat. Use a meat thermometer to ensure it reaches 165°F for safe consumption.
5. Overcooking the Garlic: Garlic can turn bitter if cooked for too long. When adding it to the skillet, keep a close eye on it and stir frequently to avoid burning. You only want to sauté it until fragrant, around 30 seconds.
6. Not Letting the Sauce Simmer: If you don’t allow the cream sauce to simmer, it will remain too thin and won’t develop the rich flavor you desire. Let it bubble gently until it reaches the desired consistency.
Creative Variations
1. Seasonal Variation: Autumn Creamy Garlic Chicken: Add diced butternut squash and sliced mushrooms to the skillet before adding the garlic. They’ll create a hearty sauce that brings a warm, autumnal flavor profile to your dish.
2. Dietary-Friendly Version: Keto Creamy Garlic Chicken: Replace the heavy cream with a combination of coconut milk and cream cheese, and serve the chicken over sautéed cauliflower rice for a low-carb alternative that retains the creamy texture.
3. Gourmet Elevated Version: Truffle Creamy Garlic Chicken: Drizzle a little truffle oil into the cream sauce right before serving. This luxurious addition will elevate the dish to gourmet status, perfect for impressing guests.
4. Quick 15-Minute Version: Express Creamy Garlic Chicken: Use thinly sliced chicken cutlets instead of whole breasts to reduce cooking time. You can have this meal on the table in under 15 minutes, making it ideal for busy weeknights.
5. Kid-Friendly Version: Cheesy Garlic Chicken: Mix in a cup of shredded cheddar or mozzarella into the sauce for a cheesy twist that kids will love. Serve it with pasta shells or macaroni for a comforting meal.
6. International Twist: Mediterranean Creamy Garlic Chicken: Incorporate sun-dried tomatoes, olives, and feta cheese into the sauce. This addition brings a zesty, Mediterranean flavor that perfectly complements the creamy garlic base.
Serving Ideas
When it comes to plating your Creamy Garlic Chicken, presentation is everything. Here are some beautiful ideas to elevate your dish:
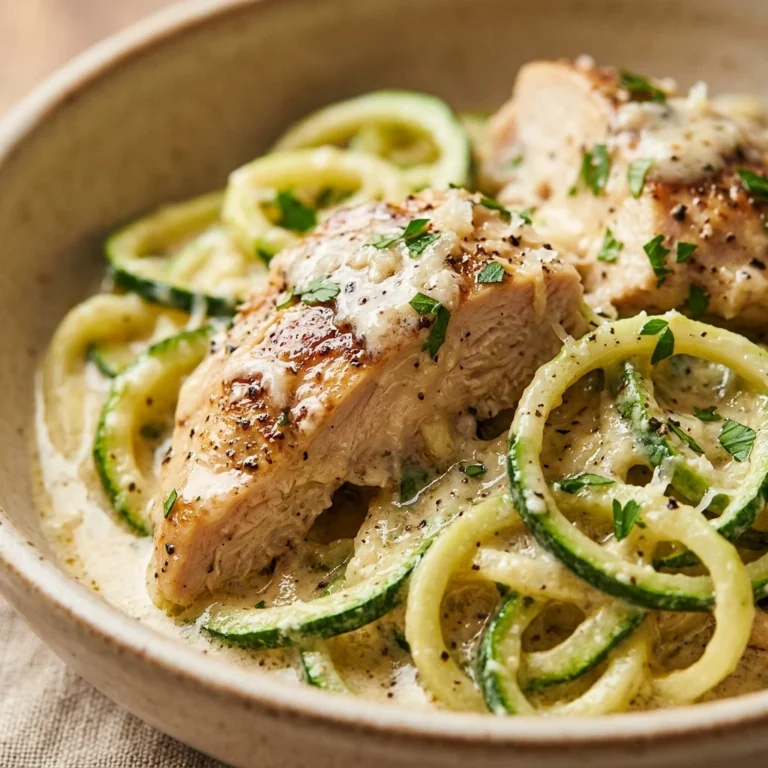
1. Layered Elegance: Start by spooning a generous portion of creamy garlic sauce onto the plate, creating a smooth canvas. Nestle the chicken breast in the center and drizzle more sauce on top. Finish with a sprinkle of fresh parsley for a vibrant green contrast.
2. Rustic Charm: Serve the chicken in a shallow bowl alongside a mound of herbed couscous. Pour the sauce over the chicken and scatter some diced cherry tomatoes for a pop of color. A sprig of rosemary can be a lovely touch for aroma and visual appeal.
3. Family Style: Present the chicken on a large wooden board with bowls of sautéed green beans and mashed potatoes on the side. Garnish the chicken with thin slices of lemon and a handful of arugula for a fresh, peppery bite that complements the richness of the dish.
4. Minimalist Approach: For a clean and modern look, place the chicken on a white plate with a small side of steamed asparagus. Drizzle the sauce in a circular pattern around the chicken and top with microgreens for a sophisticated flair.
5. Comforting Bowl: Create a hearty meal by placing the chicken and sauce over a base of creamy polenta. Top with grated Parmesan and a sprinkle of black pepper. This rustic presentation invites warmth and comfort, perfect for a cozy dinner.
What to Serve With
Pairing your Creamy Garlic Chicken with complementary dishes can elevate your meal to new heights. Here are some delightful options:
1. Garlic Bread: This classic side enhances the garlic flavor of the chicken while offering a crunchy texture that contrasts beautifully with the creaminess of the sauce. Plus, it’s perfect for soaking up every last drop of that luscious sauce.
2. Crispy Roasted Brussels Sprouts: The slight bitterness and crunch of roasted Brussels sprouts balance the richness of the chicken. Toss them with a bit of balsamic glaze for added depth, making this a colorful and nutritious side.
3. Mixed Green Salad with Lemon Vinaigrette: A fresh salad brings brightness and acidity to your plate. Use a mix of arugula, spinach, and radishes, dressed with a zesty lemon vinaigrette to cut through the creaminess of the chicken.
4. Chardonnay: A chilled glass of Chardonnay pairs beautifully, as the wine’s acidity complements the creaminess of the sauce, while its fruity notes enhance the overall flavor profile.
5. Chocolate Mousse: For dessert, a light and airy chocolate mousse provides a delightful contrast to the savory main course. Its rich chocolate flavor and silky texture will leave your guests satisfied without feeling overly stuffed.
Storage Guide
To store leftovers of your Creamy Garlic Chicken, follow these steps for optimal freshness:
– Container Type: Use an airtight glass container for best results. Glass is preferable as it does not absorb odors or stains.
– Temperature: Keep your fridge at around 40°F (4°C) to maintain food safety.
– Shelf Life: This dish can last 3 to 4 days in the fridge.
Check for signs of spoilage, such as an off smell, discoloration, or mold growth, before consuming leftovers.
To refresh your chicken before serving, consider adding a splash of fresh cream or chicken broth when reheating. This will not only restore moisture but also bring back that luscious texture that makes this dish so irresistible.
Freezing Tips
The Creamy Garlic Chicken does freeze well, making it a fantastic option for meal prep. Here’s how to do it:
– Portioning: Divide the chicken and sauce into individual servings.
– Wrapping Method: Use freezer-safe plastic wrap or aluminum foil followed by placing them in a freezer-safe container to prevent freezer burn.
– Labeling: Don’t forget to label your container with the date and contents for easy identification later.
In the freezer, it will keep for about 2 to 3 months. You might notice a slight change in texture upon thawing due to the creamy sauce, but it will still be delicious.
For the best thawing method, place the container in the fridge overnight before reheating. This gentle thawing process helps maintain the integrity of the sauce and chicken.
Reheating Guide
Reheating your Creamy Garlic Chicken properly is key to enjoying it just as much as when it was first made. Here’s how to do it:
– Microwave: Place your chicken in a microwave-safe dish. Heat on medium power for about 2-3 minutes, stirring halfway through to ensure even heating. To prevent drying out, add a tablespoon of water or chicken broth.
– Oven: Preheat your oven to 350°F (175°C). Place the chicken in an oven-safe dish and cover it with foil. Heat for about 15-20 minutes or until warmed through, ensuring it doesn’t dry out.
– Stovetop: In a skillet over medium-low heat, add the chicken along with a splash of cream or broth. Heat for about 5-7 minutes, stirring gently until warmed to your liking.
For all methods, consider adding a touch of fresh herbs or a squeeze of lemon juice before serving to restore the dish’s bright flavors.
Nutrition Overview
Each serving of your Creamy Garlic Chicken packs a satisfying punch in terms of nutrition! Here’s a breakdown of the approximate values:
– Calories: 450
– Protein: 35g
– Carbohydrates: 10g
– Fat: 30g
– Fiber: 1g
– Sugar: 2g
The key ingredients in this dish offer some fantastic health benefits. Garlic is known for its immune-boosting properties and cardiovascular health benefits. The chicken provides high-quality protein essential for muscle repair and growth, while the cream adds a source of calcium, which is vital for bone health. Enjoy this dish knowing it’s not just delicious, but nutritious too!
Frequently Asked Questions
Q: Can I substitute chicken breast with another protein?
A: Absolutely! You can use chicken thighs for a juicier option or even try pork chops or tofu for a vegetarian version. Just adjust cooking times accordingly, as they may vary.
Q: Is it possible to make this dish dairy-free?
A: Yes! You can replace the heavy cream with coconut milk or a cashew cream for a rich, dairy-free alternative. Just be mindful of the flavors, as they will slightly change.
Q: How can I reduce the calories in this recipe?
A: Opt for skinless chicken breast and use low-fat cream or Greek yogurt in place of heavy cream. You can also decrease the amount of oil used for cooking.
Q: What’s the best way to store leftover creamy garlic chicken?
A: Store leftovers in an airtight glass container in the fridge. Make sure it’s cooled down before sealing it to avoid condensation.
Q: Can I prepare this dish ahead of time?
A: Yes! You can prep the garlic sauce and chicken, storing them separately in the fridge. Just reheat and combine before serving for a quick meal.
Q: What kitchen equipment do I need for this recipe?
A: You’ll need a large skillet or sauté pan, a cutting board, and a sharp knife for prepping your ingredients, along with measuring tools for accuracy.
Q: How do I know when the chicken is fully cooked?
A: The chicken should reach an internal temperature of 165°F (74°C). Use a meat thermometer to check for doneness, ensuring it is safe to eat.
Q: Can I freeze the creamy garlic chicken?
A: Yes, this dish freezes well. Just portion it out, wrap securely, and store it in the freezer. It will last for 2-3 months.
Final Thoughts
As you prepare your Quick 30-Minute Creamy Garlic Chicken, remember to keep your cooking environment light and joyful. One of the most important tips is to ensure your chicken is well-seasoned and your sauce is creamy but not overly thick. This dish is not just about flavor; it’s about the experience of creating something delightful for yourself or your loved ones.
I genuinely hope you find joy and satisfaction in making this recipe. It’s a fantastic way to share a little culinary love. Once you’ve made it, I invite you to snap a photo and share your creation with friends or on social media.