Follow Me On Pinterest!
No Bake Peanut Butter Cup Cheesecake

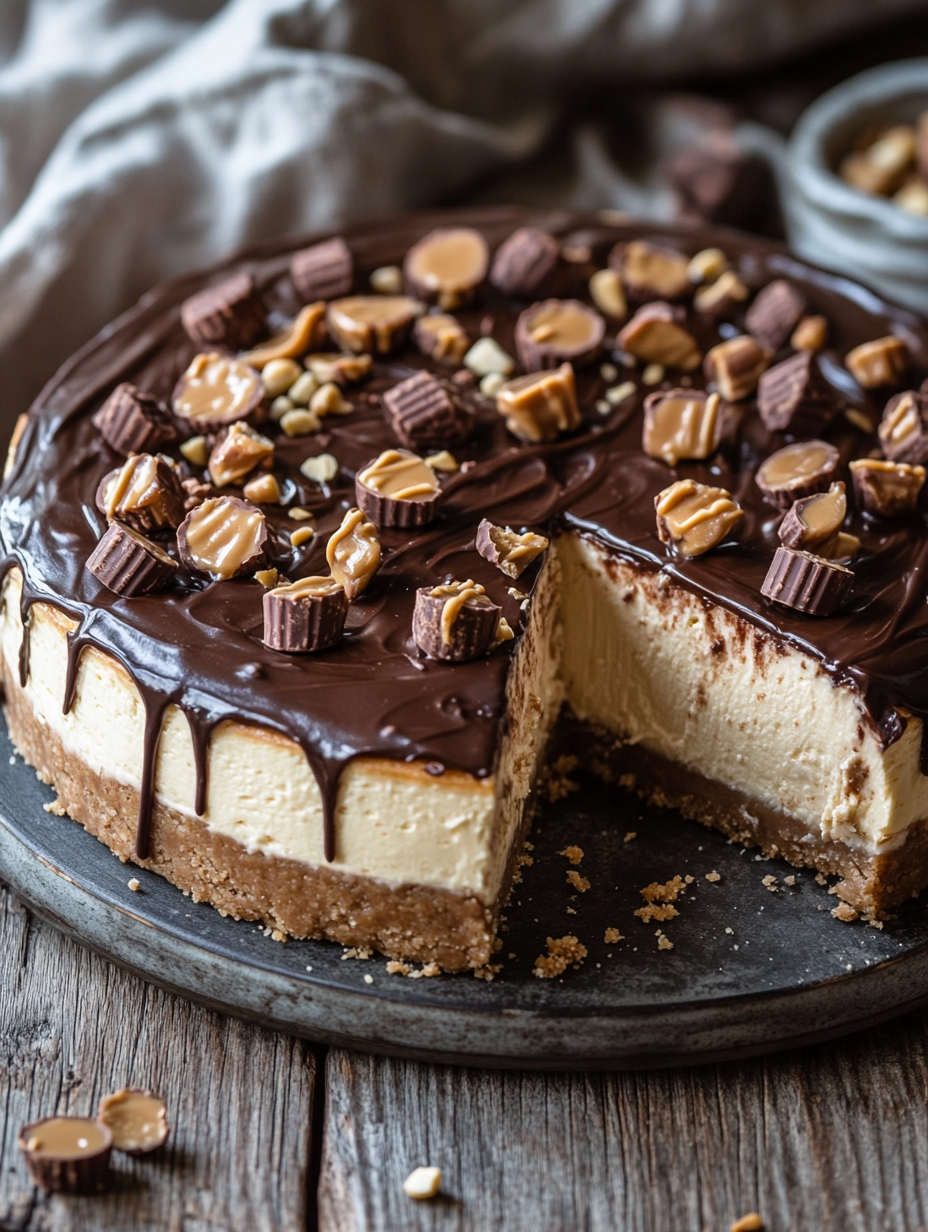
No Bake Peanut Butter Cup Cheesecake: Indulgence Without the Oven
Introduction
The very first time I tasted a peanut butter cup cheesecake, I was transported back to my childhood kitchen, where the aroma of melting chocolate and the rich scent of creamy peanut butter swirled together like a comforting hug. It was a hot summer afternoon, and my mom had decided we needed a special treat. She gathered us around the countertop, the sun streaming through the window, illuminating the excitement on our faces. With each spoonful of that velvety cheesecake, I was hooked.
Years later, as I attempted to recreate that memory in my own kitchen, I realized that some of life’s most cherished moments revolve around food, friends, and family. That’s why I’ve made it my mission to create a no-bake peanut butter cup cheesecake that captures the essence of those sunny days but doesn’t require turning on the oven. This dessert has become my go-to for gatherings, potlucks, and even quiet evenings when I just want to indulge in something deliciously rich and creamy.
Picture the layers of graham cracker crust, smooth peanut butter filling, and a decadent chocolate drizzle all melding together in one bite. Each forkful brings back those nostalgic memories while satisfying your sweet tooth. Whether you’re a peanut butter lover or just looking for an easy yet impressive dessert, this recipe is sure to become a favorite, just as it has in my home.
Why This Recipe Works
Creating a cheesecake that is both rich and light may seem like a contradiction, but this no-bake peanut butter cup cheesecake achieves the perfect balance. The secret lies in the combination of cream cheese, heavy whipping cream, and peanut butter. The cream cheese provides that classic cheesecake texture, while the whipped cream adds an airy lightness that melts in your mouth.
The process begins with the graham cracker crust, providing a sweet, buttery base that contrasts beautifully with the creamy filling. Pressing it firmly into the pan ensures it holds its shape, which is vital for a no-bake dessert.
In terms of flavor, this cheesecake combines the nutty richness of peanut butter with the sweetness of powdered sugar, creating a luscious filling that’s not overly sweet. A touch of vanilla extract enhances the flavors, bringing harmony to the dish. To finish, the drizzle of melted chocolate chips not only adds visual appeal but introduces a contrasting flavor that elevates the entire experience.
What makes this recipe particularly reliable is the ability to chill it for several hours, allowing the flavors to meld beautifully without the risk of overbaking. You can prepare it ahead of time, making it ideal for entertaining. Plus, the no-bake method means you can skip the oven altogether, leaving your kitchen cool and your spirits high.
What Makes It Special
This no-bake peanut butter cup cheesecake stands out for several reasons, setting it apart from typical store-bought or restaurant versions:
– Convenience: Unlike traditional cheesecakes that require baking and cooling, this recipe comes together quickly with minimal effort. You won’t need to worry about cracks or overbaking—just mix, layer, and chill.
– Texture: The combination of whipped cream and cream cheese results in an incredibly creamy texture that is light yet decadent, making each bite a delightful experience.
– Customizable: You can personalize this cheesecake to your heart’s content. Want to swap in almond butter? Go for it! Prefer a gluten-free crust? Just use gluten-free graham crackers. The base recipe is versatile, allowing you to cater to different dietary needs or flavor preferences.
– Visual Appeal: The glossy chocolate drizzle on top not only adds a finishing touch but makes it a stunning centerpiece for any gathering. It’s a dessert that invites compliments and questions, and you’ll love sharing the story of how simple it is to make.
Ingredient Breakdown
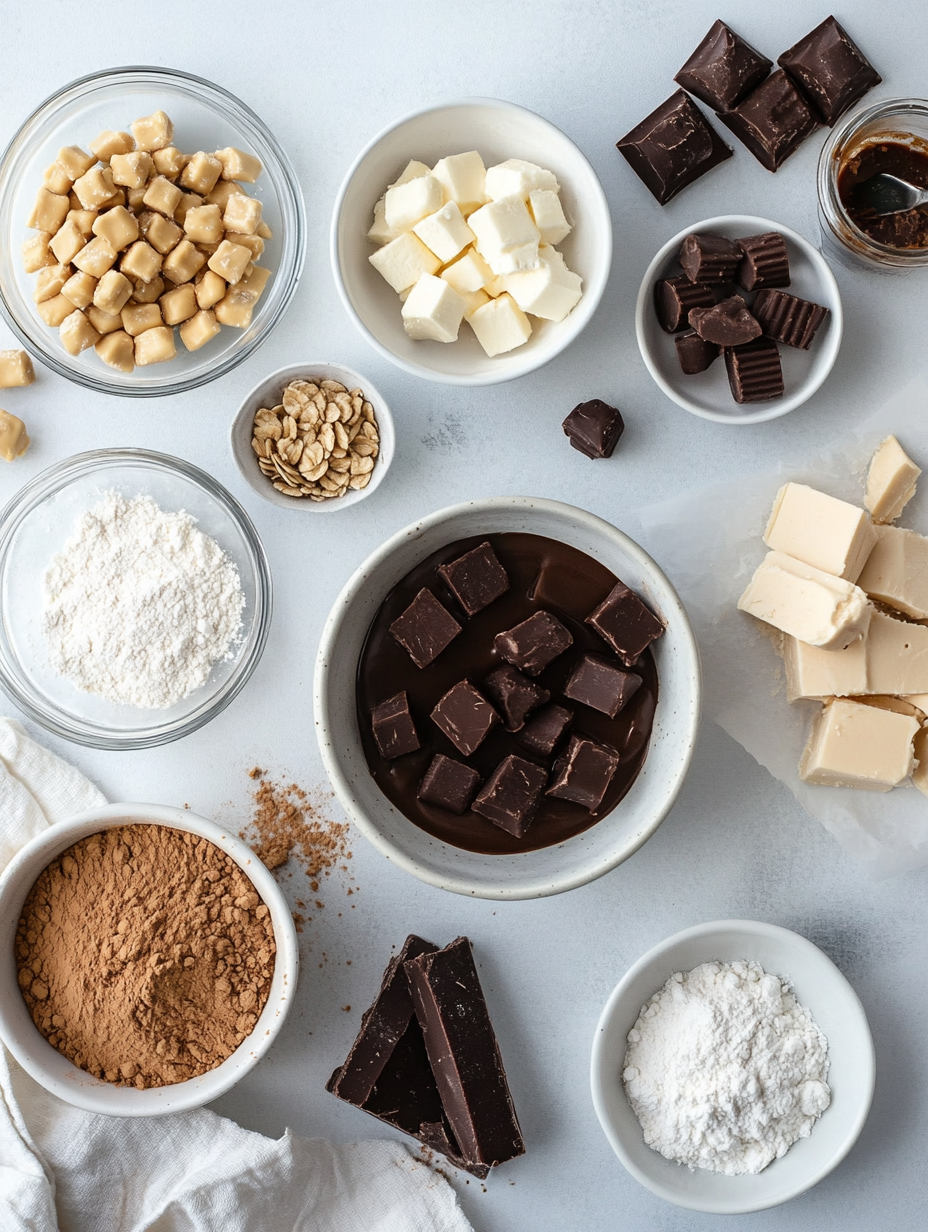
Let’s dive into the ingredients that make this no-bake peanut butter cup cheesecake a standout treat. Each component plays a crucial role, contributing to the overall flavor and texture:
1. Graham Cracker Crumbs: These form the base of your cheesecake. The buttery flavor and crunchy texture provide a perfect contrast to the creamy filling. Substitutions include digestive biscuits or gluten-free graham crackers if you’re looking for a gluten-free option.
2. Unsalted Butter: This helps bind the graham cracker crumbs together and adds richness to the crust. If you want to lighten the recipe, you can substitute with coconut oil, though this will impart a subtle coconut flavor.
3. Cream Cheese: A key player in any cheesecake, it gives the filling its signature creamy texture and tangy flavor. Be sure to use full-fat cream cheese for the best results, as reduced-fat versions may lack flavor and creaminess.
4. Peanut Butter: The star of the show! Choose a high-quality, smooth peanut butter for a silky filling. You can also use natural peanut butter, but be mindful that it might separate a bit more.
5. Powdered Sugar: This sweetener dissolves easily, ensuring a smooth filling without any graininess. If you’re looking for a healthier option, you can substitute with a sugar alternative like erythritol or coconut sugar, but make sure they are powdered for a similar texture.
6. Vanilla Extract: A splash of vanilla adds depth and enhances the flavors. Opt for pure vanilla extract over imitation for a more robust taste.
7. Heavy Whipping Cream: Essential for achieving that light, airy texture, the whipped cream helps the cheesecake hold its shape while adding a luxurious mouthfeel. If you’re dairy-free, you can find non-dairy whipping cream alternatives at most grocery stores.
8. Chocolate Chips: Used for the topping, they add a rich, sweet finish. You can use semi-sweet or dark chocolate chips, or even try a drizzle of white chocolate for a fun twist.
With these ingredients, you’re not just making a dessert; you’re crafting a delightful experience that will transport you back to those cherished moments, just like it did for me. Each bite offers a taste of nostalgia and a reminder of the simple joys found in the kitchen.
Equipment Needed
To create this no-bake peanut butter cup cheesecake, you’ll need a few essential tools that will make the process smooth and enjoyable:
– 9-inch Springform Pan: This is crucial for easy removal of your cheesecake. The sides come off, allowing for a beautiful presentation without the risk of damaging your dessert. If you don’t have one, look for a loose-bottomed cake pan as a substitute.
– Mixing Bowls: A set of sturdy mixing bowls in various sizes will make it easy to combine your ingredients without making a mess. Glass or stainless steel bowls are great choices as they won’t retain odors or stains.
– Electric Mixer: While you can mix by hand, an electric mixer will save you time and effort, especially for whipping the cream. If you’re short on space, a hand mixer is an affordable alternative.
– Spatula: A silicone spatula is perfect for folding in the whipped cream and smoothing the top of your cheesecake. It helps ensure you don’t deflate the whipped cream while combining.
– Whisk: You’ll need a whisk for mixing the cream cheese and peanut butter together smoothly. A balloon whisk works best for incorporating air into the mixture.
– Microwave-Safe Bowl: For melting the chocolate chips, a microwave-safe bowl is essential. If you prefer, you can use a double boiler on the stove as an alternative.
Each piece of equipment plays its part in creating a delightful dessert, making the process as enjoyable as the end result. With the right tools in hand, you’ll feel like a pro in the kitchen, ready to impress family and friends with this no-bake wonder!
Step-by-Step Instructions
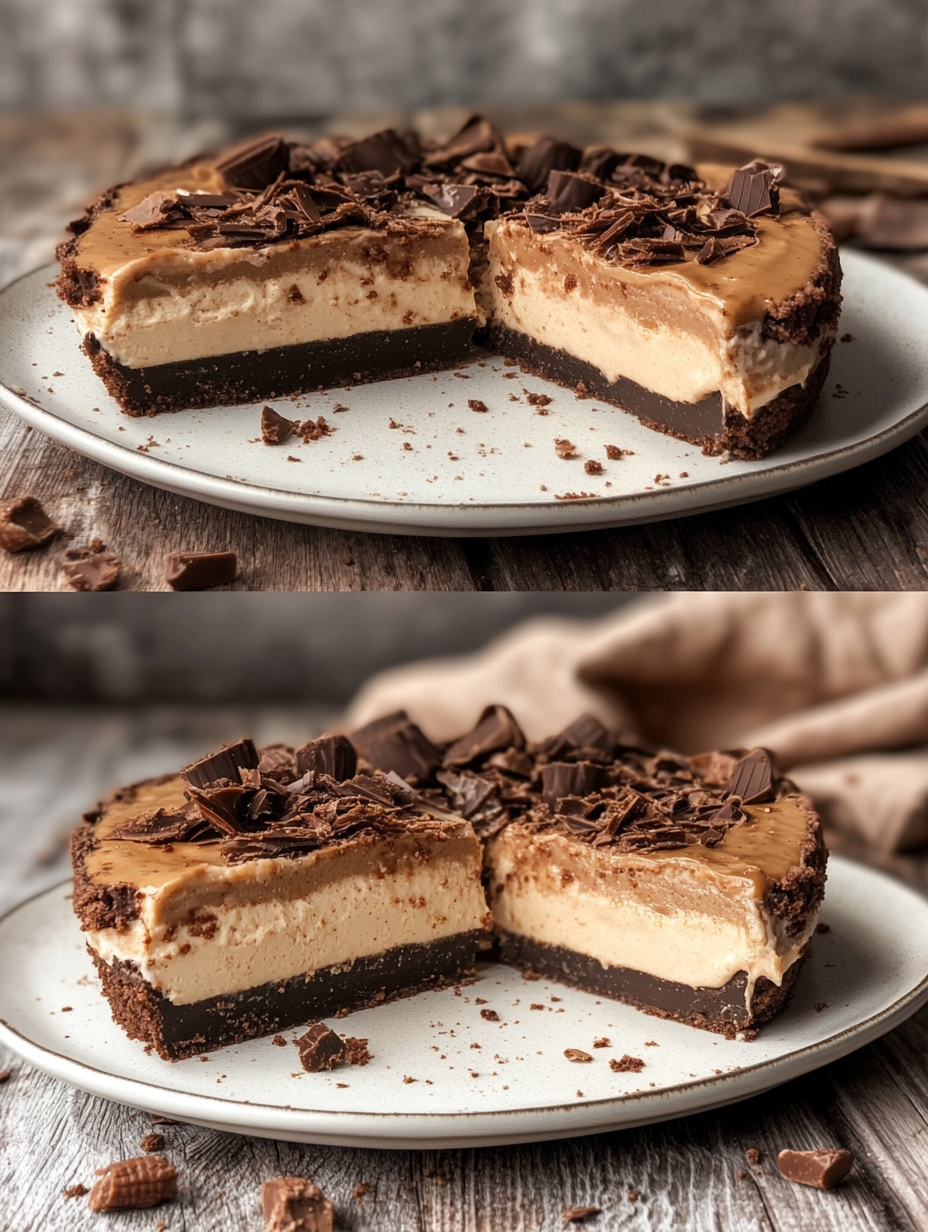
Creating your No-Bake Peanut Butter Cup Cheesecake can be a delightful and rewarding experience, especially when you follow these detailed steps. Each step is designed to guide you through the process while ensuring that your cheesecake turns out perfectly.
1. Prepare the Crust: In a medium bowl, combine 1 cup of graham cracker crumbs and 0.5 cup of melted unsalted butter. Mix well until the crumbs are fully coated and resemble wet sand. You should hear a soft crunch as you stir. This texture is key; it ensures a sturdy crust that holds up to the creamy filling.
2. Press the Crust: Transfer the crumb mixture to a 9-inch springform pan. Using the back of a measuring cup or your hands, press the mixture firmly into the bottom of the pan to create an even layer. Look for a compact layer that feels solid under your fingers. This will provide a strong base for your cheesecake.
3. Prepare the Filling: In a large mixing bowl, beat 1 cup of softened cream cheese and 0.5 cup of peanut butter together using an electric mixer. Start on low speed and gradually increase to medium. Mix until the mixture is smooth and creamy, about 2-3 minutes. You should smell the nutty aroma of the peanut butter wafting through your kitchen, a hint of what’s to come!
4. Incorporate Sugar and Vanilla: Gradually add 0.5 cup of powdered sugar and 1 teaspoon of vanilla extract to the cream cheese and peanut butter mixture. Continue mixing until fully combined and smooth, about 1-2 minutes. The smell of sweet vanilla combined with peanut butter will fill your kitchen, signaling that you’re on the right track.
5. Whip the Cream: In another bowl, pour 1 cup of heavy whipping cream. Using a whisk or electric mixer, whip the cream on high speed until stiff peaks form. This could take around 3-5 minutes. You’ll hear the whoosh of the whisk as it creates volume in the cream, achieving a light and airy consistency.
6. Fold in the Whipped Cream: Gently fold the whipped cream into the peanut butter mixture using a silicone spatula. Be careful to keep as much air in the whipped cream as possible. You’ll see the filling lighten in color and texture, becoming fluffy. This step is crucial for creating a rich, creamy cheesecake that isn’t too dense.
7. Assemble the Cheesecake: Pour the peanut butter filling over the crust in the springform pan. Use the spatula to smooth the top evenly. As you do this, take a moment to appreciate the beautiful marbling effect.
8. Drizzle with Chocolate: Melt 0.5 cup of chocolate chips in a microwave-safe bowl in 30-second intervals, stirring in between until smooth. Drizzle the melted chocolate over the cheesecake. This adds a stunning finish and an extra layer of flavor. Finally, refrigerate the cheesecake for at least 4 hours, or overnight if possible, to let it set.
Chef’s Note: Make sure your cream cheese is at room temperature for easier blending, and always taste your filling before pouring it into the crust; adjust the sweetness if necessary!
Pro Tips for the Best Results
When it comes to your No-Bake Peanut Butter Cup Cheesecake, a few insider tips can elevate your creation from good to irresistible:
1. Use Quality Ingredients: The flavor of your cheesecake will depend on the quality of your peanut butter and chocolate. Opt for natural peanut butter without added sugar or hydrogenated oils for the best taste.
2. Chill Your Mixing Bowls: Before whipping your cream, chill your mixing bowl and whisk in the freezer for about 10-15 minutes. Cold utensils help the cream whip up quicker and achieve those desired stiff peaks.
3. Don’t Rush the Folding: When incorporating the whipped cream into the peanut butter mixture, take your time. Folding gently preserves the air you worked hard to incorporate, resulting in a lighter cheesecake.
4. Add a Pinch of Salt: A small pinch of salt in your peanut butter filling can help balance the sweetness and enhance the flavors. Don’t underestimate the power of salt in sweet dishes!
5. Use a Springform Pan: This type of pan allows you to easily remove the cheesecake without damaging it. It’s perfect for showing off your dessert’s beautiful layers.
6. Allow Proper Chilling Time: Don’t skimp on the chilling time. A well-chilled cheesecake firms up nicely and allows the flavors to meld. Overnight chilling yields the best results.
7. Topping Options: Consider adding crushed peanuts, chocolate shavings, or even a drizzle of caramel on top of the melted chocolate for added texture and visual appeal.
8. Serving Temperature: Let the cheesecake sit at room temperature for about 10-15 minutes before slicing. This makes cutting easier and enhances the creamy texture.
Common Mistakes to Avoid
Even the most seasoned bakers can run into trouble with a no-bake cheesecake. Here are some common pitfalls to watch out for:
1. Using Cold Cream Cheese: Starting with cold cream cheese can lead to lumps in your filling. Always allow it to come to room temperature for a smooth mixture.
2. Overmixing the Filling: Be cautious when mixing in the powdered sugar and vanilla. Overmixing can lead to a dense texture rather than a light and airy cheesecake.
3. Not Whipping the Cream to Stiff Peaks: When whipping the cream, if you don’t achieve stiff peaks, your filling will lack the lightness it needs. Stiff peaks should stand straight up when the whisk is lifted.
4. Skipping Chilling Time: If you don’t allow the cheesecake to chill properly, it won’t set correctly and may fall apart when you slice it. Patience is key for this dessert!
5. Using the Wrong Pan Size: Ensure you’re using a 9-inch springform pan. Using a smaller pan can lead to overflow, while a larger one may cause your cheesecake to be too thin.
6. Underestimating the Importance of Folding: Folding the whipped cream too aggressively can deflate the mixture. Gentle motions are essential to maintain the light texture.
7. Not Tasting the Filling: Always taste your filling before pouring it into the crust. Adjust the sweetness to your liking; this is your cheesecake, after all!
Creative Variations
Now that you’ve mastered the classic No-Bake Peanut Butter Cup Cheesecake, why not switch it up? Here are some creative variations to inspire your next baking adventure:
1. Seasonal: For a fall twist, try adding pumpkin puree and spices like cinnamon and nutmeg to the peanut butter mixture for a Pumpkin Peanut Butter Cheesecake.
2. Dietary-Friendly: Make a vegan version by using dairy-free cream cheese, coconut cream, and maple syrup instead of powdered sugar. This way, everyone can enjoy the creamy goodness!
3. Gourmet Elevated: Add a layer of salted caramel sauce between the crust and the filling. Top with candied bacon or a sprinkle of sea salt for an adult version that is sure to impress.
4. Quick 15-Minute: For a speedy treat, make mini cheesecakes in muffin tins. Use the same ingredients and process, but reduce chilling time by half since they are smaller.
5. Kid-Friendly: Get the children involved by letting them decorate the cheesecake with colorful sprinkles or mini chocolate candies. Make it a fun family activity!
6. International Twist: Try incorporating Thai flavors by adding coconut milk to the filling and topping with toasted coconut flakes. This will give your cheesecake an exotic flair.
By exploring these variations, you can enjoy this beloved dessert in numerous ways, making it suitable for any occasion. Whether you stick to the classic or venture into creative territory, each version is sure to delight your palate!
Serving Ideas
When it comes to serving your No Bake Peanut Butter Cup Cheesecake, presentation is key to making that first impression. Here are some delightful plating ideas to elevate your dessert experience:
1. Mini Cheesecake Slices: Cut the cheesecake into smaller portions for a delightful bite-sized treat. This is perfect for parties or gatherings where guests might appreciate a variety of desserts.
2. Chocolate Drizzle: After drizzling the melted chocolate on top, consider adding a few chocolate shavings or curls for a touch of elegance. It gives a nice visual contrast against the creamy cheesecake.
3. Whipped Cream Topping: Serve with a dollop of freshly whipped cream on top. You can even add a sprinkle of crushed graham crackers or crushed peanuts for texture and flavor.
4. Fresh Fruit Garnish: Slices of banana or fresh strawberries not only add a pop of color but also a refreshing contrast to the rich cheesecake. They’re also a great way to introduce some natural sweetness.
5. Serve with Peanuts: For those who adore peanut butter, sprinkle a few chopped peanuts on top just before serving. It gives an extra crunch that complements the creamy texture of the cheesecake beautifully.
Remember to keep your serving sizes in mind; each slice should be generous yet manageable, especially for this decadent dessert.
What to Serve With
Pairing your No Bake Peanut Butter Cup Cheesecake with the right accompaniments can truly elevate the experience. Here are some delightful options:
1. Coffee: A rich, bold coffee balances the sweetness of the cheesecake, providing a perfect end to a meal. The bitterness of the coffee enhances the flavors of the peanut butter.
2. Hot Chocolate: For chocolate lovers, a warm cup of hot chocolate is a delightful pairing. This creates a comforting dessert experience, especially on a chilly evening.
3. Milk: Classic and timeless, a glass of cold milk is the perfect companion, especially for younger audiences. It cuts through the richness and makes each bite more enjoyable.
4. Ice Cream: A scoop of vanilla or chocolate ice cream can add a delightful creaminess and temperature contrast. The combination of hot and cold can be incredibly satisfying.
5. Fruit Salad: A light and refreshing fruit salad can cleanse the palate between bites of the rich cheesecake. Fruits like berries and bananas work especially well.
6. Peanut Butter Cookies: For the ultimate peanut butter experience, serve alongside some homemade peanut butter cookies. It’s a fun way to indulge for those who can’t get enough of that nutty flavor.
By thoughtfully pairing these accompaniments, you can create a well-rounded dessert spread that will leave your guests raving.
Storage Guide
To keep your No Bake Peanut Butter Cup Cheesecake fresh and delicious, proper storage is essential. Here’s how to do it:
– Container Type: Store the cheesecake in an airtight container or cover the springform pan tightly with plastic wrap to prevent it from drying out.
– Temperature: Keep it refrigerated at a consistent temperature of 35°F to 40°F. This will ensure the cheesecake remains creamy and safe to eat.
– Days It Keeps: When stored correctly, the cheesecake will stay fresh for up to 5 days in the refrigerator. While it’s best enjoyed fresh, it can still maintain its quality for a few days.
– Signs Gone Bad: Check for any off smells, discoloration, or changes in texture. If the surface appears dry or has developed any mold, it’s best to discard it.
– How to Refresh: If you find the cheesecake has dried out slightly in the fridge, you can revive it by adding a fresh dollop of whipped cream on top before serving. This adds moisture and enhances its visual appeal.
Following these guidelines will ensure that your dessert remains as delightful as the day it was made!
Freezing Tips
If you want to enjoy your No Bake Peanut Butter Cup Cheesecake beyond its refrigerator shelf life, consider freezing it. Here are some tips for successful freezing:
– Does It Freeze Well?: Yes, this cheesecake freezes well, but to maintain its texture, it’s best to freeze it before adding the chocolate drizzle.
– Portioning: Cut the cheesecake into individual slices before freezing. This makes it easier to thaw only what you need when you’re ready to indulge.
– How Long: You can freeze the cheesecake for up to 3 months. Be sure to wrap each slice in plastic wrap and then place it in an airtight container or freezer bag to prevent freezer burn.
– Thawing Method: To thaw, simply transfer the desired number of slices to the refrigerator and let them defrost overnight. If you’re in a rush, you can also set the slices out at room temperature for about 30 minutes before serving.
With these tips, you can savor this delicious dessert even longer!
Reheating Guide
While the No Bake Peanut Butter Cup Cheesecake is typically served cold, if you prefer a slightly warmer experience, reheating can be done with care. Here’s how to do it:
– Microwave: Place a slice on a microwave-safe plate and heat it for 10-15 seconds at a low power setting. Check for warmth and avoid overheating, as this can affect the texture.
– Oven: Preheat your oven to 325°F. Place the cheesecake slice in an oven-safe dish and cover it loosely with aluminum foil to prevent drying out. Heat for about 10-15 minutes, checking occasionally.
– Stovetop: Though less common, you can gently warm a slice in a non-stick skillet over medium-low heat, covered, for about 5 minutes. This method can help keep it moist while warming it through.
Be cautious not to overheat the cheesecake, as this can alter its creamy texture.
Nutrition Overview
Each slice of your No Bake Peanut Butter Cup Cheesecake is a delightful indulgence with nutritional considerations. Here’s a brief overview of its nutritional profile:
– Calories: Approximately 400-450 calories per slice, depending on portion size and specific ingredients used.
– Macros: Each serving contains roughly 25g of fat, 30g of carbohydrates, and 5g of protein. The high-fat content primarily comes from peanut butter and heavy cream, contributing to its rich and creamy texture.
– Health Benefits:
– Peanut Butter: Packed with protein and healthy fats, peanut butter can contribute to heart health and provide sustained energy.
– Cream Cheese: While it adds richness, it also contains calcium and vitamin A, essential for bone health and immune function.
– Graham Crackers: A source of whole grains, they provide some fiber, which can aid in digestion.
Enjoying this cheesecake in moderation can be a delightful treat within a balanced diet!
Frequently Asked Questions
Q: Can I use natural peanut butter for this recipe?
A: Yes, you can use natural peanut butter, but ensure it’s well-stirred to incorporate the oils. Natural peanut butter may yield a slightly different texture but will still taste delicious.
Q: How long does it take to set?
A: The cheesecake should set in the refrigerator for at least 4 hours, but overnight is ideal for the best texture and flavor development.
Q: Can I make this cheesecake dairy-free?
A: You can substitute cream cheese with a dairy-free alternative and use coconut cream instead of heavy cream. Just be aware that the flavors and texture may vary.
Q: What can I use instead of graham cracker crumbs for the crust?
A: You can use crushed cookies like Oreos, vanilla wafers, or even nut-based crusts for a gluten-free option. Each will bring a unique flavor to your cheesecake.
Q: Is it possible to add flavors to the cheesecake?
A: Absolutely! You can mix in ingredients like melted chocolate, caramel, or even a splash of your favorite liqueur to customize the flavors to your liking.
Q: How do I prevent cracks on the cheesecake top?
A: Since this is a no-bake recipe, cracking shouldn’t be an issue. However, make sure to mix your ingredients gently to avoid incorporating too much air, which can lead to uneven surfaces.
Q: Can I leave it out at room temperature?
A: It’s best to keep the cheesecake refrigerated until serving. If left out for more than 2 hours, it should be discarded to avoid food safety issues.
Q: How can I make this cheesecake healthier?
A: You can reduce the sugar by using a sugar substitute, opt for low-fat cream cheese, and use less butter for the crust. Additionally, consider topping it with fresh fruit instead of chocolate for a more nutritious finish.
Final Thoughts
Creating a No Bake Peanut Butter Cup Cheesecake is not just about the end product; it’s about the joy of making something delicious that can be shared with family and friends. Remember these key tips: always allow ample time for chilling to ensure the perfect texture and don’t hesitate to get creative with toppings and pairings. Your cheesecake can be a canvas for your culinary creativity! Dive into this scrumptious treat and bask in the joy that comes from sharing a slice of happiness. Enjoy every decadent bite!