Follow Me On Pinterest!
Mini Strawberry Cheesecakes

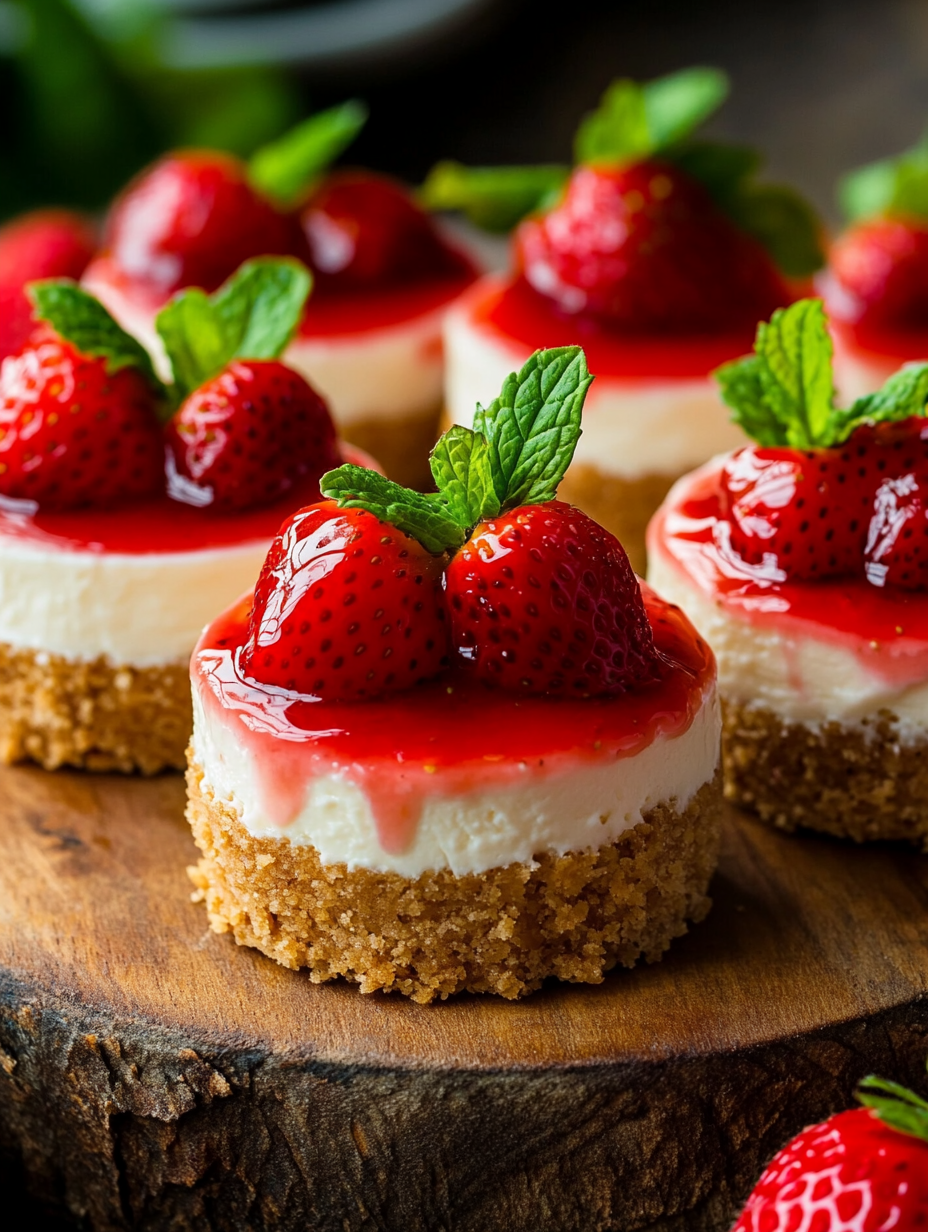
Mini Strawberry Cheesecakes: A Bite-Sized Taste of Summer
Introduction
There’s something undeniably magical about strawberries in the summertime. When I was a child, my grandmother would take me to her garden, where rows of lush green plants stretched out under the sun, their bright red jewels peeking out from beneath the leaves. The moment we picked them, she would wash them gently and serve them with a dollop of whipped cream, a simple yet delicious treat that ignited my love for all things fruity and sweet. As I grew older, that love evolved into a passion for baking, particularly cheesecakes.
One sweltering afternoon, in an attempt to recreate those sweet memories, I stumbled upon the idea of mini strawberry cheesecakes. These delightful little desserts are not only bite-sized but also capture the essence of summer in every layer. With a buttery graham cracker crust, a creamy vanilla cheesecake filling, and fresh strawberries piled on top, each bite is an invitation to savor the sweetness of life. Every time I prepare this recipe, I’m transported back to those sun-soaked days in my grandmother’s garden, the smell of strawberries mingling with the warm air.
These mini cheesecakes are not just a walk down memory lane; they also make the perfect treat for any occasion—be it a summer barbecue, a birthday party, or simply a quiet evening at home. Their petite size means you can indulge without the guilt of a full-sized cheesecake, and the fresh strawberries add a burst of color and flavor that makes them irresistible. Join me as we embark on the journey of creating these delicious little bites of nostalgia.
Why This Recipe Works
Creating the perfect cheesecake requires a delicate balance of technique and ingredients. At the heart of this mini strawberry cheesecake recipe is the combination of cream cheese and sour cream, which creates a rich, tangy flavor that is beautifully complemented by the sweetness of the strawberries. The sour cream not only adds depth but also ensures that the texture remains velvety smooth, avoiding the risk of a dry cheesecake.
One of the keys to achieving a perfect cheesecake is to mix your ingredients until just combined. Overmixing can introduce too much air into the batter, leading to cracks during baking. The egg plays a crucial role, binding everything together while adding a slight richness. You’ll want to beat your cream cheese until it’s smooth before gradually incorporating the sugar, vanilla extract, and sour cream. This step ensures a creamy consistency that’s free of lumps.
Baking at the right temperature is also vital. By setting your oven to 325°F (160°C), you create a gentle environment that allows the cheesecakes to set properly without overcooking. You’ll know they’re done when the centers appear slightly jiggly, a sign that they will firm up as they cool. This method not only ensures a deliciously creamy texture but also minimizes the likelihood of cracks, keeping your mini cheesecakes as beautiful as they are tasty.
What Makes It Special
These mini strawberry cheesecakes stand out for several reasons, making them a delightful alternative to store-bought or restaurant versions.
– Portion Control: Each cheesecake is baked in its own cupcake liner, providing the perfect individual serving size. This makes them not only easy to share but also a guilt-free indulgence.
– Fresh Ingredients: Unlike many commercial cheesecakes, this recipe highlights the beautiful flavor of fresh strawberries. The burst of juicy fruit on top adds a refreshing note that perfectly balances the rich creaminess of the cheesecake.
– Customizable: This recipe is versatile and open to adaptations based on your preferences. You can easily swap out strawberries for your favorite seasonal fruit, making it a year-round treat.
– Homemade Goodness: There’s a unique satisfaction that comes from making something from scratch. Each bite of these mini cheesecakes is a testament to your effort and love for baking, something that simply can’t be replicated by a store-bought alternative.
Ingredient Breakdown
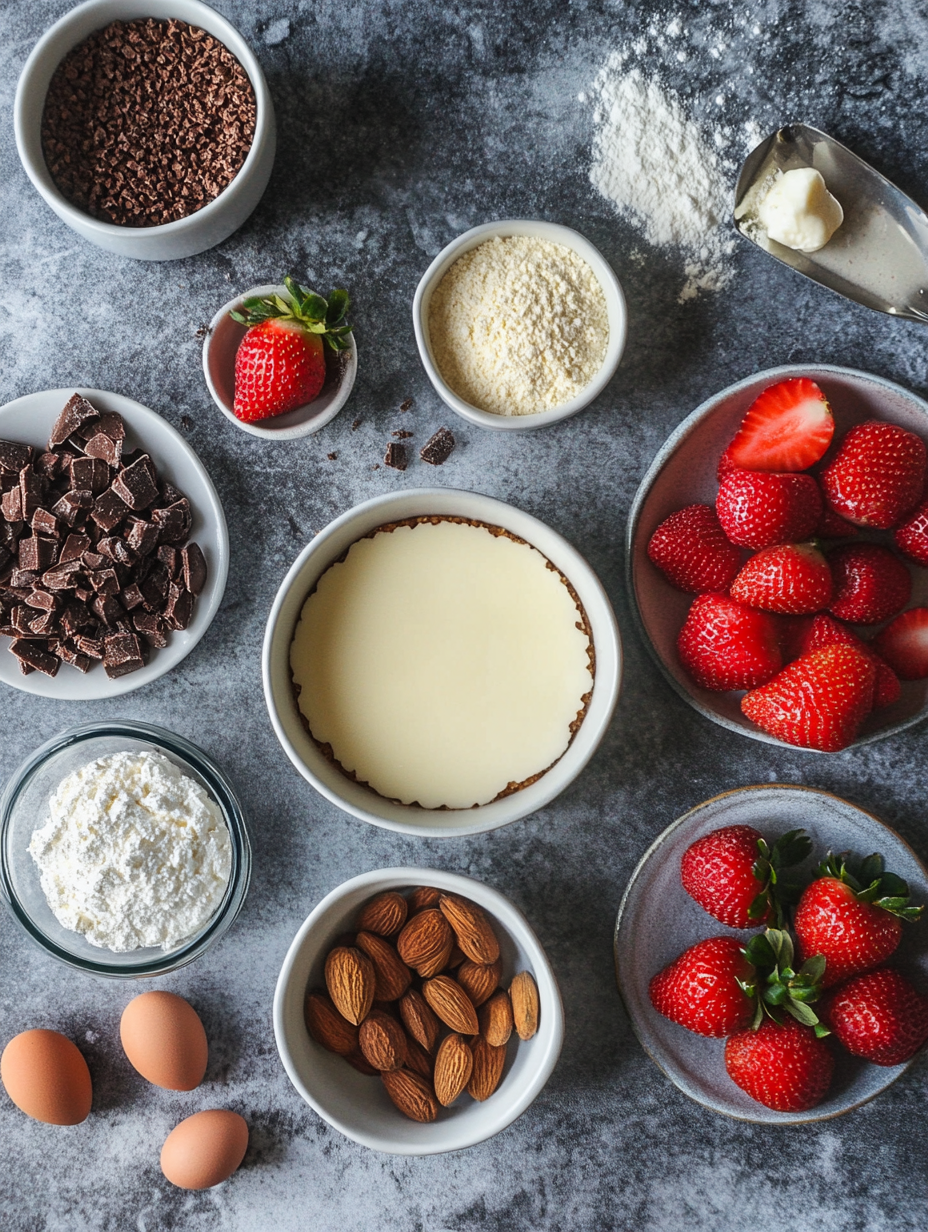
Graham Cracker Crumbs
The base of any good cheesecake starts with a solid crust. Graham cracker crumbs provide that perfect crunch and subtle sweetness that pairs beautifully with the creamy filling. If you’re looking for a gluten-free option, consider using crushed gluten-free cookies or almond flour mixed with a bit of melted butter.
Unsalted Butter
Using unsalted butter allows you to control the saltiness of your dessert. It binds the graham cracker crumbs together and contributes to a rich, satisfying flavor. If you’re dairy-free, coconut oil can serve as a great substitute.
Cream Cheese
The star of the show! Cream cheese gives these mini cheesecakes their signature richness. Make sure it’s at room temperature for easy mixing. For a lighter version, you can opt for reduced-fat cream cheese, but the flavor will be slightly different.
Sugar
Sugar balances the tanginess of the cream cheese and adds sweetness. You can substitute granulated sugar with coconut sugar or even a sugar alternative like stevia, though it may affect the texture slightly.
Vanilla Extract
A touch of vanilla extract elevates the flavor profile. It’s the secret ingredient that ties all the flavors together. For a more unique twist, you can even experiment with extracts like almond or lemon.
Egg
The egg is essential for structure. It helps bind the ingredients, giving the cheesecake its creamy texture. If you’re looking for an egg-free option, you can use a flax egg (1 tablespoon of ground flaxseed mixed with 2.5 tablespoons of water, let sit for 5 minutes) as a substitute.
Sour Cream
Sour cream adds a delightful tang and creaminess that enhances the overall flavor of the cheesecake. Greek yogurt is a great alternative if you want a lighter version, though it may change the flavor slightly.
Fresh Strawberries
Finally, the crowning glory of these mini cheesecakes: fresh strawberries. They provide a burst of flavor and a beautiful visual appeal. Feel free to swap in other fruits like blueberries, raspberries, or a mix for a colorful presentation.
Equipment Needed
To create your mini strawberry cheesecakes, you’ll need a few essential tools that will make your baking experience seamless and enjoyable.
– Muffin Tin: A standard muffin tin is crucial for shaping your mini cheesecakes. If you don’t have one, silicone muffin cups can also work beautifully, making for easy removal.
– Cupcake Liners: These not only help with easy removal but also add a lovely touch to your presentation. Choose colorful or patterned liners to elevate the visual appeal.
– Mixing Bowls: You’ll need at least two mixing bowls—one for the crust and another for the cheesecake filling. Nesting mixing bowls can save space in your kitchen.
– Electric Mixer: A hand mixer or stand mixer is ideal for achieving that smooth cream cheese texture. If you don’t have either, a whisk and some elbow grease will do just fine, though it’ll take a bit more effort.
– Rubber Spatula: This handy tool helps you mix ingredients and scrape every last bit out of your bowls. It’s perfect for folding in ingredients gently.
– Cooling Rack: After baking, it’s best to cool your mini cheesecakes on a rack. This prevents condensation from forming and keeps your cheesecakes from becoming soggy.
With these tools in hand, you’ll be ready to whip up a batch of delightful mini strawberry cheesecakes that will impress your family and friends alike!
Step-by-Step Instructions
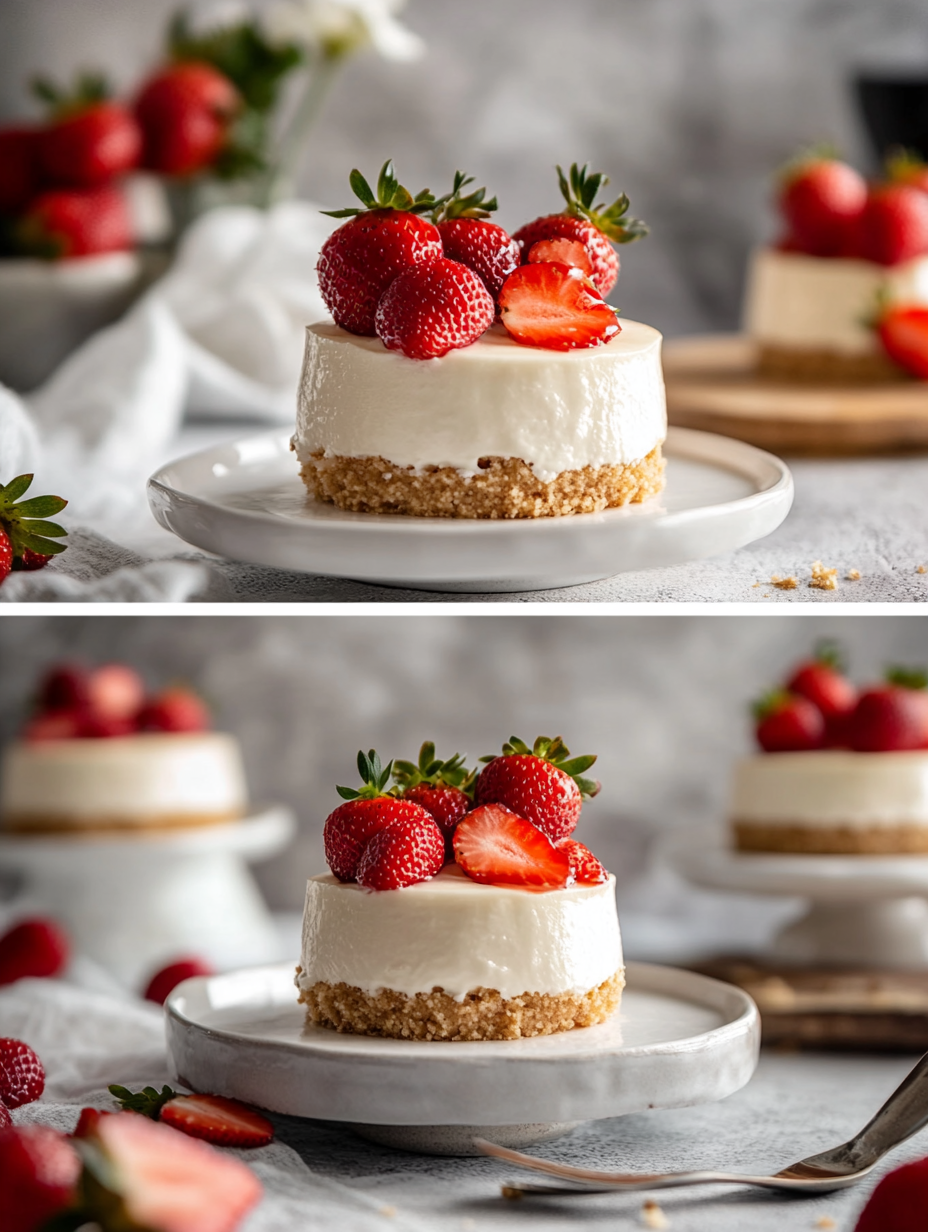
Making these Mini Strawberry Cheesecakes is a delightful experience that engages your senses from start to finish. Follow these steps to create a treat that’s sure to impress.
1. Preheat the Oven
WHAT: Start by preheating your oven to 325°F (160°C).
HOW: Turn on your oven and set the temperature, allowing it to heat while you prepare the other ingredients.
LOOK/SMELL/HEAR: You won’t notice much at this stage, but keep an ear out for the oven’s beep indicating it’s ready. Preheating is crucial as it ensures even baking from the start.
2. Prepare the Muffin Tin
WHAT: Line your muffin tin with cupcake liners.
HOW: Place a liner in each cup of your muffin tin, ensuring they fit snugly.
LOOK/SMELL/HEAR: The vibrant colors of the liners can brighten your kitchen. You might hear the rustling of the liners as you arrange them.
3. Make the Crust
WHAT: Combine graham cracker crumbs and melted butter.
HOW: In a medium bowl, mix 1 cup of graham cracker crumbs with 0.5 cup of melted unsalted butter until the mixture resembles wet sand.
LOOK/SMELL/HEAR: The rich, buttery aroma will fill the air. As you mix, you’ll hear a satisfying crunch from the crumbs blending with the butter.
4. Form the Crust
WHAT: Press the crust mixture into the muffin tin.
HOW: Take about a tablespoon of the crust mixture and press it firmly into the bottom of each cupcake liner until it’s evenly compacted.
LOOK/SMELL/HEAR: You should see a nice golden-brown layer forming at the bottom. Listen for a slight crunch as you press down, ensuring it holds together.
5. Prepare the Cheesecake Filling
WHAT: Beat cream cheese and sugar for the filling.
HOW: In a large mixing bowl, combine 1 cup of cream cheese and 0.5 cup of sugar. Using an electric mixer, beat until the mixture is smooth and creamy without lumps.
LOOK/SMELL/HEAR: The mixture will become fluffy and light. You’ll notice the sweet scent of sugar blending with the cream cheese.
6. Add Remaining Ingredients
WHAT: Incorporate the remaining filling ingredients into the mixture.
HOW: Add 1 teaspoon of vanilla extract, 1 large egg, and 0.5 cup of sour cream to the cream cheese mixture. Beat until fully combined and smooth.
LOOK/SMELL/HEAR: The mixture should look creamy and glossy. As you mix, the aroma of vanilla will tantalize your senses.
7. Pour the Filling
WHAT: Fill the muffin tin with the cheesecake batter.
HOW: Gently pour the cheesecake filling over the crusts in each cupcake liner, filling them about 3/4 full.
LOOK/SMELL/HEAR: You’ll see a creamy layer forming over the crust, and the sound of the batter pouring is pleasing.
8. Bake
WHAT: Bake the cheesecakes in the oven.
HOW: Place the muffin tin in the preheated oven and bake for about 20 minutes.
LOOK/SMELL/HEAR: You’ll notice the cheesecakes puffing slightly and turning a light golden color. When done, the centers should be set but slightly jiggly.
9. Cool and Chill
WHAT: Allow the cheesecakes to cool before refrigerating.
HOW: Once baked, remove the tin from the oven and let it cool at room temperature for about 10 minutes. Then, transfer to the refrigerator for at least 1 hour.
LOOK/SMELL/HEAR: After cooling, the cheesecakes should settle and firm up, with the rich aroma still lingering.
10. Top with Fresh Strawberries
WHAT: Add fresh strawberries before serving.
HOW: Just before serving, slice fresh strawberries and arrange them on top of each mini cheesecake.
LOOK/SMELL/HEAR: The vibrant red of the strawberries will contrast beautifully with the creamy cheesecake. You’ll hear the soft crunch of the berries as you slice them.
Chef’s Note: Always ensure your cream cheese is at room temperature for easy mixing. This critical action helps achieve a smooth filling, reducing the chance of lumps.
Pro Tips for the Best Results
Achieving perfection in your Mini Strawberry Cheesecakes involves a few insider tips that can elevate your dessert:
– Use Fresh Ingredients: Always opt for fresh cream cheese and real vanilla extract. The flavor difference is noticeable and enhances your cheesecake.
– Don’t Overmix: When incorporating the egg, mix just until blended. Overmixing can incorporate too much air, leading to cracks in your cheesecakes as they cool.
– Water Bath Method: For an ultra-smooth texture, consider using a water bath. Place the muffin tin in a larger pan filled with hot water during baking. This gentle heat helps prevent cracking.
– Chill Well: Allow your cheesecakes to chill for at least an hour before serving. This helps the flavors meld together and makes them easier to remove from the liners.
– Top with Glaze: For an added touch, consider drizzling a strawberry glaze made from pureed strawberries mixed with a bit of sugar over the top before serving.
– Experiment with Flavors: Don’t shy away from flavoring your cheesecakes with citrus zest, chocolate chips, or extracts like almond or coconut for a unique twist.
– Presentation Matters: Use a spoon or small offset spatula to gently lift the cheesecakes from their liners. A neat presentation enhances the experience.
Common Mistakes to Avoid
Every baker has experienced a mishap or two, and avoiding these common mistakes will ensure your Mini Strawberry Cheesecakes turn out fabulously.
1. Using Cold Cream Cheese: Starting with cold cream cheese can lead to lumps in your batter. Always let it come to room temperature for a smooth filling.
2. Overbaking: Leaving your cheesecakes in the oven too long will dry them out. They should be slightly jiggly in the center when you take them out.
3. Skipping the Cooling Step: Cutting into warm cheesecakes can cause them to fall apart. Allow them to cool completely for the best texture.
4. Not Using Liners: Baking without liners can make removing the cheesecakes nearly impossible. Always use cupcake liners to ensure easy removal.
5. Forgetting to Preheat the Oven: Starting with a cold oven can result in uneven baking. Preheat ensures a consistent temperature from the get-go.
6. Ignoring the Chilling Time: Serving cheesecakes straight from the oven can lead to a messy presentation. A proper chill allows them to set and improves flavor.
7. Forgetting to Adjust for Altitude: If you’re baking at a high altitude, you may need to adjust your baking time or ingredient quantities. Research the best practices for your location.
Creative Variations
Once you’ve mastered the classic Mini Strawberry Cheesecakes, why not explore some exciting variations? Here are a few ideas to inspire your next baking adventure:
1. Seasonal: Swap out strawberries for seasonal fruits. In the fall, try pumpkin puree mixed with spices like cinnamon and nutmeg for mini cheesecakes with a warm flavor profile.
2. Dietary-Friendly: For a gluten-free version, use gluten-free graham crackers or almond flour for the crust. You can also substitute a vegan cream cheese alternative to cater to vegan diets.
3. Gourmet Elevated: Add a layer of white chocolate ganache on top before adding strawberries. The creamy ganache will add richness and a touch of elegance that’s perfect for special occasions.
4. Quick 15-Minute: For a faster version, create a no-bake cheesecake by combining softened cream cheese, sugar, and whipped cream. Spoon into the liners, chill, and top with strawberries for a quick treat.
5. Kid-Friendly: Let the kids get involved by allowing them to decorate the tops with a mix of sprinkles or mini chocolate chips along with the strawberries.
6. International Twist: Bring in flavors from other cuisines by adding a hint of matcha powder for a Japanese-inspired cheesecake or using tropical fruits like mango or passionfruit for a bright, exotic flavor.
These variations allow you to tailor your mini cheesecakes to suit any occasion or preference, making them a versatile addition to your dessert repertoire!
Serving Ideas
When it comes to serving your mini strawberry cheesecakes, presentation is key! Here are some delightful ways to plate them:
1. Individual Plates: Place each mini cheesecake on its own dessert plate. Drizzle with a strawberry coulis or a dollop of whipped cream for added flair.
2. Tiered Stand: For gatherings, stack your cheesecakes on a tiered dessert stand. This not only saves space but also creates an elegant display of your treats.
3. Garnish Options: Top each cheesecake with a sprinkle of powdered sugar or a zest of lemon for a refreshing contrast to the sweetness of the strawberries.
4. Fresh Mint: Add a sprig of fresh mint on top of each cheesecake to enhance the visual appeal and impart a burst of color.
5. Chocolate Drizzle: For a fun twist, drizzle some melted chocolate over the top before serving. The combination of chocolate and strawberry is always a hit!
Each mini cheesecake is perfect as a single serving, making them easy to enjoy without fuss. Their petite size encourages sharing, so don’t hesitate to offer them at your next event!
What to Serve With
These mini strawberry cheesecakes are versatile and pair wonderfully with several accompaniments that enhance their flavors:
1. Coffee: The rich, creamy texture of the cheesecake contrasts beautifully with the bold flavors of coffee, making it an ideal pairing for after-dinner treats.
2. Sparkling Wine: A glass of sparkling wine or champagne complements the sweetness of the strawberries and cheesecake, adding a celebratory touch to any occasion.
3. Fresh Fruit Salad: A side of mixed fresh fruit not only adds color to your plate but also balances out the richness of the cheesecake with its refreshing taste.
4. Chocolate-Covered Strawberries: For true strawberry lovers, serve some chocolate-covered strawberries alongside your mini cheesecakes to intensify the fruit flavor and provide a delightful textural contrast.
5. Ice Cream: A scoop of vanilla or strawberry ice cream pairs perfectly with the cheesecake, creating a deliciously creamy dessert experience.
6. Herbal Tea: A warm cup of herbal tea, such as chamomile or mint, can provide a soothing finish to your meal and enhance the overall dessert experience.
These pairings not only elevate your serving options but also create a cohesive dessert table that will impress your guests.
Storage Guide
To ensure your mini strawberry cheesecakes stay fresh for longer, proper storage is essential. Here’s how to do it right:
– Container Type: Store your cheesecakes in an airtight container to prevent them from absorbing any odors from the fridge.
– Temperature: Keep them refrigerated at or below 40°F (4°C).
– Shelf Life: They can last up to 5 days in the refrigerator.
– Signs of Spoilage: If you notice any change in color, a sour odor, or a watery texture, it’s best to discard them.
– Refreshing: To bring back their creamy texture, consider letting them sit at room temperature for about 15 minutes before serving. You can also top with fresh strawberries and a light dusting of powdered sugar just before serving for a refreshed look.
Following these guidelines will help you enjoy the delightful flavors of your mini cheesecakes for several days!
Freezing Tips
Yes, your mini strawberry cheesecakes do freeze well, making them a fantastic make-ahead dessert option! Here’s how to do it effectively:
– Portioning: Before freezing, ensure each cheesecake is fully cooled and ideally topped with strawberries. You can freeze them individually or as a batch.
– Freezing Duration: They can be stored in the freezer for up to 2 months.
– Storage Method: Wrap each cheesecake in plastic wrap and place them in a freezer-safe container or a large zip-top bag to prevent freezer burn.
– Thawing Method: When you’re ready to enjoy them, transfer them to the fridge and let them thaw overnight. If you’re short on time, you can leave them at room temperature for about an hour.
By following these tips, you can savor these delightful treats even after a few weeks!
Reheating Guide
Reheating your mini strawberry cheesecakes can be a bit tricky since they’re best enjoyed chilled. However, if you prefer them slightly warmed, here are some methods:
– Microwave: Place one mini cheesecake on a microwave-safe plate. Heat on low power for 10-15 seconds. Be cautious not to overheat, as this can alter the texture.
– Oven: Preheat your oven to 300°F (150°C). Place the cheesecakes on a baking tray and warm for about 5-10 minutes. Check regularly to ensure they don’t get too warm.
– Stovetop: If you prefer a stovetop method, place a small pot of water on the stove and bring to a simmer. Place the cheesecakes in a heatproof dish and set over the pot (double boiler method) for about 5-7 minutes until warmed through.
Each method has its own charm, but remember that these mini cheesecakes are best enjoyed chilled!
Nutrition Overview
Each serving of your mini strawberry cheesecakes is not only a treat for your taste buds but also packs in some nutrition.
– Calories: Approximately 220 calories per cheesecake.
– Macros: Each serving contains roughly 15g of carbs, 16g of fat, and 3g of protein.
– Health Benefits:
– Strawberries: Rich in vitamins C and K, they boost your immune system and improve heart health.
– Cream Cheese: Provides calcium, which is essential for bone health.
– Sour Cream: Contains probiotics that can aid digestion.
Enjoying these mini cheesecakes can be an indulgent yet somewhat guilt-free dessert choice when balanced with a healthy diet!
Frequently Asked Questions
Q: Can I use a different fruit topping?
A: Absolutely! While strawberries are a classic choice, you can top your mini cheesecakes with blueberries, raspberries, or even a mix of tropical fruits like mango and kiwi for a delicious twist.
Q: Can I make the crust gluten-free?
A: Yes, simply substitute regular graham cracker crumbs with gluten-free graham cracker crumbs or crushed nuts for a gluten-free crust option.
Q: How do I know when the cheesecakes are done baking?
A: They should be set around the edges but still slightly jiggly in the center. They will continue to firm up as they cool.
Q: Can I add flavor variations to the cheesecake batter?
A: Of course! You can incorporate ingredients like lemon zest, cocoa powder, or even flavored extracts (e.g., almond or coconut) to customize the flavor of your mini cheesecakes.
Q: What can I do if my cheesecakes crack while baking?
A: Cracks can occur due to rapid temperature changes or overmixing. To minimize this, avoid overmixing the batter and consider baking them in a water bath for a gentler cooking process.
Q: Can I make these mini cheesecakes ahead of time?
A: Yes! These cheesecakes can be made a day or two in advance. Just store them in the refrigerator until you’re ready to serve.
Q: What’s the best way to remove them from the muffin tin?
A: Allow the cheesecakes to cool completely in the pan before removing them. Use a plastic knife to gently release them from the edges, and then lift them out using the cupcake liners.
Q: Can I use low-fat cream cheese?
A: Yes, using low-fat cream cheese is a great way to reduce calories while still enjoying the creamy texture of the cheesecake. Just keep in mind that the flavor may be slightly different.
Final Thoughts
Creating your own mini strawberry cheesecakes is a rewarding experience that results in a delightful treat perfect for any occasion. Remember, the key to success lies in the quality of ingredients and the attention you give while preparing them.
Tip: Don’t be afraid to experiment with different toppings and flavors to make this recipe your own! Whether you’re hosting a gathering or enjoying a quiet night in, these cheesecakes are sure to impress.
As you whip up these delightful mini cheesecakes, let your creativity shine, and most importantly, enjoy every bite! Happy baking!