Follow Me On Pinterest!
Cheesy Hash Brown Waffles are a delightful twist on traditio


Cheesy Hash Brown Waffles
About This Recipe
Cheesy Hash Brown Waffles are a delightful twist on traditional breakfast fare that combines the beloved flavors of crispy potatoes and melty cheese in a fun, waffle-form. Imagine biting into a golden-brown exterior that gives way to a cheesy, tender interior-this dish is not only visually appealing but also incredibly satisfying. Perfect for breakfast or brunch, these waffles can be enjoyed as a main dish or served as a savory side to complement eggs, bacon, or even a fresh salad.
What makes Cheesy Hash Brown Waffles particularly appealing is their versatility. Kids adore the cheesy flavor and crispy texture, while adults appreciate the creativity and ease of preparation. Whether you’re hosting a weekend brunch or looking for a quick, hearty meal, this recipe fits the bill perfectly.
Why You’ll Love This
Here are a few reasons why Cheesy Hash Brown Waffles will become a favorite in your kitchen:
- Unique and Delicious Flavor Combination: The combination of crispy hash browns and gooey cheese creates a flavor profile that’s hard to resist. You get the comforting taste of potatoes enhanced by the rich taste of cheese, resulting in a dish that’s both satisfying and indulgent.
- Quick and Easy Preparation: This recipe is beginner-friendly, making it accessible even for those who may not feel confident in the kitchen. With just a handful of ingredients and minimal prep time, you can whip up a batch of these waffles in no time.
- Adaptable Toppings and Serving Suggestions: Whether you prefer a drizzle of sour cream, a sprinkle of fresh herbs, or a dollop of salsa, there are endless ways to customize your waffles. Pair them with your favorite toppings for a meal that suits your taste.
- Perfect for Meal Prep or Entertaining Guests: These waffles can be made ahead of time and stored in the freezer, making them a convenient option for busy mornings. They also make a great dish for entertaining, impressing guests with their unique presentation and delicious flavor.
🥗 Ingredient Breakdown
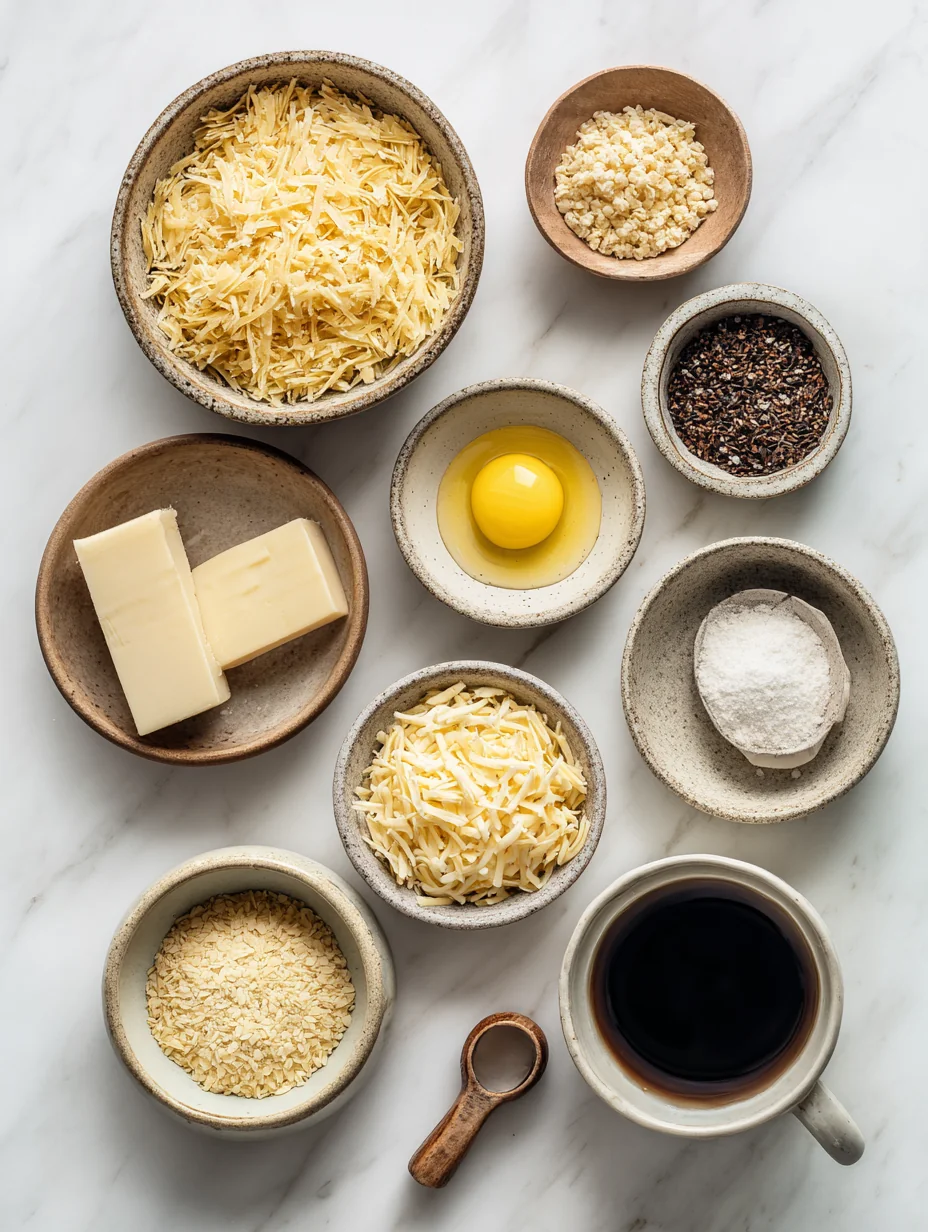
To create your Cheesy Hash Brown Waffles, you’ll need the following ingredients, each contributing to the overall flavor and texture of the dish:
- Frozen Hash Browns: The star of this recipe, frozen hash browns offer convenience and consistency. When choosing frozen hash browns, look for those with minimal additives-just potatoes and perhaps a bit of salt. This will ensure the best flavor and texture for your waffles. Thawing them before use is essential to avoid excess moisture, which can make your waffles soggy.
- Cheddar and Parmesan Cheese: These cheeses add a rich, savory flavor to the waffles. Cheddar provides a sharpness that complements the mild potatoes, while Parmesan adds a nuttiness. If you’re looking for substitutes, consider using mozzarella for a milder taste or a dairy-free cheese if you have dietary restrictions.
- Green Onions: Also known as scallions, green onions add a fresh, slightly sharp flavor that brightens up the dish. They also add a pop of color, making your waffles more visually appealing. For best results, chop them finely to distribute their flavor evenly throughout the mixture.
- Eggs and Flour: Eggs act as a binder, helping to hold the hash browns and cheese together, while flour adds structure and helps achieve the right texture. If you’re looking for a gluten-free option, you can use almond flour or a gluten-free flour blend.
- Seasonings: Garlic powder and onion powder are essential for enhancing the overall flavor of the waffles. They bring out the savory notes of the potatoes and cheese, ensuring that every bite is delicious. You can adjust the quantities based on your preference or add other seasonings like paprika for a hint of smokiness.
- Olive Oil or Cooking Spray: Greasing the waffle iron is crucial for achieving that perfect crispy texture. Olive oil not only prevents sticking but also adds a subtle flavor. If you prefer, you can use a non-stick cooking spray for convenience.
Step-by-step Preparation
Preheat the Waffle Iron
The first step in making your Cheesy Hash Brown Waffles is to preheat your waffle iron. This step is vital because a properly preheated waffle iron ensures even cooking and helps achieve that coveted crispy exterior. Follow the manufacturer’s instructions to set the temperature, typically medium to high heat works best for hash browns.
Mix the Ingredients Thoroughly
In a large mixing bowl, combine the thawed hash browns, grated cheddar and Parmesan cheese, finely chopped green onions, eggs, flour, and your chosen seasonings. Using a spatula or wooden spoon, mix the ingredients until everything is well incorporated. Aim for a consistency where the hash browns are evenly coated with the egg and flour mixture. If the mixture seems too dry, you can add a little more egg or a splash of milk to achieve the desired texture.
Cooking the Waffles
Once your waffle iron is preheated, lightly grease the plates with olive oil or cooking spray. Carefully spoon a portion of the hash brown mixture onto the center of the waffle iron-about 1 to 1.5 cups, depending on the size of your iron. Close the lid and cook according to your waffle iron’s instructions, usually around 5-7 minutes. Keep an eye on the waffles; they are done when they are golden brown and crispy. You can open the waffle iron slightly to check for doneness; the waffles should release easily without sticking.
Serving Immediately
For the best experience, serve the waffles immediately while they are hot and crispy. You can keep them warm in a low oven if needed, but they are best enjoyed fresh from the waffle iron. Pair them with your favorite toppings-like a dollop of sour cream, fresh herbs, or even an avocado slice-for a meal that’s not only delicious but also visually stunning.
Component Preparation
Preparing the Hash Browns
To prepare the frozen hash browns, remove them from the bag and place them in a clean kitchen towel or cheesecloth. Squeeze out any excess moisture; this step is crucial for achieving crispy waffles. If you skip this step, your waffles may end up soggy instead of crunchy.
Chopping Green Onions
When chopping green onions, first trim the root ends and remove any wilted outer layers. Then, slice the green onions thinly, including both the white and green parts. A sharp knife makes this process easier and safer, and finely chopped green onions will enhance both the presentation and flavor of your dish.
Grating Cheese
For the freshest flavor and best melting properties, grate your cheese just before using it. Use a box grater or food processor to achieve fine shreds. If you have pre-shredded cheese, keep in mind that it may contain anti-caking agents that can affect melting, so freshly grated cheese is always preferred.
With these steps and tips, you’re well on your way to creating Cheesy Hash Brown Waffles that will delight your family and friends. Stay tuned for more detailed instructions and creative serving ideas in the following sections!
{{step_image}} https://img.theapi.app/mj/dbcb93b4-042d-4a7a-86d2-12c1d17e50d6_0.png
Benefits of Freshly Grated Cheese
When it comes to cheesy hash brown waffles, the type of cheese you use can make a significant difference in flavor and texture. Freshly grated cheese offers superior taste and meltability compared to pre-packaged options. Packaged shredded cheese often contains anti-caking agents that can hinder melting, resulting in a less gooey and satisfying dish. By grating cheese right before using it, you ensure that it melts smoothly and integrates beautifully with the hash browns, creating that perfect cheesy goodness in every bite. Moreover, freshly grated cheese allows you to experiment with various flavors, enhancing the overall taste profile of your dish.
Assembly & Serving Tips
Creating the Perfect Waffle
To achieve the ideal waffle texture, it’s essential to get the portion size just right. When using a waffle maker, a good rule of thumb is to fill the waffle iron with about 1 cup of the hash brown mixture, depending on the size of your appliance. This amount provides a crispy exterior while ensuring a fluffy interior. After cooking, stack the waffles as you make them – this helps keep them warm and allows for a delightful presentation.
Topping Suggestions
Toppings can elevate your cheesy hash brown waffles from simple to sensational. Here are a few suggestions:
- Sour Cream: A dollop of sour cream adds a rich creaminess that complements the crispy texture of the waffles.
- Avocado: Sliced or smashed avocado brings a fresh, buttery element that works beautifully with the cheese and potatoes.
- Hot Sauce: For those who enjoy a kick, drizzle your favorite hot sauce over the waffles to add heat and depth of flavor.
- Chives or Green Onions: Sprinkle some finely chopped chives or green onions for a fresh, herby note.
Pairing Ideas
Cheesy hash brown waffles can be enjoyed in various settings – from brunch to dinner. Pair them with a simple side salad for lunch, or serve them alongside scrambled eggs and crispy bacon for a hearty breakfast. For beverages, consider a refreshing mimosa or a classic Bloody Mary for brunch, or even a crisp apple cider to enhance the savory flavors.
Presentation
Plating Techniques
The way you present your cheesy hash brown waffles can turn a simple dish into an impressive meal. Stack two or three waffles on a plate, slightly offset for visual interest. You can drizzle any sauces, like sour cream or hot sauce, artistically across the waffles to create an eye-catching pattern.
Garnish Ideas
To enhance visual appeal, consider garnishing your waffles with fresh herbs like parsley or cilantro. A sprinkle of additional cheese right before serving can also add a touch of decadence. For a pop of color, include some sliced cherry tomatoes or radishes on the side – not only will they look great, but they will also provide a refreshing crunch.
Variations
Cheese Variations
Experimenting with different types of cheese can lead to delightful new flavors. For a spicy kick, try pepper jack cheese. If you prefer a tangy profile, feta cheese can be a great addition. Simply adjust the quantity to suit your taste preference.
Add-ins and Mix-ins
To add more depth and complexity to your waffles, consider incorporating add-ins like diced bell peppers, mushrooms, or crispy cooked bacon. These ingredients can enhance both flavor and texture, making the dish even more satisfying.
Gluten-Free Adaptation
For those with gluten sensitivities, you can easily adapt the recipe to be gluten-free. Substitute all-purpose flour with a gluten-free flour blend or use almond flour for a nutty flavor. Ensure that all other ingredients are certified gluten-free to avoid cross-contamination.
Storage Guidelines
Refrigeration Tips
If you have leftover waffles, make sure to store them properly to maintain freshness. Allow them to cool completely before placing them in an airtight container. They can be stored in the refrigerator for up to 3 days.
Freezing Instructions
For longer storage, cheesy hash brown waffles can be frozen. Place cooled waffles in a single layer on a baking sheet and freeze until solid, then transfer them to a freezer-safe bag or container. They can be frozen for up to 2 months. To reheat, simply pop them in a toaster or oven until heated through and crispy again.
FAQ
Can I use fresh hash browns instead of frozen?
Yes, you can use fresh hash browns. If opting for fresh potatoes, peel and grate them, then soak them in cold water for about 30 minutes to remove excess starch. Drain and pat them dry before mixing with the other ingredients. This helps achieve a crispy texture.
What can I substitute for cheese?
For those who are lactose intolerant or looking for vegan options, there are several alternatives. Nutritional yeast can give a cheesy flavor without dairy, or you can use a plant-based cheese that melts well. Be sure to check the packaging for meltability to ensure a satisfying outcome.
How do I keep waffles crispy when storing?
To maintain the crispiness of your waffles, avoid stacking them too tightly when storing. Place parchment paper between layers if necessary. When reheating, use a toaster or an oven instead of a microwave, as this will keep them crispy.
Can I make this recipe ahead of time?
Absolutely! You can prepare the hash brown mixture ahead of time and refrigerate it for up to 24 hours. When ready to cook, stir well and proceed with the waffle-making process. You can also make the waffles in advance and reheat them for a fast and delicious meal.
Conclusion
Cheesy hash brown waffles offer a delightful combination of crispy texture and cheesy flavor, making them a versatile dish perfect for any meal. With the ease of preparation and the opportunity to customize with various ingredients and toppings, this recipe is a canvas for your culinary creativity. Don’t hesitate to experiment with different cheeses, herbs, and add-ins to make this dish uniquely yours. Enjoy the journey of discovering how delicious and satisfying homemade cheesy hash brown waffles can be!