Follow Me On Pinterest!
Caramel Apple Cheesecake Bars

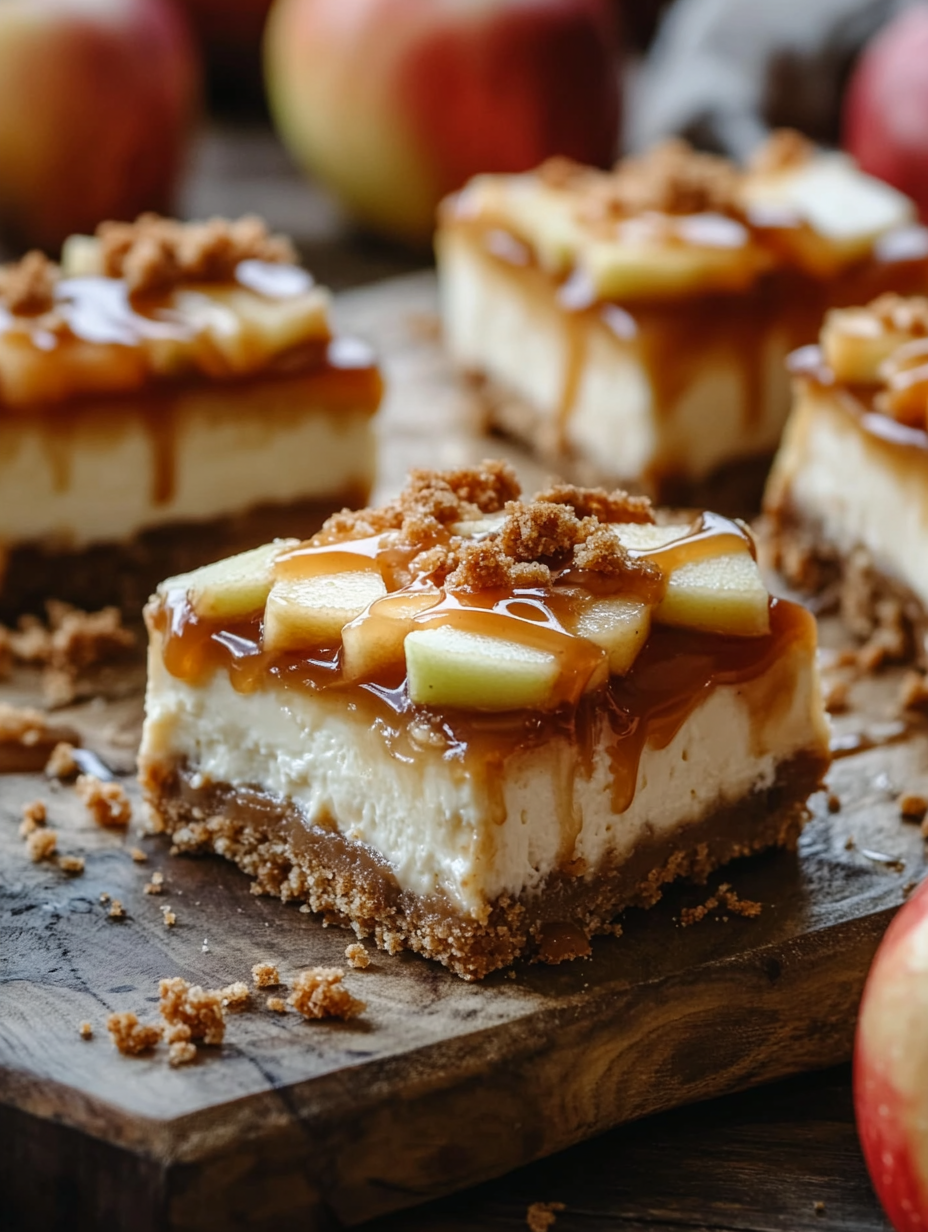
Caramel Apple Cheesecake Bars: A Heavenly Fusion of Fall Flavors
Introduction
As the leaves begin to change and the air turns crisp, I find myself reminiscing about the warm, inviting kitchen of my childhood home. Every autumn, my mother would whip up her famous caramel apple pie, filling the air with the intoxicating aromas of cinnamon, baked apples, and melting caramel. Those moments, surrounded by family, with laughter echoing off the walls and the promise of dessert on the horizon, etched themselves deeply in my heart. It’s no wonder that when I set out to create a dessert that captured that nostalgic essence, I landed on these Caramel Apple Cheesecake Bars.
Imagine the first bite: a perfect balance of creamy cheesecake that melts in your mouth, complemented by the tartness of fresh apples and the rich sweetness of caramel. Each layer tells a story—a buttery graham cracker crust supporting a luscious filling, all crowned with a drizzle of caramel that glistens like autumn sun on golden leaves. Not only do these bars taste incredible, but they also evoke those cherished memories, making them a perfect addition to any fall gathering or cozy night in. Whether you’re serving them at a festive dinner or indulging solo with a cup of warm cider, these cheesecake bars are sure to bring a smile to your face and warmth to your heart.
Why This Recipe Works
What sets these Caramel Apple Cheesecake Bars apart from other desserts is the harmonious blending of flavors and textures. The graham cracker crust provides a delightful crunch that perfectly contrasts with the creamy filling. By using unsalted butter, you have control over the salt content, allowing the sweet flavors of the cheesecake and caramel to shine through.
The star of the show is undoubtedly the cream cheese. When combined with brown sugar, it not only adds a depth of flavor but also a hint of molasses that enhances the overall richness of the bars. The two eggs act as binders, ensuring that your cheesecake filling remains smooth and stable as it bakes.
Incorporating diced apples adds a refreshing tartness that cuts through the sweetness, creating a well-rounded dessert that doesn’t feel overly indulgent. The cinnamon brings warmth and an aromatic touch reminiscent of fall.
Baking at 350°F allows for even cooking, ensuring the edges set beautifully while keeping the center soft and slightly jiggly. This method allows the flavors to meld beautifully without drying out the bars, guaranteeing a consistently delicious result every time you make them.
What Makes It Special
These Caramel Apple Cheesecake Bars are not just your average dessert; they stand out in several key ways. First, the homemade graham cracker crust lends a freshness and flavor that pre-made options simply can’t match. You have complete control over the texture and sweetness, ensuring that it complements the filling perfectly.
Second, the use of fresh, diced apples means you can customize the flavors according to your preferences. Whether you choose tart Granny Smith apples for a zing or sweet Honeycrisp apples for a more mellow flavor, each variation adds its own personality to the bars.
Third, drizzling with caramel sauce just before serving elevates these bars to a whole new level. You can use store-bought caramel for convenience or make your own for a gourmet touch. The warm, gooey caramel contrasts beautifully with the creamy cheesecake, creating a dessert that feels both indulgent and comforting.
Lastly, these bars are incredibly versatile. They can easily be adapted for different dietary needs—swap in a gluten-free crust or use a dairy-free cream cheese alternative. This flexibility allows everyone to enjoy a slice of fall, no matter their dietary restrictions.
Ingredient Breakdown
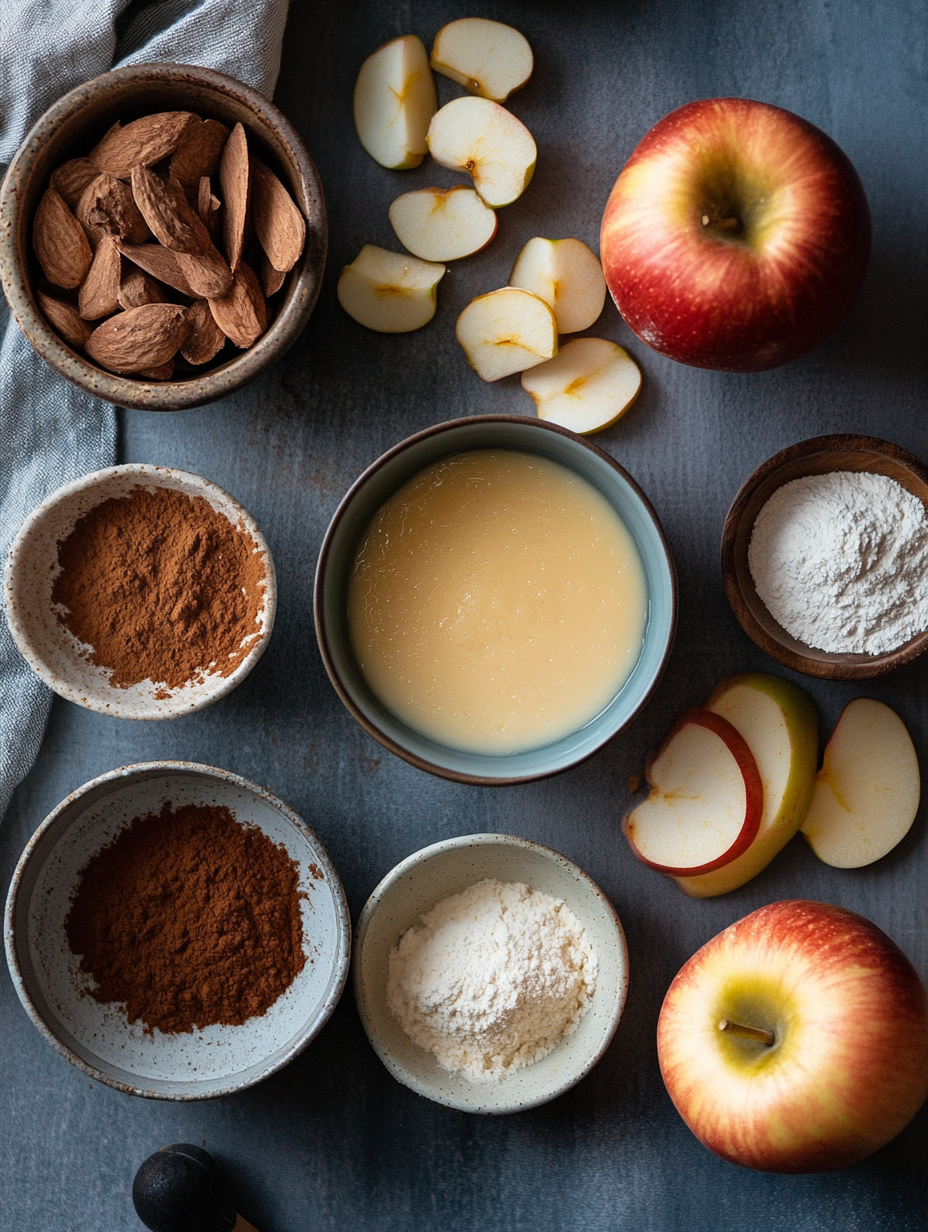
When it comes to baking, understanding the role of each ingredient is essential for achieving the best results. Let’s break down the components of these Caramel Apple Cheesecake Bars:
– Graham Cracker Crumbs: This forms the base of your dessert, providing a crunchy texture that balances the creaminess of the filling. If you’re looking for a gluten-free option, you can easily substitute with crushed gluten-free cookies or almond flour.
– Unsalted Butter: The butter binds the crumbs together and adds richness to the crust. Unsalted is preferable so you can control the overall saltiness of your dessert. If you’re dairy-free, coconut oil or a non-dairy butter substitute works well.
– Granulated Sugar: This sweetens the crust and balances the flavors. You can substitute it with coconut sugar or a sugar alternative like stevia for a lower-calorie option.
– Cream Cheese: The heart of your cheesecake filling, cream cheese provides the rich, creamy texture. If you’re looking for a lighter version, you can use reduced-fat cream cheese or a dairy-free alternative made from cashews.
– Brown Sugar: This adds a deeper sweetness and a hint of caramel flavor. If you don’t have brown sugar on hand, you can create your own by mixing granulated sugar with a little molasses.
– Eggs: Eggs help bind the filling together and give it structure. For a vegan alternative, you could use unsweetened applesauce or a commercial egg replacer.
– Vanilla Extract: This enhances the overall flavor profile. Pure vanilla extract is preferable, but in a pinch, imitation vanilla works too.
– Diced Apples: Fresh apples add a juicy and tart element to the bars. Feel free to experiment with different varieties based on your preference; just be sure to remove the skins if you prefer a smoother texture.
– Caramel Sauce: This is the crowning glory of your bars. You can use store-bought caramel for convenience, or if you’re feeling adventurous, try making your own for a personalized touch.
– Cinnamon: While optional, cinnamon adds a warm spice that perfectly complements the apples and enhances the overall flavor. If you want to mix it up, you could also add nutmeg or allspice for additional warmth.
Incorporating these ingredients thoughtfully will ensure that your Caramel Apple Cheesecake Bars are not only delicious but also a reflection of your personal taste. Each component plays a vital role in creating a dessert that feels comforting and indulgent, perfect for any fall gathering or cozy night at home.
Equipment Needed
To make your baking experience smooth and enjoyable, having the right tools on hand is essential. Here’s a list of equipment that will help you create these Caramel Apple Cheesecake Bars:
– 8×8 inch Baking Dish: This size is perfect for the recipe, allowing the bars to bake evenly. If you don’t have an 8×8 dish, a 9×9 inch dish will work, but keep an eye on the baking time as they may cook faster.
– Mixing Bowls: A set of mixing bowls in various sizes will be helpful for combining your ingredients. Opt for glass or stainless steel for easy clean-up and durability.
– Electric Mixer: While you can mix by hand, an electric mixer makes it easier to achieve a smooth and creamy filling, especially when blending the cream cheese and sugars.
– Rubber Spatula: This versatile tool is great for folding in ingredients and scraping down the sides of your mixing bowl, ensuring everything is well combined.
– Parchment Paper: Lining your baking dish with parchment paper makes it easier to lift the bars out after they’ve cooled, ensuring clean slices. If you don’t have parchment, you can grease the dish with butter or non-stick spray.
– Measuring Cups and Spoons: Accurate measurements are key to successful baking. Invest in a good set of measuring cups and spoons for both dry and liquid ingredients.
– Knife: A sharp knife is essential for slicing through your cooled cheesecake bars cleanly. A serrated knife works particularly well for this, giving you even squares without squishing the filling.
With these tools in your kitchen arsenal, you’ll be well-equipped to create your own batch of Caramel Apple Cheesecake Bars, bringing a bit of warmth and sweetness to your home this fall.
Step-by-Step Instructions
1. Prepare Your Baking Dish
Start by preheating your oven to 350°F (175°C). While it’s heating, line an 8×8 inch baking dish with parchment paper, leaving some overhang on the sides. This will help you easily remove the bars later. Listen for that satisfying crackle as the oven warms up—it’s a sign you’re on the right track!
2. Make the Crust
In a medium bowl, combine the graham cracker crumbs, melted butter, and granulated sugar. Mix until all the crumbs are evenly coated. The texture should be similar to wet sand. Press the mixture firmly into the bottom of the lined baking dish using your fingers or the back of a measuring cup to create an even layer. You should feel a slight resistance as you press down—this ensures a sturdy crust.
3. Prepare the Cheesecake Filling
In a large mixing bowl, beat the cream cheese and brown sugar together until smooth and creamy. This should take about 2-3 minutes. You want to achieve a light and fluffy consistency—listen for the whirring of your mixer and keep an eye on the texture. Once blended, the mixture should be free of lumps.
4. Incorporate the Eggs and Vanilla
Add the eggs, one at a time, mixing well after each addition. This gradual incorporation is key to avoiding a curdled texture. After mixing in the last egg, stir in the vanilla extract. You should notice a rich, sweet aroma filling the air as you add the vanilla—this is a good sign that your batter is coming together nicely.
5. Fold in Apples and Cinnamon
Gently fold in the diced apples and, if using, cinnamon. Use a spatula to carefully combine, ensuring the apples are evenly distributed without overmixing. You want to see small bits of apple peeking through the creamy batter. Smell the wonderful scent of apples and spice as you mix—this will make your bars even more enticing.
6. Bake Your Cheesecake Bars
Pour the cheesecake mixture over the prepared crust, spreading it evenly. Place it in the preheated oven and bake for about 25 minutes, or until the edges are set and the center is slightly jiggly. Keep an eye on it; you should hear a faint sizzle as the filling cooks. The edges will firm up while the center remains creamy, creating that perfect bar texture.
7. Cool and Serve
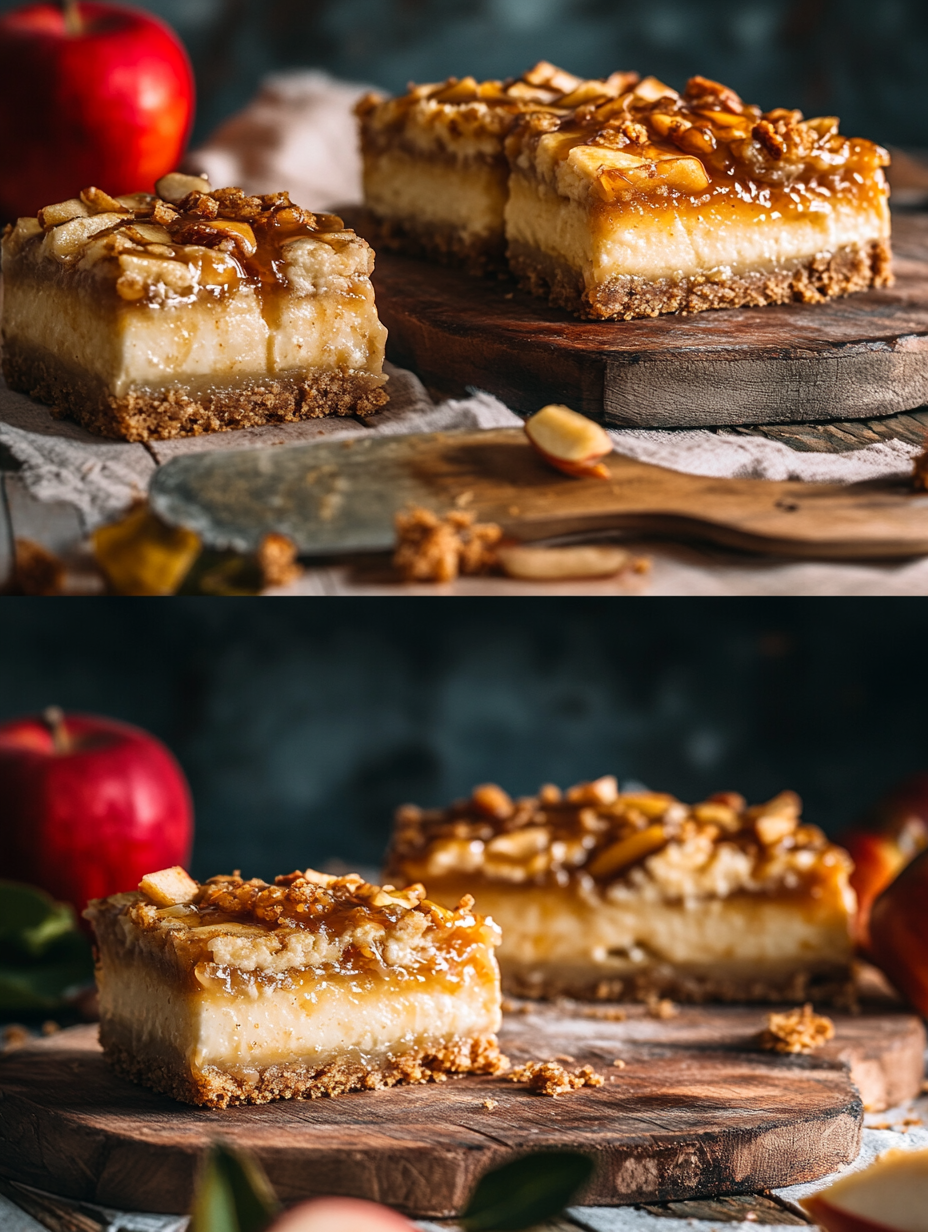
Allow the bars to cool completely in the baking dish. This step is crucial as it helps the cheesecake set properly. Once cooled, drizzle with caramel sauce for that extra touch of sweetness. Then, using the parchment overhang, lift the bars out of the dish and slice into squares. Look for the glossy sheen of the caramel on top, which should give you a delightful visual cue that your bars are ready to impress.
Chef’s Note: When preparing the crust, make sure to press it down firmly to avoid a crumbly bottom once baked. If you want to add an extra layer of flavor, consider mixing a pinch of salt into the crust for a balanced taste.
Pro Tips for the Best Results
– Room Temperature Ingredients: Ensure that your cream cheese and eggs are at room temperature. This allows for better mixing and a smoother batter, preventing lumps. If you’re short on time, you can microwave the cream cheese in 10-second increments until just softened.
– Don’t Overmix: When incorporating the eggs, mix just until combined. Overmixing can incorporate too much air and cause your cheesecake bars to crack during baking.
– Use Fresh Apples: For the best flavor and texture, opt for fresh apples rather than canned. Tart varieties like Granny Smith work well, as they balance the sweetness of the caramel.
– Cool Gradually: Allow your cheesecake to cool in the oven with the door slightly ajar for about 10 minutes before transferring it to room temperature. This gradual cooling helps prevent cracks on the surface.
– Chill Before Slicing: For cleaner cuts, chill your bars in the refrigerator for at least 2 hours after they have cooled to room temperature. This helps them firm up, making them easier to slice.
– Drizzle Just Before Serving: To maintain the integrity of the caramel sauce, drizzle it on just before serving. This keeps it from absorbing into the cheesecake bars and keeps the topping looking beautiful.
– Experiment with Toppings: While caramel is a classic go-to, consider adding a sprinkle of sea salt or chopped nuts for added texture and flavor.
Common Mistakes to Avoid
1. Using Cold Ingredients: Starting with cold cream cheese or eggs can lead to a lumpy filling. Always allow these ingredients to come to room temperature for a silky smooth batter.
2. Skipping Parchment Paper: If you skip lining the baking dish, you risk the bars sticking and breaking apart when you try to remove them. Always line the dish for easy extraction.
3. Overbaking: If you bake the cheesecake bars for too long, they can become dry and lose their creamy texture. Aim for a slight jiggle in the center once the baking time is up.
4. Not Allowing to Cool: Cutting into the bars before they have cooled completely can result in a messy serving. Give them time to set; patience will reward you with beautiful slices.
5. Forgetting the Apples: Skipping the diced apples means losing out on the wonderful flavor and texture contrast. Don’t forget this key ingredient; it’s what makes these bars special!
6. Using Old Ingredients: Ensure your baking ingredients, especially the cream cheese and eggs, are fresh. Old ingredients can negatively affect the taste and texture of your dessert.
7. Not Tasting the Batter: It’s always a good idea to taste the batter before baking. This can help you adjust the sweetness or add more spices as needed, ensuring the final product is just right.
Creative Variations
1. Seasonal Spice Variation: For a fall twist, consider adding a dash of nutmeg and allspice along with the cinnamon. This will deepen the flavor profile and give your cheesecake bars a cozy, autumnal feel.
2. Dietary-Friendly Option: For a gluten-free version, substitute the graham cracker crumbs with almond flour or gluten-free cookie crumbs. You can also use dairy-free cream cheese to cater to lactose intolerance.
3. Gourmet Elevated: Elevate your bars by adding a swirl of chocolate ganache on top or incorporating some crushed caramel candies into the filling. Both choices add a rich, decadent flair.
4. Quick 15-Minute Version: If you’re short on time, use store-bought cheesecake filling and prepared crust. Just bake briefly until set, then top with diced apples and caramel for a fast, yet delicious treat.
5. Kid-Friendly Fun: Let the kids help by allowing them to mix in their favorite candy pieces like mini chocolate chips or crushed Oreos into the batter before baking. This will make a fun, colorful twist that they’ll love.
6. International Twist: Add a hint of maple syrup instead of brown sugar for a Canadian-inspired version. Pair it with pecans in the crust for a delightful crunch and rich flavor.
7. Frozen Treat: Transform these bars into a frozen dessert by pouring the cheesecake mixture into popsicle molds. Freeze for a few hours, then enjoy a creamy, fruity dessert on a hot day!
With these detailed steps and creative ideas, you’re well-equipped to make your Caramel Apple Cheesecake Bars not just a recipe but a delightful experience for you and anyone lucky enough to share them with you!
Serving Ideas
When it comes to serving your Caramel Apple Cheesecake Bars, presentation is key! Here are a few delightful plating ideas to make your dessert even more enticing:
1. Rustic Presentation: Serve the bars directly from the baking dish, garnished with a sprinkle of cinnamon and a drizzle of caramel sauce over the top. This casual approach is perfect for a cozy gathering.
2. Individual Plates: Cut the bars into smaller squares and plate them individually on dessert plates. Add a dollop of whipped cream and a slice of fresh apple for a pop of color and texture.
3. Layered Dessert Cups: Crumble the bars and layer them in clear dessert cups with whipped cream and additional caramel drizzle. This creates a fun, trifle-like dessert that’s visually appealing.
4. Ice Cream Pairing: Serve warm bars alongside a scoop of vanilla or caramel ice cream. The creamy texture of the ice cream complements the cheesecake beautifully, and the warm-cold contrast is simply divine.
5. Festive Touch: For special occasions, use fall-themed decorations such as mini pumpkins or cinnamon sticks on the plate. This adds a seasonal touch that’s perfect for gatherings in the autumn months.
Each serving should be about one square, allowing your guests to enjoy a satisfying portion without feeling overwhelmed.
What to Serve With
Pairing your Caramel Apple Cheesecake Bars with complementary flavors can elevate your dessert experience. Here are some fantastic options:
1. Coffee: A cup of freshly brewed coffee enhances the creamy sweetness of the bars, creating a perfect balance. The bitterness of the coffee contrasts beautifully with the rich caramel and apple flavors.
2. Spiced Tea: A warm cup of spiced chai or apple cider tea can echo the flavors in your cheesecake, making it a comforting pairing, especially in cooler months.
3. Sweet Wine: A glass of dessert wine, like a late-harvest Riesling or a sweet Moscato, pairs well with the rich, creamy texture of the bars, adding a fruity touch that complements the apples.
4. Pecan Pie: For a dessert spread, consider serving pecan pie alongside your cheesecake bars. The nutty flavor and crunch of the pecans create a lovely textural contrast to the creamy bars.
5. Cheese Board: A small cheese board with sharp cheddar or brie can provide a savory counterpoint, balancing the sweetness of your dessert. Add some nuts or dried fruit for extra variety.
6. Pumpkin Spice Cupcakes: For a festive touch, serve your bars alongside pumpkin spice cupcakes. The combination of caramel apple and pumpkin flavors can create an inviting seasonal dessert table.
These pairings not only enhance the overall flavor experience but also create a delightful dessert spread that your guests will love.
Storage Guide
To keep your Caramel Apple Cheesecake Bars fresh and delicious, proper storage is essential. Here’s how to do it:
– Container Type: Place the cooled bars in an airtight container. You can also cover them tightly with plastic wrap if you don’t have a container handy.
– Temperature: Store the bars in the refrigerator at a temperature below 40°F (4°C) to prevent spoilage.
– Shelf Life: When stored properly, these bars can last for up to 5-7 days in the refrigerator.
– Signs of Spoilage: Check for any off smells, changes in color, or mold. If you notice any of these signs, it’s best to discard the bars.
– Refreshing Tips: When you’re ready to enjoy leftovers, consider warming them slightly in the microwave for about 10-15 seconds to revive the creamy texture and flavor.
By following these guidelines, you can savor the deliciousness of your cheesecake bars all week long!
Freezing Tips
If you want to enjoy your Caramel Apple Cheesecake Bars at a later date, freezing is a fantastic option. Here are some tips on how to do it effectively:
– Freezing Method: Cut the bars into squares and wrap each piece individually in plastic wrap. Then, place them in a freezer-safe airtight container or a heavy-duty freezer bag to prevent freezer burn.
– Freezing Duration: These bars freeze well for up to 3 months. After that, while they may still be safe to eat, quality might start to decline.
– Thawing: To enjoy your frozen bars, simply transfer them from the freezer to the refrigerator and allow them to thaw overnight. If you’re in a hurry, you can also let them sit at room temperature for about 30-60 minutes.
By following these tips, you can ensure that your cheesecake bars remain delicious and ready to satisfy your sweet tooth at a moment’s notice!
Reheating Guide
If you’re eager to enjoy your Caramel Apple Cheesecake Bars warm, reheating them properly is key. Here’s how to do it using different methods:
– Microwave: Place one bar on a microwave-safe plate and heat it for about 10-15 seconds. Check to ensure it’s warmed through, and heat for an additional 5 seconds if necessary. Be careful not to overheat, as it can make the cheesecake tough.
– Oven: Preheat your oven to 350°F (175°C). Place the bars on a baking sheet and cover them loosely with aluminum foil to prevent browning. Heat for about 10-15 minutes or until warmed through.
– Stovetop: For a quick stovetop option, place a bar in a non-stick skillet over low heat. Cover with a lid and heat for about 5-7 minutes, checking frequently to avoid burning.
Using these methods, you can bring back the creamy texture and delightful flavors of your cheesecake bars, making them a delicious treat once again!
Nutrition Overview
When it comes to indulging in Caramel Apple Cheesecake Bars, you may be curious about their nutritional value. Here’s a quick breakdown:
– Calories: Each bar contains approximately 290 calories.
– Macros: You can expect around 20g of fat, 25g of carbohydrates, and 4g of protein per serving.
– Health Benefits:
– Apples: Rich in fiber and vitamin C, apples contribute to overall health and can aid digestion.
– Cream Cheese: Provides calcium and protein, essential for maintaining strong bones and muscles.
– Cinnamon: Known for its anti-inflammatory properties, cinnamon also helps regulate blood sugar levels.
While these bars are definitely a treat, they do offer some nutritional benefits that can make you feel a bit better about indulging!
Frequently Asked Questions
Q: Can I use store-bought caramel sauce instead of homemade?
A: Absolutely! Store-bought caramel sauce is a convenient option and will still provide that delicious caramel flavor. Just drizzle it on top before serving.
Q: What type of apples work best in this recipe?
A: For these cheesecake bars, tart apples like Granny Smith or sweet varieties like Honeycrisp work wonderfully. They hold their shape and add great flavor.
Q: Can I make these bars ahead of time?
A: Yes, these bars can be made a day in advance. Store them in the refrigerator until you’re ready to serve them for the best flavor and texture.
Q: Is there a gluten-free option for the crust?
A: Yes! You can substitute the graham cracker crumbs with gluten-free options, like almond flour or gluten-free graham crackers, to create a delicious crust.
Q: How can I tell when the cheesecake is done baking?
A: The edges should look set, and the center will still be a bit jiggly. It will continue to set as it cools, so don’t worry if it looks slightly undercooked.
Q: Can I add other fruits to the cheesecake mixture?
A: Absolutely! You can experiment with other fruits such as diced pears or even berries. Just ensure they’re not too watery to maintain the texture of the cheesecake.
Q: What’s the best way to serve these bars?
A: These bars are best enjoyed chilled, but you can also serve them warm with a scoop of ice cream for a delightful treat.
Q: Can I substitute cream cheese with another type of cheese?
A: While cream cheese provides the best texture, you could try mascarpone for a richer flavor or ricotta for a lighter feel, though the end result may vary slightly.
Final Thoughts
Creating these Caramel Apple Cheesecake Bars is a labor of love that truly pays off. Remember, the key to a perfect cheesecake lies in not overbaking—the slight jiggle in the center is what makes them creamy and luscious.
As you gather friends and family around to share these delicious bars, don’t forget to encourage everyone to add their twist—perhaps a sprinkle of nuts or a different fruit layer! The joy of home baking is not just in the creation but also in sharing and discovering new flavors together.
So, gather your ingredients, roll up your sleeves, and dive into the delightful world of baking. You’re in for a sweet treat that’s sure to impress!