Follow Me On Pinterest!
Baked Coconut Cheesecake

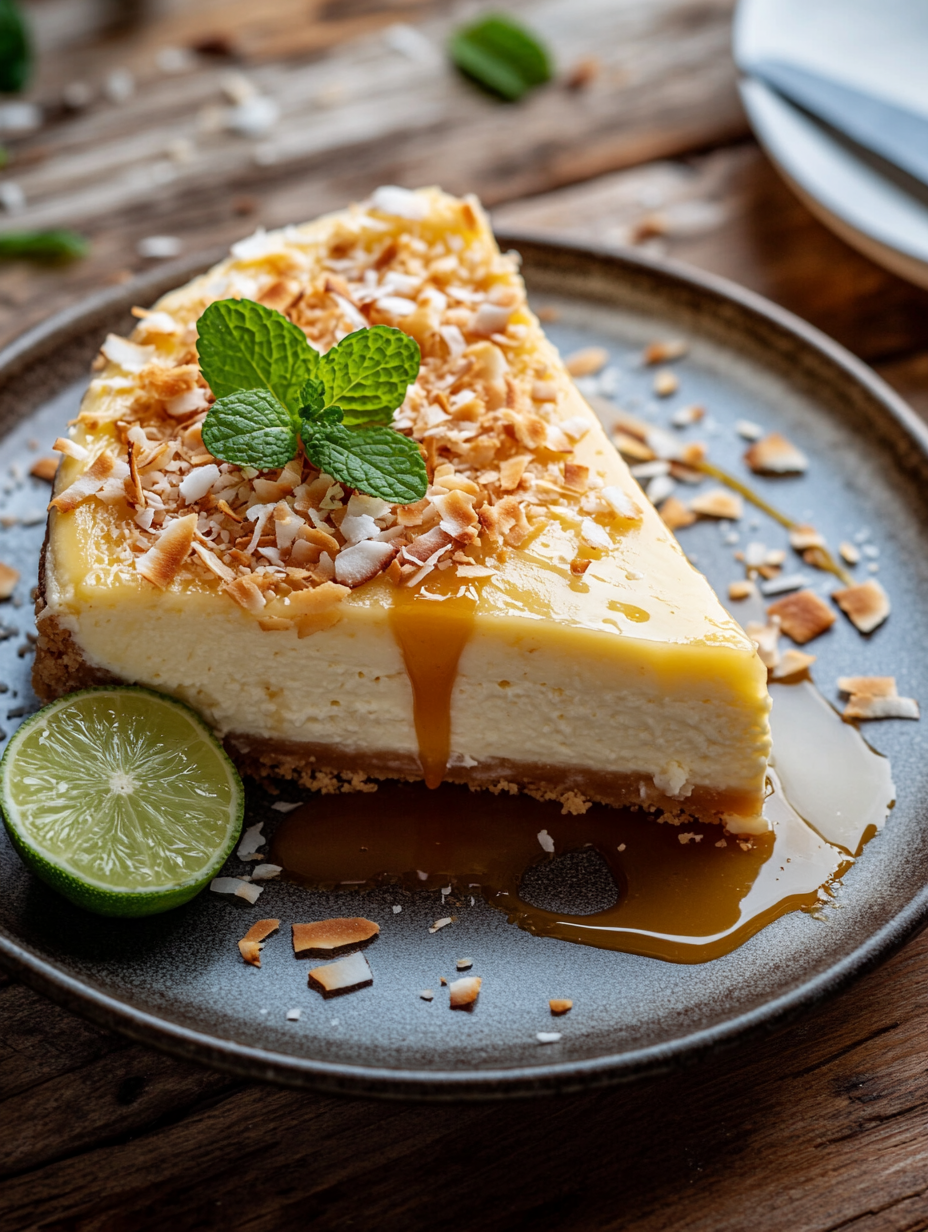
Baked Coconut Cheesecake: A Slice of Tropical Paradise
Introduction
Imagine biting into a slice of cheesecake that transports you to a sun-drenched beach, where the sound of gentle waves and the scent of salty air surrounds you. For me, that slice is the Baked Coconut Cheesecake. I first discovered this tropical delight during a family gathering at my aunt’s home in Florida. As I entered her kitchen, warm aromas of baked goods wafted through the air, beckoning me closer. On the counter sat a magnificent cheesecake topped with toasted coconut flakes, glistening under the warm kitchen light.
As I took my first bite, the creamy richness melted on my tongue, while the coconut flavor danced playfully, taking me straight to a sandy shore. The graham cracker crust provided the perfect crunch contrasting the smooth filling, and I couldn’t help but ask for the recipe that day. It quickly became a staple in my baking repertoire, a go-to for celebrations, and a comforting treat on quiet evenings alike.
Each time I bake this cheesecake, the familiar scents evoke fond memories of laughter and love, of sunny days spent with family. It’s more than just dessert; it’s a piece of my heart, a reminder that the simplest ingredients can create extraordinary moments. With this Baked Coconut Cheesecake, you too can bring a touch of the tropics into your kitchen and create memories that will linger long after the last slice is gone.
Why This Recipe Works
The magic of this Baked Coconut Cheesecake lies in the balance of its ingredients and the science behind the baking process. The foundation starts with a luscious crust made from graham cracker crumbs and shredded coconut, which provides a delightful texture and a hint of sweetness. The combination of unsalted butter ensures that the crust holds together perfectly while adding richness.
The filling is where the true transformation happens. By using cream cheese as the base, you achieve a creamy, dense texture that is characteristic of a classic cheesecake. The addition of sour cream not only adds a tangy flavor but also contributes to the cheesecake’s smoothness and creaminess. Granulated sugar sweetens the mixture, balancing the slight tartness of the cream cheese and sour cream.
Incorporating coconut milk deepens the tropical flavor profile, creating a wonderfully cohesive taste experience. Each egg added one at a time helps to bind the filling, giving it a stable structure as it bakes. The slow baking process at a controlled temperature allows the cheesecake to set gradually, preventing cracks and ensuring a silky texture.
Finally, the crowning touch of toasted coconut flakes adds both visual appeal and a delightful crunch that enhances the overall experience. This recipe is reliable because it combines well-balanced flavors with tested techniques, ensuring that each bite is as delightful as the last.
What Makes It Special
What sets this Baked Coconut Cheesecake apart from store-bought or restaurant versions is its unique blend of freshness, quality, and personal touch. Here are a few reasons why this cheesecake shines:
– Homemade Goodness: Unlike commercial cheesecakes often laden with preservatives, this recipe uses fresh, wholesome ingredients, ensuring that each slice is bursting with authentic flavor. You have complete control over the quality and freshness of the components, making it a healthier option.
– Tropical Twist: The infusion of coconut in both the filling and the crust creates a luscious tropical experience that you won’t find in typical cheesecakes. It transports your taste buds to paradise, making it a perfect dessert for summer gatherings or tropical-themed parties.
– Customizable: This recipe serves as a fantastic base that can be easily customized. Whether you want to incorporate other flavors like lime or pineapple, or even swap out the crust for something like almond flour for a gluten-free option, the possibilities are endless.
– Memorable Presentation: The toasted coconut flakes not only add texture but also provide an appealing visual element that makes your cheesecake stand out. When you serve it, it looks just as good as it tastes, making it perfect for impressing guests during special occasions.
Ingredient Breakdown
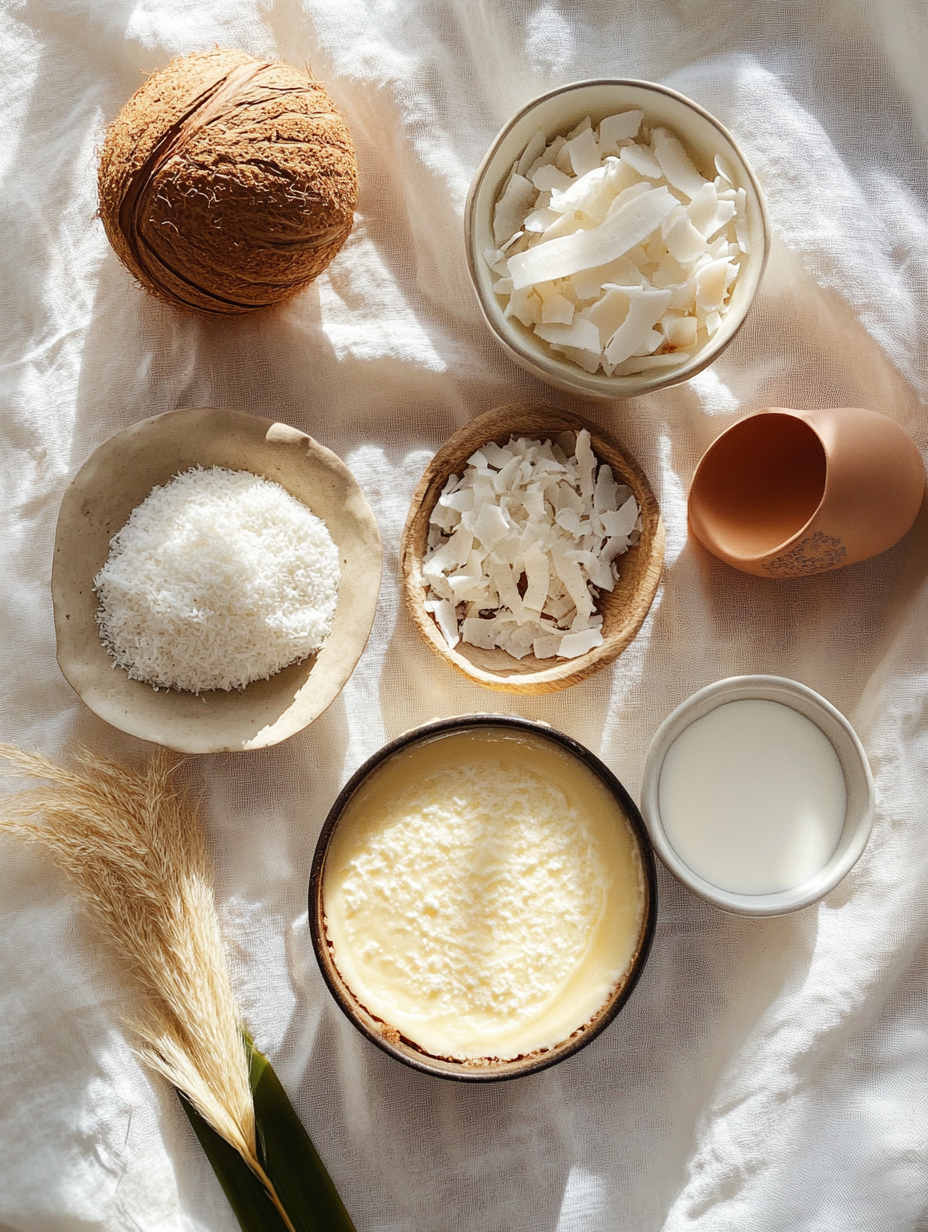
Understanding the role of each ingredient in your Baked Coconut Cheesecake not only helps you appreciate its flavor but also allows for substitutions when necessary. Here’s a detailed breakdown of what you’ll need:
– Graham Cracker Crumbs (1 cup): This forms the base of your crust, offering a sweet crunch that perfectly complements the creamy filling. For a gluten-free version, consider using crushed gluten-free cookies or almond flour.
– Unsweetened Shredded Coconut (0.5 cup): Adding texture and flavor to the crust, shredded coconut is essential for that tropical flair. If you prefer a milder coconut taste, you can reduce this amount or even use finely chopped nuts for a different texture.
– Granulated Sugar (0.25 cup for crust, 0.5 cup for filling): Sugar sweetens the crust and filling, balancing the tanginess of the cream cheese. You can substitute with coconut sugar or a sugar alternative if you’re looking for a lower-calorie option.
– Unsalted Butter (0.5 cup): This provides richness to the crust. If you’re looking for a dairy-free alternative, coconut oil can be an excellent substitute, maintaining that coconut theme while keeping it vegan.
– Cream Cheese (16 oz): The star of the filling, cream cheese gives the cheesecake its signature creaminess. For a lighter option, consider using reduced-fat cream cheese, though the texture may vary slightly.
– Sour Cream (0.5 cup): This adds a tangy flavor and ensures a smooth texture. Greek yogurt can be used as a substitute for a healthier alternative; however, be sure to use plain, unsweetened yogurt for the best results.
– Vanilla Extract (1 teaspoon): Vanillin adds depth to the flavor profile, enhancing all the other ingredients. If you don’t have vanilla extract, a vanilla bean or even almond extract can be a lovely alternative.
– Eggs (3 large): These bind the filling together and contribute to the cheesecake’s structure. For a vegan version, you can use flax eggs (1 tablespoon flaxseed meal mixed with 2.5 tablespoons water per egg) to achieve a similar effect.
– Unsweetened Coconut Milk (0.5 cup): This ingredient amplifies the coconut flavor and contributes to the creamy texture. If you don’t have coconut milk, any other kind of milk, like almond or oat milk, can work, but the flavor will change.
– Toasted Coconut Flakes (0.5 cup): These are the finishing touch, providing both a crunchy texture and added coconut flavor. Toast them lightly in a pan to bring out their natural sweetness. You can also use chopped nuts or chocolate shavings if you prefer a different topping.
By understanding the roles of these ingredients, you can better appreciate the magic behind your Baked Coconut Cheesecake and feel empowered to make adjustments that suit your dietary needs or personal tastes.
Equipment Needed
To create your Baked Coconut Cheesecake, you’ll need a few essential tools that will make the process smoother and more enjoyable:
– 9-inch Springform Pan: This is ideal for cheesecakes as it allows you to easily release the sides for a beautiful presentation. If you don’t have one, a regular round cake pan will work, but be prepared for more difficulty in serving.
– Mixing Bowls: A set of mixing bowls in various sizes is essential for combining your crust and filling. Opt for glass or stainless steel for durability; they’re also easier to clean.
– Electric Mixer: While you can mix by hand, an electric mixer will save you time and ensure a smooth filling. A hand mixer is a great affordable option if you don’t want to invest in a stand mixer.
– Spatula: A rubber or silicone spatula is crucial for scraping down the sides of your mixing bowl and smoothing out the cheesecake filling in the pan.
– Measuring Cups and Spoons: Accurate measurements are key in baking, so having a good set of measuring cups and spoons is a must.
– Oven Thermometer (optional): This is particularly useful if you’re unsure about your oven’s accuracy. Baking at the correct temperature is vital for the cheesecake to set properly.
With these tools at your disposal, you’ll be well-equipped to create a stunning Baked Coconut Cheesecake that not only tastes divine but also looks irresistible.
Step-by-Step Instructions
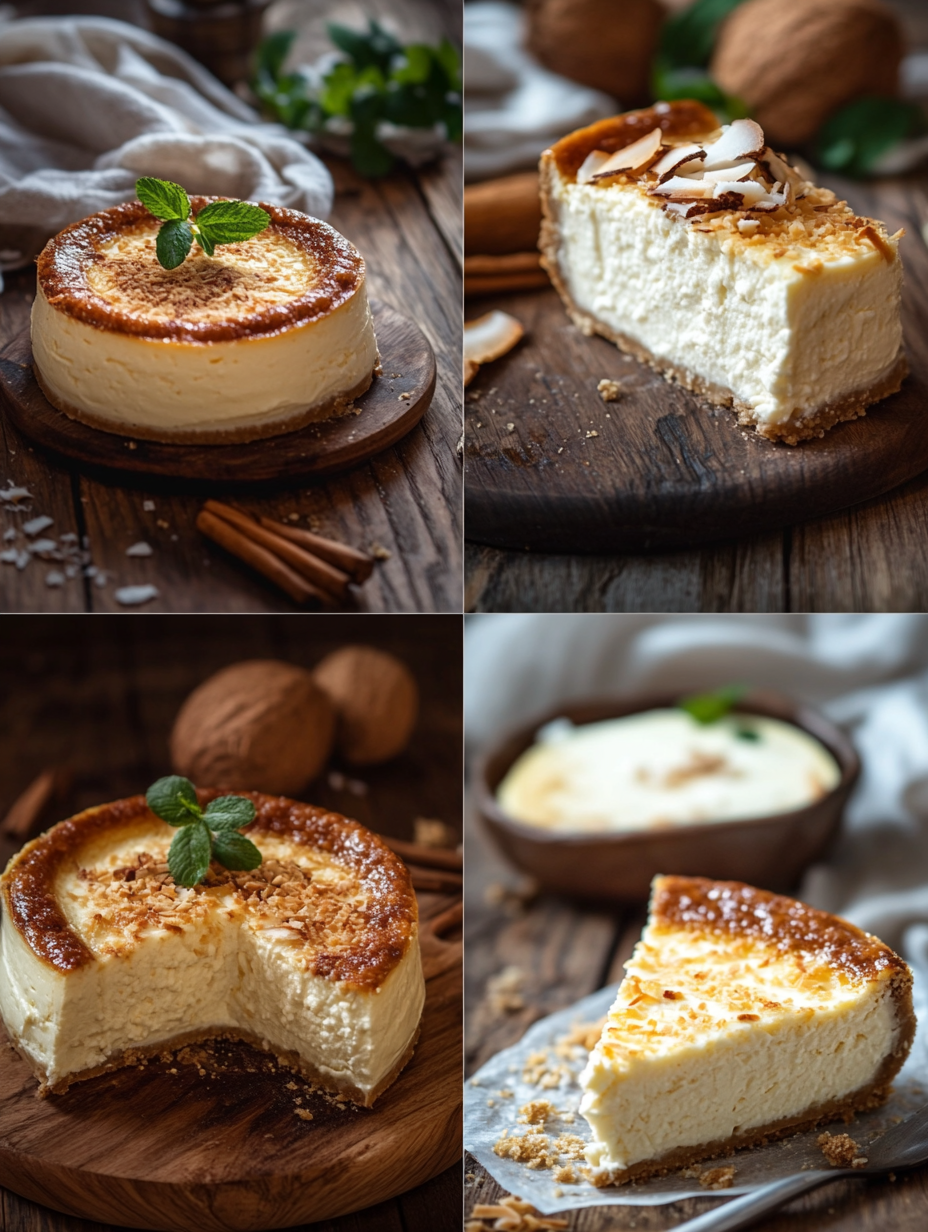
1. Preheat Your Oven
What: Preheating your oven is crucial for achieving that perfect baked cheesecake texture.
How: Set your oven to 325°F (163°C) and allow it to preheat fully before you place your cheesecake inside.
Look/Smell/Hear: You’ll know your oven is ready when the preheat indicator lights up, and you can hear a gentle hum as it reaches the desired temperature.
2. Prepare the Crust
What: The crust adds a delightful texture to your cheesecake, balancing the creaminess of the filling.
How: In a medium bowl, combine 1 cup of graham cracker crumbs, 0.5 cup of unsweetened shredded coconut, 0.25 cup of granulated sugar, and 0.5 cup of melted unsalted butter. Stir well until the mixture resembles wet sand.
Look/Smell/Hear: It should feel crumbly yet hold together when pressed. The scent of melted butter will be inviting.
3. Form the Crust
What: Forming the crust ensures it holds together when baked.
How: Use your fingers or the back of a measuring cup to press the mixture firmly into the bottom of a 9-inch springform pan. Make sure it’s evenly spread and compact.
Look/Smell/Hear: You should hear a slight crunch as you press down, and the crust should feel solid.
4. Mix the Cream Cheese Filling
What: The filling is the star of the show, creamy and rich.
How: In a large mixing bowl, beat 16 oz of softened cream cheese using an electric mixer on medium speed until it’s smooth and creamy.
Look/Smell/Hear: You’ll see a glossy, smooth texture, and the sound of the mixer will become steady as lumps disappear.
5. Combine Wet Ingredients
What: Adding the sour cream, sugar, vanilla, and coconut milk creates a luscious filling.
How: Add 0.5 cup of sour cream, 0.5 cup of sugar, 1 teaspoon of vanilla extract, and 0.5 cup of coconut milk to the cream cheese. Mix until well blended and creamy.
Look/Smell/Hear: The batter should be thick and fragrant, with the vanilla and coconut aromas wafting through your kitchen.
6. Incorporate the Eggs
What: Eggs add structure and richness to the cheesecake.
How: Add 3 large eggs one at a time, mixing on low speed just until combined after each addition. This gentle mixing prevents excess air from being incorporated.
Look/Smell/Hear: The mixture will become lighter in color, and the sound of your mixer should be soft and steady.
7. Pour and Smooth
What: Pouring the filling over the crust ensures an even bake.
How: Pour the cheesecake filling over the prepared crust, then use a spatula to smooth the top.
Look/Smell/Hear: The batter should flow smoothly, and you might hear a gentle slosh as you spread it out.
8. Bake the Cheesecake
What: Baking sets the filling and adds a beautiful texture.
How: Place the springform pan in the oven and bake for about 45 minutes. The center should be set but still have a slight jiggle.
Look/Smell/Hear: You’ll notice a slight golden hue on the edges and a warm, sweet aroma filling your kitchen.
9. Cool the Cheesecake
What: Cooling slowly helps prevent cracks.
How: Remove the cheesecake from the oven and let it cool in the pan for at least 10 minutes before transferring it to the refrigerator.
Look/Smell/Hear: The smell will deepen as it cools, and you’ll want to ensure it’s no longer hot to the touch.
10. Chill and Serve
What: Chilling is essential for the best texture.
How: Chill the cheesecake for at least 4 hours or overnight before serving. Before slicing, top with 0.5 cup of toasted coconut flakes for extra flavor and crunch.
Look/Smell/Hear: The cheesecake will firm up beautifully, and the toasted coconut will add a delightful aroma as you prepare to slice.
Chef’s Note: Be sure to let the cheesecake cool completely before chilling. This helps avoid condensation, which can ruin the texture.
Pro Tips for the Best Results
1. Use Room Temperature Ingredients: Make sure your cream cheese, eggs, and sour cream are at room temperature before mixing. This helps achieve a creamy, lump-free filling.
2. Don’t Overmix: When adding the eggs, mix only until combined. Overmixing can lead to cracks in your cheesecake as it bakes.
3. Water Bath for Extra Creaminess: For an ultra-smooth texture, consider baking your cheesecake in a water bath. Wrap the springform pan in foil and place it in a larger pan filled with hot water.
4. Cool Gradually: After baking, allow your cheesecake to cool gradually in the oven with the door slightly ajar to prevent sudden temperature changes, which can cause cracks.
5. Chill Overnight: If you can resist, let your cheesecake chill overnight. This allows the flavors to meld beautifully and the texture to set perfectly.
6. Toasting Coconut Flakes: For a flavor boost, toast your coconut flakes before topping your cheesecake. Spread them on a baking sheet and bake at 350°F (175°C) for 5-7 minutes, stirring frequently until golden.
7. Slice with a Hot Knife: For clean slices, dip your knife in hot water and wipe it clean between cuts. This prevents the creamy filling from sticking to the knife.
8. Garnish Thoughtfully: Consider garnishing with fresh fruit or a drizzle of chocolate ganache for an added touch of elegance.
Common Mistakes to Avoid
1. Using Cold Ingredients: Starting with cold cream cheese or eggs can lead to lumps in your batter. Always let them come to room temperature first for a smooth mix.
2. Not Mixing Enough: If you don’t mix your cream cheese long enough, you may end up with a lumpy texture. Make sure to beat it until fully smooth before adding other ingredients.
3. Skipping the Chill Time: Cutting into your cheesecake too soon can result in a gooey, under-set filling. Always allow it to chill for at least 4 hours—overnight is even better.
4. Overbaking: Overbaking will dry out your cheesecake and create cracks. Look for a slightly jiggly center to indicate it’s perfectly baked.
5. Not Using a Springform Pan: Attempting to bake a cheesecake in a typical cake pan can make it difficult to remove without ruining it. Always use a springform pan for easy removal.
6. Forgetting the Coconut Flakes: The toasted coconut flakes on top add not just flavor but also texture. Do not skip this step if you want the full coconut experience.
7. Not Monitoring Baking Time: Every oven is slightly different, so keep an eye on your cheesecake as it bakes. Check for doneness a few minutes before the timer goes off to avoid overcooking.
Creative Variations
1. Seasonal Twist: For a springtime touch, add a layer of fresh strawberries or a strawberry reduction sauce on top of your cheesecake. In the fall, consider a pumpkin-spiced version by incorporating pumpkin puree and warming spices like cinnamon and nutmeg.
2. Dietary-Friendly: If you’re looking for a gluten-free version, substitute the graham cracker crumbs with almond flour or gluten-free cookies. For a dairy-free option, use vegan cream cheese and coconut yogurt in place of sour cream.
3. Gourmet Elevated: Elevate your cheesecake by adding a swirl of passionfruit puree or mango puree into the filling before baking. This adds a vibrant color and a tangy flavor contrast.
4. Quick 15-Minute: For a no-bake version, blend your ingredients together and pour them into a pre-made graham cracker crust. Chill for a couple of hours, then serve with fresh fruits or a coconut cream topping.
5. Kid-Friendly: Have fun with the kids by letting them decorate the cheesecake with their favorite candies or fruit. You can even create a ‘tropical island’ theme with gummy palm trees and edible sand (crushed graham crackers).
6. International Twist: Incorporate flavors from around the world by adding a hint of Thai coconut flavoring or lime zest for a zesty kick. You can also consider a Brazilian-inspired version by adding condensed milk and using a biscuit base made of Maria cookies.
7. Chocolate Coconut Cheesecake: For chocolate lovers, mix in cocoa powder to the filling for a rich chocolate coconut cheesecake. Top with chocolate ganache and coconut flakes for a decadent treat.
Serving Ideas
When it comes to serving your Baked Coconut Cheesecake, presentation can elevate the experience to new heights. Here are some delightful ideas to consider:
1. Garnished with Fresh Fruit: Top each slice with a medley of fresh tropical fruits like mango, pineapple, or kiwi. The bright colors and natural sweetness will beautifully contrast the creamy cheesecake.
2. Coconut Cream Drizzle: Whip up some coconut cream by chilling a can of coconut milk overnight and scooping out the solidified cream. Drizzle this over the cheesecake for a rich and glossy finish.
3. Chocolate Shavings: For chocolate lovers, grate some dark chocolate over the top of your cheesecake slices. The bittersweet chocolate pairs wonderfully with the coconut flavor.
4. Layered Parfaits: For a fun twist, layer cheesecake cubes with whipped cream and crushed graham crackers in parfait glasses. This makes for an eye-catching dessert that guests will love.
5. Individual Mini Cheesecakes: If you’re hosting a party, consider making individual mini cheesecakes in cupcake liners. This way, guests can grab their own slice without needing to cut the larger cake.
These serving ideas not only enhance the visual appeal but also add complementary flavors, making your coconut cheesecake a standout dessert at any gathering.
What to Serve With
Pairing your Baked Coconut Cheesecake with complementary flavors can take your dessert experience to the next level. Here are some delightful suggestions:
1. Coffee: A rich cup of coffee balances the sweetness of the cheesecake. The bitterness will enhance the flavors of the coconut and cream cheese.
2. Tea: A light herbal tea, like chamomile or mint, can provide a refreshing contrast. The soothing properties of tea can also be a nice complement to the cheesecake’s richness.
3. Pineapple Sorbet: The bright and tangy notes of pineapple sorbet offer a refreshing counterpoint to the dense cheesecake, cleansing the palate between bites.
4. Whipped Cream: A dollop of lightly sweetened whipped cream can enhance the creaminess of the cheesecake, adding an airy texture that makes each bite even more delightful.
5. Fruit Salad: A simple fruit salad featuring tropical fruits like papaya, passion fruit, and berries can brighten the plate and add a refreshing crunch, balancing the creaminess of the dish.
6. Sparkling Wine: For a celebratory touch, serve your cheesecake with a glass of sparkling wine. The effervescence cuts through the richness of the dessert, offering a delightful pairing.
These pairings can elevate your dessert experience, creating a harmonious taste journey that your guests are sure to enjoy.
Storage Guide
Properly storing your Baked Coconut Cheesecake ensures it stays fresh and delicious. Here’s how to do it right:
– Container Type: Use an airtight container or cover the cheesecake tightly with plastic wrap. If you’ve used a springform pan, you can leave it in the pan and wrap it up securely.
– Temperature: Store your cheesecake in the refrigerator at a temperature below 40°F (4°C). This keeps the cheesecake at its best quality.
– Shelf Life: Your cheesecake will stay fresh for about 5-7 days in the fridge. However, for the best flavor and texture, aim to consume it within 3-4 days.
– Signs It’s Gone Bad: Look for signs like an off smell, discoloration, or changes in texture (like excessive moisture or a crust forming). If any of these occur, it’s best to discard it.
– Refreshing Tips: If your cheesecake seems a bit dry after a few days, a light drizzle of coconut milk or cream over the top can help rejuvenate its texture and flavor.
By following these storage tips, you’ll ensure that your delicious cheesecake remains a showstopper right to the last bite!
Freezing Tips
If you’d like to save your Baked Coconut Cheesecake for later, you’ll be happy to know it freezes quite well! Here are some helpful tips:
– Freezing Process: First, allow the cheesecake to cool completely. Then, wrap it tightly in plastic wrap, followed by aluminum foil to prevent freezer burn.
– Portioning: If you plan to freeze individual slices, cut the cheesecake into portions before wrapping. This way, you can easily take out just what you need without thawing the entire cake.
– Freezer Duration: Your cheesecake can last in the freezer for up to 2-3 months. Just be sure to label it with the date for reference!
– Thawing Method: To thaw, simply transfer the cheesecake to the refrigerator and let it thaw overnight. If you’re in a hurry, you can leave it out at room temperature for about 1-2 hours, but keep an eye on it to avoid melting.
With these freezing tips, you can enjoy your delicious coconut cheesecake at a later date without sacrificing its flavor or texture!
Reheating Guide
Reheating your Baked Coconut Cheesecake can bring back its creamy goodness if you’ve stored leftovers. Here’s how to do it:
– Microwave Instructions: Place a slice on a microwave-safe plate and heat on medium power for 15-20 seconds. Check for warmth and continue heating in 5-second intervals if needed. Be careful not to overheat, as this can change the texture.
– Oven Instructions: Preheat your oven to 250°F (120°C). Wrap the cheesecake slice in aluminum foil to prevent it from drying out and place it in the oven for 10-15 minutes. This method will gently warm the cheesecake, keeping it moist.
– Stovetop Instructions: If you prefer, you can use a skillet over low heat. Place the cheesecake slice in the skillet, cover it with a lid, and heat for 5-7 minutes, checking frequently to avoid burning.
By using these reheating methods, you can enjoy your cheesecake as if it were freshly baked!
Nutrition Overview
Indulging in a slice of Baked Coconut Cheesecake can be a delightful experience, and it’s good to know what you’re enjoying. Each serving contains approximately 380 calories with a breakdown of around 25g of fat, 30g of carbohydrates, and 7g of protein.
Key ingredients like coconut provide health benefits, including:
– Coconut: Rich in healthy fats and fiber, coconut can contribute to heart health and provide a quick source of energy.
– Cream Cheese: A source of calcium and protein, cream cheese can help strengthen bones and support muscle health.
– Sour Cream: This adds a tangy flavor while providing probiotics, which are beneficial for gut health.
Enjoy your cheesecake while keeping these nutritional elements in mind!
Frequently Asked Questions
Q: Can I use low-fat cream cheese for this recipe?
A: Yes, you can substitute low-fat cream cheese, but keep in mind that it may affect the texture and richness of the cheesecake. The flavor may also be slightly different.
Q: Can I make this cheesecake without eggs?
A: Absolutely! You can replace eggs with alternatives such as flaxseed meal or a commercial egg replacer. This will create a slightly different texture but will still result in a tasty cheesecake.
Q: How can I tell when the cheesecake is done baking?
A: The cheesecake is done when the edges are set, and the center still has a slight jiggle. It will continue to firm up as it cools, so don’t worry if it seems a little undercooked when you take it out.
Q: Can I add other flavors to the cheesecake?
A: Yes! You can infuse other flavors like lime zest for a zesty kick or mix in chocolate chips for a rich addition. Just be mindful of how these changes may affect the overall balance.
Q: How do I prevent cracks in my cheesecake?
A: To minimize cracks, make sure your ingredients are at room temperature before mixing, and avoid overmixing. Additionally, you can bake the cheesecake in a water bath for a gentler cooking environment.
Q: Can I use sweetened coconut instead of unsweetened?
A: While you can use sweetened coconut, it will increase the overall sweetness of the cheesecake. If you like a sweeter dessert, feel free to adjust the sugar content in the recipe accordingly.
Q: How long does it take to chill the cheesecake?
A: For best results, chill the cheesecake for at least 4 hours, but overnight is preferable. This allows the flavors to meld and the texture to set perfectly.
Q: Can I make this cheesecake ahead of time?
A: Yes! This cheesecake can be made up to a day in advance and stored in the refrigerator. Just remember to garnish with toasted coconut flakes just before serving for the best results.
Final Thoughts
As you wrap up your culinary adventure with this Baked Coconut Cheesecake, remember a couple of key tips: always allow your cheesecake to cool completely before chilling it in the refrigerator for the best texture, and don’t hesitate to get creative with toppings and pairings!
Your enthusiasm for baking will shine through each slice, making it a hit with family and friends. So, roll up your sleeves, gather your ingredients, and immerse yourself in this tropical treat. You’re not just baking a cheesecake; you’re creating a memorable experience that will warm hearts and satisfy sweet cravings. Enjoy every moment and every bite!