Follow Me On Pinterest!
Air Fryer Chocolate Lava Cake

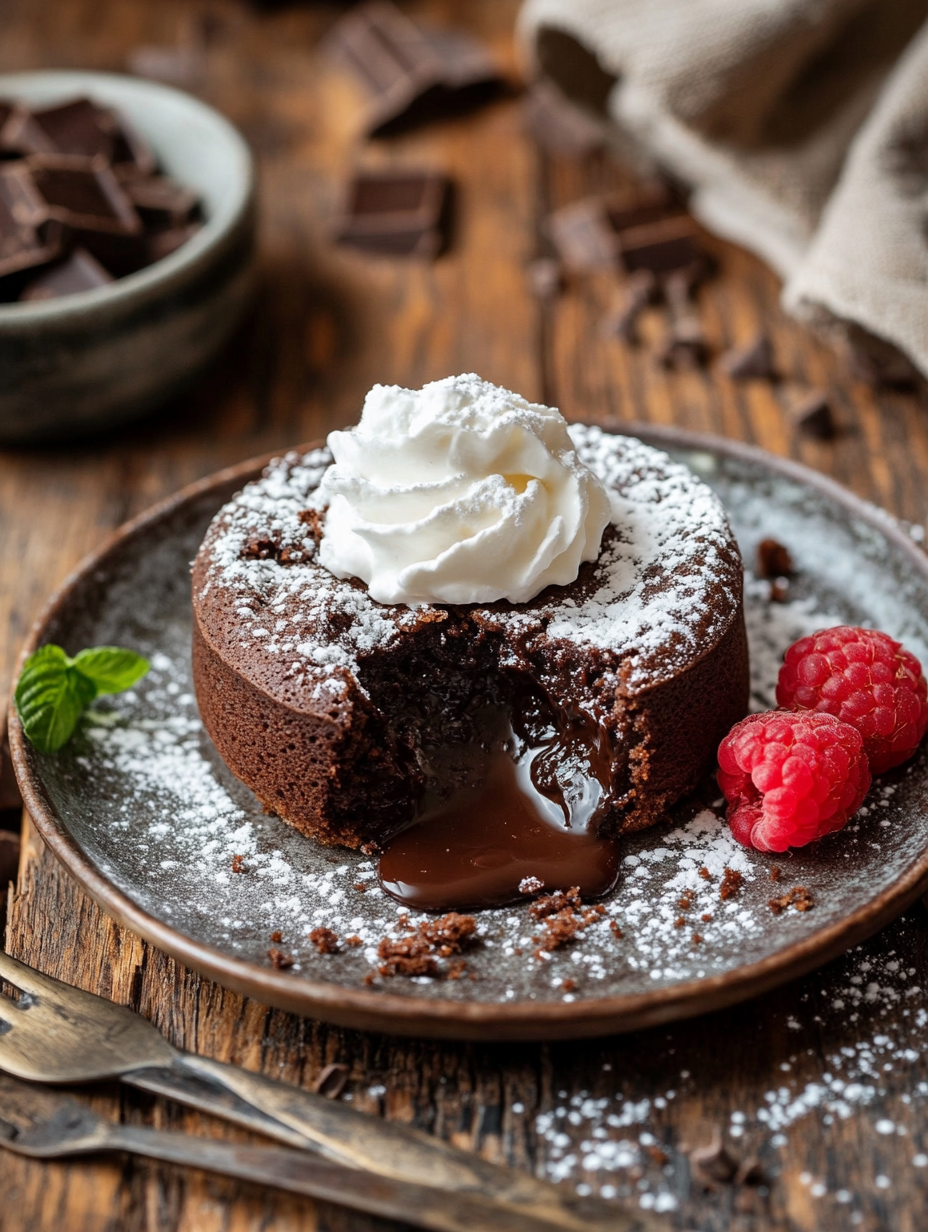
Air Fryer Chocolate Lava Cake: **Decadent Indulgence in Minutes**
Introduction
There’s something undeniably magical about a chocolate lava cake. I still remember the first time I experienced that molten center bursting forth as I cut into a warm, decadent cake. It was during a cozy dinner at a quaint little bistro in Paris, and the moment I tasted that gooey chocolate, my heart melted just as much as the cake did in my mouth. The rich, velvety chocolate combined with the soft, tender cake created a heavenly experience that I knew I had to recreate at home.
Fast forward to today, I find myself in my own kitchen, and the allure of air fryer chocolate lava cake has rekindled those sweet memories. The beauty of this dessert lies not just in its flavor, but in the sheer ease of preparation. With the air fryer whirring away, I can almost hear the bustling streets of Paris, and the aroma of melting chocolate fills my home like a warm embrace.
What I love most about this recipe is how it captures that luxurious indulgence without the fuss of traditional baking methods. You don’t need a fancy oven or hours of painstaking preparation. In under 30 minutes, you can create a dessert that impresses, delights, and satisfies your chocolate cravings. Whether it’s a special occasion or a simple weeknight treat, this air fryer chocolate lava cake is sure to become a favorite, just as it has for me.
Why This Recipe Works
This air fryer chocolate lava cake recipe is a delightful blend of technique and flavors that come together to create a dessert that is both satisfying and indulgent. The key to achieving that signature molten center lies in the balance of ingredients and precision in cooking time.
First and foremost, the combination of dark chocolate chips and unsalted butter creates a smooth, rich chocolate base that forms the heart of the cake. Melting these two together ensures that they meld seamlessly, allowing for a silky texture that elevates the overall experience. The powdered sugar sweetens the mixture while also contributing to the cake’s delicate crumb.
The inclusion of eggs and egg yolks plays a crucial role in achieving that perfect gooey center. Eggs provide structure, while the extra yolks enrich the batter, ensuring a moist and decadent result. The all-purpose flour is just enough to hold everything together without making the cake dense.
Using an air fryer offers a unique advantage over traditional baking. The hot circulating air creates a crisp outer layer while keeping the inside soft and gooey. This method significantly reduces cooking time, making it not only a faster option but also a more energy-efficient one. With just 12-15 minutes of cooking, you can achieve that restaurant-quality lava cake right at home.
What Makes It Special
What sets this air fryer chocolate lava cake apart from those you might find in a restaurant or store is its simplicity, freshness, and customization.
1. Fresh Ingredients: Unlike store-bought options that may contain preservatives, this recipe utilizes simple, fresh ingredients that you can easily find in your pantry. You have control over the quality and freshness of what you’re consuming.
2. Customizable Flavors: This recipe serves as a blank canvas. You can experiment with different types of chocolate (like milk chocolate or white chocolate), add a hint of espresso for depth, or even mix in your favorite nuts or fruit for added texture and flavor.
3. Quick and Convenient: Preparing a lava cake in an air fryer is considerably faster than traditional methods. You can whip up a batch in less than half an hour, making it an ideal dessert for unexpected guests or a sweet evening treat after dinner.
4. Perfect Texture: The air fryer creates a unique cooking environment that results in a cake with a crispy exterior and a warm, flowing center—something that can be hard to achieve consistently in a standard oven.
Ingredient Breakdown
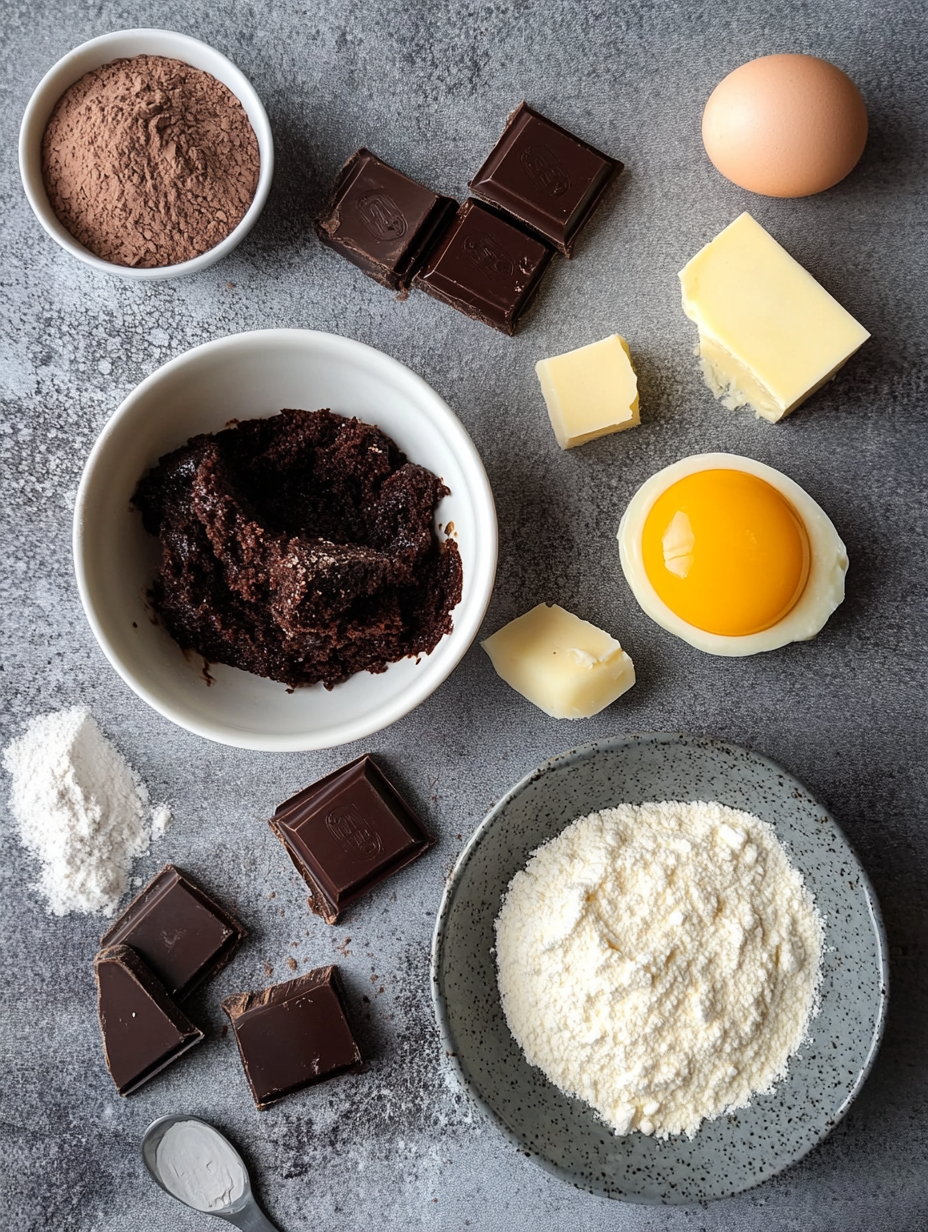
Let’s delve deeper into each ingredient and understand its role in crafting the perfect air fryer chocolate lava cake:
– Dark Chocolate Chips: The star of the show! These chips should be high-quality for the best flavor. If you prefer a sweeter cake, you can opt for semi-sweet chocolate chips. Dark chocolate provides a rich taste that complements the sweetness of the sugar.
– Unsalted Butter: This adds richness and moisture to the cake. Using unsalted butter allows you to have precise control over the salt level in your recipe, enhancing the overall flavor without making it overly salty.
– Powdered Sugar: This ingredient not only sweetens the batter but also dissolves quickly, creating a smooth texture. If you’re looking for a less sugary alternative, you could use coconut sugar, though this might alter the final taste slightly.
– Eggs and Egg Yolks: Eggs provide structure and stability, while the additional yolks contribute fat and richness, which are crucial for a moist cake. For a vegan option, you could experiment with flax eggs (1 tablespoon flaxseed meal mixed with 3 tablespoons water per egg) or aquafaba as a substitute.
– All-Purpose Flour: This ingredient helps bind everything together. If you’re looking for a gluten-free option, you can substitute with a 1:1 gluten-free flour blend, which works well in most baking recipes.
– Vanilla Extract: The addition of vanilla enhances the overall flavor profile, adding warmth and depth to the cake. You can also use almond extract for a different aromatic experience.
– Salt: Just a pinch of salt elevates the taste of chocolate, balancing sweetness and enhancing the overall flavor. If you’re watching your sodium intake, you can reduce the amount or omit it altogether.
By understanding the role each ingredient plays, you can make informed choices and adjustments based on your preferences or dietary needs. This attention to detail is what makes home baking so rewarding and delicious!
Equipment Needed
To whip up your air fryer chocolate lava cake, you’ll need a few essential tools:
– Air Fryer: The star of this recipe! If you don’t yet own one, consider investing in a compact model that fits your kitchen space. Air fryers are versatile and can be used for much more than just baking.
– Microwave-Safe Bowl: For melting the chocolate and butter together. Ensure it’s large enough to hold all the ingredients you’ll be combining later.
– Whisk: A good whisk is invaluable for mixing the ingredients smoothly. If you don’t have one, a fork or spoon can work in a pinch, but a whisk will produce a lighter batter.
– Ramekins: These small, oven-safe dishes are perfect for portioning your lava cakes. Make sure they are greased well to ensure the cakes release easily once cooked.
– Sifting Tool (optional): While not strictly necessary, a sifter can help ensure that your flour and powdered sugar are lump-free, creating a smoother batter.
– Spatula: For folding the flour into the batter without overmixing, a silicone spatula is gentle on the mixture and helps maintain the lightness of the cake.
If you’re looking for affordable alternatives, consider using small oven-safe bowls for baking or repurposing other kitchen gadgets you already have on hand. The most important part is to have fun and enjoy the process of creating this delightful dessert!
Step-by-Step Instructions
1. Preheat the Air Fryer
– WHAT: You’ll start by preheating the air fryer so it reaches the right cooking temperature.
– HOW: Set your air fryer to 350°F (175°C) and allow it to run for about 5 minutes.
– LOOK/SMELL/HEAR: You may hear the fan whirring, and the air fryer will be warm to the touch. No specific smell, but you’ll feel the excitement building for the deliciousness to come!
2. Melt the Chocolate and Butter
– WHAT: Combine dark chocolate chips and unsalted butter for a rich, gooey chocolate base.
– HOW: In a microwave-safe bowl, add 1 cup of dark chocolate chips and 0.5 cup of butter. Microwave in 30-second intervals, stirring in between, until smooth.
– LOOK/SMELL/HEAR: Keep an eye out for the chocolate melting and becoming glossy. You’ll smell the rich aroma of chocolate as it heats, enticing your senses.
3. Whisk the Egg Mixture
– WHAT: Prepare a fluffy mixture of eggs and sugar that will add structure to your cake.
– HOW: In a separate bowl, whisk together 1 cup of powdered sugar, 2 eggs, 2 egg yolks, 1 teaspoon of vanilla extract, and 0.25 teaspoon of salt until well combined.
– LOOK/SMELL/HEAR: The mixture should become a pale yellow color with a slightly thick consistency. You may hear the whisking sound, which should be a rhythmic swirl.
4. Combine Chocolate and Egg Mixtures
– WHAT: Mix the melted chocolate with the egg mixture, ensuring to maintain a smooth, silky texture.
– HOW: Gradually pour the melted chocolate mixture into the egg mixture while stirring constantly. This prevents the eggs from cooking and turning into scrambled eggs.
– LOOK/SMELL/HEAR: The batter will darken, becoming a luscious chocolate color. You should smell the deep, rich aroma of chocolate, a sign that you’re on the right track.
5. Fold in the Flour
– WHAT: Add flour to create the cake’s structure without overmixing.
– HOW: Gently fold in 0.5 cup of all-purpose flour using a spatula until just combined.
– LOOK/SMELL/HEAR: The batter should be thick but still pourable. Avoid overmixing; you want to see a few flour streaks remaining. The smell of chocolate should be prominent!
6. Prepare the Ramekins
– WHAT: Greasing and dusting the ramekins will ensure the cakes release effortlessly after cooking.
– HOW: Grease the insides of four ramekins with butter and dust them lightly with cocoa powder.
– LOOK/SMELL/HEAR: The butter will melt slightly inside the ramekin, and you’ll see a light coating of cocoa powder. You may catch a hint of buttery fragrance.
7. Fill and Cook the Cakes
– WHAT: Pour the batter into the prepared ramekins and cook until the edges are set.
– HOW: Divide the batter evenly among the ramekins, filling each about 3/4 full. Place the ramekins in the air fryer basket and cook for 12-15 minutes.
– LOOK/SMELL/HEAR: After about 10 minutes, peek through the air fryer window; the edges should look firm while the center remains slightly jiggly. A rich chocolate scent will fill your kitchen, making your mouth water!
8. Serve the Cakes
– WHAT: Inverting the ramekins onto plates will reveal your gorgeous lava cakes.
– HOW: Let them sit for 1-2 minutes after cooking, then carefully invert each ramekin onto a plate and gently tap to release the cake.
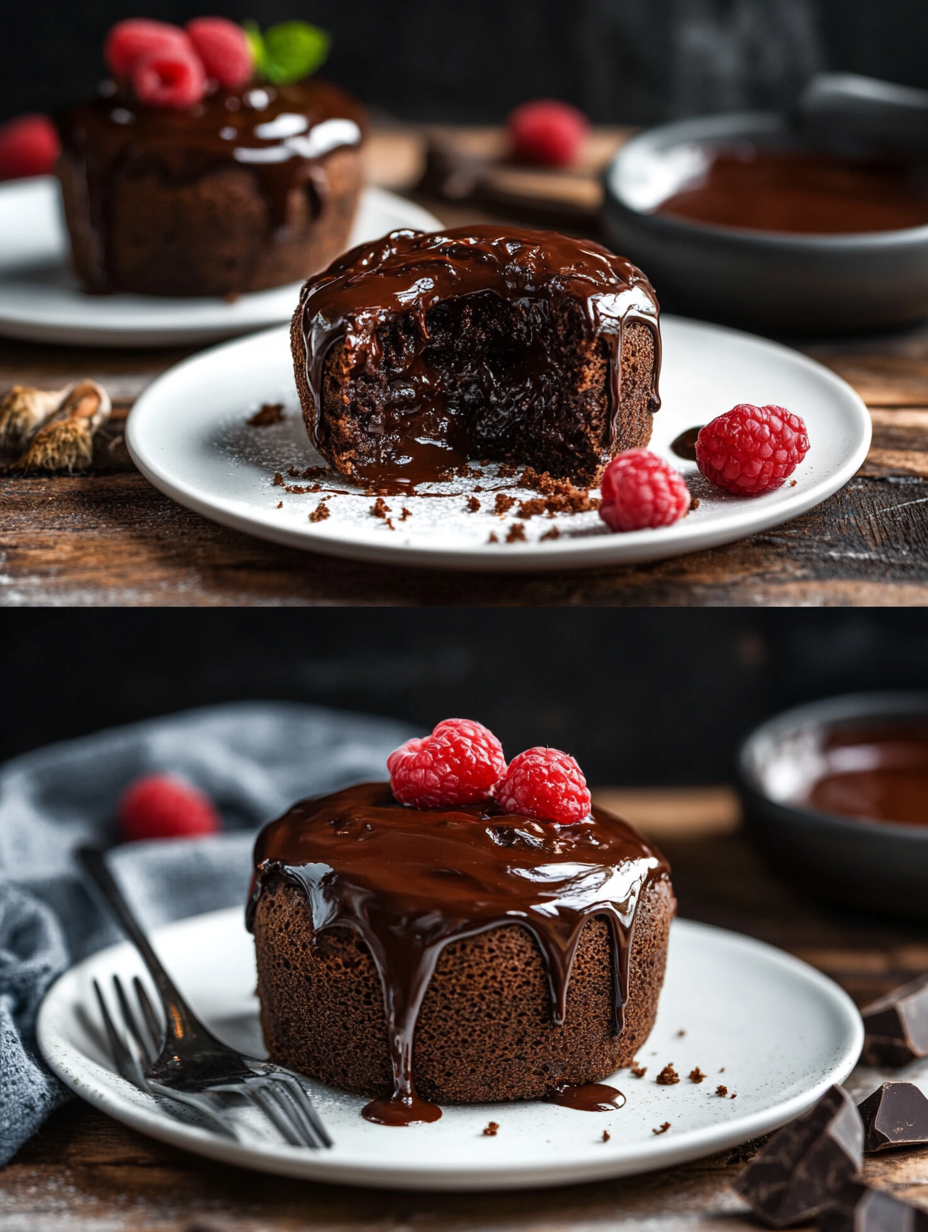
– LOOK/SMELL/HEAR: The cakes should plop out smoothly, and you might hear a gentle tap as they land on the plate. The warm, gooey center will ooze out when you cut into them, releasing an enticing chocolate aroma.
Chef’s Note: Always keep an eye on the cakes in the last few minutes of cooking; every air fryer is different and may have variations in cooking times.
Pro Tips for the Best Results
1. Use High-Quality Chocolate: Opt for good quality dark chocolate with at least 60% cocoa for a richer flavor. Cheaper brands can lead to a waxy texture.
2. Don’t Overmix the Batter: Overmixing can lead to dense cakes instead of the desired light and airy texture. Gently fold in the flour until just combined.
3. Room Temperature Ingredients: Ensure that your eggs and butter are at room temperature before mixing. This promotes better emulsification and a smoother batter.
4. Experiment with Flavor Add-Ins: Consider adding a pinch of espresso powder to enhance the chocolate flavor. Alternatively, a splash of orange liqueur or peppermint extract can add a delightful twist.
5. Chill the Batter: For a more pronounced lava effect, chill the batter in the ramekins for 10-15 minutes before you cook them. This helps the centers stay gooey while the edges firm up.
6. Keep an Eye on Cooking Time: Start checking your cakes a minute or two before the suggested cooking time. Overcooking will result in solid lava cakes instead of the desired melty center.
7. Serve Immediately: These cakes are best served warm. As they cool, the center will continue to set, so have your plates ready and enjoy them right away!
Common Mistakes to Avoid
1. Using Cold Ingredients: Starting with cold eggs or butter can lead to a lumpy batter and uneven baking. Always use room temperature ingredients for the best results.
2. Overcooking the Cakes: Baking them too long will turn your molten center into a solid cake. Keep an eye on the timer and pull them out when the edges are firm but the center remains soft.
3. Skipping the Greasing Step: Failing to grease and dust the ramekins can lead to cakes sticking, making for a messy and disappointing presentation. Always prepare your ramekins properly!
4. Using Low-Quality Chocolate: Using cheap chocolate chips can result in a less flavorful cake with a grainy texture. Opt for a premium brand for the best taste.
5. Not Preheating the Air Fryer: Skipping preheating can alter the cooking time and texture of the cake. Always preheat your air fryer for consistent results.
6. Too Much Flour: Adding too much flour will create a dense cake rather than a light, airy one. Measure accurately, and remember to fold gently!
7. Ignoring the Waiting Time: Rushing to serve the cakes right out of the air fryer can lead to a molten mess. Let them rest for a couple of minutes to set slightly before serving.
Creative Variations
1. Seasonal: Incorporate seasonal flavors by adding pumpkin puree and spices for a fall-inspired lava cake or crushed raspberries for a fresh summer twist. You could also top with a dollop of whipped cream to enhance the seasonal theme.
2. Dietary-Friendly: For gluten-free lava cakes, substitute all-purpose flour with a gluten-free blend. You can also use dairy-free chocolate and butter substitutes to make it vegan-friendly without sacrificing flavor.
3. Gourmet Elevated: Elevate your lava cake by adding a pinch of sea salt on top just before serving or a drizzle of balsamic reduction for a sophisticated touch. Pair with a scoop of homemade ice cream for a restaurant-quality dessert.
4. Quick 15-Minute: For a speedy version, use pre-packaged cake mix as a base. Prepare as directed, then add a few chocolate squares in the center before air frying for a quick and gooey dessert.
5. Kid-Friendly: Let kids customize their cakes by adding mini marshmallows or sprinkles to the batter. Top with colorful frosting or whipped cream to make them more fun!
6. International Twist: Infuse your cakes with flavors from around the world. Try adding a hint of matcha for a Japanese touch or a spoonful of dulce de leche for a Latin American flair. Each variation will bring a unique spin to the classic lava cake.
7. Nutty Addition: Stir in chopped nuts such as hazelnuts or almonds into the batter for added texture and flavor. You can also use nut butter as a filling for an unexpected twist on the classic lava center.
Serving Ideas
When it comes to plating your Air Fryer Chocolate Lava Cake, presentation is key to making this indulgent dessert even more delightful. Here are several ideas to elevate your dessert game:
1. Fresh Berries: Place a handful of mixed berries—such as raspberries, strawberries, or blueberries—next to the lava cake. Their bright colors and tartness will balance the rich chocolate beautifully.
2. Whipped Cream: A dollop of freshly whipped cream on top adds a light and airy texture that complements the dense cake. Consider adding a sprinkle of cocoa powder on the cream for an extra touch.
3. Chocolate Sauce Drizzle: Drizzle a bit of warm chocolate sauce over the cake and plate for an indulgent look. This also enhances the chocolate flavor and makes for a visually appealing presentation.
4. Ice Cream: Serve your lava cake warm alongside a scoop of vanilla bean or salted caramel ice cream. The contrast of temperatures will make every bite memorable.
5. Mint Leaves: For a pop of color and freshness, garnish your plate with a few mint leaves. This not only adds visual appeal but also a refreshing taste that pairs well with chocolate.
For portion sizes, one lava cake per person is typically sufficient, but feel free to adjust based on your guests’ preferences and appetites.
What to Serve With
Pairing your Air Fryer Chocolate Lava Cake with the right accompaniments can transform it into a gourmet experience. Here are some fantastic pairings:
1. Coffee: A rich espresso or a cup of strong coffee enhances the deep chocolate flavor. The bitterness of coffee complements the sweetness of the cake, creating a harmonious balance.
2. Red Wine: A glass of full-bodied red wine, such as Cabernet Sauvignon or Merlot, can elevate the dessert. The wine’s robust flavors match beautifully with chocolate.
3. Milk: Sometimes, the classic choice is the best. A cold glass of milk provides a comforting contrast to the warm, gooey cake and is especially enjoyable for kids and those young at heart.
4. Fruit Sorbet: A scoop of lemon or raspberry sorbet provides a refreshing counterpoint to the richness of the cake. The tartness cuts through the sweetness and cleanses the palate.
5. Chocolate-Covered Almonds: These crunchy treats add texture and another layer of chocolate flavor. They’re perfect for snacking alongside your lava cake.
6. Caramel Sauce: Drizzling a bit of homemade or store-bought caramel sauce over the cake before serving adds a sweet, buttery flavor that pairs wonderfully with chocolate.
Storage Guide
To keep your Air Fryer Chocolate Lava Cake fresh and delicious, proper storage is essential. Here are your best options:
– Container Type: Store your lava cakes in airtight containers to prevent them from drying out. Glass or plastic containers with tight-fitting lids work great.
– Temperature: Keep the cakes in the refrigerator at a consistent temperature of 34°F to 40°F (1°C to 4°C). This helps maintain their moisture and texture.
– Days it Keeps: Properly stored, your lava cakes will last for about 2-3 days in the refrigerator. After that, they may begin to lose flavor and moisture.
– Signs Gone Bad: If you notice any off smells, mold, or a change in texture, it’s best to discard the cakes. Freshness is key to enjoying this dessert at its best.
– How to Refresh: When you’re ready to enjoy your leftover lava cake, pop it in the microwave for 10-15 seconds to warm it up. You’ll restore that gooey center that makes it so delightful!
Freezing Tips
Yes, your Air Fryer Chocolate Lava Cake can be frozen for later enjoyment! Here’s how to do it effectively:
– Portioning: If you want to freeze individual servings, you can do so by placing each ramekin in the freezer. Make sure they are completely cooled before freezing to avoid condensation.
– How Long: Frozen lava cakes can last for up to 3 months. For best quality, consume them within this timeframe.
– Thawing Method: To thaw, transfer the ramekin from the freezer to the refrigerator and let it sit overnight. If you’re short on time, you can also thaw it at room temperature for about 1-2 hours.
Reheating Guide
When it’s time to enjoy your Air Fryer Chocolate Lava Cake again, here’s how to reheat it properly:
– Microwave: Place the ramekin in the microwave and heat for 10-15 seconds. Check if it’s warmed through; if not, continue heating in 5-second intervals. Be careful not to overheat, as you want to keep that gooey center.
– Oven: Preheat your oven to 350°F (175°C). Place the ramekin on a baking sheet and bake for about 5-7 minutes, just until warmed through. This is a great method to keep the texture intact.
– Stovetop: For a unique approach, you can reheat in a double boiler. Fill a pot with a little water, then place the ramekin on top, ensuring it doesn’t touch the water. Heat for about 5-10 minutes, checking regularly.
Nutrition Overview
Each serving of Air Fryer Chocolate Lava Cake is a treat, and knowing what’s in it can help you enjoy it even more. Here’s a quick nutrition overview:
– Calories: Approximately 350 calories per serving, depending on the specific ingredients used.
– Macros per Serving:
– Fat: 20g
– Carbohydrates: 40g
– Protein: 4g
– Health Benefits:
– Dark Chocolate: Rich in antioxidants and may improve heart health.
– Eggs: A great source of high-quality protein and essential nutrients.
– Butter: While it’s high in fat, it also contains fat-soluble vitamins that can benefit your health in moderation.
Indulging in this dessert doesn’t just satisfy your sweet tooth; it provides some key nutrients as well!
Frequently Asked Questions
Q: Can I make the batter ahead of time?
A: Absolutely! You can prepare the batter a few hours in advance and store it in the refrigerator. Just remember to bring it back to room temperature before pouring it into the ramekins and cooking.
Q: Can I use milk chocolate instead of dark chocolate?
A: Yes, you can use milk chocolate, but keep in mind that it will result in a sweeter cake with a different flavor profile. Dark chocolate is recommended for that intense chocolatey goodness.
Q: What if I don’t have ramekins?
A: If you don’t have ramekins, you can use silicone molds or even muffin tins. Just be sure to adjust the cooking time, as they might cook faster.
Q: Can I use gluten-free flour?
A: Yes, you can substitute all-purpose flour with a gluten-free blend. Just ensure that the blend is suited for baking to maintain the right texture.
Q: How do I know when the lava cakes are done?
A: The edges should be set, while the center remains soft and jiggly. A little trial and error may be necessary, but err on the side of undercooking to ensure that molten center!
Q: What if my lava cake doesn’t ooze?
A: If the center doesn’t flow, it may have been cooked too long. Make sure to keep an eye on the time and test for doneness as mentioned above.
Q: Can I add flavors to the batter?
A: Definitely! You can add a splash of espresso, a dash of cinnamon, or even some orange zest for a unique twist on the classic recipe.
Q: Are there any vegan alternatives for this recipe?
A: Yes, you can make vegan chocolate lava cake by using dairy-free chocolate and substituting eggs with flaxseed meal or applesauce. There are several recipes online that cater specifically to vegan diets.
Final Thoughts
Making an Air Fryer Chocolate Lava Cake is not just about dessert; it’s a delightful experience that you can share with family and friends. Remember, the key to a perfect lava cake lies in the timing—keep an eye on it while it cooks to achieve that perfect gooey center.
As you savor each bite, take time to enjoy the rich flavors and the joy of creating something so delicious in your air fryer. So go ahead, indulge a little, and surprise your loved ones with this decadent treat. You deserve it!