Follow Me On Pinterest!
One Pan Lemon Garlic Chicken

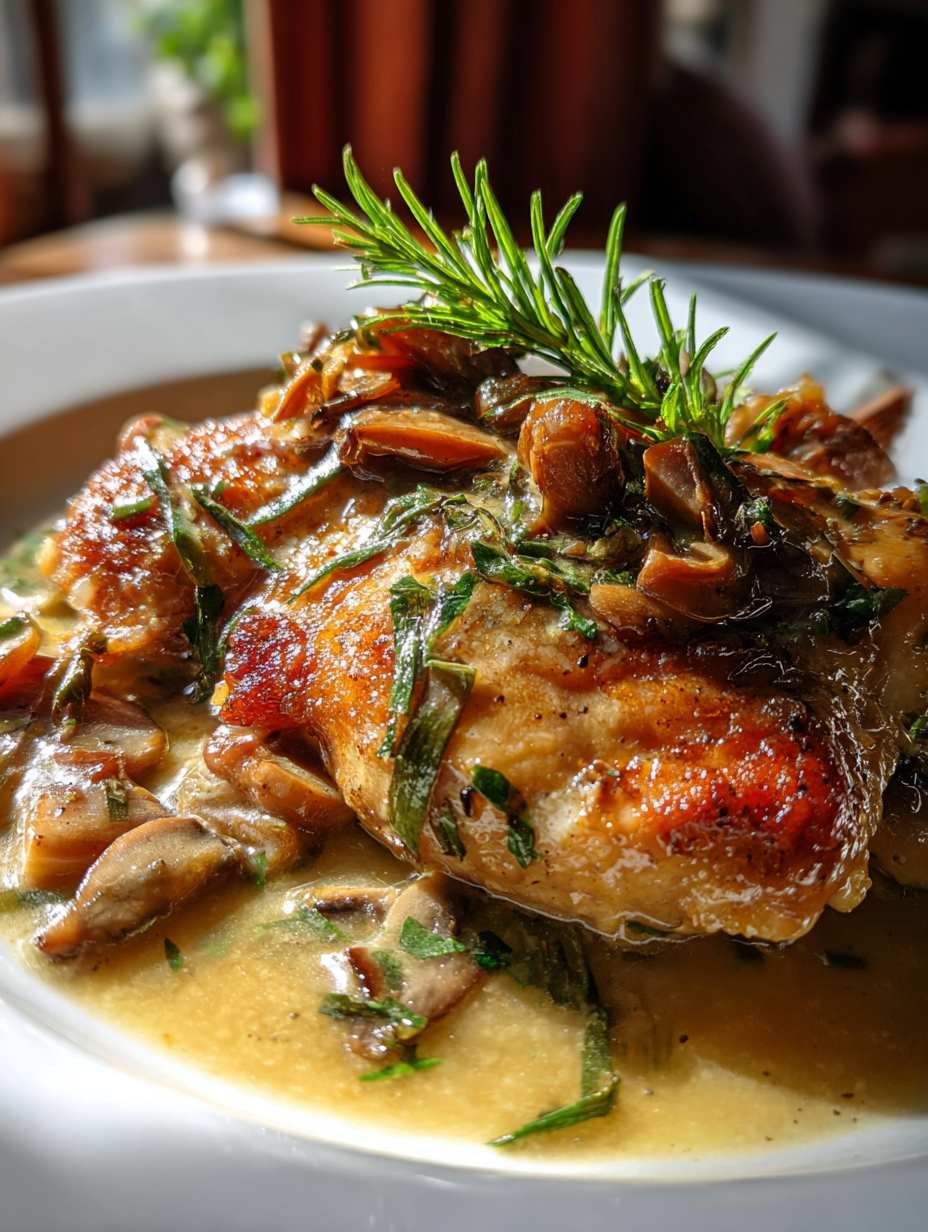
One Pan Lemon Garlic Chicken: A Bright and Zesty Dish to Simplify Your Weeknight Dinner
—
Introduction
I still remember the first time I stumbled upon the recipe for One Pan Lemon Garlic Chicken. It was a rainy Wednesday evening, and the comforting aroma of simmering garlic wafted through my kitchen, wrapping me like a warm blanket. As I sliced into the vibrant lemon and watched the juice trickle down onto the chicken, I felt a spark of excitement — it was as if I had unlocked a secret treasure of flavors.
The bright yellow of the lemons stood in stark contrast to the rich, golden-brown skin of the chicken, glistening under the soft kitchen lights. The sizzle of the chicken hitting the hot pan was a symphony of sound, promising a meal that would not only warm my belly but also lift my spirits. With each bite, the tender, juicy chicken wrapped in a garlicky, zesty glaze filled my mouth, creating a delightful explosion of flavors that danced on my taste buds.
This dish became a staple in my kitchen, not just for its delectable taste but for the ease with which it comes together. The one-pan aspect meant fewer dishes to wash, and the combination of lemon, garlic, and fresh herbs made it feel special without being overly complicated. Whether it was a busy weeknight or a relaxed Sunday dinner, I knew I could always count on this recipe to deliver comfort and delight.
Now, let’s dive into the magic of creating your very own One Pan Lemon Garlic Chicken, a dish that embodies both simplicity and gourmet flair.
—
Why This Recipe Works
The brilliance of this One Pan Lemon Garlic Chicken lies in its balance of flavors and textures. The combination of lemon and garlic is timeless, creating a bright and savory punch that awakens the palate. Lemon provides acidity, which cuts through the richness of the chicken, while garlic adds depth and warmth. Together, they create a sauce that complements the protein beautifully, enhancing its natural flavors rather than overwhelming them.
Achieving the perfect texture is another reason this recipe shines. When you sear the chicken, you develop a golden-brown crust that locks in juices, ensuring that each bite remains succulent and tender. The oven roasting that follows allows the chicken to finish cooking evenly, while the vibrant vegetables absorb the residual flavors from the pan, resulting in a medley of textures — crispy garlic, tender chicken, and roasted veggies that melt in your mouth.
Each ingredient plays a crucial role. Olive oil serves as the base for sautéing, adding a rich flavor and helping to achieve that beautiful crust. Fresh herbs, like parsley or thyme, bring an earthy note that rounds out the dish. The lemon not only brightens the flavors but also tenderizes the chicken thanks to its acidity.
Unlike many generic versions that rely on bottled sauces or excessive seasoning, this recipe encourages you to use fresh, high-quality ingredients, allowing the natural flavors to shine through. The simplicity of the one-pan method means that you don’t need to worry about complex techniques or multiple pots and pans, making it a reliable go-to for any home cook.
—
What Makes It Special
This One Pan Lemon Garlic Chicken stands out for several compelling reasons.
– Freshness and Flavor: Unlike restaurant or store-bought options, this recipe allows you to use fresh ingredients, resulting in a meal that bursts with flavor. You can taste the difference when you use freshly squeezed lemon juice and minced garlic, as opposed to pre-packaged alternatives.
– Customization: One of the joys of making this dish at home is the ability to customize it to your taste. Want to add more veggies? Toss in some asparagus or bell peppers for added color and nutrition. Prefer it spicier? A sprinkle of red pepper flakes can elevate the dish to new heights.
– Cost-Effective: Preparing this meal at home is not only satisfying but also economical. It saves you money compared to dining out, and you can make a generous portion that will leave you with leftovers for lunch the next day.
– Surprising Elements: The secret to elevating this dish lies in the use of fresh herbs and a touch of white wine (if desired). These ingredients add a layer of complexity that you might not expect, transforming a simple weeknight dinner into something truly special.
—
Ingredient Breakdown
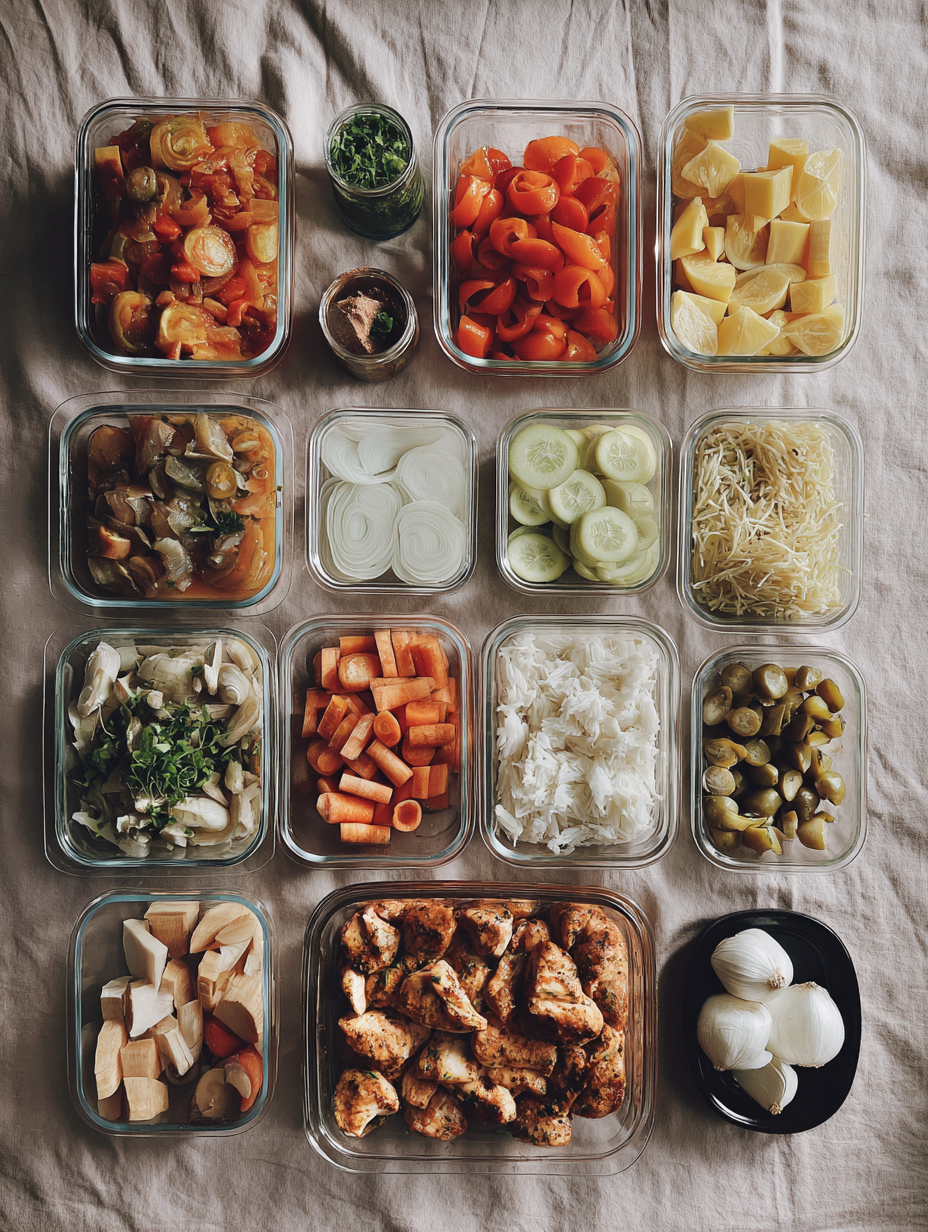
To make One Pan Lemon Garlic Chicken, you’ll need the following ingredients, each playing a crucial role in the overall flavor and texture of the dish:
1. Bone-in, Skin-on Chicken Thighs (4 pieces): These offer a juicy, flavorful base for the dish. The skin crisps up beautifully during cooking, providing a delicious contrast to the tender meat. The thighs are more forgiving than chicken breasts, remaining moist even if slightly overcooked.
2. Garlic (4-6 cloves): Fresh garlic is a must! It infuses the dish with a fragrant, savory aroma and flavor. The quantity can be adjusted based on your personal taste; feel free to add more for a stronger garlic punch.
3. Lemon (2 medium): You will need both the zest and juice. The zest brightens the dish while the juice adds acidity that balances the richness of the chicken. Using fresh lemons is key for optimal flavor.
4. Olive Oil (3 tablespoons): This helps achieve that beautiful golden crust on the chicken and adds richness. Use a high-quality extra virgin olive oil for the best taste.
5. Fresh Herbs (such as parsley or thyme, about ¼ cup chopped): Fresh herbs elevate the dish, adding a pop of color and freshness. You can use dried herbs in a pinch but adjust the quantity to about 1 tablespoon, as dried herbs are more concentrated.
6. Salt and Pepper (to taste): Essential for enhancing the flavors of the chicken and vegetables. Don’t be shy; seasoning well is crucial for a delicious outcome.
Substitution Options:
– Dairy-Free: This recipe is naturally dairy-free; just ensure your chicken broth (if you use it) is also dairy-free.
– Gluten-Free: The recipe is gluten-free as written. Always check labels if using packaged ingredients like broth.
– Vegan Option: Substitute chicken with pressed tofu or tempeh and adjust the cooking time accordingly. Use vegetable broth for added flavor.
Specialty Ingredients:
You can find fresh herbs, lemons, and high-quality olive oil at your local grocery store or farmer’s market. If you’re looking for organic options, many health food stores offer a range of organic produce and oils.
—
Equipment Needed
To create your One Pan Lemon Garlic Chicken, you’ll need a few essential tools:
– Large Skillet or Oven-Safe Pan: A sturdy skillet is crucial for searing the chicken and then transferring it to the oven. Choose a heavy-bottomed pan that can withstand high heat, such as cast iron or stainless steel.
– Tongs: These are perfect for flipping the chicken without piercing the skin, ensuring that all the delicious juices stay locked inside.
– Cutting Board and Knife: A sharp knife and a reliable cutting board are essential for chopping garlic, herbs, and lemons efficiently.
– Measuring Spoons: Precise measurements help in achieving the perfect balance of flavors, especially for oil and seasonings.
Optional tools could include a zester for getting the zest off the lemons easily, or a microplane for grating garlic. While not essential, they can make the prep work a bit easier.
If you’re looking for affordable alternatives, consider using a regular frying pan and standard kitchen utensils if you don’t have specialized tools. Just ensure that your frying pan can go in the oven if you choose not to use an oven-safe one.
Step-by-Step Instructions
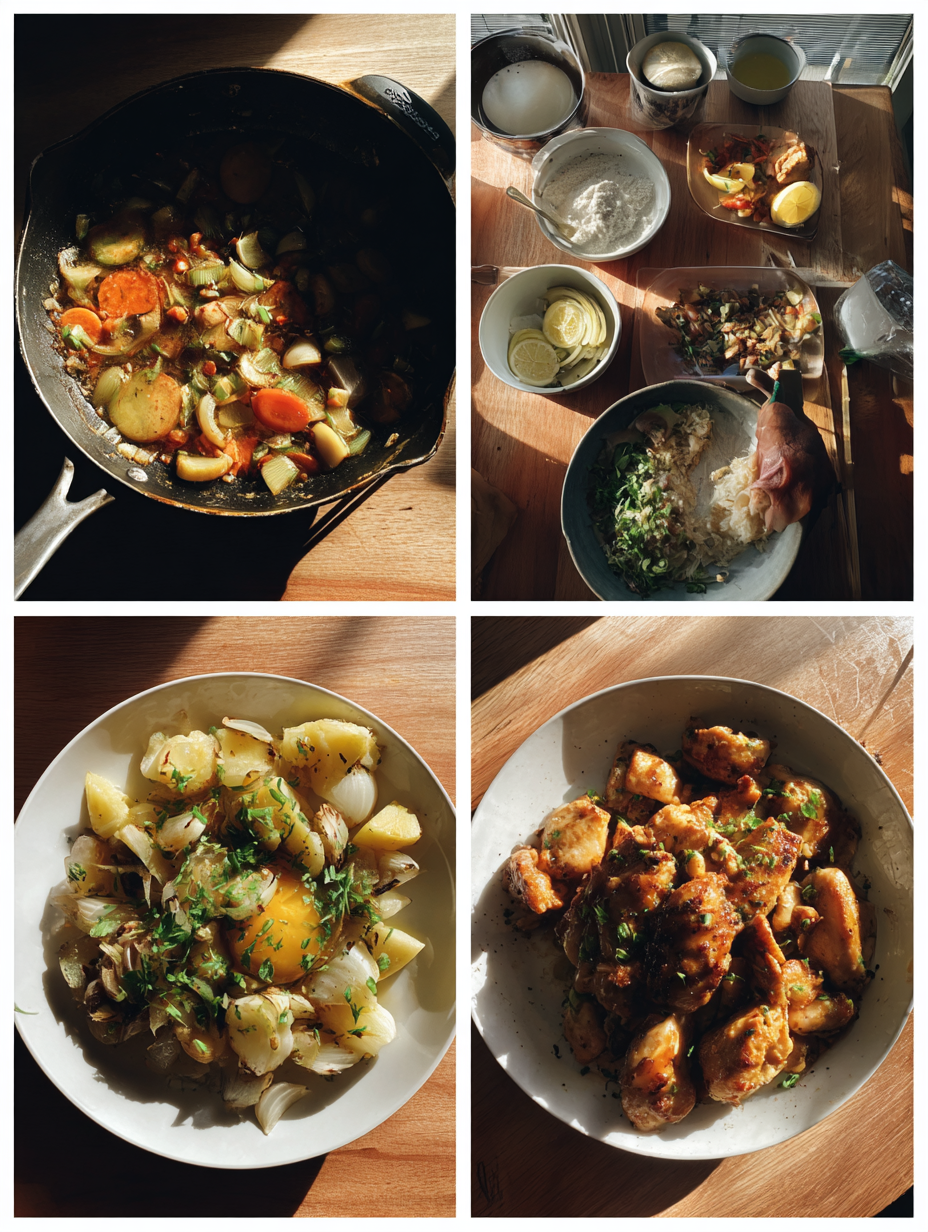
1. Prep the Ingredients: Start by gathering all your ingredients. You will need 4 bone-in, skin-on chicken thighs, 2 lemons, 4 cloves of garlic, 1 tablespoon of olive oil, and salt and pepper. Zest one lemon and then cut both lemons in half, squeezing the juice into a bowl, removing any seeds. This step is crucial for maximizing the flavor of your chicken. Chef’s Note: Fresh lemon juice is best; bottled juice lacks the bright, fresh flavor that complements the garlic.
2. Season the Chicken: Pat the chicken thighs dry with paper towels and place them in a mixing bowl. Season generously with salt and pepper, then drizzle with half of the lemon juice and the zest. Rub the mixture into the skin and meat, ensuring each piece is well-coated. You should hear a satisfying sound as the seasoning adheres to the chicken. Let it marinate for about 15 minutes at room temperature. Chef’s Note: This step enhances the flavor and allows the chicken to cook more evenly.
3. Sear the Chicken: Heat a large, oven-safe skillet over medium-high heat. Add 1 tablespoon of olive oil and let it heat until shimmering. Carefully place the chicken thighs skin-side down in the skillet. You should hear a sizzling sound as they hit the pan, which indicates that you’re getting a nice sear. Cook for about 5-7 minutes without moving them until the skin is golden brown. Check the chicken’s color; it should be a deep brown, creating a beautiful crust. Chef’s Note: Avoid overcrowding the pan, which can lead to steaming instead of searing.
4. Add Garlic and Remaining Ingredients: Once the chicken is nicely browned, flip the thighs over. Add 4 cloves of minced garlic to the pan and sauté for about 1 minute until fragrant. You should smell the garlic’s aroma filling the kitchen, which signals that it’s time to add the rest of the ingredients. Squeeze in the remaining lemon juice and add the lemon halves around the chicken. Chef’s Note: Don’t let the garlic burn; it should be slightly golden before you move on to the next step.
5. Roast in the Oven: Preheat your oven to 400°F (200°C) if you haven’t already. Transfer the skillet to the oven and roast for about 25-30 minutes. The chicken is done when it reaches an internal temperature of 165°F (75°C). You’ll see the skin bubbling and crisping around the edges. If you prefer extra crispy skin, broil for an additional 2-3 minutes at the end. Chef’s Note: Using a meat thermometer ensures perfect doneness without drying the chicken.
6. Rest Before Serving: Once out of the oven, transfer the chicken to a plate and let it rest for at least 5 minutes. This step is vital as it allows the juices to redistribute throughout the meat, ensuring each bite is juicy and tender. You should see the juices pooling slightly under the chicken, indicating it’s ready for slicing. Chef’s Note: Use this time to prepare any sides or a simple salad to accompany your chicken.
Pro Tips for the Best Results
1. Use Bone-In Chicken: Bone-in chicken thighs retain moisture and flavor better than boneless cuts. The bone helps distribute heat evenly, resulting in juicier meat.
2. Don’t Skip the Resting Period: Allowing the chicken to rest after cooking is crucial for maximizing juiciness. This step prevents the juices from running out when you cut into it, ensuring a succulent experience.
3. Searing is Key: A proper sear creates a flavorful crust and seals in moisture. If your chicken isn’t sizzling when placed in the pan, it indicates that the pan isn’t hot enough, leading to steaming rather than browning.
4. Zest Before Juicing: Zesting your lemons before juicing maximizes flavor. The zest contains essential oils that brighten the dish, providing a fragrant citrus aroma that enhances the overall taste.
5. Monitor Oven Temperature: Keep an oven thermometer handy; sometimes, the oven’s built-in thermostat can be off. Cooking at the right temperature ensures even cooking and prevents drying out the chicken.
6. Experiment with Fresh Herbs: Adding fresh herbs like rosemary or thyme during the roasting process can elevate the flavor profile. Their aromatic qualities complement the lemon and garlic beautifully.
7. Use High-Quality Olive Oil: A good-quality olive oil not only adds flavor but also helps achieve a perfect sear. Opt for extra virgin olive oil for the best taste and health benefits.
8. Save the Drippings: Don’t discard the drippings left in the pan after cooking. They can be deglazed with a bit of chicken broth or white wine to create a quick sauce that adds depth to your dish.
Common Mistakes to Avoid
1. Using Boneless Chicken: Many beginners default to boneless chicken, which can lead to a dry and bland dish. Bone-in chicken thighs are more forgiving and flavorful, giving you a better end result.
2. Skipping the Marination: Not allowing the chicken to marinate can result in bland flavors. Marinating even for a short time enhances the chicken’s taste; the acids in lemon juice help tenderize the meat.
3. Not Preheating the Skillet: Placing chicken in a cold skillet will lead to steaming rather than searing. Always ensure your skillet is hot enough to create that sought-after crust.
4. Overcrowding the Pan: Trying to cook too much chicken at once can lead to uneven cooking and steaming. Cook in batches if necessary to ensure each piece gets the proper sear.
5. Ignoring Internal Temperature: Relying solely on cooking time rather than checking the internal temperature can result in undercooked or overcooked chicken. Always use a meat thermometer for accuracy.
6. Cutting Into Chicken Too Soon: Cutting into the chicken immediately after cooking allows the juices to escape, leading to dryness. Let it rest to maintain its moisture and tenderness.
7. Forgetting to Deglaze: Not utilizing the flavorful bits stuck to the pan can waste potential flavor. Deglaze with broth or wine to create a sauce that complements the chicken beautifully.
Creative Variations
1. Seasonal Variation: Herb-Infused Lemon Garlic Chicken – Add a handful of fresh herbs like parsley, thyme, or cilantro to the marinade. Their freshness will brighten the dish and bring out the seasonal flavors.
2. Dietary-Friendly Version: Keto Lemon Garlic Chicken – Replace the chicken thighs with skin-on chicken breasts and use coconut oil instead of olive oil. The result is a leaner, keto-friendly dish that still packs plenty of flavor.
3. Gourmet Elevated Version: Truffle Lemon Garlic Chicken – Drizzle a bit of truffle oil over the chicken right before serving, and garnish with shaved truffles or wild mushrooms. This luxurious twist adds depth and an earthy aroma that elevates the dish to gourmet status.
4. Quick 15-Minute Version: Skillet Lemon Garlic Chicken – Use thinly sliced chicken breasts for a faster cooking time. Sear for about 3-4 minutes per side and follow the same lemon-garlic preparation. It’s perfect for those busy weeknights.
5. Kid-Friendly Version: Lemon Garlic Chicken Bites – Cut chicken into bite-sized pieces before marinating and roasting. Serve with a side of honey mustard or ranch for dipping, making it more appealing to children.
6. International Twist: Mediterranean Lemon Garlic Chicken – Incorporate olives, cherry tomatoes, and capers into the pan during the last 10 minutes of roasting. This adds a Mediterranean flair and vibrant colors to your dish.
Serving Ideas
When it comes to presenting your One Pan Lemon Garlic Chicken, the key is to make it as visually appealing as it is delicious. Here are some beautiful plating ideas to elevate your dish:
1. Rustic Charm: Serve the chicken on a wooden cutting board surrounded by roasted lemon wedges and fresh herbs like thyme or rosemary. This rustic look invites a cozy, home-cooked feel.
2. Elegant Plating: Use a large white plate to showcase the chicken as the star. Place it in the center and arrange colorful sides—such as vibrant green asparagus or roasted cherry tomatoes—around it. Finish with a sprinkle of microgreens for a fresh touch.
3. Layered Presentation: Stack the chicken thighs slightly on top of one another and drizzle with the garlic-lemon sauce. Add a side of fluffy couscous garnished with parsley to provide a nice textural contrast. This approach adds height to your dish, making it more visually interesting.
4. Bowl Style: For a more casual presentation, serve the chicken, veggies, and sauce in a deep bowl. Top with a dollop of creamy yogurt or tzatziki and a squeeze of fresh lemon juice for a pop of brightness. This method is perfect for family-style meals.
5. Garnish Ideas: Don’t forget to garnish! A sprinkle of crushed red pepper flakes can add a lovely pop of color and a hint of spice. Fresh basil or dill also works wonders, adding both flavor and a beautiful green hue.
Remember, portion sizes should generally be around 4-6 ounces of chicken per person, allowing room for sides and garnishes that complement your gorgeous presentation. As you set your table, consider coordinating colors and textures to create a delightful dining experience!
What to Serve With
Pairing your One Pan Lemon Garlic Chicken with complementary dishes can transform your meal into a culinary adventure. Here are some suggestions that will harmonize beautifully with your main dish:
1. Herbed Quinoa Salad: This light, fluffy salad made with cooked quinoa, diced cucumbers, cherry tomatoes, and a lemon vinaigrette offers a refreshing contrast to the savory chicken. The nuttiness of quinoa balances the dish while adding texture.
2. Garlic and Herb Roasted Potatoes: Roasted potatoes seasoned with garlic and rosemary complement the lemony flavors of the chicken and add a satisfying crunch. Their golden crust and fluffy interior make them the perfect sidekick.
3. Sautéed Green Beans with Almonds: Bright green beans sautéed with slivers of toasted almonds add both color and a delightful crunch. Their slight bitterness balances the rich flavors of the chicken, creating a vibrant plate.
4. Crisp Caesar Salad: The crisp, cool romaine lettuce paired with a zesty Caesar dressing will cut through the richness of the chicken, creating a delightful contrast. Top it with homemade croutons for added texture.
5. Lemon Sorbet: For dessert, a light lemon sorbet will refresh your palate after the savory meal. Its citrusy sweetness beautifully ties back to the lemon in the chicken, making it a perfect finish to your dinner.
6. Chilled White Wine: A chilled Sauvignon Blanc or Pinot Grigio pairs wonderfully, enhancing the citrus notes of the dish while complementing the herbaceous elements. The acidity of the wine will balance the flavors, making each bite more delightful.
Storage Guide
To ensure your One Pan Lemon Garlic Chicken stays fresh for future meals, proper storage is essential. Here’s how to store your leftovers effectively:
– Container Type: Use a glass container with an airtight lid to store your chicken. Glass helps preserve flavor and prevents leaks, while airtight containers keep moisture at bay.
– Temperature: Store your chicken in the refrigerator at or below 40°F (4°C) within two hours of cooking for optimal freshness.
– Storage Duration: Properly stored, the chicken will last for 3-4 days. Be sure to keep an eye on it; any longer and you risk compromising flavor and texture.
– Signs of Spoilage: Look for off smells, a slimy texture, or discoloration. If you notice any of these signs, it’s best to err on the side of caution and discard the chicken.
– Refreshing Before Serving: To revive your leftovers, reheat them gently on the stove with a splash of chicken broth or water. This will help restore moisture and prevent drying out, ensuring your meal is just as delicious as when it was freshly cooked.
Freezing Tips
Yes, your One Pan Lemon Garlic Chicken freezes beautifully! Here are some straightforward steps to ensure it retains its quality:
– Portioning: Divide the chicken into single or family-sized portions, depending on your needs. This makes it easier to thaw only what you need.
– Wrapping Method: Wrap each portion tightly in plastic wrap, and then place it in a freezer-safe bag or container. Make sure to remove as much air as possible to prevent freezer burn.
– Labeling: Clearly label each package with the date and contents. This will help you keep track of how long it’s been in the freezer.
– Freezer Duration: When stored properly, it can last in the freezer for up to 4 months without significant loss of quality.
– Quality After Thawing: While the chicken will retain its flavor and moisture, you may notice a slight change in texture. This is normal, but reheating gently will help restore some moisture.
– Best Thawing Method: For best results, thaw your chicken overnight in the refrigerator rather than using a microwave, as this helps maintain its texture and flavor.
Reheating Guide
Reheating your One Pan Lemon Garlic Chicken correctly can make all the difference in enjoying those tasty leftovers. Here’s how to do it:
– Microwave: Place the chicken in a microwave-safe dish, adding a splash of broth or water to keep it moist. Heat on medium power for 2-3 minutes, checking periodically. Stir halfway through to ensure even heating, and prevent it from drying out.
– Oven: Preheat your oven to 350°F (175°C). Place the chicken in an oven-safe dish, covering it with aluminum foil to trap moisture. Heat for about 15-20 minutes, or until warmed through.
– Stovetop: Heat a non-stick skillet over medium-low heat and add a couple of tablespoons of chicken broth. Add the chicken and cover the pan, letting it heat for about 5-7 minutes. The broth will help maintain moisture and flavor.
– Restoring Texture and Flavor: Regardless of your reheating method, adding a splash of fresh lemon juice or a pat of butter just before serving can help restore the dish’s original brightness and richness.
Nutrition Overview
Your One Pan Lemon Garlic Chicken is not only delicious but also packed with nutrition. Here’s a quick overview of its approximate nutritional values per serving:
– Calories: 350
– Protein: 30g
– Carbohydrates: 6g
– Fat: 20g
– Fiber: 1g
– Sugar: 0g
This dish is rich in lean protein from the chicken, which supports muscle repair and keeps you feeling full longer. The garlic is not just flavorful; it also has antibacterial properties and may boost your immune system. Lastly, the lemons provide a healthy dose of vitamin C, essential for skin health and immune function. Enjoying this dish not only satisfies your taste buds but also contributes positively to your health!
Frequently Asked Questions
Q: Can I use chicken breasts instead of thighs?
A: Absolutely! While chicken thighs are juicier and more forgiving when cooked, chicken breasts will work as well. Just be cautious not to overcook them, as they can dry out more easily. Adjust the cooking time down by about 5-10 minutes.
Q: Can I make this dish gluten-free?
A: Yes, you can easily make this dish gluten-free! Just ensure that any chicken broth or stock you use is labeled gluten-free. Fresh ingredients like garlic, lemon, and herbs are naturally gluten-free, so you’re in the clear.
Q: How can I make this dish dairy-free?
A: This recipe is naturally dairy-free. If you want to add a creamy element, consider using a dairy-free yogurt or a splash of coconut cream after cooking. Just be sure to check your labels!
Q: How long does it take to cook the chicken?
A: Cooking time may vary depending on the size of your chicken pieces. Generally, bone-in thighs take about 25-30 minutes at 375°F (190°C) until they reach an internal temperature of 165°F (74°C). Always use a meat thermometer for accuracy.
Q: Can I add vegetables to the pan?
A: Yes, adding seasonal vegetables like bell peppers, zucchini, or carrots will enhance the dish. Just be sure to cut them into similar sizes for even cooking. Add them to the pan during the last 15 minutes of cooking.
Q: Can I use dried herbs instead of fresh?
A: Yes, you can substitute dried herbs for fresh ones, but remember that dried herbs are more potent. Use about one-third the amount of dried herbs compared to fresh.
Q: What kind of pan should I use?
A: A large, heavy-duty skillet or a cast-iron pan works best for this recipe. These types of pans distribute heat evenly and help achieve a nice sear on the chicken.
Q: Can I prepare this dish ahead of time?
A: Yes! You can marinate the chicken in the garlic and lemon mixture a few hours ahead of time or even overnight in the refrigerator. This will deepen the flavors and make for a quick cook time when you’re ready to serve.
Final Thoughts
As you prepare to make your One Pan Lemon Garlic Chicken, remember that the quality of your ingredients will shine through in the final dish. Using fresh herbs and bright lemons will elevate the flavors, making it a standout meal for any occasion.
I genuinely hope you enjoy this recipe as much as I do! It’s perfect for a family dinner or a simple weeknight meal, and the joy of sharing it with loved ones is unparalleled. I can’t wait to hear how yours turns out!
So gather your ingredients, embrace the aroma of garlic and lemon, and let this dish become a favorite in your culinary repertoire.