Follow Me On Pinterest!
Chocolate Hazelnut No Bake Cheesecake

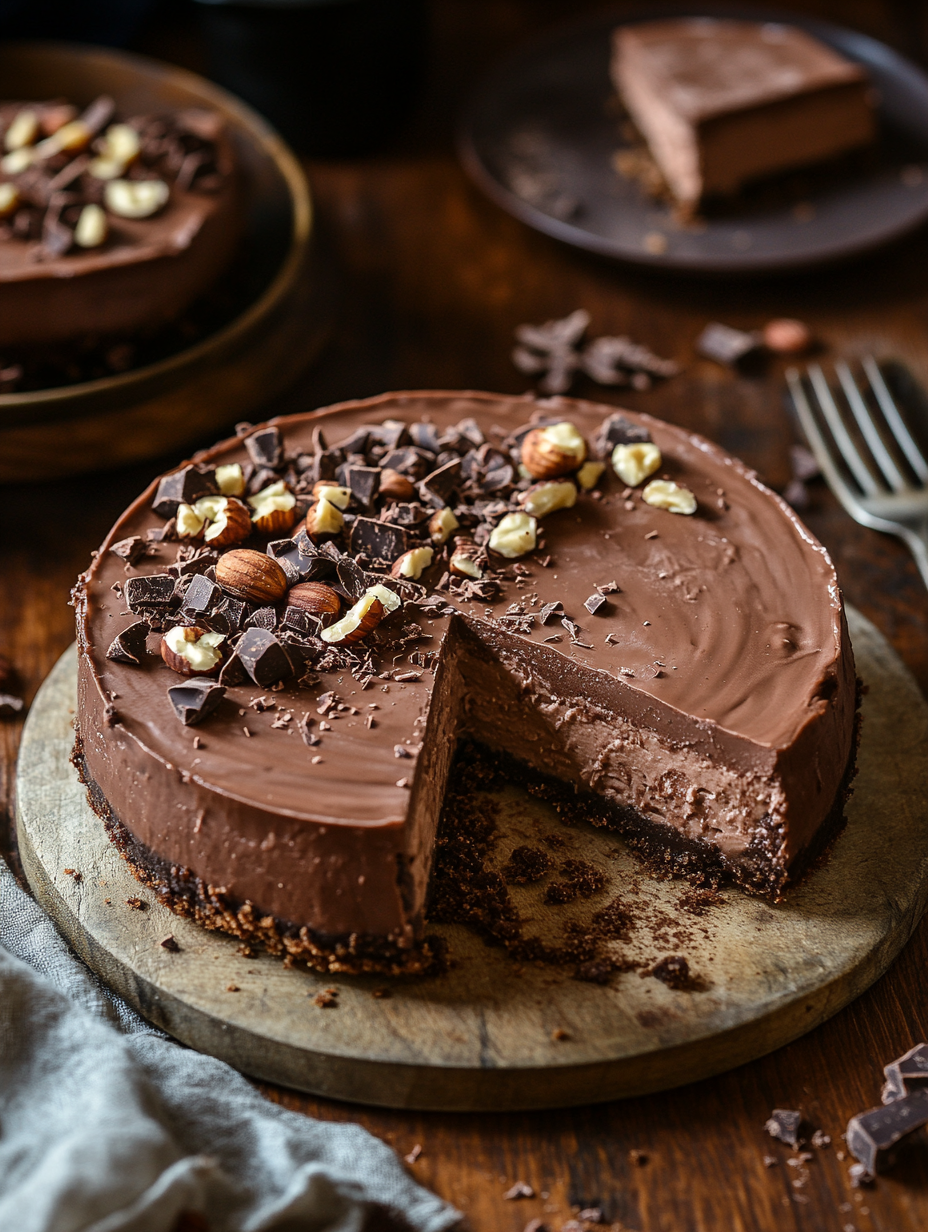
Chocolate Hazelnut No Bake Cheesecake: Indulge Without the Oven
Introduction
Picture yourself on a lazy Sunday afternoon, the sun streaming through your kitchen window, casting a warm glow over the countertop. You’ve had a long week, and the idea of baking a cake feels more like a chore than a treat. That’s when your eyes land on a jar of hazelnut spread and a pack of chocolate cookies sitting innocently in your pantry. A smile creeps across your face as you remember that decadent Chocolate Hazelnut No Bake Cheesecake you stumbled upon a few weeks ago.
This cheesecake became a favorite in your home not just for its rich, creamy texture but also because it evokes a sense of nostalgia. You recall the first time you made it for a gathering of friends. As you served slices, the combination of chocolate and hazelnut flavors filled the room with a comforting aroma that wrapped around everyone like a warm hug. It was an instant hit, sparking laughter and conversations that continued long into the evening.
The beauty of this no-bake dessert is that it allows you to create something special without the fuss of an oven. The silky cream cheese blended with the sweet, nutty notes of hazelnut spread creates a luxurious filling that is perfectly complemented by the crunchy chocolate cookie crust. Each bite is a harmonious blend of crunch and creaminess that transports you to a world of indulgence. This cheesecake isn’t just a dessert; it’s a celebration of flavors and memories, and it has earned its place in your recipe collection.
Why This Recipe Works
This Chocolate Hazelnut No Bake Cheesecake is a triumph of simplicity and flavor, making it a go-to dessert for both novice and experienced bakers alike. The technique is straightforward, relying on cool ingredients and minimal hands-on time, which is ideal for those busy days when you want something impressive without the hassle of baking.
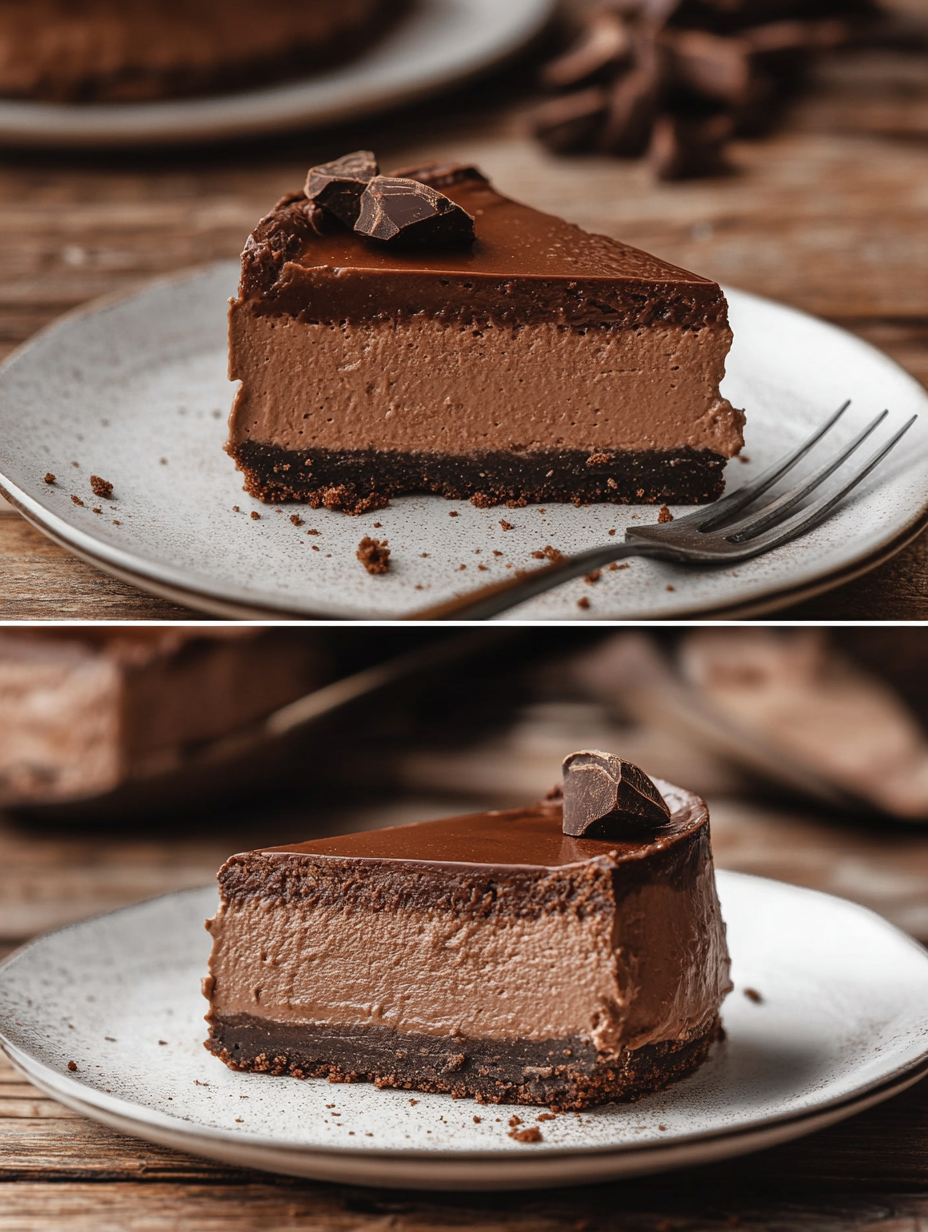
The crust is made from crushed chocolate cookies mixed with melted unsalted butter, creating a sturdy base that provides a delightful contrast to the rich filling. By using heavy cream whipped to soft peaks, you achieve a light and airy texture that balances the cream cheese’s density, which is key for a successful no-bake cheesecake.
Moreover, the hazelnut spread brings a luscious, nutty flavor that complements the chocolate perfectly, while the addition of vanilla extract enhances the overall taste profile. The combination of these ingredients not only ensures a creamy texture but also locks in a depth of flavor that makes each bite incredibly satisfying.
The science behind this recipe is rooted in the balance of sweet and savory, along with the creamy and crunchy elements that keep your taste buds intrigued. It’s a dessert that checks all the boxes: it’s quick to prepare, rich in flavor, and a guaranteed crowd-pleaser.
What Makes It Special
What sets this Chocolate Hazelnut No Bake Cheesecake apart from store-bought options or restaurant desserts? Here are a few standout qualities:
– Homemade Goodness: You control the ingredients, ensuring that everything is fresh and tailored to your taste. Unlike mass-produced desserts, you can enhance or adjust the sweetness and textures to your liking.
– No Baking Required: The convenience of a no-bake cheesecake means you can whip it up anytime without worrying about preheating the oven or timing the baking process. It’s perfect for those spontaneous dessert cravings or last-minute gatherings.
– Flavor Depth: The combination of chocolate cookies and hazelnut spread creates a unique flavor profile that most store-bought cheesecakes lack. The richness of the chocolate pairs beautifully with the nutty undertones of hazelnut, making it a luxurious treat.
– Visual Appeal: This cheesecake is not just delicious; it’s also visually stunning. Topped with chopped hazelnuts, it adds a touch of elegance that makes it suitable for any occasion—from casual family dinners to more formal celebrations.
Ingredient Breakdown

Creating this Chocolate Hazelnut No Bake Cheesecake involves a blend of simple yet essential ingredients. Let’s dive into what each component brings to the table:
– Hazelnuts: These nutty wonders are rich in flavor and provide a delightful crunch. They are packed with healthy fats and nutrients. If you have nut allergies, you can substitute with sunflower seeds or simply omit them.
– Chocolate Cookies: The base of this cheesecake relies on crushed chocolate cookies, which lend a deep chocolate flavor and a satisfying crunch. If you prefer a gluten-free option, feel free to use gluten-free chocolate cookies.
– Unsalted Butter: Butter acts as a binding agent for the crust, ensuring that the cookie crumble sticks together. Using unsalted butter allows you to control the overall saltiness of the dessert.
– Cream Cheese: The star of the show! Cream cheese contributes to the cheesecake’s creamy texture and rich flavor. It’s crucial to use softened cream cheese to avoid lumps in your filling. For a lighter option, you can use Neufchâtel cheese, which has less fat.
– Sugar: A touch of sugar is needed to balance the flavors and enhance sweetness. Adjust this to your preference, especially if you’re using a sweet hazelnut spread.
– Heavy Cream: This ingredient is essential for achieving that light, airy texture. Whipping the cream adds volume and prevents the cheesecake from being too dense. Coconut cream or a dairy-free whipping cream can be used as substitutes for a dairy-free version.
– Hazelnut Spread: This glorious ingredient is what infuses the cheesecake with that rich hazelnut flavor. While Nutella is a popular choice, there are many artisan or organic brands available that offer various flavors. If you need a nut-free version, look for sunflower seed spreads that mimic the flavor.
– Vanilla Extract: A splash of vanilla extract enhances the overall flavor profile, adding warmth and depth to the cheesecake. You can also use vanilla bean paste for a more intense flavor.
By understanding each ingredient’s role, you can easily customize this cheesecake to fit your dietary preferences or ingredient availability. So, whether you’re entertaining guests or treating yourself, this recipe is a reliable way to create a dessert that’s as delicious as it is simple to make.
Equipment Needed
To make your Chocolate Hazelnut No Bake Cheesecake, you’ll need a few essential tools to streamline the process:
– 9-inch Springform Pan: This pan is crucial for creating a beautiful cheesecake that can be easily removed without damaging the sides. If you don’t have a springform pan, you can use a regular pie dish, but it will be a bit trickier to serve.
– Mixing Bowls: Having a couple of mixing bowls will allow you to prepare your crust and filling separately. Opt for glass or stainless steel for easy cleanup.
– Electric Mixer: A hand or stand mixer makes quick work of beating the cream cheese and whipping the cream. If you don’t have an electric mixer, a whisk and some elbow grease will do, but it will take longer.
– Spatula: A rubber spatula is perfect for folding in the whipped cream without deflating it. It’s also handy for smoothing the filling over the crust.
– Food Processor: While optional, a food processor makes crushing the cookies a breeze. If you don’t have one, you can place the cookies in a zip-top bag and crush them with a rolling pin.
Having the right tools not only simplifies the process but also ensures that your cheesecake turns out perfectly every time. Plus, many of these items are versatile enough to be used in other recipes, making them worth the investment.
Step-by-Step Instructions
1. Prepare the Crust
Start by taking your chocolate cookies and crushing them into fine crumbs. You can use a food processor or place them in a zip-top bag and crush them with a rolling pin. Add the melted butter to the cookie crumbs and mix until everything is evenly coated.
*What to look for:* The mixture should have a sandy texture and hold together when pressed.
*Tip:* If you prefer a thicker crust, increase the amount of cookies to 1.5 cups.
2. Form the Base
Using your fingers or the back of a measuring cup, press the cookie mixture firmly into the bottom of a 9-inch springform pan. Make sure it’s even and compact.
*What to look for:* The crust should be smooth and hold its shape when you remove the pan’s sides later.
*Tip:* To avoid sticking, line the bottom of the pan with parchment paper.
3. Cream the Cheese
In a separate mixing bowl, beat the softened cream cheese with the sugar using an electric mixer on medium speed. Continue until the mixture is smooth and creamy, about 2-3 minutes.
*What to look for:* The cream cheese should lose its lumps and have a silky texture.
*Tip:* For a tangier flavor, you could use a blend of cream cheese and mascarpone.
4. Add Flavor
Next, add the hazelnut spread and vanilla extract to the cream cheese mixture. Blend until everything is fully incorporated, scraping down the sides of the bowl as needed.
*What to look for:* The mixture should be uniform in color and whipped up to a creamy consistency.
*Tip:* For an extra layer of flavor, you can add a pinch of salt to balance the sweetness.
5. Whip the Cream
In a separate bowl, whip the heavy cream until stiff peaks form. This usually takes about 3-5 minutes at high speed.
*What to look for:* The cream should hold its shape and be glossy but not grainy.
*Tip:* For a chocolate twist, you can add cocoa powder to the cream while whipping.
6. Combine Mixtures
Gently fold the whipped cream into the cream cheese mixture using a spatula. Be careful not to deflate the whipped cream; you want to retain that light, airy texture.
*What to look for:* The mixture should be light and fluffy, with no streaks of white remaining.
*Tip:* Use a figure-eight motion to fold, which helps incorporate air without losing volume.
7. Assemble and Chill
Pour the cheesecake filling over your prepared crust, smoothing the top with a spatula. Cover the springform pan with plastic wrap and chill in the refrigerator for at least 2 hours to set.
*What to look for:* The cheesecake should be firm to the touch when done.
*Tip:* For best results, chill overnight for flavors to meld beautifully.
8. Serve and Garnish
Once set, carefully remove the sides of the springform pan. Garnish your cheesecake with chopped hazelnuts for added crunch and visual appeal.
*What to look for:* The cheesecake should come off cleanly, and the topping should be evenly distributed.
*Tip:* Drizzle with extra hazelnut spread or chocolate sauce for an indulgent finish.
Pro Tips for the Best Results
1. Choose Quality Ingredients: The flavor of your cheesecake heavily relies on the quality of the ingredients. Use high-quality cream cheese and a rich hazelnut spread for a deeper taste.
2. Room Temperature Ingredients: Make sure your cream cheese is at room temperature. This ensures that it blends smoothly with the sugar and other ingredients, preventing lumps in your cheesecake.
3. Chill the Bowl and Whisk: For better whipped cream, chill your mixing bowl and whisk in the refrigerator for 10-15 minutes before whipping. This helps the cream whip up more easily and hold its shape.
4. Don’t Rush the Chilling: Allowing the cheesecake to chill for the recommended time is crucial. If you cut into it before it’s fully set, you risk a runny filling, which can ruin the overall texture.
5. Decorate Thoughtfully: When garnishing, consider adding elements that enhance both flavor and texture. Pairing the chopped hazelnuts with some chocolate shavings can elevate your presentation.
6. Experiment with Flavors: While this recipe is a chocolate hazelnut delight, don’t hesitate to add your twist. Think about adding a touch of espresso powder or orange zest for a unique flavor profile.
7. Use a Spatula for a Neat Finish: When smoothing the cheesecake filling, a spatula can help achieve a flat surface. This is especially important if you plan to add layers of toppings later.
8. Serve with a Side: Consider serving your cheesecake with a side of fresh berries or a scoop of vanilla ice cream. It creates a delightful contrast and adds freshness to each bite.
Common Mistakes to Avoid
1. Using Cold Cream Cheese: Starting with cold cream cheese can lead to a lumpy batter. Always soften cream cheese to room temperature before using it to achieve a smooth texture.
2. Overmixing: While you want to combine the ingredients well, overmixing the batter after adding the whipped cream can deflate it and result in a dense cheesecake instead of a light and airy one.
3. Skipping the Chill Time: It might be tempting to dig in right away, but not chilling the cheesecake long enough leads to a soft filling that won’t hold its shape.
4. Ignoring the Crust: A crust that’s too dry or too wet can ruin your cheesecake. Ensure you press the crust firmly and use the right butter ratio to achieve a perfect texture.
5. Not Tasting as You Go: Always taste your filling before chilling. If it needs more sweetness or flavor, it’s best to adjust before it sets.
6. Not using a Springform Pan: A standard pan will make it difficult to release the cheesecake. Always use a springform pan for easy removal and presentation.
7. Not Cleaning Up the Edges: If there are any drips or smudges on the sides of your pan, they’ll show up on the finished product. Clean the edges before chilling for a polished look.
Creative Variations
1. Seasonal: Incorporate seasonal flavors by adding pumpkin puree and spices for a fall twist or fresh berries and lemon zest for a refreshing summer version. Adjust the sugar accordingly to balance the flavors.
2. Dietary-Friendly: For a vegan version, substitute the cream cheese with a cashew cream base, use coconut cream for the whipped element, and choose dairy-free cookies and hazelnut spread. This maintains the flavors while catering to dietary restrictions.
3. Gourmet Elevated: Create a gourmet cheesecake by adding a layer of ganache on top before chilling. You can also use sea salt flakes as a garnish to enhance the flavor profile, creating a sweet and salty contrast.
4. Quick 15-Minute: If you’re short on time, use pre-made cookie crusts and ready-to-use whipped cream. Combine the cream cheese and hazelnut spread, layer them in cups, and let them chill briefly. Serve them as individual desserts!
5. Kid-Friendly: Make it fun for kids by adding colorful sprinkles or using Nutella as the hazelnut spread. You could also involve them in the process by letting them decorate their own cheesecake slices.
6. International Twist: Give your cheesecake an international flair by infusing it with matcha for a Japanese-inspired version or adding espresso and mascarpone for an Italian tiramisu-style cheesecake.
7. Nut-Free Option: Substitute the hazelnuts with sunflower seed butter and use vanilla cookies for the crust. This keeps the essence of a nutty cheesecake without using actual nuts, making it safe for nut allergies.
Serving Ideas
When it comes to serving your Chocolate Hazelnut No-Bake Cheesecake, presentation is key. Here are some delightful ideas to elevate your dessert:
1. Chopped Hazelnuts: Sprinkle a generous amount of chopped hazelnuts on top just before serving for an added crunch and a beautiful contrast to the creamy cheesecake.
2. Chocolate Shavings: Use a vegetable peeler to create delicate chocolate shavings from a dark chocolate bar. This not only adds a touch of elegance but also enhances the chocolate flavor.
3. Whipped Cream: A dollop of freshly whipped cream can make your cheesecake even more indulgent. Opt for sweetened cream with a hint of vanilla or cocoa powder for extra flavor.
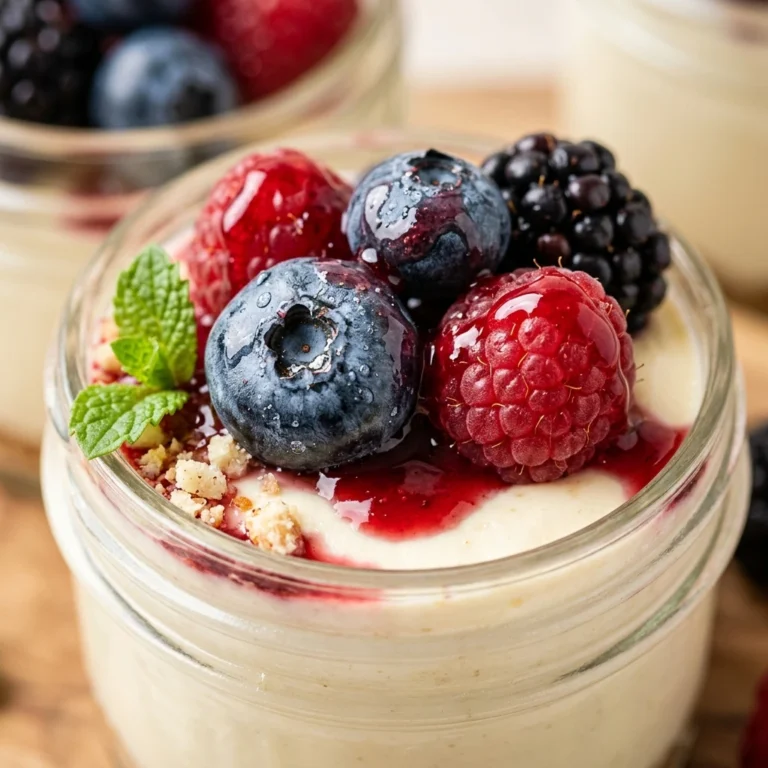
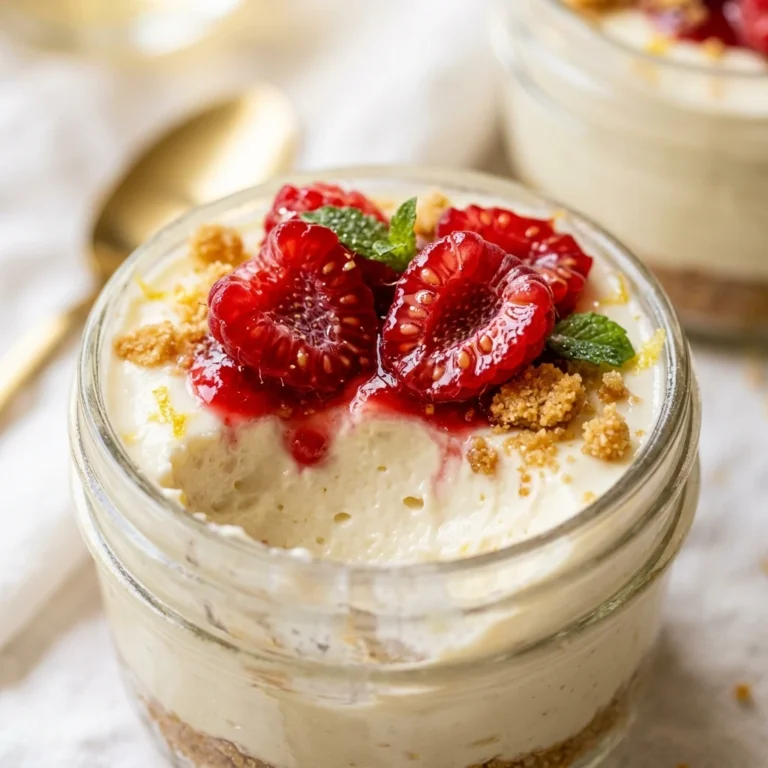
4. Fruit Compote: Serve with a side of fruit compote, like raspberry or blueberry, for a tangy contrast. The tartness of the fruit balances the richness of the cheesecake beautifully.
5. Individual Portions: For a fun twist, consider serving in small mason jars. Layer the crust and filling for a charming presentation, perfect for parties or gatherings.
Each serving should be about one slice or a small jar, allowing you to indulge without overdoing it. Enjoy the decadence while keeping it light!
What to Serve With
Pairing your Chocolate Hazelnut No-Bake Cheesecake with complementary flavors can elevate your dessert experience. Here are some delightful ideas:
– Espresso or Coffee: The rich, bold flavors of espresso or coffee enhance the chocolate notes in the cheesecake. This pairing not only rounds out the meal but also provides a pleasant contrast to the sweet dessert.
– Red Wine: A glass of red wine, particularly a fruity Merlot or a velvety Cabernet Sauvignon, can beautifully complement the nutty and chocolatey flavors.
– Vanilla Ice Cream: A scoop of creamy vanilla ice cream next to your cheesecake can add another layer of sweetness and creaminess, creating a delightful combination.
– Hazelnut Liqueur: For an adult twist, a splash of hazelnut liqueur served alongside can enhance the hazelnut flavor and make for a sophisticated dessert experience.
– Fresh Berries: A side of fresh berries adds a refreshing element. Their natural acidity balances the richness of the cheesecake, making each bite more enjoyable.
– Mint Tea: A cup of soothing mint tea can provide a refreshing finish to your meal, cleansing the palate and enhancing the dessert’s flavors.
These pairings not only complement the cheesecake, but they also create a well-rounded dining experience that will leave your guests impressed.
Storage Guide
Proper storage is crucial to maintaining the freshness and flavor of your Chocolate Hazelnut No-Bake Cheesecake. Here are some tips for keeping your dessert in top condition:
– Container Type: Store your cheesecake in an airtight container or cover it tightly with plastic wrap. If you used a springform pan, you can simply cover the top with plastic wrap or aluminum foil.
– Temperature: Keep your cheesecake refrigerated at or below 40°F (4°C). This helps prevent spoilage and maintains its creamy texture.
– Days It Keeps: When stored properly, your cheesecake can last for up to 5 days in the refrigerator.
– Signs Gone Bad: If you notice any off-smell, discoloration, or mold, it’s best to discard the cheesecake to avoid foodborne illnesses.
– How to Refresh: If the cheesecake seems a bit dry after a few days, serve it with a drizzle of chocolate sauce or a dollop of whipped cream to bring moisture back and enhance the flavor.
By following these storage guidelines, you’ll ensure that your cheesecake remains as delicious as the day you made it!
Freezing Tips
Yes, your Chocolate Hazelnut No-Bake Cheesecake can be frozen! Here’s how to do it right:
– Freezing Method: Place the cheesecake in the springform pan (if it’s not already in an airtight container) and wrap it tightly with plastic wrap, followed by aluminum foil to prevent freezer burn.
– Portioning: For convenience, consider slicing the cheesecake into individual portions before freezing. This allows you to easily grab a slice whenever a sweet craving hits!
– How Long: The cheesecake can be frozen for up to 3 months without compromising its quality.
– Thawing Method: When you’re ready to enjoy, transfer the cheesecake to the refrigerator to thaw overnight. This gentle thawing method helps maintain its creamy texture.
Freezing is a great way to enjoy this treat at a later date while keeping its flavors intact!
Reheating Guide
While your Chocolate Hazelnut No-Bake Cheesecake is traditionally served chilled, you may want to refresh it slightly before serving. Here’s how to do it:
– Microwave: If you prefer it a bit soft, place a slice on a microwave-safe plate and heat it in the microwave for about 15-20 seconds. Keep an eye on it to avoid melting!
– Oven: For a larger portion, preheat your oven to 350°F (175°C), place the cheesecake in a baking dish, and warm it for about 10-15 minutes. Cover it with aluminum foil to prevent the top from browning.
– Stovetop: While not common for cheesecake, you can place a slice in a pan over low heat, covering it with a lid, and let it warm for a few minutes until it reaches your desired temperature.
Remember, the goal is to warm it slightly without losing the creamy consistency that makes this cheesecake so delightful!
Nutrition Overview
A slice of Chocolate Hazelnut No-Bake Cheesecake is not just a treat; it offers a delightful balance of flavors and nutrition. Here’s a quick breakdown:
– Calories: Each serving contains approximately 350 calories.
– Macros: The cheesecake features about 25g of fat, 30g of carbohydrates, and 5g of protein per slice.
– Health Benefits:
– Hazelnuts are packed with healthy fats, fiber, and essential vitamins such as Vitamin E, which supports skin health.
– Cream cheese provides calcium, essential for strong bones and teeth.
– Dark chocolate (used in the cookies) can offer antioxidants and improve heart health.
Enjoy this dessert knowing it’s not just indulgent but also carries some nutritional benefits!
Frequently Asked Questions
Q: Can I use low-fat cream cheese in this recipe?
A: Yes, you can use low-fat cream cheese to reduce calories. However, it may affect the creaminess and texture of the cheesecake slightly.
Q: How can I make this cheesecake gluten-free?
A: Substitute the chocolate cookies with gluten-free cookies or crushed nuts. Ensure all ingredients, especially the hazelnut spread, are labeled gluten-free.
Q: Can I use a different type of nut instead of hazelnuts?
A: Absolutely! Almonds or pecans can be delightful alternatives, although they will change the flavor profile slightly.
Q: Is it possible to make this cheesecake vegan?
A: While traditional cream cheese and heavy cream won’t work, you can explore vegan cream cheese and coconut cream as substitutes. Just ensure all other ingredients are vegan-friendly.
Q: How can I enhance the chocolate flavor?
A: For a richer chocolate experience, consider adding cocoa powder to the filling or using dark chocolate cookies for the crust.
Q: Can I prepare this cheesecake in advance?
A: Yes! This cheesecake can be made a day or two in advance, making it an ideal choice for gatherings.
Q: What can I use instead of hazelnut spread?
A: If hazelnut spread is unavailable, chocolate peanut butter or almond butter could work, providing a unique twist on flavors.
Q: How do I know when the cheesecake is set?
A: The cheesecake should be firm to the touch and not jiggle when you gently shake the pan. Chilling it for at least 2 hours is essential for the best texture.
Final Thoughts
Creating this Chocolate Hazelnut No-Bake Cheesecake is not just about satisfying your sweet tooth; it’s about sharing joy with those you love. Here’s a key tip: always allow your cheesecake to chill thoroughly—this step is crucial for achieving that perfect, creamy texture.
Your enthusiasm for this delightful dessert will surely shine through as you serve it to friends and family. Whether it’s a special occasion or a simple weeknight treat, this cheesecake promises to impress. So roll up your sleeves, gather your ingredients, and dive into this luscious recipe. You won’t be disappointed! Enjoy every scrumptious bite!