Follow Me On Pinterest!
No Bake Lemon Cheesecake

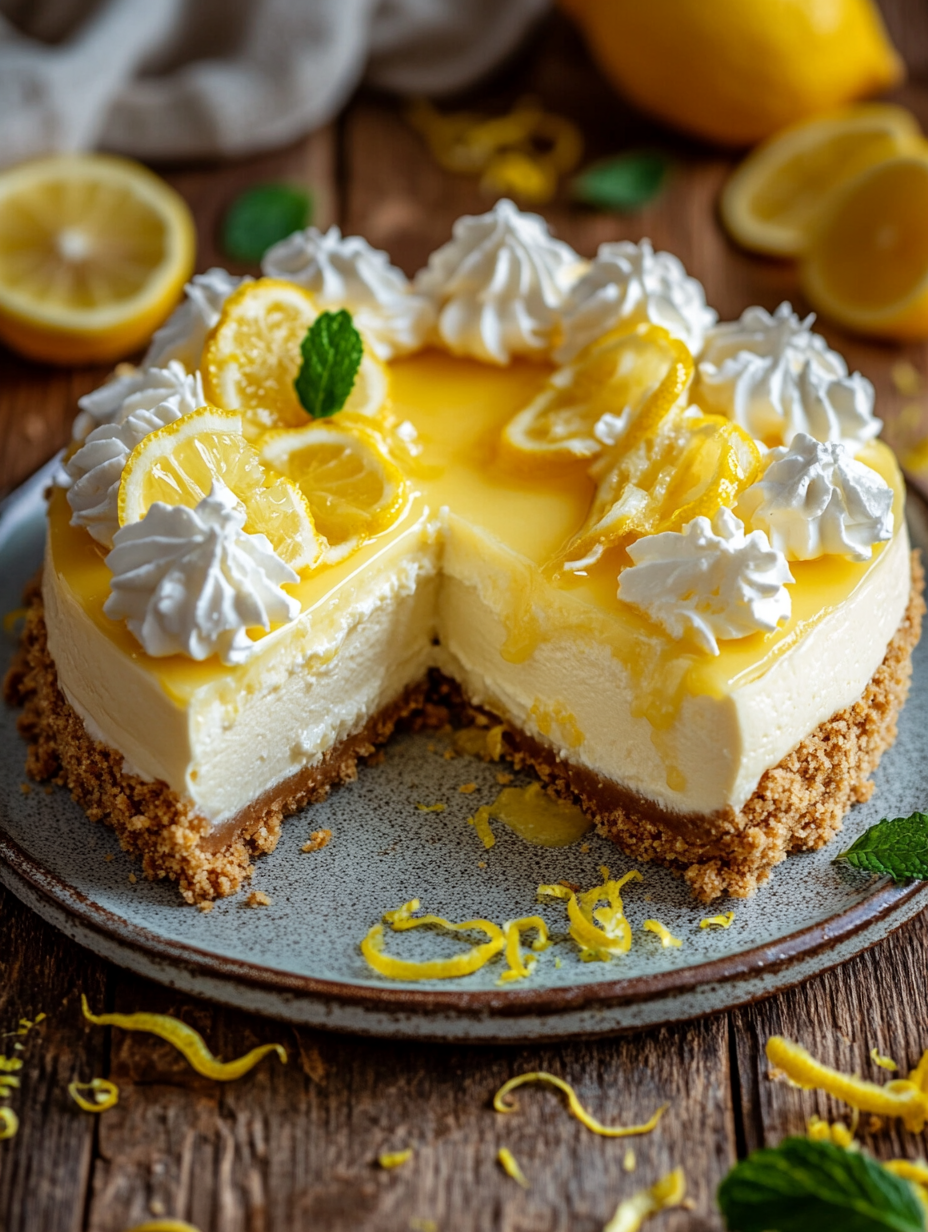
No Bake Lemon Cheesecake: A Bright Slice of Sunshine
Introduction
When the temperatures rise and the days stretch longer, my thoughts drift to that first bite of No Bake Lemon Cheesecake. The tangy flavor dances across my tongue, instantly transporting me back to my grandmother’s sun-drenched kitchen every summer. I can still picture her, a whirlwind of flour and zest, expertly crafting this delightful dessert. The air was thick with the scent of fresh lemons, the kind that made you feel alive and full of possibilities.
There’s something magical about a no-bake cheesecake, especially one infused with the bright, sunny essence of lemon. It was always the centerpiece of our family gatherings, a creamy delight that brought smiles around the table. I can still hear my cousins laughing as they tried to snag the first slice, their fingers dusted with graham cracker crumbs. Each bite was a balance of sweetness and tartness, a perfect reflection of summer itself.
This recipe has become a staple in my home, not just for its ease but for the memories it holds. It’s a celebration of family, warmth, and the joy of sharing something delicious. Whether it’s a simple weeknight treat or a holiday gathering, this cheesecake brings a little bit of sunshine into any occasion. And the best part? No oven required!
Why This Recipe Works
The beauty of this No Bake Lemon Cheesecake lies in its simplicity and reliability, making it a perfect dessert for any occasion. At the heart of this recipe is the combination of cream cheese and heavy cream. The cream cheese provides a rich, luscious base, while the whipped heavy cream adds an airy lightness, creating a texture that’s both creamy and smooth. This contrast ensures that each slice is indulgent yet refreshing—a true testament to what a cheesecake should be.
In terms of flavor, fresh lemon juice and zest are key components. The acidity from the lemon not only brightens the cheesecake but also helps balance the sweetness from the sugar, preventing the dessert from becoming overly rich. This interplay between sweet and tangy is what makes this cheesecake sing.
Additionally, using graham cracker crumbs for the crust provides a delightful crunch and a hint of sweetness. When mixed with melted butter, it creates a sturdy base that holds up beautifully against the creamy filling. By pressing it firmly into the pie dish, you ensure that each slice holds together perfectly, making it easy to serve and even easier to enjoy.
This recipe is also incredibly forgiving. If you find yourself short on an ingredient, there are plenty of options for substitutions. From dairy-free cream cheese to gluten-free graham crackers, this cheesecake can cater to a variety of dietary needs without compromising on flavor or texture. Overall, the technique is straightforward, the ingredients are accessible, and the results are consistently delicious—a trifecta of success in the kitchen!
What Makes It Special
This No Bake Lemon Cheesecake stands out not just for its flavor but for its unique characteristics that elevate it above store-bought and restaurant versions. Here are a few reasons why this cheesecake is a gem:
– Freshness: The use of fresh lemon juice and zest brings a brightness that is often missing from commercial desserts. You can taste the difference, and that vibrant flavor makes each bite feel like a special occasion.
– Customizable: Unlike pre-packaged cheesecakes, you have control over the sweetness and tartness of this recipe. You can adjust the lemon juice to suit your tastebuds, allowing for a personalized dessert experience.
– Textural Harmony: The combination of smooth, creamy filling and a crunchy graham cracker crust creates a delightful mouthfeel. This contrast is often overlooked in store-bought options, which can feel one-dimensional.
– No Baking Required: The fact that this cheesecake doesn’t require any baking makes it a perfect option for warm weather when you want to avoid heating up the kitchen. It’s a quick assembly that yields impressive results, allowing you to spend more time enjoying your day rather than slaving over a hot oven.
Ingredient Breakdown
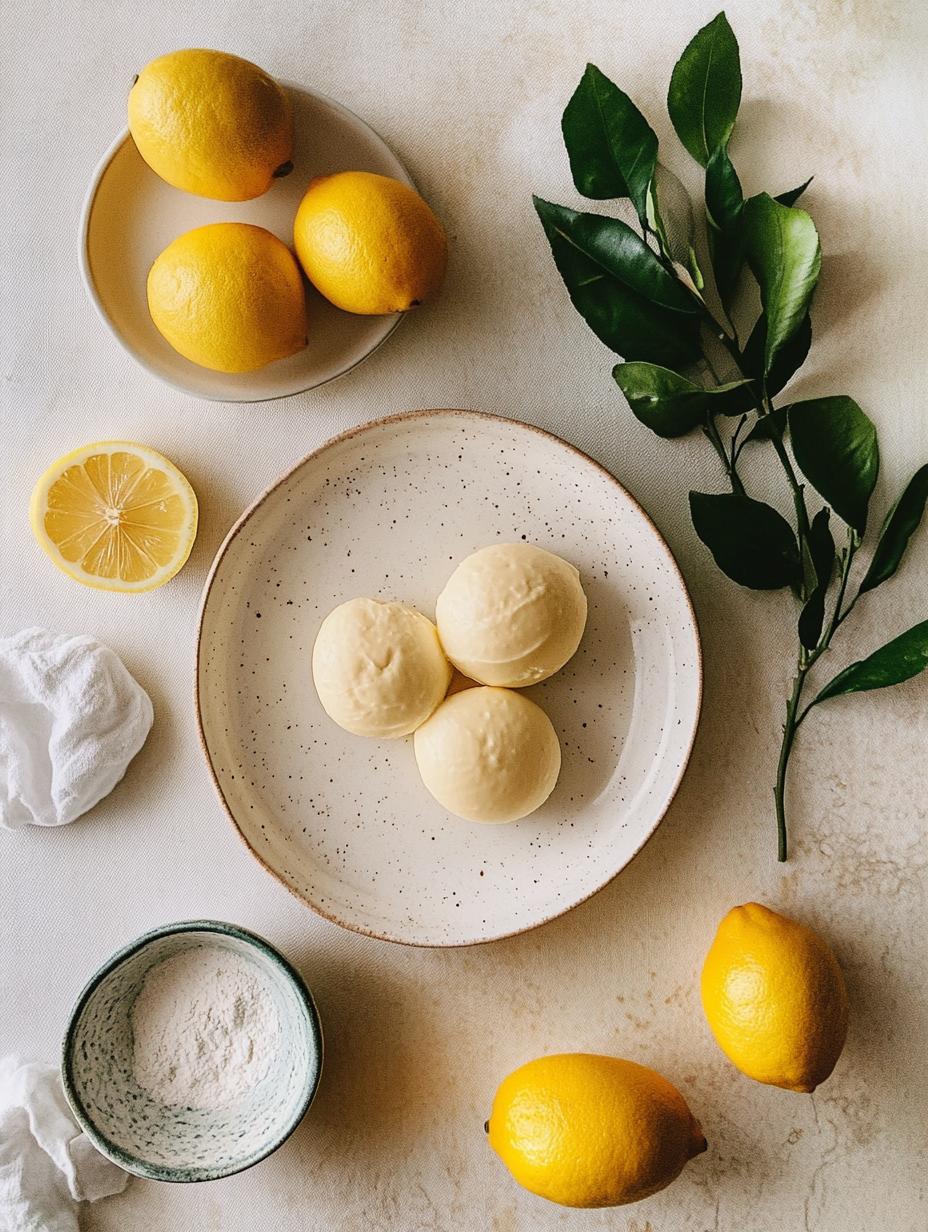
1. **Graham Cracker Crumbs**
The foundation of your cheesecake starts with graham cracker crumbs. They provide a sweet, slightly nutty flavor and a delightful crunch. If you’re looking for a gluten-free option, simply substitute with gluten-free graham crackers or crushed almonds for a nutty twist.
2. **Unsalted Butter**
Melted unsalted butter binds the crumbs together, ensuring your crust holds its shape once set. Using unsalted butter also allows you to control the overall saltiness of the dessert, which is particularly important when balancing flavors.
3. **Cream Cheese**
The star of the show, cream cheese lends its creamy texture and tangy flavor to the cheesecake. Make sure it’s at room temperature for easier blending. If you need a dairy-free option, look for vegan cream cheese alternatives that can mimic the texture and flavor well.
4. **Sugar**
Granulated sugar sweetens the filling, balancing the tanginess of the lemon. You can easily swap this out for coconut sugar or a sugar substitute if you want to cut back on refined sugars.
5. **Heavy Cream**
Whipped heavy cream adds a lightness to the cheesecake. This essential ingredient creates that airy texture that makes the cheesecake melt in your mouth. For a lighter alternative, you can experiment with whipped coconut cream, though the flavor will differ slightly.
6. **Lemon Juice and Zest**
Freshly squeezed lemon juice and zest are what give this cheesecake its signature tang. Be sure to use fresh lemons for the best flavor—bottled lemon juice simply can’t compete! The zest adds an aromatic quality that enhances the lemon flavor, making it vibrant and refreshing.
7. **Vanilla Extract**
A splash of vanilla extract rounds out the flavors and adds depth. It harmonizes beautifully with the other ingredients, making the cheesecake more cohesive. If you want to keep things simple, you can omit it, but I highly recommend including it for that extra touch of flavor.
Equipment Needed
To create your No Bake Lemon Cheesecake, you won’t need any fancy equipment—just some basic kitchen tools. Here’s what you’ll need:
– Mixing Bowls: A couple of good-sized bowls for mixing the crust and the filling. Look for sturdy options that can withstand vigorous mixing.
– Electric Mixer: A hand mixer or stand mixer will make your life easier when blending the cream cheese and whipping the heavy cream. If you don’t have either, a whisk will do the trick, though it will take more elbow grease!
– Pie Dish: A 9-inch pie dish is ideal for setting your cheesecake. If you don’t have one, a springform pan works beautifully as well.
– Spatula: A silicone spatula is perfect for folding the whipped cream into the filling without deflating it.
– Measuring Cups and Spoons: Accurate measurements are key to a successful cheesecake, so don’t skimp on these essentials.
Affordable Alternatives
– If you’re on a budget, look for store-brand ingredients—often, they are just as good as name brands.
– For mixing bowls, repurpose any large bowls you might already have at home, or even use a large pot in a pinch.
Now that you’re equipped with all the necessary knowledge and tools, let’s get started on creating this delightful dessert that’s sure to impress!
Step-by-Step Instructions

1. Prepare the Crust
– What: Combine the graham cracker crumbs and melted butter to create the crust.
– How: In a mixing bowl, add 1 cup of graham cracker crumbs and 0.5 cup of unsalted butter (melted). Use a fork or spatula to mix until the crumbs are evenly coated and resemble wet sand.
– Look/Smell/Hear: You’ll notice a buttery aroma as the crumbs absorb the melted butter. The mixture should hold together when squeezed in your hand.
2. Press the Crust into the Dish
– What: Form the crust in the pie dish.
– How: Take the crumb mixture and press it firmly into the bottom of a 9-inch pie dish. Use the bottom of a measuring cup or your fingers to create an even layer.
– Look/Smell/Hear: The crust will start to hold its shape; you should hear a satisfying crunch as you press down. Make sure you achieve a solid base, as this will provide essential stability for your cheesecake.
3. Create the Cheesecake Filling
– What: Beat the cream cheese and sugar together.
– How: In a large mixing bowl, add 8 oz of softened cream cheese and 0.5 cup of sugar. Use an electric mixer on medium speed to blend until completely smooth and creamy, about 2-3 minutes.
– Look/Smell/Hear: The mixture should turn creamy and glossy, with no lumps remaining. You’ll hear a whirring sound as the mixer does its magic!
4. Add Flavorings
– What: Incorporate the lemon juice, zest, and vanilla.
– How: With the mixer on low speed, gradually add 0.5 cup of lemon juice, 1 tbsp of lemon zest, and 1 tsp of vanilla extract. Mix until fully combined and smooth.
– Look/Smell/Hear: The fresh citrus aroma will fill your kitchen, and the color of the filling will brighten as you mix.
5. Fold in the Whipped Cream
– What: Combine the whipped cream with the cheesecake mixture.
– How: In a separate bowl, whip 1 cup of heavy cream until stiff peaks form. Gently fold the whipped cream into the cream cheese mixture using a spatula, being cautious not to deflate the whipped cream.
– Look/Smell/Hear: The filling should become light and airy. Look for a smooth consistency with no streaks of whipped cream remaining. You’ll hear the gentle folding sound of the spatula in the bowl.
6. Pour and Smooth the Filling
– What: Transfer the filling onto the crust.
– How: Carefully pour the cheesecake filling over the prepared crust. Use a spatula to smooth the top evenly.
– Look/Smell/Hear: The filling should glide over the crust, and you’ll notice the beautiful, creamy texture. Take a moment to appreciate the fresh lemon scent that’s emanating from the mixture.
7. Chill the Cheesecake
– What: Allow the cheesecake to set.
– How: Cover the pie dish with plastic wrap and refrigerate for at least 2 hours, or until the filling is firm to the touch.
– Look/Smell/Hear: After chilling, the cheesecake will feel stiff and set. You can smell the refreshing citrus notes as you uncover it.
Chef’s Note: Make sure to use full-fat cream cheese for the best creamy texture. If you want a more pronounced lemon flavor, add a bit more lemon zest to the filling.
Pro Tips for the Best Results
1. Use Room Temperature Ingredients: Ensure your cream cheese is at room temperature before mixing. This will create a smoother filling with fewer lumps. Remove it from the fridge about 30 minutes before you start.
2. Fresh Lemon Juice and Zest: Always opt for fresh lemons instead of bottled lemon juice. The flavor difference is significant, and the zest adds a bright aroma that enhances your cheesecake.
3. Don’t Overmix: When folding in the whipped cream, be gentle! Overmixing can deflate the whipped cream, resulting in a denser cheesecake. Aim for a light and airy texture.
4. Chill Longer for a Firmer Texture: If you prefer a firmer cheesecake, consider chilling it overnight. This allows the flavors to meld beautifully and results in a more stable filling.
5. Use a Springform Pan: If you want to make a larger cheesecake or present it more elegantly, a springform pan is a great choice. It allows for easy removal without disturbing the crust.
6. Decorate Thoughtfully: Enhance presentation by topping your cheesecake with fresh berries, whipped cream, or a drizzle of lemon glaze. Visual appeal is just as important as taste!
7. Taste the Filling: Before pouring the filling onto the crust, taste a small spoonful. You can adjust the sweetness or acidity by adding more sugar or lemon juice if necessary.
Common Mistakes to Avoid
1. Using Cold Cream Cheese: Starting with cold cream cheese can lead to lumps in your cheesecake filling. Always allow it to soften at room temperature for at least 30 minutes before mixing.
2. Not Pressing the Crust Firmly Enough: A loose crust can lead to a soggy bottom. Make sure you press the crumbs down firmly to create a solid base that holds together well.
3. Skipping the Whipped Cream: Whipped cream is essential for that light and airy texture. Skipping this step will result in a denser cheesecake that lacks the desired creaminess.
4. Not Chilling Long Enough: Rushing the chilling process can result in a filling that doesn’t set properly. Always allow at least 2 hours in the refrigerator, but longer is better for optimal results.
5. Overmixing the Cream Cheese: Be careful not to overbeat the cream cheese when adding sugar. Overmixing can introduce too much air, leading to cracks during the setting process.
6. Not Using Fresh Ingredients: Utilizing stale or expired ingredients can negatively affect the flavor. Fresh lemons and high-quality cream cheese will elevate your no-bake cheesecake.
7. Avoiding Zest: Skipping the lemon zest means missing out on a deeper citrus flavor. Always include it for that extra zing that makes your cheesecake stand out.
Creative Variations
1. Seasonal Twist: For a festive touch, consider incorporating seasonal fruits. In the fall, swap out lemon for pumpkin puree, add pumpkin spice, and garnish with whipped cream and a sprinkle of cinnamon for a delightful autumn dessert.
2. Dietary-Friendly Option: For a lighter version, substitute low-fat cream cheese and Greek yogurt for the heavy cream. Replace sugar with stevia or a sugar substitute to keep it low-calorie while still maintaining a creamy texture.
3. Gourmet Elevated: Elevate your cheesecake by adding white chocolate to the filling. Melt 4 oz of white chocolate and fold it into the cream cheese mixture for a luxurious, sweet twist. Top with edible flowers for an elegant presentation.
4. Quick 15-Minute: In a hurry? Use pre-made graham cracker crusts and store-bought whipped cream. Simply mix the filling ingredients and pour into the crust. Refrigerate briefly, and you’ll have a delicious dessert ready in no time!
5. Kid-Friendly Version: Transform this dessert into a fun kid-friendly treat by adding colorful sprinkles or topping it with chocolate chips. You can also create mini cheesecakes in cupcake liners for portion-controlled bites.
6. International Twist: Give your cheesecake a unique flair by incorporating matcha powder for a Japanese-inspired version. Mix in 1-2 tablespoons of matcha into the filling for a beautiful green color and a subtle earthy flavor.
7. Chocolate Lemon Cheesecake: For a decadent chocolate twist, add 1/4 cup of cocoa powder to the filling and swirl in some melted chocolate before pouring it over the crust. This rich combination of chocolate and lemon creates a surprising and delightful dessert.
Serving Ideas
When it comes to serving your No Bake Lemon Cheesecake, presentation is key! Here are some delightful plating ideas that will elevate your dessert to the next level:
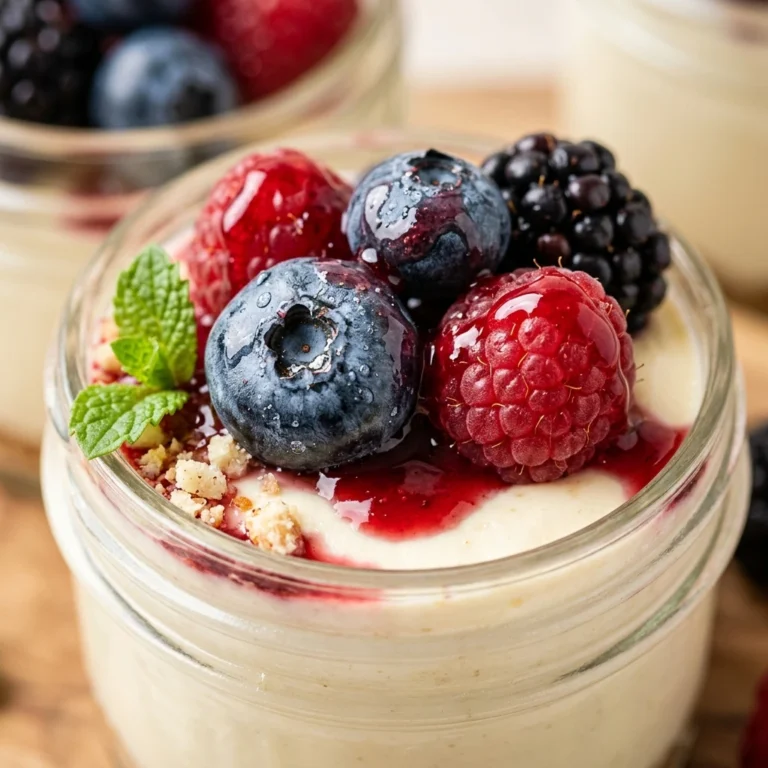
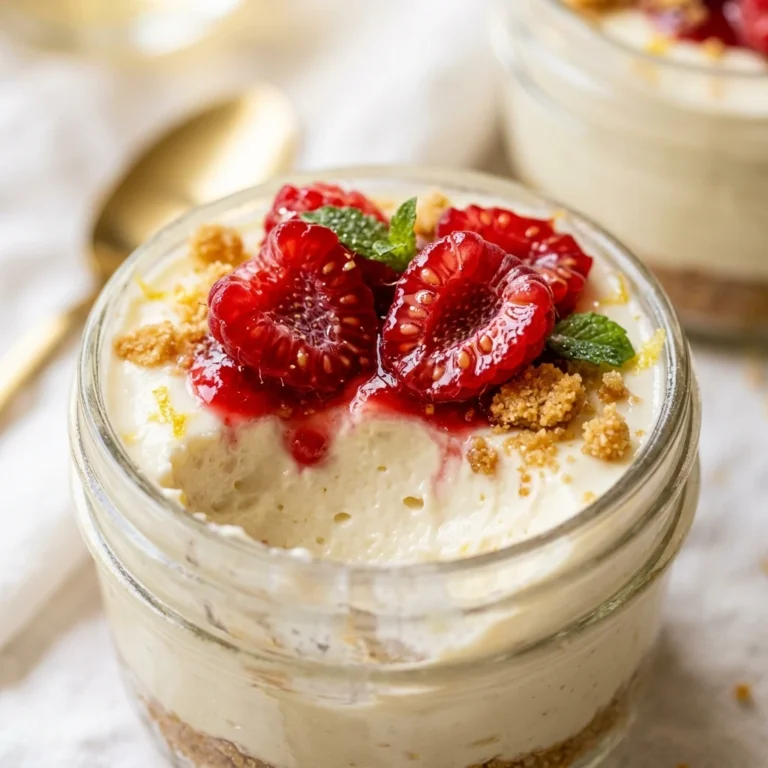
1. Individual Servings: Consider using small glass jars or dessert cups to serve individual portions. Layer the graham cracker crust and cheesecake filling for a beautiful presentation. Top with a dollop of whipped cream and a slice of lemon for a pop of color.
2. Garnished with Berries: Fresh berries, such as strawberries, blueberries, or raspberries, make excellent garnishes. Scatter them over the top of the cheesecake or arrange them in a circle for an inviting look. Not only do they add color, but their tartness complements the lemon flavor beautifully.
3. Candied Lemon Slices: For a sophisticated touch, top each slice with candied lemon slices. Their sweetness and chewiness balance the tartness of the cheesecake, making each bite a delight.
4. Herb Infusion: Fresh mint or basil leaves can add a unique twist to your cheesecake. Place a sprig on top of each slice or chop finely and sprinkle over the entire cheesecake for a refreshing herbal note.
5. Chocolate Drizzle: If you’re a chocolate lover, a light drizzle of melted white or dark chocolate can add an unexpected richness that pairs wonderfully with the lemon. Just be sure to let it cool slightly before drizzling!
What to Serve With
Pairing your No Bake Lemon Cheesecake with the right accompaniments can enhance the overall dining experience. Here are some delightful options:
– Iced Tea or Lemonade: The citrusy notes of lemonade or the refreshing qualities of iced tea complement the cheesecake’s lemon flavor perfectly. Opt for unsweetened versions to balance the sweetness of the dessert.
– Coffee or Espresso: The rich and bold flavors of coffee or a shot of espresso create a great contrast to the lightness of the cheesecake. The bitterness of coffee can balance the sweetness, making each bite even more enjoyable.
– Fruit Salad: A light fruit salad made with seasonal fruits adds a refreshing touch. The sweetness of the fruits will enhance the tartness of the cheesecake, creating a well-rounded dessert experience.
– Whipped Cream: While the cheesecake is creamy, a generous dollop of freshly whipped cream on top adds extra texture and indulgence. You can even flavor the whipped cream with a splash of vanilla or a hint of lemon for cohesion.
– Chocolate-Covered Nuts: The crunch and slight bitterness of chocolate-covered almonds or hazelnuts can add a delightful contrast to the creamy cheesecake. They are also fun finger foods that guests will love.
– Sorbet: A scoop of lemon or raspberry sorbet served alongside the cheesecake can act as a palate cleanser and adds a refreshing element to the dessert.
Storage Guide
To keep your No Bake Lemon Cheesecake fresh and delicious, proper storage is essential. Here’s how to do it right:
– Container Type: Store your cheesecake in an airtight container or cover it tightly with plastic wrap. This will prevent it from absorbing any odors from your refrigerator and keep it moist.
– Temperature: Always store your cheesecake in the refrigerator at or below 40°F (4°C). This ensures that it remains safe to eat and maintains its creamy texture.
– Shelf Life: Your cheesecake will stay fresh for about 3 to 4 days in the refrigerator. If you notice any changes in texture or smell, it’s best to discard it.
– Signs Gone Bad: Look for a sour smell, discoloration, or a watery texture. If the cheesecake develops any mold, do not consume it.
– Refreshing: If your cheesecake seems a bit dry after storing, you can refresh it by adding a light layer of whipped cream on top or serving it with a fruit sauce to enhance its flavor and moisture.
Freezing Tips
If you want to enjoy your No Bake Lemon Cheesecake later, freezing is an option! Here’s what you need to know:
– Freezing Quality: Yes, this cheesecake freezes well. However, keep in mind that the texture may change slightly upon thawing, so it’s best to consume it fresh if possible.
– Portioning: Cut the cheesecake into individual slices before freezing. This makes it easier to thaw only what you need without having to defrost the entire dessert.
– Freezing Duration: Properly stored, your cheesecake can be frozen for up to 2 months. Make sure to wrap each slice tightly in plastic wrap before placing it in a freezer-safe container.
– Thawing Method: To thaw, simply transfer the cheesecake from the freezer to the refrigerator and let it sit overnight. This gradual thawing helps preserve its texture. Avoid thawing in the microwave, as it can cause the cheesecake to become soggy.
Reheating Guide
If you find yourself with leftover slices of No Bake Lemon Cheesecake, reheating is not necessary, as it’s best served chilled. However, if you prefer warm desserts, here’s how to handle it:
– Microwave: Place a slice on a microwave-safe plate and heat it on medium power for about 10-20 seconds. Check frequently to make sure it doesn’t get too warm.
– Oven: Preheat your oven to 350°F (175°C). Place the cheesecake slice on a baking sheet and cover it loosely with aluminum foil to prevent it from drying out. Heat for about 10 minutes, or until warmed through.
– Stovetop: You can use a double boiler for gentle heating. Place the cheesecake slice on a heatproof plate and sit it over a pot of simmering water (not boiling). Cover and let it warm for about 5-7 minutes.
Nutrition Overview
Indulging in a slice of No Bake Lemon Cheesecake can be a delightful treat without too much guilt. Here’s a quick nutritional breakdown:
– Calories: Each serving contains approximately 300 calories, making it a relatively light dessert option when compared to baked counterparts.
– Macros: You can expect around 23g of fat, 30g of carbohydrates, and 3g of protein per serving. The high fat content mainly comes from the cream cheese and heavy cream, while the crust contributes to the carbs.
– Health Benefits: Key ingredients like lemon juice offer a good dose of vitamin C, boosting your immune system. Additionally, cream cheese provides calcium, which is essential for bone health, while heavy cream provides energy and essential fatty acids.
Frequently Asked Questions
Q: Can I use a different type of crust?
A: Absolutely! While graham cracker crumbs are traditional, you can substitute them with crushed Oreos, digestive biscuits, or even a gluten-free alternative to suit your dietary preferences.
Q: How do I know when the cheesecake is set?
A: After chilling for at least 2 hours, the cheesecake should be firm to the touch. It will also slightly pull away from the edges of the dish, indicating that it has set properly.
Q: Can I make this cheesecake ahead of time?
A: Yes! This cheesecake is perfect for making ahead. You can prepare it up to 2 days in advance, allowing the flavors to meld beautifully while it chills in the refrigerator.
Q: Is there a dairy-free option for this cheesecake?
A: Yes! You can use dairy-free cream cheese and coconut cream as a substitute for heavy cream. Just ensure that your crust is also dairy-free if that’s a concern.
Q: Can I add other flavors to the cheesecake?
A: Certainly! You can experiment with various flavors by incorporating different extracts like almond or adding pureed fruits. Just be sure to adjust the sugar levels accordingly.
Q: How can I make it less sweet?
A: If you prefer a less sweet cheesecake, reduce the sugar amount in the filling. You can also balance the sweetness by increasing the lemon juice and zest for a more tart flavor.
Q: What if I don’t have lemon juice?
A: In a pinch, you can use lime juice as a substitute. It will provide a similar tartness and refreshing flavor, creating a deliciously different cheesecake.
Q: How do I prevent cracks in my cheesecake?
A: Since this is a no-bake recipe, cracks are not as much of an issue. However, ensure that your cream cheese is softened before mixing, as this will help create a smooth filling without lumps.
Final Thoughts
Your No Bake Lemon Cheesecake is not just a dessert; it’s a delightful way to celebrate warm weather with its refreshing flavors. One key tip is to ensure that your cream cheese is at room temperature before mixing. This will guarantee a smooth, lump-free filling that everyone will love.
I hope you’ll try this simple yet impressive dessert for your next gathering. It’s sure to be a crowd-pleaser that leaves everyone asking for seconds. So gather your ingredients, roll up your sleeves, and enjoy the delightful process of creating this creamy, tangy cheesecake. Happy baking (or in this case, chilling)!