Follow Me On Pinterest!
Crispy Air Fryer Onion Rings


Crispy Air Fryer Onion Rings: A Guilt-Free Snack That Doesn’t Compromise on Flavor
Introduction
The first time I tasted onion rings, I was at a small diner with my childhood friends. The aroma of frying onions filled the air, and as I took my first bite, I was transported to a world of crunchiness and flavor. Each ring was enveloped in a golden, crispy batter that crunched perfectly as I bit into it, revealing the sweet, tender onion within. It was a moment of pure bliss.
Fast forward to today, and while I’ve indulged in countless variations of this classic snack, I often find myself craving that same nostalgic taste without the heaviness that comes with traditional frying methods. This is where my air fryer comes into play. With its ability to create that same satisfying crunch while using significantly less oil, I can enjoy onion rings guilt-free. When I whip up a batch of Crispy Air Fryer Onion Rings, it’s not just about satisfying a craving; it’s a delicious trip down memory lane that I can share with my family.
Making these onion rings is not just about the end product; it’s about the experience—the sound of the crunch, the warmth of the spices, and the joy of sharing them with loved ones. Whether you’re serving them as a side dish, a party snack, or just a treat for yourself, these air fryer onion rings will quickly become a cherished recipe in your kitchen.
Why This Recipe Works
Creating Crispy Air Fryer Onion Rings is a delightful blend of culinary science and technique. The key element is the air fryer, which uses hot air to circulate around the food, mimicking the effects of deep frying but with significantly less oil. This allows the onion rings to become beautifully crispy without the added fat and calories.
So, what makes this recipe particularly reliable? Let’s break it down:
1. Soaking in Buttermilk: By soaking the onion rings in buttermilk, you not only add flavor but also help the flour and breadcrumbs adhere better to the onions. The acidity in the buttermilk tenderizes the onions, allowing for that perfect melt-in-your-mouth texture.
2. Panko Breadcrumbs: Using panko instead of regular breadcrumbs is a game-changer. Panko is lighter and crispier, providing an incredible crunch that holds up beautifully during cooking. This texture is crucial for achieving that satisfying bite you expect from onion rings.
3. Layering Flavors: The combination of paprika, garlic powder, salt, and black pepper isn’t just there for seasoning; it elevates the overall flavor profile of the onion rings. Each bite is packed with a symphony of tastes that complement the sweetness of the onion.
4. Controlled Cooking Environment: The air fryer’s ability to cook evenly and quickly ensures that your onion rings are not only crispy but also cooked through, preventing that soggy texture that often plagues fried versions. The result is a golden-brown exterior that you can’t resist.
All these elements work together harmoniously, making this recipe an easy yet satisfying way to recreate a beloved snack. You’ll find that these Crispy Air Fryer Onion Rings are not just a healthier alternative but a delightful treat that might just have you forgetting all about their deep-fried counterparts.
What Makes It Special
What sets these Crispy Air Fryer Onion Rings apart from the versions you find in restaurants or stores? Here are a few unique qualities:
– Healthier Option: These onion rings offer a guilt-free indulgence. By using an air fryer, you drastically reduce the amount of oil needed, making them a much lighter snack without sacrificing flavor.
– Customizable Flavor Profile: The recipe serves as a blank canvas. You can easily adjust the spices to suit your taste. Want a kick? Add cayenne pepper. Prefer something more savory? Try incorporating Parmesan cheese into the breadcrumb mixture.
– Homemade Freshness: There’s nothing quite like the taste of freshly made onion rings. When you make them at home, you control the quality of the ingredients, ensuring they are free from preservatives and artificial flavors often found in store-bought versions.
– Quick and Easy: With just a few simple ingredients and minimal prep time, you can whip these up in a flash. Perfect for those busy evenings or spontaneous gatherings!
These qualities not only enhance your eating experience but also bring a sense of satisfaction that comes from making something delicious from scratch. You’ll find that once you try these onion rings, you’ll never want to go back to the store-bought versions again.
Ingredient Breakdown
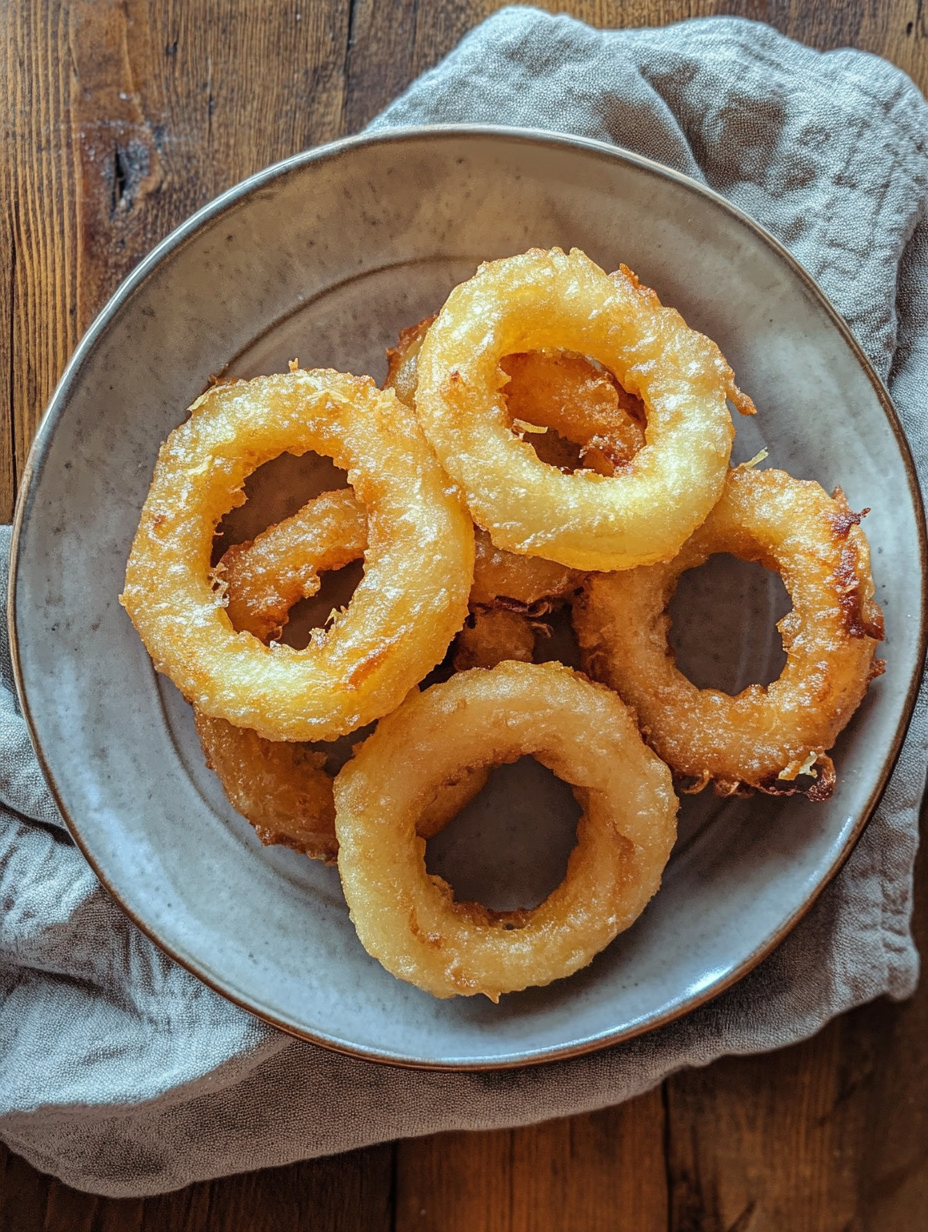
Understanding the ingredients in your Crispy Air Fryer Onion Rings is crucial to mastering this recipe. Here’s a breakdown of each component, their roles, and possible substitutions for dietary needs:
– Onions: The star of the show! Choose large, sweet onions like Vidalia or yellow onions for the best flavor and texture. If you’re looking for a milder taste, you can also use shallots.
– All-Purpose Flour: This acts as the primary coating for the onion rings, allowing the buttermilk to cling and provide a base for the breadcrumbs. For a gluten-free option, consider using almond flour or a gluten-free all-purpose blend.
– Buttermilk: This ingredient not only adds a tangy flavor but also tenderizes the onions. If you don’t have buttermilk on hand, you can easily make a substitute by mixing one cup of milk with one tablespoon of vinegar or lemon juice and letting it sit for 5-10 minutes.
– Panko Breadcrumbs: Providing that much-desired crunch, panko is a must for this recipe. If you’re out, regular breadcrumbs can be used, but the texture will be less crispy. For a gluten-free option, look for gluten-free panko.
– Paprika, Garlic Powder, Salt, and Black Pepper: Each of these spices enhances the flavor. They can be adjusted according to your taste preferences. For instance, smoked paprika can add a lovely smoky depth, while you can omit garlic powder if you prefer a simpler flavor profile.
– Olive Oil: A light spray of olive oil helps achieve that golden brown color and crispiness without heavy frying. If you’re concerned about flavor, feel free to use avocado oil or any neutral oil you prefer.
Understanding the roles of these ingredients allows you to modify the recipe to your liking while ensuring that the final product remains delicious and satisfying. Whether you’re sticking to the classic version or experimenting with substitutes, you’ll be on your way to creating mouthwatering onion rings in no time!
Equipment Needed
To make your Crispy Air Fryer Onion Rings, you’ll need a few essential tools that make the process seamless:
– Air Fryer: The star of your kitchen! An air fryer cooks food evenly, creating that crispy texture we all love without the excess oil. If you’re new to air frying, look for models with adjustable temperature settings and a good capacity.
– Cutting Board and Knife: A sturdy cutting board and a sharp knife are essential for slicing your onions into perfect rings. Make sure your knife is sharp to ensure clean cuts and ease when slicing.
– Mixing Bowls: You’ll need a few bowls to hold the buttermilk, flour mixture, and panko breadcrumbs. Having separate bowls helps keep your workspace organized and makes the dredging process a breeze.
– Spray Bottle: A spray bottle is a handy tool for evenly distributing oil over your onion rings. If you don’t have one, you can use a pastry brush to brush the oil on, but a spray bottle allows for a lighter, more even coating.
– Tongs: While not mandatory, a pair of tongs can help you handle the onion rings without making a mess. They’re also great for flipping the rings halfway through cooking.
These tools not only enhance your cooking experience but also ensure that you achieve the best possible results for your onion rings. Plus, many of these items are quite affordable and can be found at your local kitchen supply store or online.
Step-by-Step Instructions
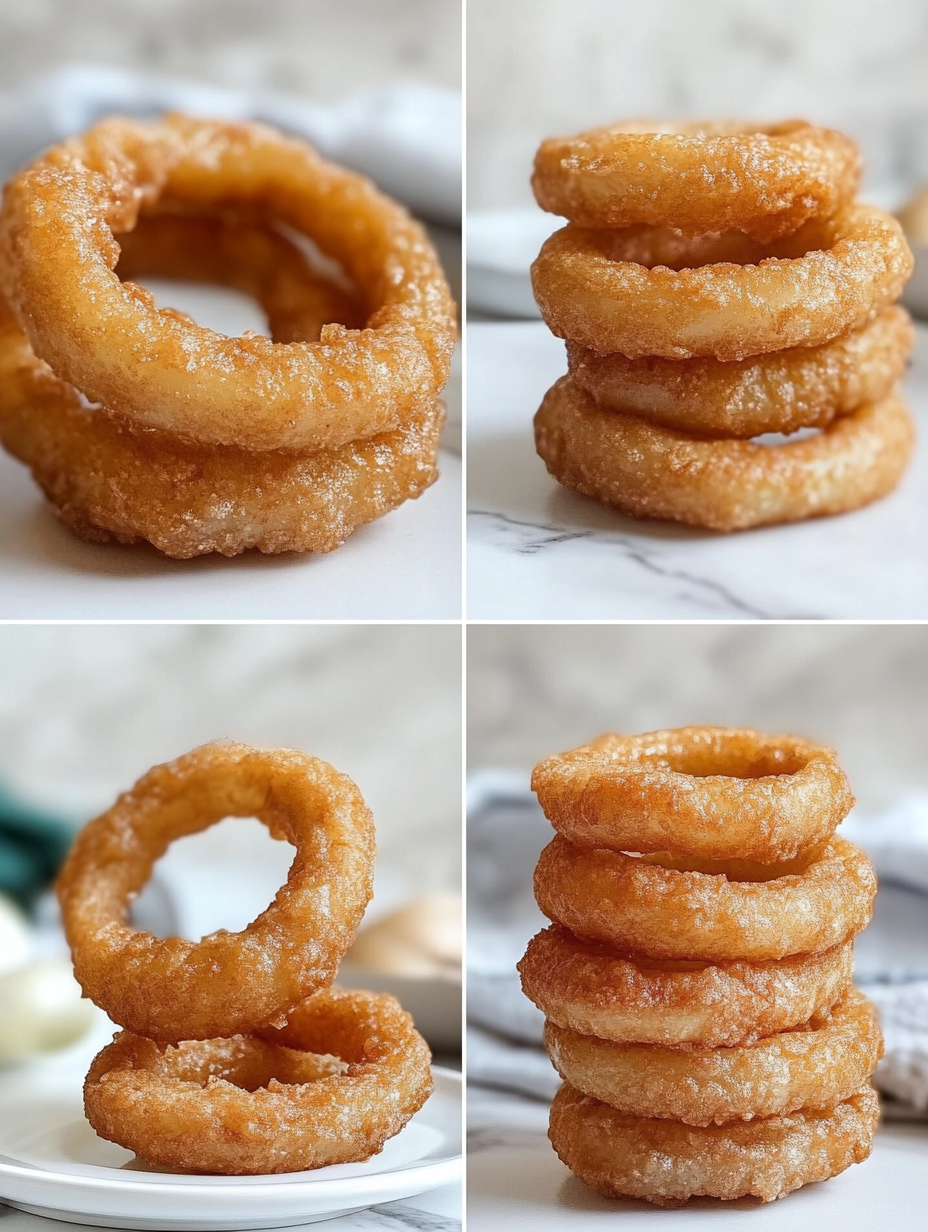
1. Peel and Slice the Onions
– What: Begin by peeling your large onions and slicing them into 0.5-inch thick rings.
– How: Use a sharp knife and a cutting board for safety and precision. It helps to cut both ends off the onion for stability while slicing.
– What to look/smell/hear: You’ll notice a sharp, pungent smell as you slice through the onion. Aim for uniform thickness to ensure even cooking.
2. Soak the Onion Rings
– What: Place the onion rings in a bowl and pour buttermilk over them, allowing them to soak for about 10 minutes.
– How: The buttermilk helps to tenderize the onions and adds a subtle tanginess. Cover the bowl with a lid or plastic wrap to keep the moisture in.
– What to look/smell/hear: You may hear a slight sloshing sound as you move the rings in the buttermilk. The aroma should be creamy and inviting, hinting at the flavors to come.
3. Prepare the Coatings
– What: In a separate bowl, mix together the flour, paprika, garlic powder, salt, and black pepper.
– How: Whisk the dry ingredients until well combined. This mixture is essential for creating a flavorful base for your onion rings.
– What to look/smell/hear: You’ll see the vibrant red of the paprika and smell the aromatic garlic powder. The sound of the whisk against the bowl is a satisfying prelude to frying.
4. Set Up the Panko Station
– What: In another bowl, place the panko breadcrumbs.
– How: Ensure the breadcrumbs are evenly spread out; this will help each onion ring get coated thoroughly when you’re ready to bread them.
– What to look/smell/hear: The panko should look light and airy. You may hear a crunch when you move it around, signaling it’s ready for action.
5. Dredge the Onion Rings
– What: Remove the onion rings from the buttermilk, allowing the excess to drip off, then dredge each ring first in the flour mixture, followed by the panko breadcrumbs.
– How: Start with the flour mixture to create a base layer that the panko can adhere to. Make sure to press the panko firmly onto each ring for maximum crunch.
– What to look/smell/hear: You’ll notice a satisfying crunch as the panko clings to the onion rings. The aroma will shift to a more savory and promising scent.
6. Arrange in the Air Fryer
– What: Lightly spray the air fryer basket with olive oil and arrange the onion rings in a single layer, ensuring they do not touch.
– How: Lay them out in a way that allows air to circulate freely around each ring, which is crucial for achieving that crispy texture.
– What to look/smell/hear: You should hear a light hiss from the oil as you spray. The rings should look golden and inviting, setting the stage for frying.
7. Air Fry for Crispiness
– What: Air fry at 400°F for 10 minutes, then flip the rings, spray lightly with more oil, and cook for an additional 10 minutes until they’re golden brown and crispy.
– How: Use tongs to carefully flip each ring after the first cooking time. This ensures even cooking and browning on both sides.
– What to look/smell/hear: As they cook, you’ll notice a delightful crunching sound and a mouthwatering aroma filling your kitchen. Look for that beautiful golden color; it’s your signal that they’re ready!
Chef’s Note: Remember, the secret to crispy onion rings is in the double coating and the light spray of oil. This technique allows for maximum crunch without the excess oil of traditional frying.
Pro Tips for the Best Results
– Use Fresh Onions: Fresh onions not only have a better flavor but also maintain their structure during frying, resulting in a crunchier texture.
– Let the Rings Rest: After dredging, allow the onion rings to sit for a few minutes before air frying. This helps the coating adhere better.
– Don’t Overcrowd the Basket: If the rings are too close together, they’ll steam rather than fry. Work in batches if necessary.
– Experiment with Seasoning: Don’t be afraid to adjust the spices in the flour mixture to fit your taste. Consider adding cayenne pepper for heat or herbs like dried oregano or thyme for a herby twist.
– Check for Doneness: Every air fryer is different. Start with the recommended time, but keep an eye on your onion rings. They should be golden brown and crispy.
– Serve Immediately: For the best texture, serve your onion rings right after cooking. If you need to keep them warm, place them on a wire rack in the oven set to low heat.
– Use Cooking Spray: A light spray of oil before and during cooking ensures a crispy finish without excess fat.
Common Mistakes to Avoid
1. Skipping the Soaking Step: The buttermilk soak is crucial for flavor and texture. Skipping it results in bland onion rings.
2. Using Regular Breadcrumbs: Regular breadcrumbs won’t provide the same crunch. Always opt for panko breadcrumbs for that extra crispiness.
3. Not Drying the Rings Properly: Allowing excess buttermilk to drip off ensures the coating sticks well. Too much moisture can lead to a soggy finish.
4. Stacking the Rings: Placing onion rings on top of each other in the air fryer prevents them from cooking evenly. Always arrange them in a single layer.
5. Neglecting to Preheat the Air Fryer: If your air fryer isn’t preheated, the cooking time will be off, affecting the texture and color of your rings.
6. Overcooking or Undercooking: Keep an eye on the cooking time. Overcooked rings will be dry, while undercooked rings will be soggy and lacking flavor.
7. Not Using Enough Oil: A light spray of oil helps achieve that golden color and crispy texture. Skipping this step can result in dry, chewy onion rings.
Creative Variations
1. Seasonal Onion Rings: Try using sweet onions in the spring and summer for a milder flavor. In the fall, consider adding a dash of cinnamon or nutmeg for a seasonal twist.
2. Dietary-Friendly: Substitute all-purpose flour with almond flour or gluten-free flour for a gluten-free version. Use a dairy-free buttermilk alternative such as almond or oat milk mixed with vinegar.
3. Gourmet Elevated: For a gourmet touch, add grated Parmesan cheese to the panko breadcrumbs or drizzle the finished rings with a balsamic glaze for added flavor and sophistication.
4. Quick 15-Minute: If you’re short on time, use frozen onion rings. They can be cooked directly in the air fryer, cutting down prep time significantly. Just remember that the frying time may need adjustment.
5. Kid-Friendly: For a fun twist, coat the onion rings in a mixture of crushed cornflakes and a sprinkle of cheese. The kids will love the crunchy texture and cheesy flavor!
6. International Twist: Experiment with different spice blends such as Cajun seasoning for a Southern flair, or garam masala for an Indian-inspired version. Each brings its unique flavor profile to the classic onion ring.
7. Stuffed Onion Rings: For an indulgent variation, stuff the onion rings with cheese before coating. When cooked, the cheese melts and creates a gooey, delicious surprise inside.
By following these tips and variations, you can create the perfect crispy air fryer onion rings that will be the star of your next snack or gathering. Enjoy experimenting with flavors and techniques to make this dish your own!
Serving Ideas
Crispy air fryer onion rings are not just a snack; they can elevate any meal when plated creatively. Here are a few serving ideas to inspire you:
1. Classic Dipping Trio: Serve your onion rings with a trio of dipping sauces like creamy ranch, spicy sriracha mayo, and tangy barbecue sauce. This not only looks appealing but also gives your guests a variety of flavors to enjoy.
2. Onion Ring Stack: For a dramatic presentation, stack the onion rings on a small plate or wooden board. Drizzle with a balsamic glaze and sprinkle some fresh chives on top for an elegant look.
3. Burgers and Rings Combo: Place a side of onion rings next to homemade burgers on a large platter. This pairing is a classic that always gets rave reviews. You can even place a few rings atop your burger for an extra crunch!
4. Salad Garnish: Lightly crumble a few onion rings over a mixed greens salad. The crispy texture adds a delightful crunch that contrasts beautifully with the fresh veggies.
5. Snack Bowl: For a casual gathering, serve the onion rings in a large bowl with some fresh herbs scattered on top. This relaxed presentation encourages sharing and keeps things fun.
What to Serve With
When it comes to pairing your crispy air fryer onion rings, the options are both delicious and versatile. Here are some fantastic side dishes and meals that go perfectly with these crispy delights:
1. Burgers: There’s nothing like the combination of juicy burgers and crispy onion rings. The richness of the burger complements the crunchy texture of the rings, making for a satisfying meal.
2. Hot Dogs: Elevate your hot dog game by serving onion rings on the side. The crunchy contrast adds a fun twist to a classic cookout favorite.
3. Fried Chicken: Pairing onion rings with fried chicken creates a crunchy, comfort-food experience. The flavors meld beautifully, and the rings can serve as a delightful side.
4. Loaded Nachos: Sprinkle some crispy onion rings over a plate of loaded nachos for an unexpected, crispy topping that enhances the overall texture and flavor profile.
5. Fish Tacos: Serve these onion rings alongside fish tacos for a surf-and-turf twist. The rings’ crunch balances the soft taco filling.
6. Deli Sandwiches: A hearty deli sandwich paired with onion rings makes for a satisfying lunch. The rings add a delightful crunch that complements the sandwich’s fillings.
Storage Guide
To keep your crispy air fryer onion rings fresh, proper storage is essential. Here’s how to do it:
– Container Type: Use an airtight container to prevent moisture from getting in, which can make your onion rings soggy.
– Temperature: Store the onion rings in the refrigerator at a temperature of 40°F or below.
– Days It Keeps: When stored correctly, they will last up to 3-4 days in the fridge.
– Signs Gone Bad: If you notice a sour smell, off-putting texture, or discoloration, it’s best to discard them.
– How to Refresh: To revive the crunch, you can reheat them in the air fryer at 375°F for about 5 minutes. This will help restore their crispiness without making them greasy.
Freezing Tips
If you want to prepare your crispy onion rings ahead of time, freezing is a great option. Here’s how to do it:
– Freezing Well: Yes, these onion rings freeze well! Just make sure they are completely cooled before freezing to maintain their texture.
– Portioning: Lay the onion rings in a single layer on a baking sheet, freeze for a couple of hours, and then transfer them to a freezer-safe bag or container. This prevents them from sticking together.
– How Long: They can be frozen for up to 3 months for the best quality.
– Thawing Method: To use frozen onion rings, simply remove them from the freezer and cook them straight from frozen in the air fryer, adding an extra minute or two to the cooking time.
Reheating Guide
When it’s time to enjoy your leftover onion rings, here’s how to effectively reheat them:
– Microwave: This is the quickest method, but it may not keep them crispy. Place the onion rings on a microwave-safe plate and heat in 30-second intervals until warm, but be cautious not to overheat.
– Oven: Preheat your oven to 375°F. Place the onion rings on a baking sheet in a single layer and bake for about 10 minutes, or until heated through and crispy.
– Stovetop: Heat a small amount of oil in a skillet over medium heat. Add the onion rings and cook for about 2-3 minutes on each side, or until they are crisp and heated through.
Nutrition Overview
Each serving of crispy air fryer onion rings contains approximately 250 calories. Here’s a quick breakdown of the macros per serving:
– Fat: 10g
– Carbohydrates: 35g
– Protein: 4g
The key ingredients in this recipe provide not only flavor but also nutritional benefits. Onions are rich in antioxidants and may help reduce inflammation. Panko breadcrumbs are lighter than traditional breadcrumbs, allowing you to enjoy a crispy texture without the added calories. Buttermilk contributes probiotics, which are beneficial for gut health.
Frequently Asked Questions
Q: Can I make these onion rings gluten-free?
A: Absolutely! Use a gluten-free flour blend and gluten-free breadcrumbs to create a delicious gluten-free version of these onion rings.
Q: Can I use a different type of onion?
A: While yellow onions are traditional, you can experiment with red or sweet onions for a different flavor profile. Sweet onions can add a hint of natural sweetness to your rings!
Q: How do I make these onion rings vegan?
A: You can substitute buttermilk with a non-dairy milk mixed with a teaspoon of vinegar to create a vegan alternative. Use a plant-based oil spray for frying.
Q: What is panko breadcrumbs, and why should I use them?
A: Panko breadcrumbs are a Japanese-style breadcrumb made from crustless bread, resulting in a lighter, airier texture that creates a crispier coating when fried or baked.
Q: Can I prepare the onion rings in advance?
A: Yes! You can slice the onions, soak them in buttermilk, and coat them up to a day in advance. Just store them in the fridge until ready to cook.
Q: What if I don’t have buttermilk?
A: You can easily make a substitute by combining 1 cup of milk (dairy or non-dairy) with 1 tablespoon of vinegar or lemon juice. Let it sit for 5-10 minutes before using.
Q: Can I use a different cooking method instead of an air fryer?
A: Yes! You can deep-fry or bake the onion rings in the oven. If baking, just be sure to spray them with oil to achieve that crispy texture.
Q: Why are my onion rings soggy?
A: Soggy onion rings can result from excess moisture. Make sure to let them drain after soaking and avoid overcrowding the air fryer basket to ensure even cooking.
Final Thoughts
Crispy air fryer onion rings are not only a delightful treat but also a wonderful addition to any gathering or meal. They are surprisingly easy to make and offer a healthier alternative to traditional frying.
Tip: Remember to let your onion rings cool completely before storing them to maintain their crispiness.
Your kitchen adventures should always be fun, so enjoy creating this amazing snack, share it with friends and family, and relish in the compliments you’re sure to receive.