Follow Me On Pinterest!
Quick 30-Minute Vegetarian Chili


A Flavorful Comfort in a Hurry: The Perfect Weeknight Dinner
—
Introduction
I can still remember the first time I whipped up my Quick 30-Minute Vegetarian Chili. It was a chilly November evening, the kind where the air is crisp and hints of wood smoke linger in your nostrils. I had just returned from a long day at work, and the thought of spending hours slaving over a hot stove felt overwhelming. As I rummaged through my pantry, the brightly colored cans of beans, tomatoes, and vibrant spices caught my eye, whispering promises of warmth and comfort.
As I chopped the bell peppers, their sharp crunch echoed in the quiet of my kitchen, and the scent of onions sautéing in olive oil began to fill the space, mingling with the earthy aroma of cumin and chili powder. The colors of diced tomatoes and bright green herbs danced together in my mind, and I could already envision the steamy bowl of chili that awaited me. I tossed in some zucchini, and the sizzling sounds of vegetables meeting heat sang a melody of homecoming.
In just 30 minutes, I was transported to a world where each spoonful was a hug on a spoon, rich with flavor and texture. The creamy cannellini beans contrasted beautifully with the tender veggies, creating a satisfying heartiness that made me feel content and nourished. This dish quickly became a favorite not just for its speed but for the way it warmed both body and spirit. Now, almost every week, it graces my dinner table, a reliable reminder that nutritious and delicious meals don’t have to take forever to prepare.
Ready to create your own batch of this comforting delight? Let’s dive into the details of this quick, vibrant, and wholesome vegetarian chili that brings warmth to any weeknight!
—
Why This Recipe Works
This Quick 30-Minute Vegetarian Chili stands out not just for its brisk preparation time but also for its balance of flavors and textures. At the heart of this recipe are the key flavor combinations that make it sing. The warm, smoky notes of cumin and smoked paprika are perfectly complemented by the sweet, slightly tangy brightness of diced tomatoes and bell peppers. This blend creates a depth that is often missing in more generic versions, elevating your chili from a mere meal to a comforting experience.
Texture plays a critical role, too. The creamy consistency of cannellini beans melds beautifully with the vibrant crunch of fresh vegetables like zucchini and corn, while the rich broth provides a sumptuous base. By using both canned and fresh ingredients, you achieve a well-rounded texture that is satisfying without being overly heavy.
Each ingredient in this recipe serves a purpose. The onions provide a foundational sweetness that balances the dish, while the garlic adds aromatic depth. Fresh cilantro brightens the flavors right before serving, offering a burst of freshness that contrasts with the hearty chili base. In just half an hour, you create a robust dish that is not only quick but also packed with nutrients and flavors—something that sets this chili apart from many store-bought or restaurant options.
—
What Makes It Special
What truly makes this 30-Minute Vegetarian Chili special are its unique qualities that you won’t find in typical restaurant or canned versions.
– Freshness: Making this chili at home means you control the quality and freshness of your ingredients. You can choose organic tomatoes, seasonal vegetables, and spices that haven’t been sitting on a shelf for months—ensuring vibrant flavors in every bite.
– Customization: This recipe is incredibly versatile. Whether you prefer more heat, want to sneak in additional veggies, or need to cater to specific dietary restrictions, you can adjust the ingredients to suit your tastes.
– Cost-Effective: Whipping up a pot of chili at home is not only cheaper than dining out but allows you to enjoy a generous portion for later. You’ll find that making this chili is an investment in both your health and your wallet.
– Surprising Elements: One surprising twist is the addition of a dash of cocoa powder or a splash of apple cider vinegar at the end. These ingredients may seem unexpected, but they add a subtle depth and complexity that enhances the overall flavor profile, making your chili unforgettable.
—
Ingredient Breakdown
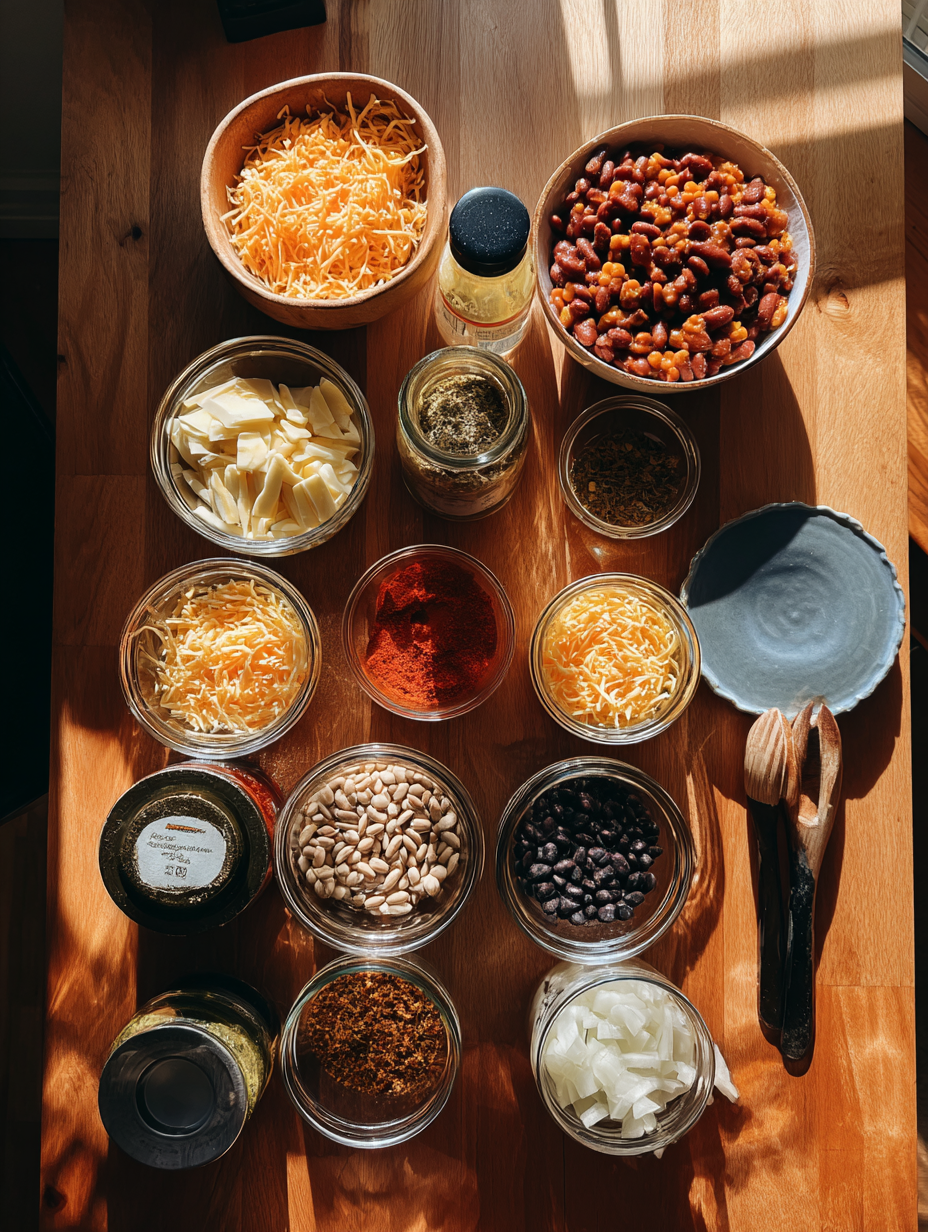
– Olive Oil (2 tablespoons): This is your base for sautéing the aromatics. It adds richness and helps the spices bloom, ensuring you capture the essence of each ingredient.
– Onion (1 medium, diced): Onions provide a natural sweetness and a foundation of flavor. When sautéed, they caramelize slightly, adding depth to the chili.
– Garlic (3 cloves, minced): Garlic infuses the dish with its aromatic qualities. It’s a powerhouse of flavor that enhances the overall profile of the chili.
– Bell Peppers (1 cup, diced): Choose a mix of colors—red, yellow, and green—for visual appeal and varying sweetness. They add a lovely crunch and vibrant color.
– Zucchini (1 medium, diced): Zucchini absorbs flavors and adds a satisfying texture. It cooks quickly, ensuring it’s tender but not mushy.
– Diced Tomatoes (1 can, 14.5 ounces): Canned tomatoes serve as the base of your chili, bringing acidity and moisture. Look for fire-roasted varieties for an added smoky flavor.
– Cannellini Beans (1 can, drained and rinsed): These creamy white beans provide protein and a silky texture, making the chili hearty and filling.
– Corn (1 cup, fresh or frozen): Sweet corn adds bursts of flavor and a delightful crunch that contrasts with the softer beans and vegetables.
– Chili Powder (1 tablespoon): This spice blend is essential for that classic chili flavor. You can adjust the amount based on your heat preference.
– Cumin (1 teaspoon): Cumin adds a warm, earthy note that is crucial for a well-rounded chili. It enhances the depth of the dish.
– Smoked Paprika (1 teaspoon): This ingredient introduces a subtle smokiness that elevates the chili, making it taste as if it has been simmering for hours.
– Salt and Pepper (to taste): Essential for enhancing all the flavors in the dish. Adjust these to your preference before serving.
– Fresh Cilantro (for garnish): This herb brightens the flavors of the chili and adds a fresh touch right before serving.
Substitutions:
– Dairy-Free/Vegan: This recipe is already dairy-free, but you can serve it with dairy-free sour cream or avocado for creaminess.
– Gluten-Free: This chili is inherently gluten-free, but always check labels on canned ingredients.
– Other Beans: Feel free to swap out cannellini beans with black beans or kidney beans for variety.
Specialty Ingredients:
You can find smoked paprika, quality canned tomatoes, and a variety of beans at most grocery stores, but for the freshest produce and herbs, consider visiting a local farmer’s market.
—
Equipment Needed
To make your Quick 30-Minute Vegetarian Chili, you’ll need a few essential tools to streamline the cooking process:
– Large Pot or Dutch Oven: This is where all the magic happens. A sturdy pot allows for even heat distribution, which is crucial for sautéing and simmering.
– Cutting Board and Knife: A solid cutting board and a sharp knife are essential for prepping your vegetables efficiently. Look for a non-slip board for safety.
– Wooden Spoon or Spatula: This will be your best friend in the kitchen, helping you to sauté, stir, and combine ingredients without scratching your pot.
– Can Opener: A reliable can opener is necessary for easily accessing your canned beans and tomatoes.
– Measuring Cups and Spoons: Precision matters, especially with spices. Having a set of measuring cups and spoons ensures that you get the flavors just right.
Optional Tools:
– Blender: If you prefer a smoother chili, a blender can help you purée part of the mixture to create a creamier texture.
– Ladle: For serving, a ladle makes it easy to portion out your chili without spilling.
Affordable Alternatives:
If you don’t have a Dutch oven, any heavy-bottomed pot will work. You can also use a sharp paring knife if a chef’s knife feels too daunting for your veggie prep.
With these tools at your disposal, you’re well on your way to creating a warm, inviting pot of vegetarian chili that will make your kitchen feel like the coziest place on earth.
Step-by-Step Instructions
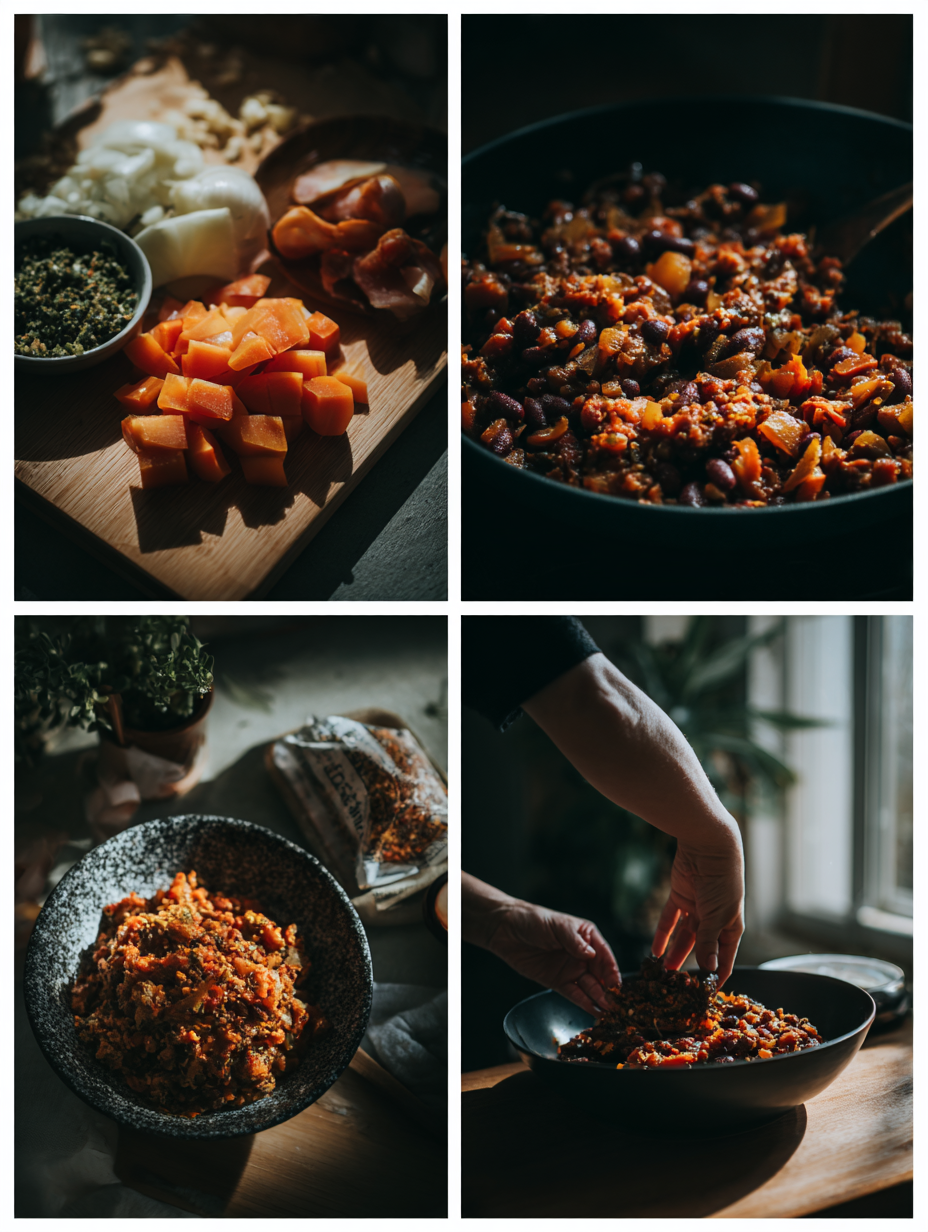
1. Gather Your Ingredients
Start by assembling all your ingredients on the countertop. You’ll need 1 can of black beans, 1 can of kidney beans, 1 can of diced tomatoes, 1 bell pepper, 1 onion, 2 cloves of garlic, 2 tablespoons of chili powder, 1 teaspoon of cumin, 1 teaspoon of smoked paprika, 1 cup of vegetable broth, and salt and pepper to taste. Ensure everything is prepped: dice the onion and bell pepper, and mince the garlic. This is crucial for a seamless cooking experience, allowing you to focus on the flavors as they develop.
2. Sauté the Aromatics
Heat 2 tablespoons of olive oil in a large pot over medium heat. Once the oil shimmers (about 2 minutes), add the diced onion. Sauté for 3-4 minutes, stirring occasionally, until the onion becomes translucent and fragrant. Next, add the minced garlic and bell pepper, cooking for an additional 2-3 minutes. Listen for a gentle sizzle, and pay attention to the aroma; you want a sweet, savory smell that indicates the aromatics are cooking properly. Chef’s Note: If the garlic starts to brown too quickly, lower the heat to prevent bitterness.
3. Add the Spices
Sprinkle in your chili powder, cumin, and smoked paprika. Stir the spices into the sautéed vegetables for about 1 minute, allowing them to bloom and release their essential oils. This step is critical for building depth and complexity in your chili. Look for the spices to darken slightly in color and for the fragrant aroma to intensify, which indicates they’re ready for the next step.
4. Incorporate the Canned Ingredients
Pour in the canned black beans, canned kidney beans, and canned diced tomatoes (with their juices) into the pot. Follow that with 1 cup of vegetable broth. Stir everything together vigorously, ensuring the beans and tomatoes are well mixed with the spices. This should take about 2 minutes. You should see a colorful mixture with the beans and tomatoes evenly distributed. Chef’s Note: For a thicker chili, you can slightly mash some of the beans against the side of the pot with your spoon.
5. Simmer
Increase the heat until the mixture reaches a gentle boil, then reduce it to low. Cover the pot and let it simmer for 15 minutes, stirring occasionally. This allows the flavors to meld beautifully. You’re looking for small bubbles breaking the surface, and the chili should thicken slightly by the end of this time. If necessary, taste and adjust seasoning with salt and pepper to your liking.
6. Final Touches
After the 15 minutes, remove the lid and give the chili a good stir. If it’s too thick for your taste, you can add a splash more vegetable broth. If you enjoy a little heat, this is the time to add a pinch of cayenne pepper or some diced jalapeños. Let it simmer uncovered for an additional 5 minutes to meld any new flavors. The chili should be hearty and fragrant, inviting you to take that first comforting spoonful.
7. Serve
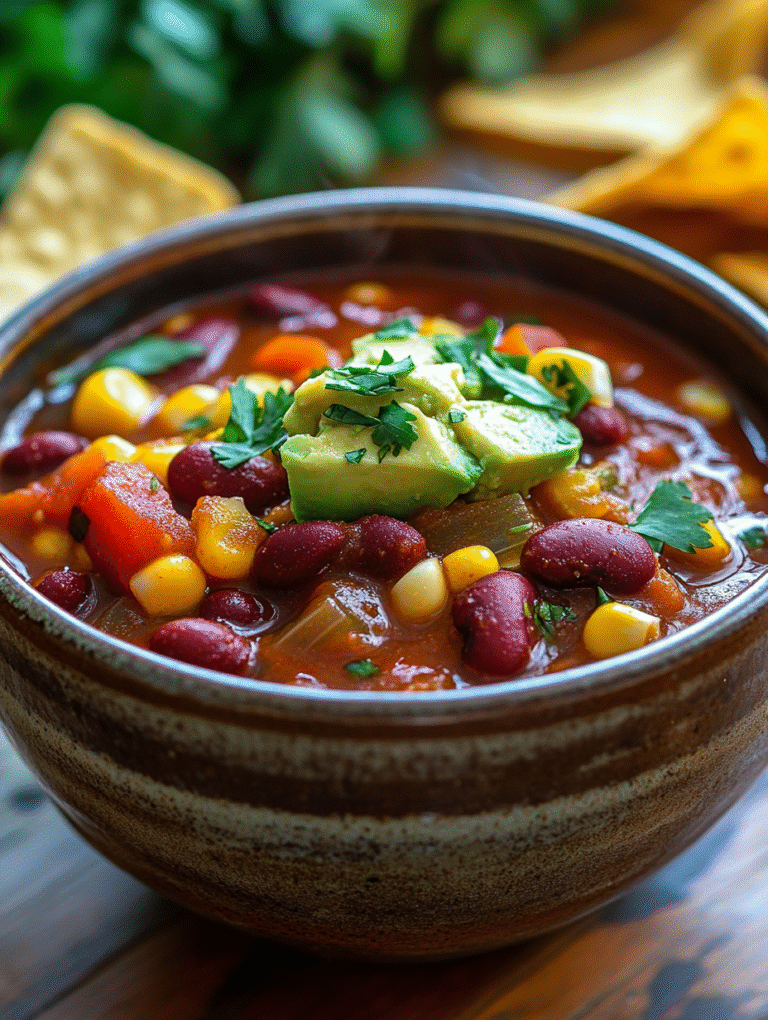
Ladle your chili into bowls and garnish as desired. Consider toppings like fresh cilantro, avocado slices, or a dollop of sour cream or Greek yogurt for a creamy contrast. Serve immediately while it’s warm and comforting. The chili should have a vibrant color and a thick, stew-like consistency, with the beans and veggies playing harmoniously in each bite.
Pro Tips for the Best Results
1. Use Fresh Spices
Ensure your spices are fresh before adding them. Old spices can lose their potency, making your chili bland. A quick sniff test will confirm their aroma; if they smell weak, it’s time to replace them.
2. Quality Canned Ingredients
Choose high-quality canned beans and tomatoes. Opt for brands that use minimal additives. The flavor of these ingredients can significantly impact the overall taste of your chili, enhancing its authenticity.
3. Adjust for Heat Gradually
If you prefer a spicier chili, add heat gradually. Start with a small amount of cayenne or diced jalapeño, then taste before adding more. This prevents you from overpowering the dish with heat, allowing for a balanced flavor profile.
4. Don’t Skip the Simmer
Even though this is a quick recipe, the simmering stage is crucial. It allows flavors to meld together beautifully. Skipping this step will leave your chili tasting more like its individual ingredients rather than a cohesive dish.
5. Experiment with Texture
If you like a chunkier chili, use a combination of whole beans and mashed beans. This gives a delightful variance in texture, making each bite interesting. Simply mash about half the beans after they’re cooked to create a thicker base while keeping the rest whole.
6. Garnish Wisely
The right garnish can elevate your chili from good to great. Fresh herbs like cilantro or parsley add brightness, while avocado or cheese can add creaminess. Choose toppings that complement the spiciness and add contrasting textures.
7. Store Leftovers Properly
If you have leftovers, store them in an airtight container in the fridge. Chili often tastes even better the next day as the flavors deepen and develop overnight. To reheat, add a splash of broth to prevent it from drying out.
Common Mistakes to Avoid
1. Using Dried Beans Instead of Canned
While dried beans can be great, they require soaking and longer cooking time. Jumping straight into a quick recipe with dried beans can lead to hard, undercooked legumes, ruining your chili. Always opt for canned beans for this quick dish.
2. Overcooking the Garlic
Garlic can quickly turn from fragrant to burnt. If it’s overcooked, it becomes bitter and can overshadow the other flavors in your chili. Keep it on medium heat and watch closely to remove it as soon as it becomes fragrant.
3. Neglecting to Taste as You Cook
Failing to taste your chili at various stages can lead to unbalanced flavors. Always taste and adjust seasoning as you go. A pinch of salt or a dash of acidity from lime juice can enhance the overall flavor dramatically.
4. Skipping the Simmer
Skipping or rushing the simmering step can prevent the flavors from developing fully. This can result in a dish that tastes disjointed rather than harmonious. Allowing it to simmer for the recommended time is essential for the best flavor.
5. Not Using Enough Liquid
If you don’t add enough broth or liquid, your chili might turn out too thick or dry. Aim for a nice stew-like consistency. If it looks too thick, don’t hesitate to add more broth during cooking.
6. Ignoring Flavor Balance
A common mistake is ignoring the balance of flavors. If your chili turns out bland, it usually lacks salt or acidity. A splash of vinegar or a squeeze of lime juice at the end can elevate the dish significantly.
7. Forgetting About Garnishes
Serving chili without garnishes can make it look less appealing and less flavorful. Fresh toppings add color and texture, enhancing both the presentation and taste. Always finish with a sprinkle of herbs or a creamy element for a complete dish.
Creative Variations
1. Seasonal Variation
In fall, switch out the bell pepper for butternut squash. Dice the squash and add it in with the onion to allow it to soften and incorporate its sweetness into the chili. This seasonal twist adds a delightful sweetness and a beautiful orange hue.
2. Dietary-Friendly Version
For a vegan adaptation, simply ensure that any garnishes, like sour cream, are plant-based. You can use cashew cream or coconut yogurt as a creamy alternative. This keeps the dish completely dairy-free while still satisfying.
3. Gourmet Elevated Version
Upgrade your chili by adding quinoa for a protein boost and a nutty flavor. Cook the quinoa separately and stir it in at the end for a gourmet touch. Consider topping with crème fraîche and chopped chives for an elegant finish.
4. Quick 15-Minute Version
For a super speedy option, use pre-cooked lentils instead of beans, and skip the chopping by using frozen mixed vegetables. This allows you to have a hearty chili ready in no time while still packing in the nutrition.
5. Kid-Friendly Version
To make it more appealing to kids, reduce the spices slightly and add sweet corn for sweetness and crunch. You can also serve with tortilla chips or grated cheese on top to make it fun and interactive.
6. International Twist
Give your chili an Italian twist by adding Italian herbs like oregano and basil, and a splash of balsamic vinegar. Serve it with a side of crusty bread for dunking, making it a cozy Italian-inspired meal.
Serving Ideas
When it comes to serving your Quick 30-Minute Vegetarian Chili, presentation can elevate the experience from ordinary to extraordinary. Here are some beautiful ways to plate and serve this dish:
1. Rustic Bowl: Serve the chili in a deep, rustic bowl, allowing the vibrant colors to shine through. Top with a generous dollop of sour cream or Greek yogurt for creaminess, and sprinkle with finely chopped cilantro and green onions for freshness. A few slices of jalapeño on top add a pop of color and heat.
2. Chili Bar: Create a chili bar by setting up a large serving dish filled with the chili and a variety of toppings on the side. Include shredded cheese, avocado slices, crispy tortilla strips, and sliced olives. Use colorful bowls for each topping to make the display visually appealing.
3. Personalized Portions: For an intimate dinner, serve individual portions in small cast-iron skillets. Garnish with crumbled feta and a sprinkle of paprika for added visual appeal. This not only keeps the chili warm but also adds a rustic charm to your table setting.
4. Accompaniment on the Side: Plate the chili alongside a slice of cornbread or a small mixed greens salad. Drizzle a light vinaigrette over the salad to contrast with the hearty chili, and add a few cherry tomatoes for a burst of color.
5. Garnish with Style: Finish each bowl with a spritz of lime juice and a few cilantro leaves for a bright, fresh touch. Consider using colorful bowls or plates that complement the rich, earthy colors of the chili, making it a feast for the eyes as well as the palate.
What to Serve With
Pairing your Quick 30-Minute Vegetarian Chili with complementary dishes can create a well-rounded meal. Here are some delightful suggestions:
1. Cornbread Muffins: The sweetness of cornbread muffins perfectly balances the spicy and savory notes of the chili, providing a lovely texture contrast that enhances each bite.
2. Guacamole and Tortilla Chips: Creamy guacamole with crispy tortilla chips adds a flavorful, refreshing contrast. The richness of the avocado complements the chili’s hearty flavor while adding a delightful crunch.
3. Crispy Roasted Brussels Sprouts: The slight bitterness and crunch of roasted Brussels sprouts create a wonderful texture balance with the soft, warm chili. Toss them with a bit of balsamic glaze for an added flavor kick.
4. Margaritas: For a fun beverage pairing, serve your chili with a refreshing margarita. The bright, citrusy notes of the drink cut through the richness of the chili, making each bite and sip a delightful experience.
5. Chocolate Avocado Mousse: Finish your meal with a light, creamy chocolate avocado mousse. The sweetness of the dessert contrasts beautifully with the savory chili, leaving your palate satisfied without feeling overly full.
Storage Guide
To keep your Quick 30-Minute Vegetarian Chili fresh for later enjoyment, proper storage is essential. Here’s how to do it:
– Container Type: Use airtight containers made from glass or BPA-free plastic to avoid any lingering odors and to maintain freshness.
– Storage Temperature: Store your chili in the refrigerator at 40°F (4°C) or lower to slow bacterial growth.
– Shelf Life: Properly stored, your chili will keep for 3-4 days in the fridge.
– Signs of Spoilage: Before consuming, check for any off smells, discoloration, or mold — these are signs that the chili has gone bad.
– Refreshing Before Serving: When you’re ready to enjoy your leftovers, add a splash of vegetable broth or water to restore moisture and heat gently on the stovetop until warmed through, stirring occasionally to ensure an even temperature.
Freezing Tips
Yes, your Quick 30-Minute Vegetarian Chili freezes beautifully! Here’s how to do it properly:
– Portioning: Allow the chili to cool completely before portioning it into freezer-safe containers or resealable freezer bags. Aim for individual servings to make defrosting easier.
– Wrapping Method: If using bags, remove excess air before sealing to prevent freezer burn. For containers, leave a little space at the top, as the chili will expand when frozen.
– Labeling: Clearly label each container or bag with the date and contents, so you can easily identify it later.
– Storage Duration: The chili can be stored in the freezer for up to 3 months without significant loss of quality.
– Quality Changes: Expect a slight change in texture after thawing, but the flavors will still be vibrant.
– Best Thawing Method: To thaw, place the chili in the refrigerator overnight or use the defrost setting on your microwave if you’re short on time.
Reheating Guide
When it’s time to enjoy your chili again, here are some specific reheating instructions:
– Microwave: Pour a serving into a microwave-safe bowl, cover it loosely with a damp paper towel to prevent drying out, and heat on high for 2-3 minutes, stirring halfway through. Check to ensure it’s heated evenly.
– Oven: Preheat your oven to 350°F (175°C). Place the chili in an oven-safe dish, cover with foil to retain moisture, and heat for 20-25 minutes, stirring halfway through to ensure even heating.
– Stovetop: In a saucepan over medium heat, add your chili. To restore moisture, add a splash of vegetable broth or water and stir frequently for about 10-15 minutes until heated through.
– Texture Restoration Tips: To bring back some of the original texture, consider adding a few fresh vegetables or a sprinkle of fresh herbs just before serving.
Nutrition Overview
Your Quick 30-Minute Vegetarian Chili not only delights your taste buds but also packs a nutritious punch. Here’s a quick look at the approximate nutritional values per serving:
– Calories: 280
– Protein: 12g
– Carbohydrates: 45g
– Fat: 6g
– Fiber: 10g
– Sugar: 8g
Key ingredients like beans provide a hearty source of protein and fiber, which can help keep you full longer. Bell peppers, rich in vitamins A and C, contribute to your daily nutrient intake while adding vibrant color. Lastly, the inclusion of tomatoes also offers a good dose of antioxidants, promoting overall health.
Frequently Asked Questions
Q: Can I substitute the beans for something else?
A: Absolutely! If you prefer a different texture or flavor, you can use lentils or chickpeas instead of beans. Both will provide adequate protein and fiber while giving the chili a unique twist.
Q: Is this chili gluten-free?
A: Yes, this chili is naturally gluten-free! Just be sure to check that any canned ingredients, like beans or diced tomatoes, are labeled gluten-free to avoid any hidden gluten.
Q: Can I make this chili in advance for meal prep?
A: Yes, this chili is perfect for meal prep! You can make a big batch ahead of time, store it in individual portions, and enjoy it throughout the week or freeze for later.
Q: How can I make this chili spicier?
A: To amp up the heat, add diced jalapeños, chili powder, or even a dash of hot sauce to the pot while cooking. Taste as you go to achieve your desired spice level.
Q: Can I add other vegetables to the chili?
A: Definitely! Feel free to throw in any vegetables you have on hand, like zucchini, carrots, or even spinach. They’ll add nutrition and depth of flavor to your chili.
Q: What type of pot is best for making chili?
A: A heavy-bottomed pot, like a Dutch oven, is ideal for making chili. It distributes heat evenly and allows for slow cooking, which enhances the flavors.
Q: How long does it take to cook the chili from scratch?
A: This quick recipe is designed to be made in 30 minutes, but if you choose to use dried beans, you’ll need to soak and cook them beforehand, which will add to your prep time.
Q: Can I use canned vegetables instead of fresh?
A: Yes, canned vegetables can be a great time-saver. Just make sure to drain and rinse them to reduce excess sodium and maintain good flavor.
Final Thoughts
As you prepare your Quick 30-Minute Vegetarian Chili, remember that the key to a delicious outcome lies in fresh ingredients and a pinch of love. Don’t hesitate to customize the recipe to suit your taste! I genuinely believe this chili will become a comforting staple in your home, perfect for busy weeknights or cozy gatherings.
I can’t wait to see how your version turns out! Share your culinary masterpiece with friends or on social media, and invite others to enjoy this vibrant dish. Don’t forget to take a moment to savor each spoonful— you’ve earned it!