Follow Me On Pinterest!
One Pan Honey Garlic Chicken


One Pan Honey Garlic Chicken: A Sweet and Savory Dish That Will Transform Your Weeknight Dinners
—
Introduction
There’s a certain kind of magic that happens in the kitchen on a chilly evening when you’re craving something warm and comforting. I remember the first time I made One Pan Honey Garlic Chicken; it was a drizzly Wednesday night, and the world outside felt gray and gloomy. As I stood by the stove, the air was filled with the inviting scent of garlic sizzling in olive oil, mingling with the sweet notes of honey that kissed the chicken as it caramelized. The sound of the chicken sizzling in the pan was music to my ears, a gentle reminder that something delicious was on its way.
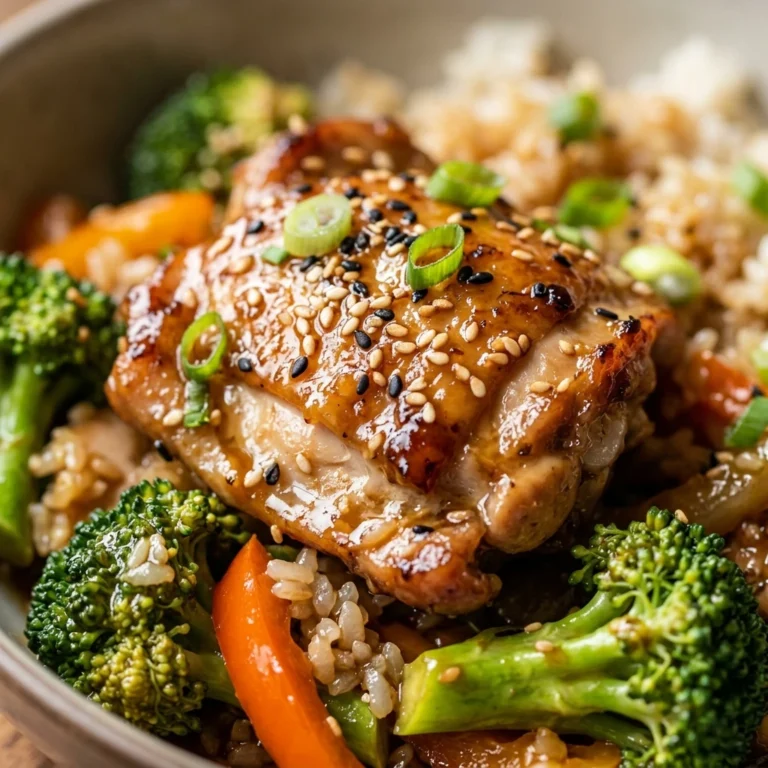
The vibrant colors of the dish were a feast for the eyes: the golden-brown chicken glistened under the kitchen lights, while the bright green of sautéed broccoli added a touch of freshness. As I plated the dish, the glossy sauce clung to the chicken, creating a beautiful sheen that made my mouth water. I remember the first bite vividly—the tender chicken, the sticky sweet sauce, and the crisp, crunchy vegetables danced together in harmony.
This dish quickly became a favorite in my household, not just for its mouthwatering taste but also for its ease of preparation. You can whip it up in under 30 minutes, all in one pan, which means fewer dishes to wash and more time to enjoy with loved ones. It’s the kind of recipe that effortlessly impresses, whether you’re cooking for family or hosting friends.
Now, let’s dive into the details of this delightful dish that’s sure to become a staple in your kitchen as well.
—
Why This Recipe Works
At the heart of this One Pan Honey Garlic Chicken lies a harmonious blend of flavors and textures that elevate it above typical weeknight meals. The sweetness of honey balances the sharp, pungent notes of garlic, creating a sauce that’s sticky and irresistibly flavorful. These two ingredients work in perfect tandem to enhance the natural savory flavors of the chicken, resulting in a dish that is both sweet and savory—a combination that is universally loved.
Texture plays a crucial role as well. The chicken is seared to perfection, yielding a crispy exterior that contrasts beautifully with its tender, juicy interior. As you bite into the chicken, you’ll experience that delightful crunch, followed by the succulent meat that practically melts in your mouth. The addition of vibrant vegetables, like broccoli or bell peppers, adds an element of crispness, providing a satisfying crunch that balances the dish’s overall richness.
Each ingredient has its purpose. The chicken thighs offer a richer flavor compared to chicken breasts, and their fat content keeps the meat juicy during cooking. The soy sauce brings umami depth, while the ginger adds a warm, zesty kick. This version of honey garlic chicken stands out from generic recipes because of its careful attention to these flavor nuances and texture contrasts, all of which come together in a delightful one-pan meal that is both satisfying and sophisticated.
—
What Makes It Special
This One Pan Honey Garlic Chicken boasts several unique qualities that set it apart from takeout or store-bought versions.
– Freshness: When you make this dish at home, you control the quality of ingredients, ensuring that everything is fresh. The vibrant vegetables are crisp, and the chicken is juicy, making every bite a delightful experience.
– Cost-Effective: Preparing this meal at home is not only more economical than ordering in, but it also allows you to buy ingredients in bulk, which can save you money in the long run.
– Customization: You have the freedom to adjust the flavors to suit your palate. Want it spicier? Add a dash of chili flakes. Prefer a tangy twist? Squeeze in some fresh lime juice. This adaptability makes it easy to create a dish that’s uniquely yours.
– Surprising Elements: The use of ginger and a splash of sesame oil elevates this dish beyond typical honey garlic recipes, adding depth and a hint of warmth that you often miss in restaurant versions.
—
Ingredient Breakdown
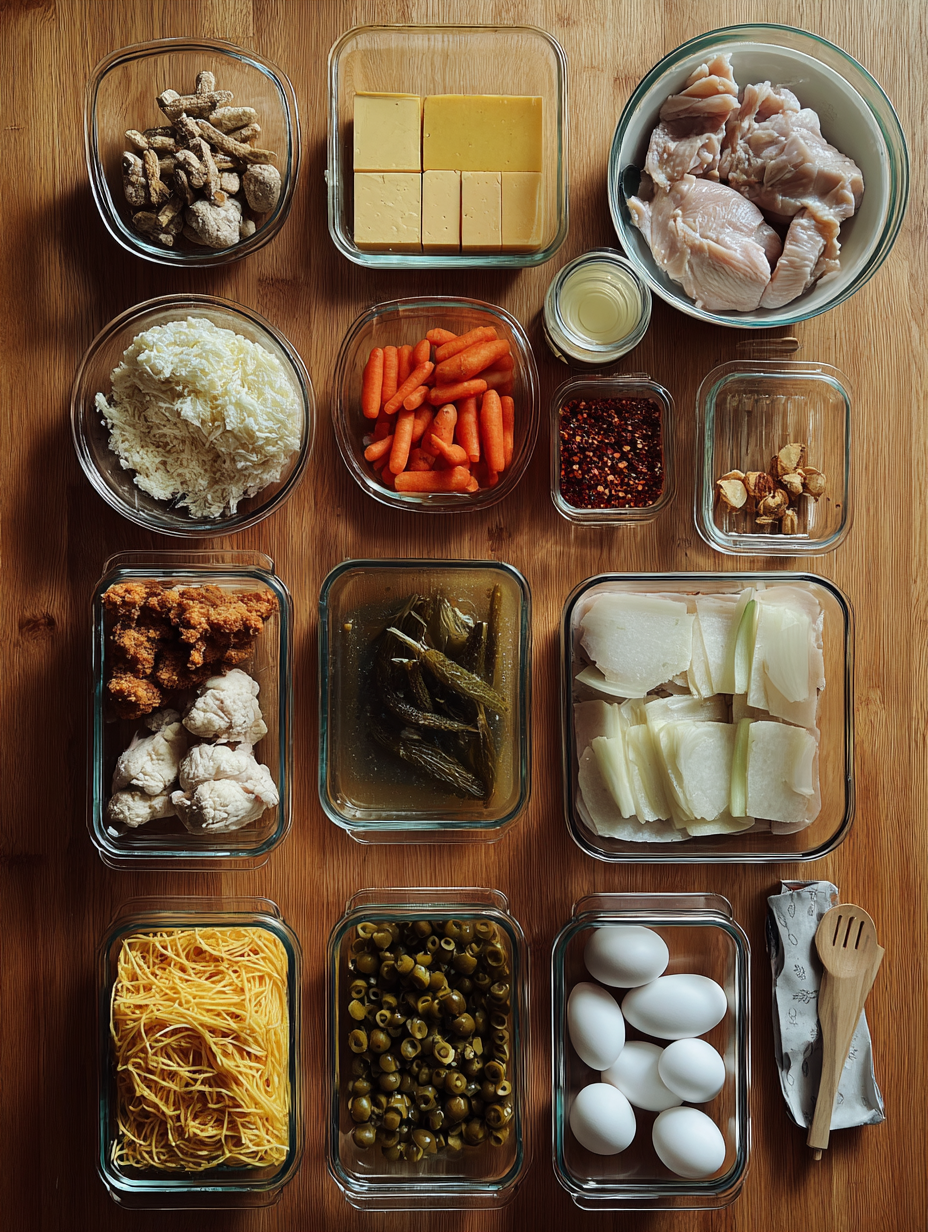
1. Chicken Thighs: The star of this dish, chicken thighs are preferred for their moistness and rich flavor. Using boneless thighs allows for quick cooking and easy handling. Aim for about 1.5 pounds, which should yield 4 servings.
2. Honey: This natural sweetener is what gives the dish its delightful glaze. You’ll need around 1/3 cup. If you’re looking for a lower-calorie option, you can substitute with agave syrup or maple syrup, but the flavor will differ slightly.
3. Garlic: Freshly minced garlic (about 4 cloves) is essential for that aromatic punch. While you can use garlic powder in a pinch, nothing beats the depth of flavor from fresh garlic.
4. Soy Sauce: Approximately 1/4 cup of soy sauce adds a savory depth. For a gluten-free version, opt for tamari.
5. Ginger: A tablespoon of freshly grated ginger brings a warm, zesty kick that balances the sweetness. You can also use ground ginger, but the fresh variety is recommended for its brightness.
6. Vegetables: Broccoli florets are a great addition for color and crunch, but feel free to substitute with bell peppers, snap peas, or carrots—whatever you have on hand. Aim for about 2 cups of mixed vegetables.
7. Sesame Oil: About 1 tablespoon of sesame oil adds a nutty richness. If you don’t have it on hand, you can substitute with olive oil, though the flavor profile will shift slightly.
8. Cornstarch: A teaspoon of cornstarch helps to thicken the sauce, giving it that desirable sticky consistency. If you’re looking for a gluten-free option, ensure your cornstarch is labeled as such.
9. Salt and Pepper: These essentials enhance all the other flavors. You can adjust the quantities according to your taste.
Each ingredient plays a vital role in creating a balanced dish. If you need to make substitutions for dietary preferences, the options provided will help you adapt without sacrificing flavor. Specialty ingredients like sesame oil can often be found in Asian grocery stores or health food stores, making it easy to get everything you need for this delightful meal.
—
Equipment Needed
1. Large Skillet or Wok: An essential tool for this recipe, a large skillet or wok allows for even cooking and ample space for sautéing both the chicken and vegetables without overcrowding. A non-stick skillet can help prevent sticking and make cleanup easier.
2. Cooking Spoon or Spatula: A sturdy spoon or spatula is necessary for stirring and flipping the chicken. A wooden or silicone utensil is a great choice to avoid scratching your skillet.
3. Measuring Cups and Spoons: Accurate measurement of your ingredients ensures the right balance of flavors. Invest in a set of measuring cups and spoons to make your cooking experience more precise.
4. Cutting Board and Sharp Knife: For chopping garlic, ginger, and vegetables, a good cutting board and sharp knife are crucial. They make prep work quick and safe, allowing for a smoother cooking process.
5. Plate or Serving Dish: You’ll need a nice plate or serving dish to present your beautifully cooked honey garlic chicken. A simple white dish allows the colors of the meal to shine.
6. Optional – Meat Thermometer: If you’re concerned about the doneness of your chicken, a meat thermometer can help ensure it reaches a safe internal temperature of 165°F (75°C).
By gathering these essential tools, you’ll set yourself up for success as you create this wonderful, flavorful one-pan meal. Remember, while some tools are essential, others can be swapped for items you already have at home, making this recipe accessible to everyone.
Step-by-Step Instructions
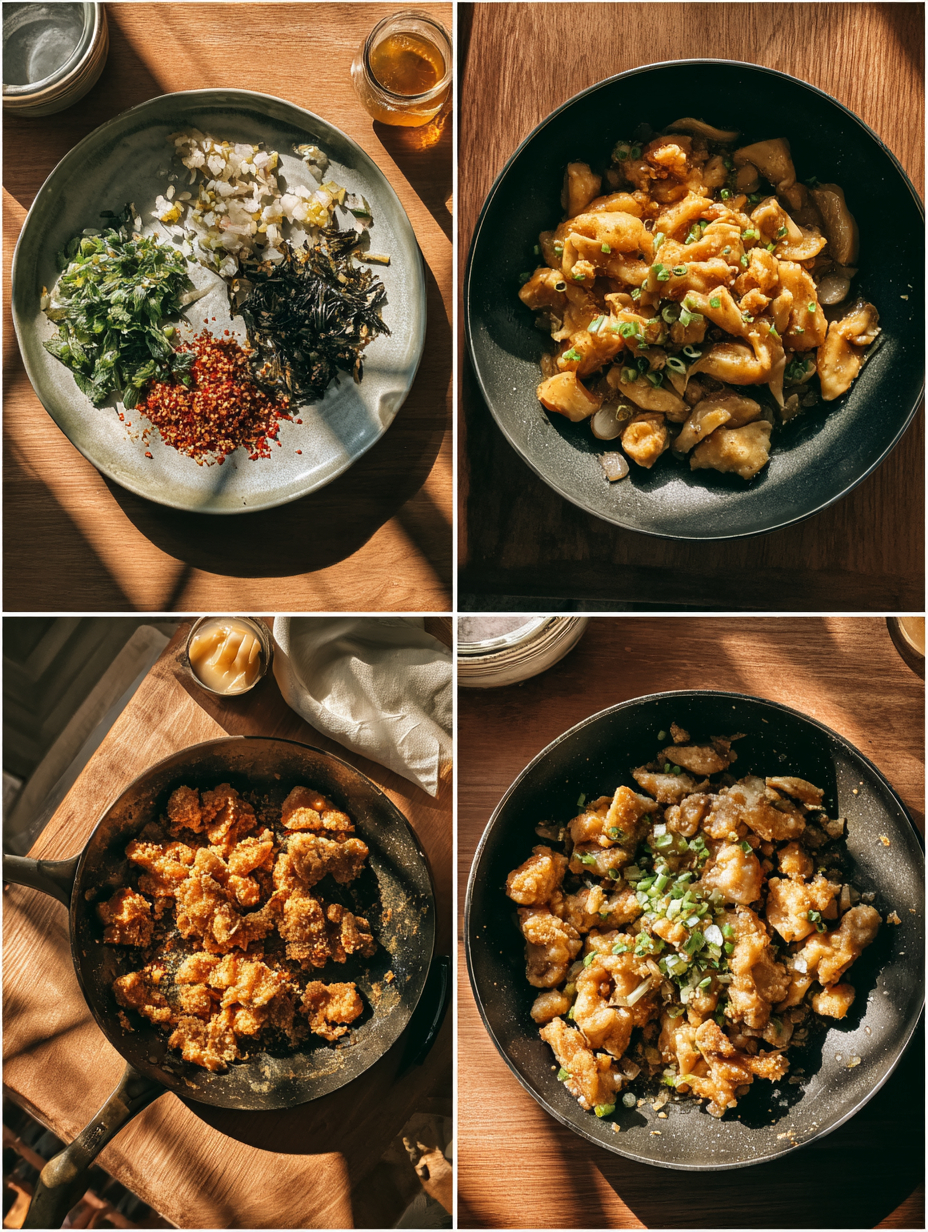
1. Prepare Your Ingredients: Start by gathering all your ingredients. You need chicken thighs, honey, soy sauce, garlic, ginger, and green onions. Dice the garlic and ginger finely, and make sure your chicken thighs are patted dry with paper towels. This helps to get a nice sear. Look for the chicken to be moist but not wet; excess moisture will steam rather than sear.
2. Heat the Pan: In a large skillet or frying pan, heat 2 tablespoons of oil over medium-high heat. You want the oil to shimmer but not smoke, which usually takes about 2-3 minutes. This is your cue that the pan is hot enough for the chicken. If you hear a sizzle immediately upon placing the chicken in the pan, you’re on the right track.
3. Sear the Chicken: When the oil is ready, carefully place the chicken thighs skin-side down in the pan. Do not overcrowd the pan; you may need to work in batches. Sear for about 5-7 minutes until the skin is golden brown and crispy. Listen for a steady sizzle; if it turns into a loud roar, your heat is too high. Once the skin is perfectly browned, flip the thighs over and cook for another 4-5 minutes on the other side.
4. Make the Sauce: In a small bowl, combine ¼ cup honey, ¼ cup soy sauce, diced garlic, and ginger. Stir well until it’s fully mixed. This sauce is sweet, savory, and aromatic. You’ll know it’s ready when the garlic and ginger are evenly distributed. Set it aside; you’ll be adding it to the pan shortly.
5. Add the Sauce to the Chicken: Once the chicken is cooked through (internal temperature should be 165°F), reduce the heat to medium. Pour the honey garlic sauce over the chicken. You’ll hear a welcoming sizzle as it hits the hot pan. Cook for an additional 5-7 minutes, allowing the sauce to thicken. Stir occasionally to coat the chicken evenly. Look for the sauce to become glossy and syrupy, clinging to the chicken.
6. Finish and Serve: Once the sauce has thickened, remove the pan from the heat. Serve the chicken hot, garnished with chopped green onions. The aroma should be inviting, with notes of sweetness and garlic filling your kitchen. Pair it with rice or steamed vegetables to soak up that delicious sauce.
Chef’s Note: For extra flavor, consider marinating your chicken in the honey garlic sauce for 30 minutes to 2 hours before cooking. This will infuse the chicken with even more depth of flavor.
Pro Tips for the Best Results
1. Use Bone-In Chicken: Opt for bone-in chicken thighs for juicier meat. The bone adds flavor and moisture during cooking, resulting in a more succulent dish.
2. Temperature Control is Key: Keep your heat at medium-high when searing. This ensures a robust caramelization without burning the garlic in the sauce later on.
3. Fresh Ingredients Matter: Use fresh garlic and ginger rather than powdered versions. Fresh ingredients offer vibrant flavors that can elevate your dish significantly.
4. Thicken the Sauce Properly: If your sauce isn’t thickening, add a cornstarch slurry (1 tablespoon cornstarch mixed with 2 tablespoons cold water). This will help create a glossy, thick consistency that clings beautifully to the chicken.
5. Let the Chicken Rest: After cooking, let the chicken rest for a few minutes before slicing. This helps the juices redistribute, making each bite tender and flavorful.
6. Experiment with Honey: Try using different types of honey (like clover or wildflower) for varying flavor profiles. The floral notes will change the dish’s overall taste.
7. Garnishes Make a Difference: Don’t skip the green onions! Their fresh crunch and mild onion flavor complement the dish beautifully and add a touch of color.
Common Mistakes to Avoid
1. Using Skinless Chicken: Mistake: Many opt for skinless chicken thinking it’s healthier.
Why it ruins the dish: Without the skin, the chicken lacks flavor and moisture.
Correct Approach: Use skin-on thighs to get that crispy, flavorful exterior.
2. Not Patting Dry: Mistake: Not drying the chicken properly before cooking.
Why it ruins the dish: Wet chicken won’t sear well and will steam instead.
Correct Approach: Use paper towels to pat the chicken dry, ensuring a perfect sear.
3. Overcrowding the Pan: Mistake: Placing too many chicken pieces in the pan at once.
Why it ruins the dish: This lowers the pan’s temperature and prevents browning.
Correct Approach: Cook in batches if necessary, allowing each piece room to brown.
4. Skipping the Sauce Preparation: Mistake: Forgetting to prepare the sauce in advance.
Why it ruins the dish: It can lead to rushed cooking and uneven flavor distribution.
Correct Approach: Have your sauce ready before cooking the chicken to ensure a smooth transition.
5. Ignoring Internal Temperature: Mistake: Not checking the chicken for doneness.
Why it ruins the dish: Undercooked chicken is unsafe to eat.
Correct Approach: Use a meat thermometer to ensure the chicken reaches 165°F.
6. Using Low-Quality Soy Sauce: Mistake: Opting for cheap soy sauce.
Why it ruins the dish: It can impart a harsh, salty flavor rather than a balanced one.
Correct Approach: Invest in a good-quality soy sauce for a more nuanced flavor in your dish.
7. Not Allowing the Sauce to Thicken: Mistake: Serving the dish immediately after adding sauce.
Why it ruins the dish: The sauce will be watery and won’t coat the chicken well.
Correct Approach: Let the sauce simmer and reduce for 5-7 minutes to enhance its texture and flavor.
Creative Variations
1. Seasonal Variation: Citrus Honey Garlic Chicken
Add the zest and juice of an orange or lemon to your honey garlic sauce. The citrus brightens the dish, adding a fresh note that’s perfect for spring or summer.
2. Dietary-Friendly Version: Vegan Honey Garlic Tofu
Substitute chicken with firm tofu, pressing it to remove excess moisture. Use maple syrup instead of honey to create a vegan-friendly version that’s just as delicious.
3. Gourmet Elevated Version: Honey Garlic Chicken with Sesame Crust
Coat your chicken thighs with sesame seeds before searing for a gourmet touch. Finish the dish with a drizzle of high-quality sesame oil after cooking for added depth.
4. Quick 15-Minute Version: Honey Garlic Chicken Stir-Fry
Slice chicken breasts into thin strips and cook them over high heat for just 3-4 minutes. Toss in the sauce and vegetables like bell peppers and broccoli for a quick, one-pan stir-fry.
5. Kid-Friendly Version: Honey Garlic Chicken Bites
Cut chicken thighs into bite-sized pieces and bread them lightly with panko before frying. This gives a crunchy texture that kids will love, pairing perfectly with the sweet sauce.
6. International Twist: Honey Garlic Chicken with Asian Flavors
Add 1 tablespoon of sriracha or chili paste to the sauce for a spicy kick. Garnish with chopped cilantro and serve over jasmine rice for a delightful Asian-inspired meal.
Serving Ideas
When it comes to serving your One Pan Honey Garlic Chicken, presentation can elevate the dish from everyday to extraordinary. Here are some beautiful ways to plate and serve this delicious meal:
1. Rustic Serving Style: Serve the chicken directly in the pan it was cooked in, garnished with a sprinkle of chopped fresh parsley and sesame seeds. This not only keeps the dish warm but adds a homey feel. Pair with some steamed broccoli on the side for a splash of color.
2. Elegant Plating: For a more refined presentation, slice the chicken into medallions and fan them out on a white plate. Drizzle a bit of the honey garlic sauce over the top and garnish with thinly sliced green onions and a few edible flowers. This adds a stunning contrast against the plate and impresses your guests.
3. Bowl Style: Create a comforting bowl by serving the chicken over a bed of fluffy jasmine rice or quinoa. Top with sautéed bell peppers and snap peas for a vibrant look. Finish with a wedge of lime for a zesty touch that invites freshness.
4. Charcuterie Board: For a fun, shareable option, place the chicken pieces on a large wooden board surrounded by small bowls of sliced cucumbers, pickled radishes, and jasmine rice. This casual setup encourages guests to help themselves, enhancing the communal feel of your meal.
5. Colorful Contrast: Serve the chicken alongside a vibrant mango salsa made with diced mango, red onion, cilantro, and lime juice. The bright colors and sweet-tangy flavors not only create a feast for the eyes but also complement the savory notes of the chicken.
What to Serve With
To create a well-rounded meal that complements your One Pan Honey Garlic Chicken, consider these delightful pairings:
1. Garlic Parmesan Roasted Potatoes: The crispy, herby potatoes provide a satisfying crunch and rich flavor that balances the sweetness of the chicken, making every bite a delightful contrast.
2. Cucumber Tomato Salad: This refreshing salad adds a crisp, bright element to your plate. The acidity of the tomatoes and the coolness of the cucumbers offset the rich honey garlic sauce, creating a harmonious balance.
3. Mango Lassi: This creamy, yogurt-based drink is perfect for cutting through the richness of the chicken. Its sweet and tangy notes provide a delightful beverage option that pairs beautifully with the dish.
4. Steamed Asparagus: The light, earthy flavor of asparagus complements the chicken without overpowering it. A sprinkle of lemon zest after steaming adds brightness, making your plate visually appealing and delicious.
5. Chilled White Wine: A glass of Sauvignon Blanc or Chardonnay offers a crisp, refreshing contrast to the honey garlic flavors. The wine’s acidity enhances your meal while keeping the experience light and enjoyable.
6. Pineapple Upside-Down Cake: For dessert, this classic cake echoes the sweet notes of the chicken while adding a fruity, moist finish to your meal. The caramelized pineapple connects subtly with the honey, tying your dinner together beautifully.
Storage Guide
To store any leftovers from your One Pan Honey Garlic Chicken, follow these guidelines for maximum freshness:
– Containers: Use airtight glass containers to keep your chicken safe from moisture and odors in the fridge. Glass is preferred as it doesn’t absorb odors or stains.
– Temperature: Store your leftovers at a stable refrigerator temperature of below 40°F (4°C). This ensures the chicken stays fresh and safe to eat.
– Shelf Life: Leftover honey garlic chicken will keep well in the refrigerator for 3 to 4 days. Be sure to consume it within this time frame for the best taste and safety.
– Signs of Spoilage: If your chicken develops an off smell, slimy texture, or any discoloration, it’s best to discard it. Trust your senses; they’re your best guide!
– Refreshing Before Serving: To restore freshness before serving, add a splash of chicken broth or a drizzle of olive oil when reheating. This will help rehydrate the chicken and revive its flavors, bringing it back to life.
Freezing Tips
Yes, your One Pan Honey Garlic Chicken freezes well, making it a fantastic option for meal prep. Here’s how to properly freeze it:
– Portioning: Allow the chicken to cool completely, then divide it into individual portions. This makes it easy to thaw just what you need later.
– Wrapping Method: Wrap each portion tightly in plastic wrap before placing it in a freezer-safe airtight container or zip-top bag. Removing as much air as possible will prevent freezer burn.
– Labeling: Don’t forget to label each container with the date and contents to keep track of your freezer meals.
– Freezer Lifespan: Properly stored, your chicken can last in the freezer for up to 3 months without sacrificing quality.
– Quality Changes: While the flavor will remain intact, expect a slight change in texture after thawing. The chicken may lose some of its juiciness, but it will still be delicious.
– Best Thawing Method: The best way to thaw your chicken is overnight in the refrigerator. If you’re short on time, you can use the microwave’s defrost setting, but be careful to avoid starting the cooking process.
Reheating Guide
When you’re ready to enjoy your One Pan Honey Garlic Chicken again, follow these reheating methods for the best results:
– Microwave: Place the chicken in a microwave-safe dish and cover it with a damp paper towel to prevent drying out. Heat at medium power for about 2-3 minutes or until heated through, stirring halfway for even warming.
– Oven: Preheat your oven to 350°F (175°C). Place the chicken in an oven-safe dish and cover it with foil to retain moisture. Heat for 10-15 minutes, or until warmed through.
– Stovetop: Heat a skillet over medium-low heat and add a splash of water or broth to the pan. Add the chicken, cover, and cook for about 5-7 minutes, stirring occasionally, until heated through.
– Texture Restoration Tips: To restore the original texture and flavor, consider adding a dash of soy sauce or a bit of honey while reheating. This will boost the flavor profile and keep it moist.
Nutrition Overview
In each serving of your One Pan Honey Garlic Chicken, you can expect approximately:
– Calories: 350
– Protein: 30g
– Carbohydrates: 25g
– Fat: 15g
– Fiber: 1g
– Sugar: 10g
Not only is this dish flavorful, but it also provides several health benefits. The chicken breast is a lean source of protein, essential for muscle repair and growth. Garlic contains compounds that may boost your immune system, while honey provides natural sweetness and antioxidants. Enjoying this meal means not only treating your taste buds but also nourishing your body.
Frequently Asked Questions
Q: Can I substitute boneless chicken thighs for chicken breasts?
A: Absolutely! Boneless chicken thighs will add a richer flavor due to their higher fat content. Just be mindful of slightly adjusting the cooking time, as thighs may require a bit longer to cook through.
Q: What can I use instead of honey?
A: If you’re looking for alternatives to honey, maple syrup or agave nectar can work well. They will provide a similar sweetness, though the flavor profile will differ slightly.
Q: Is this recipe gluten-free?
A: Yes, your One Pan Honey Garlic Chicken can easily be made gluten-free by ensuring that your soy sauce is either gluten-free or using tamari. Just check the labels before purchasing.
Q: How can I make this dish spicier?
A: To add some heat, you can mix in a pinch of red pepper flakes or a tablespoon of Sriracha into the honey garlic sauce. Adjust it to your preferred spice level!
Q: Can I use frozen chicken for this recipe?
A: It’s best to thaw your chicken before cooking for even cooking and flavor absorption. If you use frozen chicken, increase the cooking time and ensure it reaches an internal temperature of 165°F (74°C).
Q: How do I know when the chicken is done cooking?
A: The safest way to check is by using a meat thermometer. The chicken should reach an internal temperature of 165°F (74°C) for safe consumption. If you don’t have a thermometer, ensure the juices run clear when pierced.
Q: Can I add vegetables to this dish?
A: Yes! Broccoli, bell peppers, and snap peas are fantastic additions that not only enhance the dish’s flavor but also increase its nutritional value. Just add them to the pan during the last few minutes of cooking.
Q: What kitchen equipment do I need?
A: You’ll need a large skillet or frying pan for this recipe. A good spatula or tongs will help you turn the chicken easily. A meat thermometer is also recommended for ensuring proper cooking temperatures.
Final Thoughts
As you venture into making your One Pan Honey Garlic Chicken, remember the importance of balancing flavors. A splash of acidity from lime or vinegar can elevate the dish even further. I’m genuinely excited for you to try this recipe; the warm, sweet notes combined with the savory chicken are sure to impress your family and friends.
Don’t shy away from experimenting with your favorite vegetables or garnishes; this dish is versatile and can easily be adapted. Once you’ve made it, share your results and any personal twists you’ve added. Enjoy the cooking process and savor every bite!