Follow Me On Pinterest!
Mummy Sugar Cookies with Candy Eyes
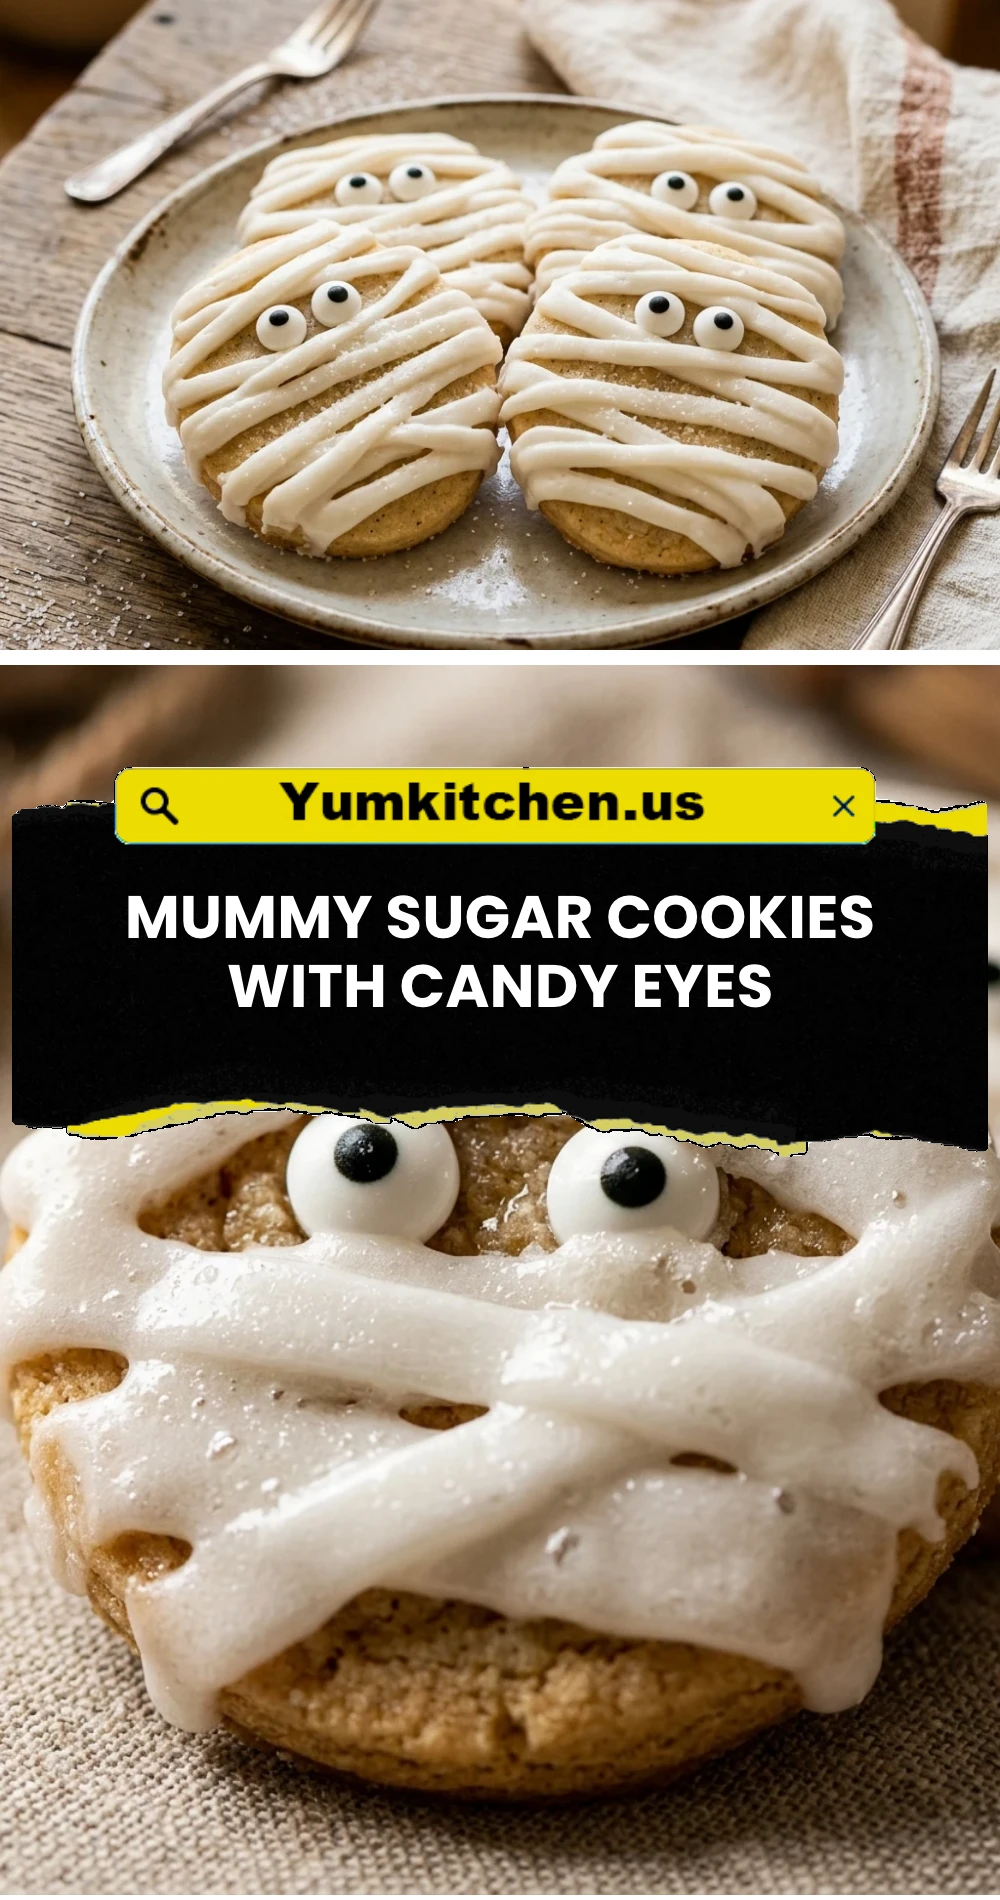
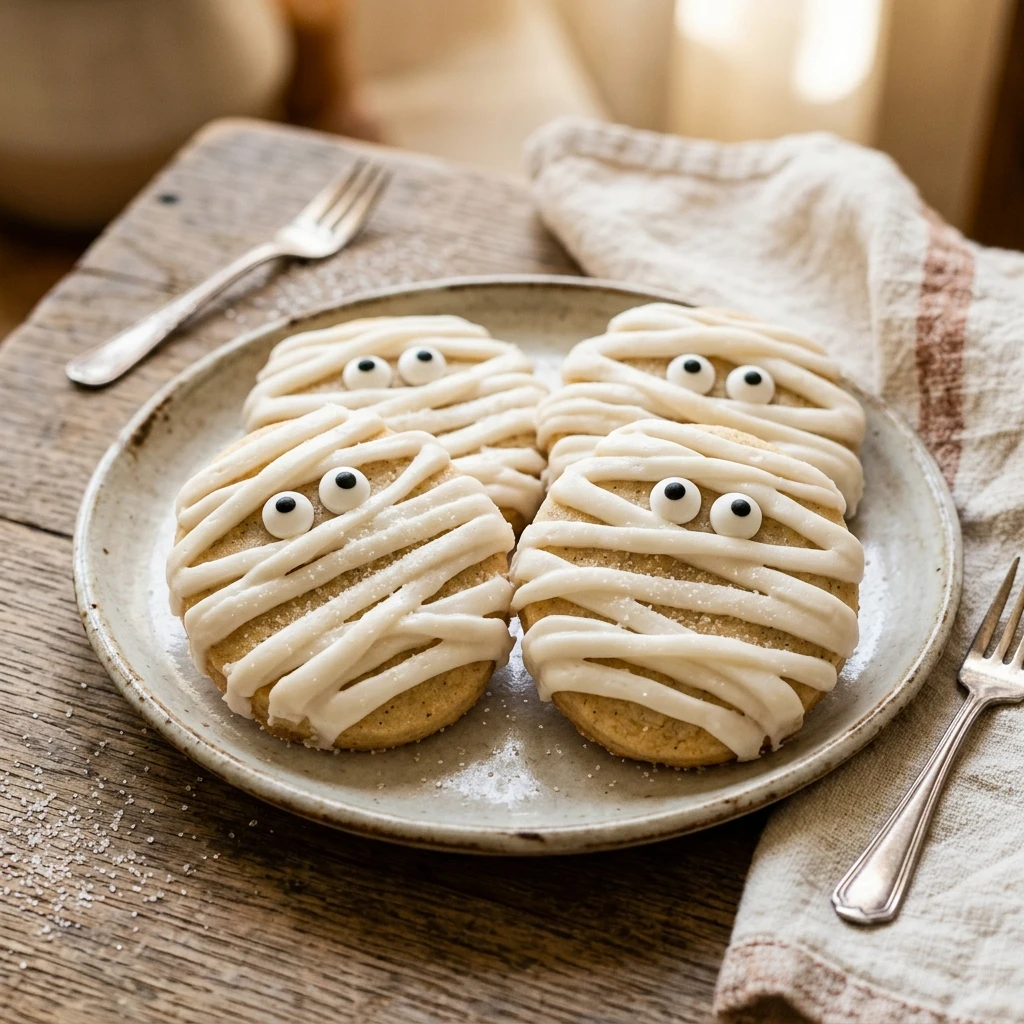
Get ready to brew up some magic in your kitchen! These Mummy Sugar Cookies with Candy Eyes are the ultimate Halloween treat. They are spooky, sweet, and surprisingly simple to make. Whether you are hosting a costume party or looking for a fun weekend activity with the kids, these cookies will be the star of the show. With their buttery base and adorable “wrapped” appearance, they strike the perfect balance between creepy and cute. Let’s get baking and create some delicious monsters!
Recipe Information
- Prep Time: 20 minutes
- Cook Time: 10 minutes
- Total Time: 30 minutes
- Servings: 24 cookies
- Difficulty: Easy
Nutrition values
- Calories: 185 kcal
- Protein: 2g
- Carbs: 26g
Why Make This Mummy Sugar Cookies with Candy Eyes
Halloween is all about the treats, and these mummy cookies are a crowd-pleaser for several reasons. First, they use a reliable sugar cookie base that doesn’t spread, ensuring your mummies stay perfectly round and uniform. Second, the decorating process is completely foolproof. You don’t need professional piping skills; the messy, overlapping “bandage” look is exactly what makes them look like authentic mummies! Finally, the candy eyes add a whimsical touch that makes everyone smile. They are great for school bake sales, office parties, or a cozy spooky movie night at home.
Ingredients
- 1 cup unsalted butter, softened to room temperature
- 1 cup granulated sugar
- 1 large egg
- 1 teaspoon pure vanilla extract
- 2 ½ cups all-purpose flour
- 1 teaspoon baking powder
- ½ teaspoon salt
- 1 cup white chocolate melts or white buttercream frosting
- 48 small candy eyes
Directions
Step 1: Prepare the Dough
Preheat your oven to 350°F (175°C) and line two large baking sheets with parchment paper or silicone mats. In a large mixing bowl, cream together the softened butter and granulated sugar until the mixture is light and fluffy. Beat in the egg and vanilla extract until well combined. In a separate medium bowl, whisk together the flour, baking powder, and salt. Gradually add the dry ingredients to the wet ingredients, mixing at a low speed until a soft dough forms.
Step 2: Shape and Bake
Scoop about one tablespoon of dough at a time and roll it into a 1-inch ball using your hands. Place the balls two inches apart on the prepared baking sheets. Gently flatten each ball with the bottom of a glass or your palm until they are about half an inch thick. Bake for 8 to 10 minutes, or until the edges are just barely golden but the centers remain pale. Remove the cookies from the oven and let them cool on the baking sheet for 5 minutes before transferring them to a wire rack to cool completely.
Step 3: Prepare the “Bandages”
If you are using white chocolate melts, place them in a microwave-safe bowl. Heat in 30-second intervals, stirring in between, until the chocolate is completely smooth. If you are using frosting, fit a piping bag with a flat “basket weave” tip or a small round tip. Transfer the melted chocolate or frosting into the piping bag. If you do not have a piping bag, a plastic sandwich bag with a tiny corner snipped off works perfectly for drizzling.
Step 4: Decorate the Mummies
Place two candy eyes on the upper third of each cooled cookie. Use a tiny dab of frosting or chocolate on the back of each eye to act as glue. Once the eyes are set, drizzle the white chocolate or frosting back and forth across the cookie in horizontal and diagonal lines to create the bandage look. Be sure to leave a small gap around the eyes so the mummy can “see.” Allow the cookies to sit for about 15 minutes until the topping is firm and set.
Expert Tips for Perfect Mummy Sugar Cookies with Candy Eyes
For the best results, make sure your butter is truly at room temperature before mixing; this ensures a smooth, non-lumpy dough. If the dough feels too soft or sticky to roll, chill it in the fridge for 30 minutes before shaping. When decorating, move the piping bag quickly and confidently to get clean, straight “bandage” lines. If your white chocolate begins to thicken, simply pop it back in the microwave for 10 seconds. Most importantly, always wait until the cookies are completely cold before decorating, or your mummy wraps will melt and run off the sides!
Delicious Variations
You can easily customize these cookies to fit your personal taste. Use a chocolate sugar cookie base for a dark, spooky contrast against the white bandages. If you prefer a different flavor profile, swap the vanilla extract for almond, peppermint, or lemon extract. You can also use colored candy eyes—like green, orange, or red—for an extra creepy “monster mummy” effect. For a richer flavor, try using a cream cheese frosting instead of white chocolate for the wraps.
Frequently Asked Questions
Can I use store-bought sugar cookie dough? Absolutely! If you are short on time, pre-made refrigerated dough works great. Just follow the package instructions for baking and then proceed with the decorating steps once they are cool.
How should I store these cookies? Store the finished cookies in an airtight container at room temperature for up to 5 days. If you are using a soft buttercream frosting instead of chocolate, place a sheet of parchment paper between layers to prevent the bandages from sticking to each other.
Can I freeze mummy cookies? Yes, you can freeze the baked, undecorated cookies for up to 3 months. It is generally best to decorate them after they have thawed to ensure the white chocolate or frosting looks its best.
What if I cannot find candy eyes at the store? You can easily make your own eyes by piping two small dots of white frosting and placing a tiny dot of black decorating gel or a mini chocolate chip in the center of each.
Is white chocolate or frosting better for the bandages? White chocolate melts set much harder, which makes the cookies easier to stack and transport. Frosting stays softer and offers a more traditional “cookie-and-cream” texture and flavor.
Conclusion
These Mummy Sugar Cookies with Candy Eyes are guaranteed to be the highlight of your Halloween celebrations. They are simple to bake, incredibly fun to decorate, and even better to eat. Whether you follow the recipe exactly or add your own spooky twist, these treats are a wonderful way to celebrate the season. Get the whole family involved in the decorating process and enjoy these sweet, “wrapped” delights together. Happy Halloween and happy baking!