Follow Me On Pinterest!
Halloween Themed Food – Edible Bloody Band-Aids
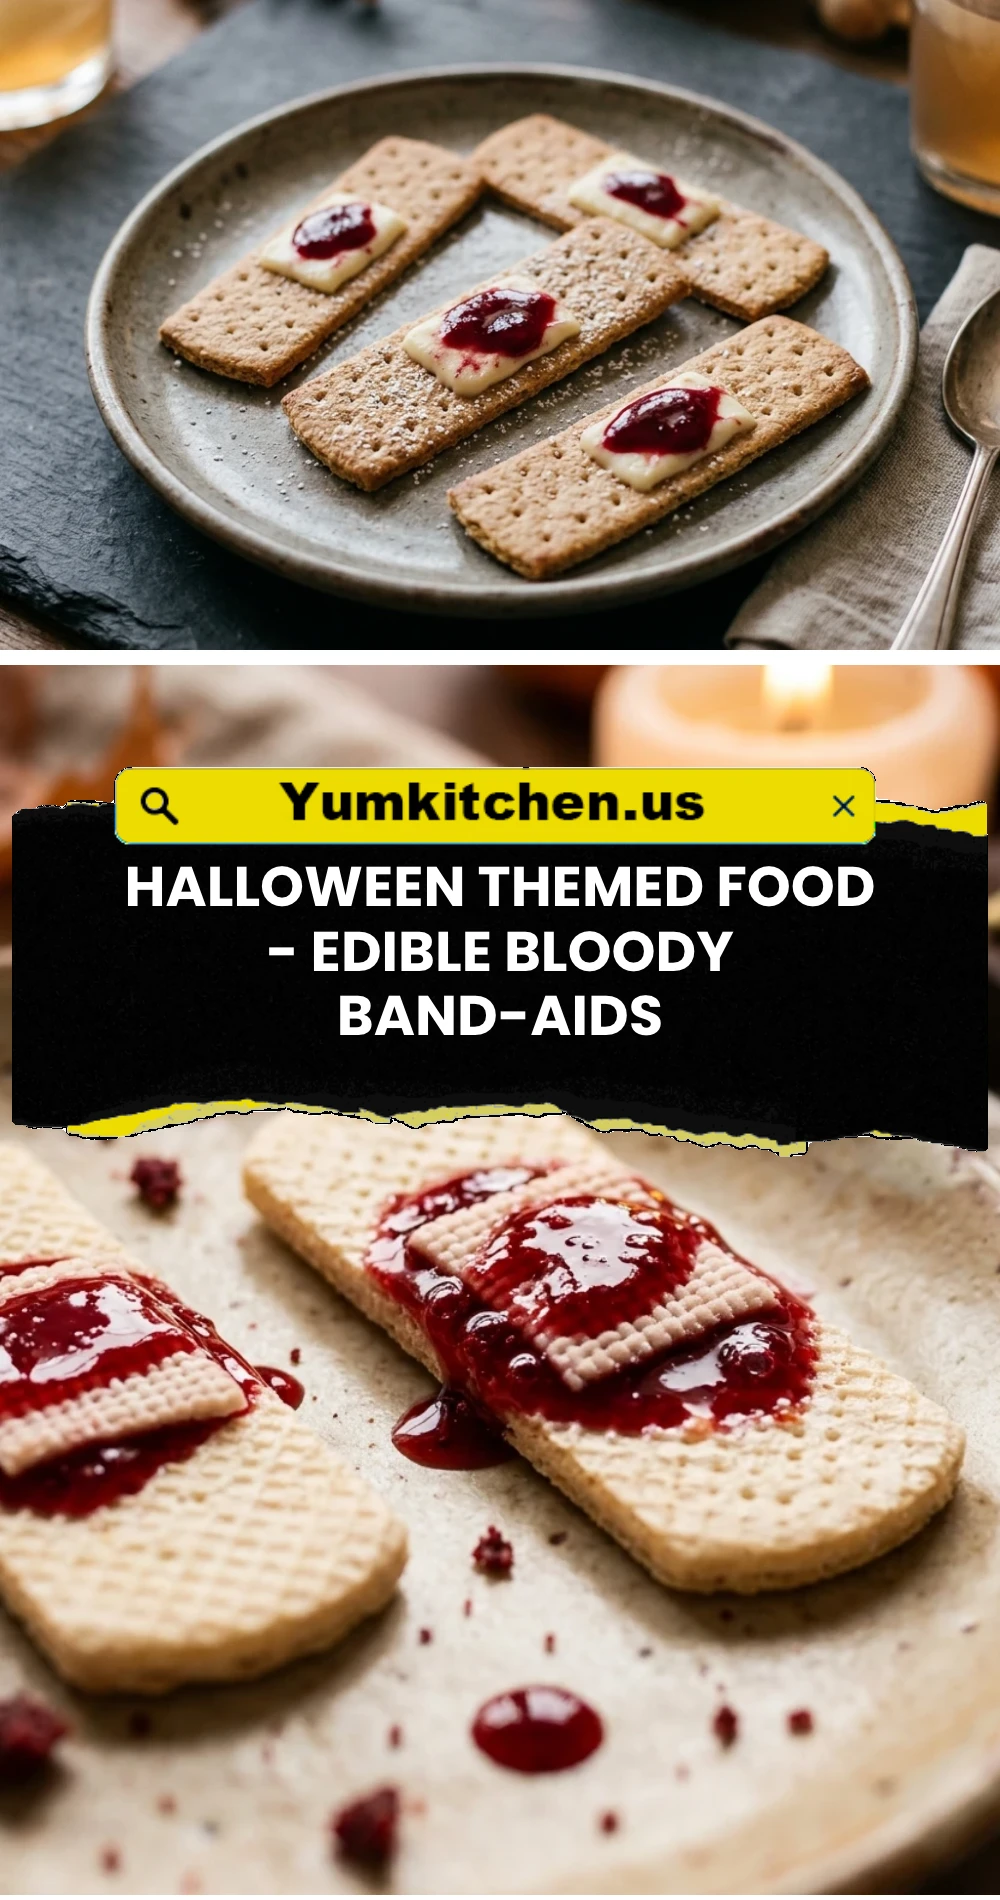
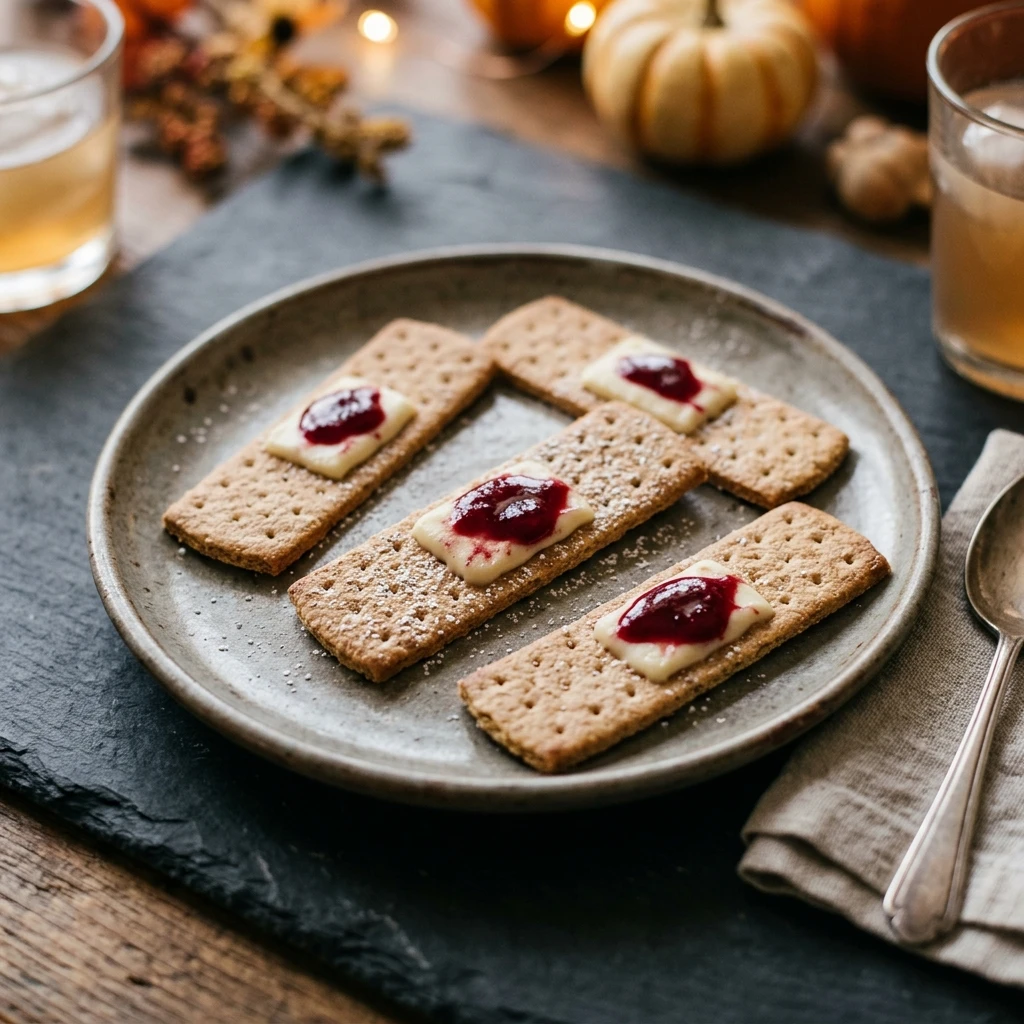
Looking for a snack that is equal parts gruesome and delicious? These Edible Bloody Band-Aids are the ultimate creepy-cool addition to your Halloween party spread. They look shockingly realistic on a platter, yet they are made from simple, sweet pantry staples that everyone loves. Whether you are hosting a haunted house gathering or just want to surprise the kids with a spooky lunchbox treat, these “first-aid” snacks take minutes to assemble and require zero actual cooking. Get ready to watch your guests do a double-take before they dive into these crunchy, sweet, and slightly morbid delights!
Recipe Information
- Prep Time: 15 minutes
- Cook Time: 0 minutes
- Total Time: 15 minutes
- Servings: 24 band-aids
- Difficulty: Easy
Nutrition values
- Calories: 65 kcal per piece
- Protein: 1g
- Carbs: 10g
Why Make This Halloween Themed Food – Edible Bloody Band-Aids
These treats are the perfect solution for busy hosts who need high-impact results with low-effort prep. Unlike complicated cakes or cookies, you do not need to turn on the oven or have professional decorating skills. They use the natural shape of graham crackers to mimic the look of a bandage perfectly. Plus, the combination of honey crackers, creamy frosting, and tart fruit jam provides a classic flavor profile that appeals to both kids and adults. It is a budget-friendly way to add a “gross-out” factor to your dessert table that remains completely appetizing once you take a bite.
Ingredients
- 12 full-sheet graham crackers (honey or cinnamon flavor)
- 1/2 cup white vanilla frosting or softened cream cheese
- 1/4 cup seedless strawberry or raspberry jam (the redder, the better)
- Optional: A small splash of red food coloring to intensify the jam color
Directions
Step 1: Prepare the Cracker Bases
Carefully break each full graham cracker sheet along the perforated lines into four small rectangles. To ensure the “band-aids” look uniform and don’t have jagged edges, use a sharp serrated knife to gently saw through the lines. Set the rectangular pieces aside on a clean parchment-lined tray.
Step 2: Apply the Gauze Padding
Fill a small piping bag or a plastic sandwich bag with the white frosting or softened cream cheese. Snip off a small corner of the bag. Pipe a small, neat square directly in the center of each graham cracker rectangle. This represents the cotton gauze part of the bandage. Use a small offset spatula or the back of a spoon to flatten the square slightly if it looks too puffy.
Step 3: Add the Blood Splatter
Stir your strawberry or raspberry jam in a small bowl until it is smooth and fluid. If the jam is too thick, microwave it for 5 seconds. Use a toothpick or a small spoon to place a messy dab of red jam right in the center of the white frosting square. For a more realistic look, let a tiny bit of the “blood” smear toward the edges of the white gauze.
Step 4: Final Set and Serve
Place the finished band-aids in the refrigerator for about 10 minutes to help the frosting set. This prevents the “blood” from sliding off during transport. Arrange them haphazardly on a white ceramic platter or even a clean, unused surgical tray for the full medical-horror effect.
Expert Tips for Perfect Halloween Themed Food – Edible Bloody Band-Aids
To get the most realistic look, use seedless jam. Seeds can ruin the illusion of liquid blood. If you want a more “aged” look to your bandages, use cinnamon graham crackers, as the darker color mimics used fabric. Always keep a damp paper towel nearby; sticky jam fingers can leave red prints on the “clean” parts of the cracker, which ruins the sharp contrast. If you are using cream cheese instead of frosting, ensure it is at room temperature before piping so it lays flat and smooth.
Delicious Variations
You can easily swap the graham crackers for long vanilla wafer cookies or rectangular shortbread biscuits for a different texture. For a healthier version, use rectangles of apple slices dipped in lemon juice (to prevent browning) as the base. If you want a savory version, use rectangular crackers, a square of white cheddar cheese, and a drop of sriracha or ketchup as the blood. Chocolate lovers can use chocolate graham crackers for “dirty” bandages and white chocolate ganache for the gauze.
Frequently Asked Questions
Can I make these a day in advance?
It is best to assemble these no more than 2-3 hours before serving. Graham crackers tend to absorb moisture from the frosting and jam, which can make them soggy if they sit in the fridge overnight.
What if I don’t have a piping bag?
A simple Ziploc bag with the corner snipped off works perfectly. Alternatively, you can use a small measuring spoon to drop the frosting, though the edges might not be as sharp and square.
Is there a vegan version of this recipe?
Yes! Simply use vegan graham crackers (many brands are accidentally vegan) and swap the dairy frosting for a vegan vanilla frosting or a thick coconut cream stiffened with powdered sugar.
How do I stop the jam from running?
If your jam is very thin, mix it with a tiny bit of cornstarch or powdered sugar to thicken it up. Chilling the jam before applying it also helps it stay in a concentrated “clot” in the center of the gauze.
Can I use red frosting instead of jam?
You certainly can, but jam provides a glossy, translucent look that mimics blood much more effectively than opaque red frosting does. The tartness of the fruit also balances the sweetness of the cracker.
Conclusion
These Edible Bloody Band-Aids are the perfect blend of spooky and simple. They prove that you don’t need hours in the kitchen to create a memorable Halloween treat that guests will talk about for weeks. With just three ingredients and a few minutes of assembly, you have a snack that is guaranteed to be the highlight of your spooky celebration. Serve them up, sit back, and enjoy the squeals of delight and “ewws” from your hungry monsters!