Follow Me On Pinterest!
Halloween Funfetti Dot Cake (Viral Pinterest Recipe)
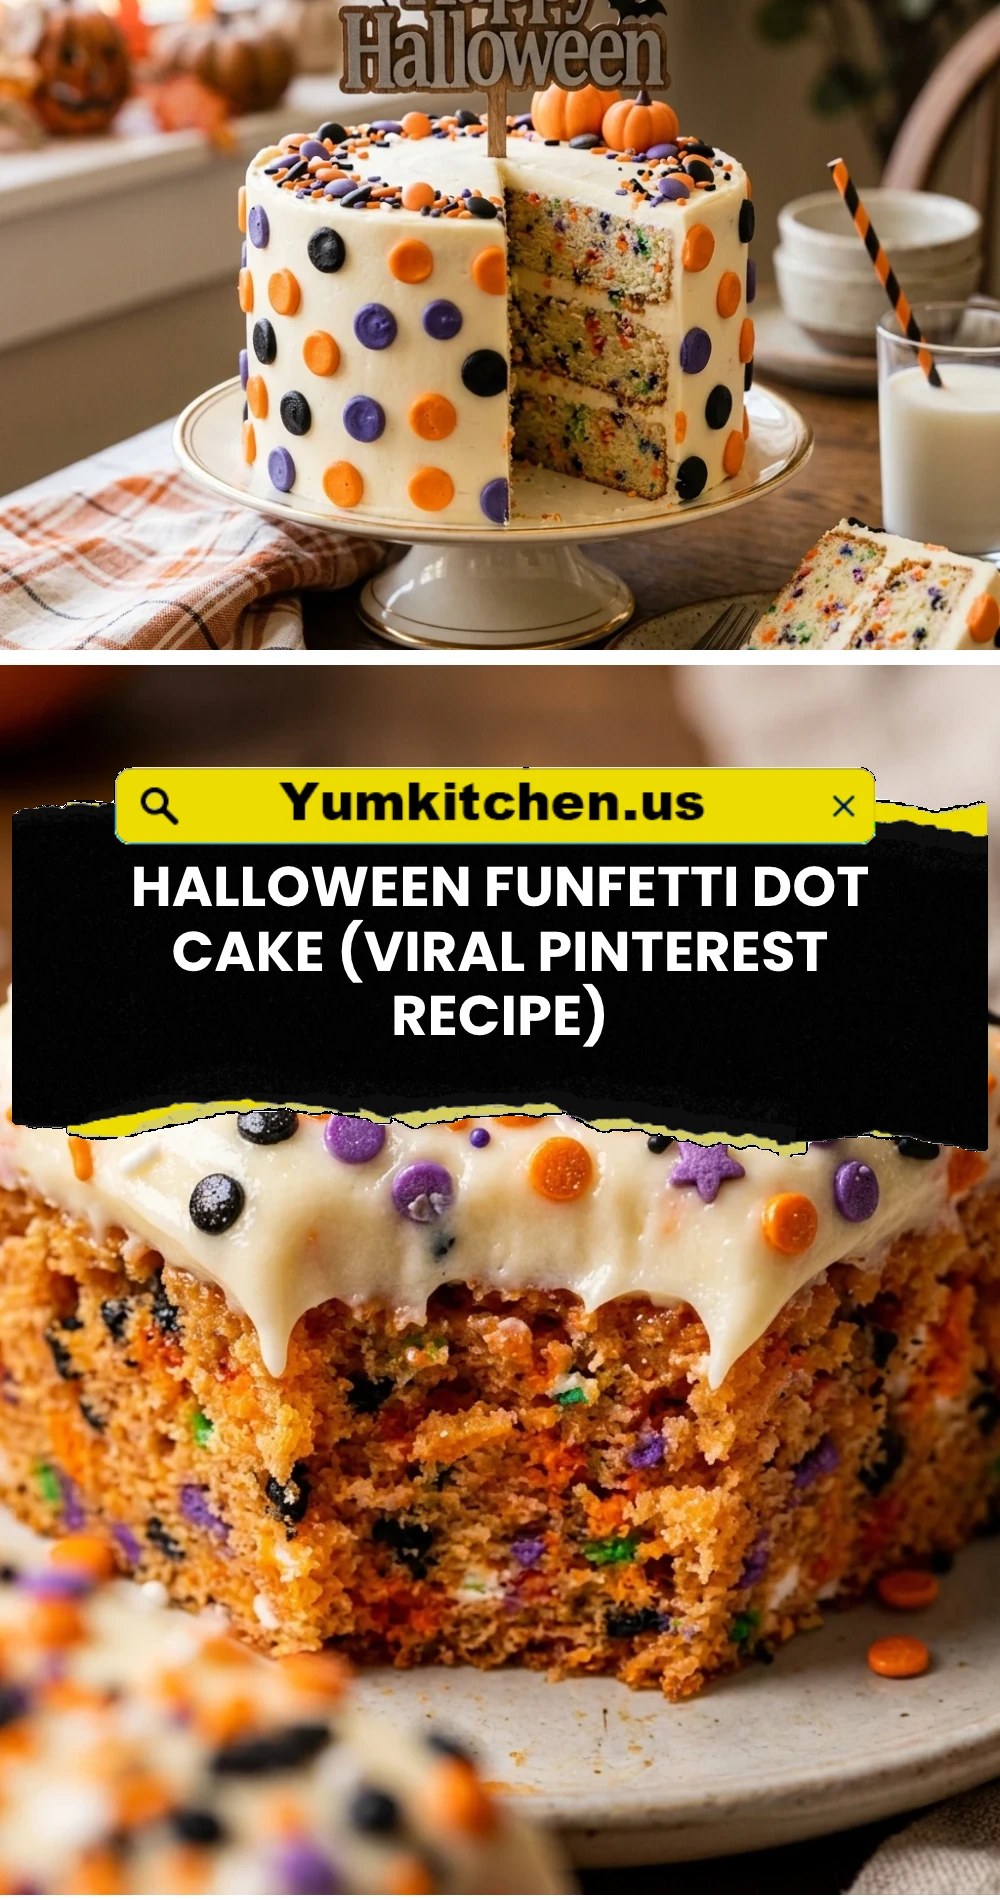
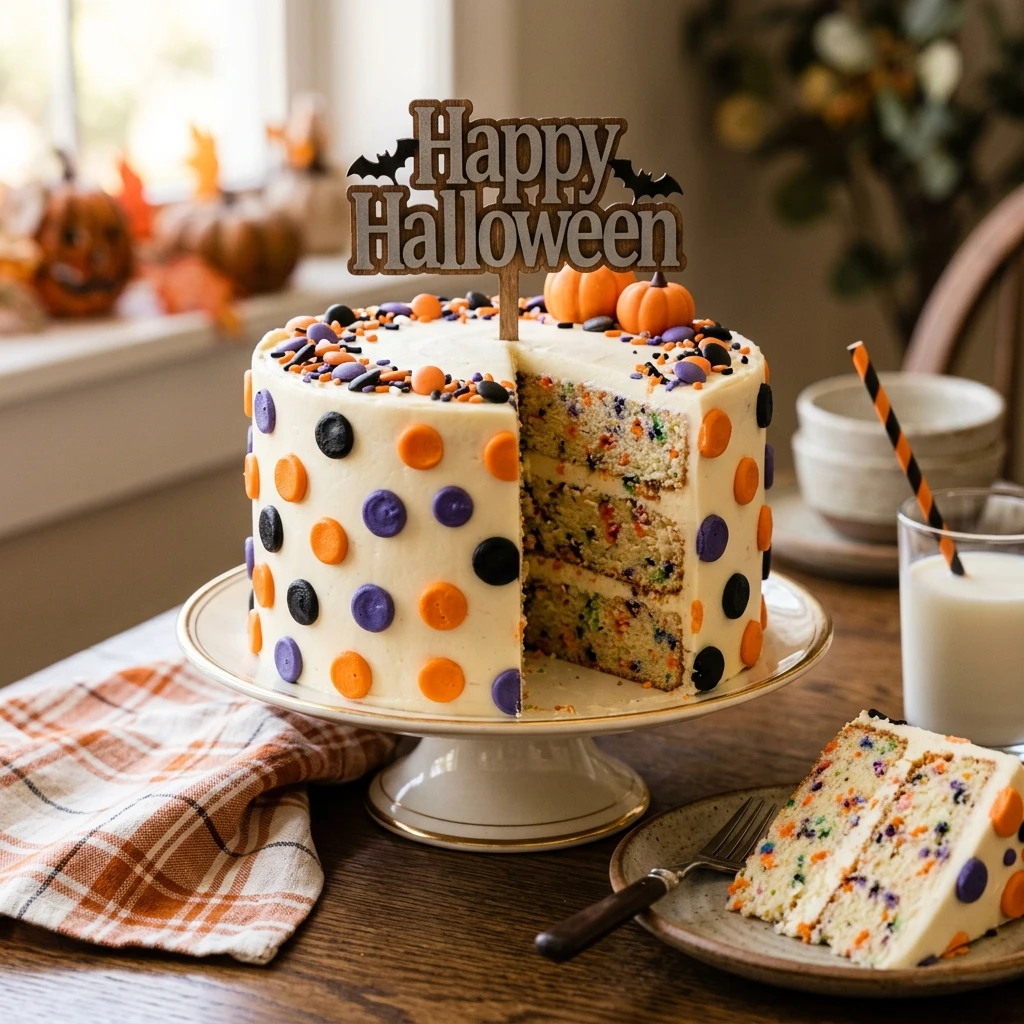
Get ready to wow your guests with the ultimate showstopper this spooky season. The Halloween Funfetti Dot Cake has taken Pinterest by storm, and for a good reason! It looks like a professional masterpiece from a high-end bakery, but you can easily recreate it in your own kitchen. This cake features a classic vanilla crumb studded with vibrant, spooky-colored “polka dots” hidden inside every slice. It is the perfect blend of whimsical fun and delicious flavor that will make your Halloween party unforgettable.
Recipe Information
- Prep Time: 40 minutes
- Cook Time: 50 minutes
- Total Time: 90 minutes
- Servings: 12 servings
- Difficulty: Medium
Nutrition values
- Calories: 425 kcal
- Protein: 4g
- Carbs: 62g
Why Make This Halloween Funfetti Dot Cake (Viral Pinterest Recipe)
This cake is the definition of “Instagram-worthy.” Beyond its stunning appearance, it offers a nostalgic funfetti flavor that appeals to both kids and adults. Making this recipe allows you to experiment with “surprise-inside” baking techniques without needing professional tools. It is highly customizable, festive, and guaranteed to be the centerpiece of any dessert table. Plus, the satisfaction of slicing into the cake to reveal those perfect orange, purple, and green dots is unmatched.
Ingredients
- 2 boxes of White Cake Mix (plus ingredients required on the boxes: water, oil, and egg whites)
- Neon gel food coloring (Orange, Purple, and Lime Green)
- 1/2 cup Halloween-themed sprinkles (bats, ghosts, and stars)
- 3 cups Vanilla buttercream frosting (store-bought or homemade)
- 1/2 cup Black cocoa powder (for black frosting accents)
- 1 tsp Vanilla extract
Directions
Step 1: Bake the Colored Dots
Preheat your oven to 350°F (175°C). Prepare one box of white cake mix according to the package instructions. Divide the batter into three small bowls. Add orange gel coloring to one, purple to the second, and green to the third. Pour each colored batter into a greased muffin tin or a small cake pan. Bake for about 15-18 minutes or until a toothpick comes out clean. Let these cool completely. Once cool, crumble the cakes separately and mix each with a tablespoon of frosting to create a “cake pop” consistency. Roll them into small, 1-inch balls and freeze for 20 minutes.
Step 2: Prepare the Main Batter
Prepare the second box of white cake mix. Fold in the Halloween sprinkles gently so the colors don’t bleed. Grease and flour two 8-inch round cake pans. Pour a thin layer of the white batter into the bottom of each pan. This creates a base for your dots to sit on so they don’t sink to the very bottom.
Step 3: Arrange the Polka Dots
Take your chilled colored cake balls out of the freezer. Arrange them in a circular pattern on top of the thin layer of batter in the cake pans. Alternate the colors (orange, purple, green) to ensure every slice has a variety of dots. Gently pour the remaining white batter over the balls until they are completely covered. Smooth the tops with a spatula.
Step 4: Baking and Cooling
Place the pans in the oven and bake for 30-35 minutes. Since the “dots” are already baked, you are primarily cooking the surrounding white batter. Check for doneness by inserting a toothpick into the white cake area. Remove from the oven and let the cakes cool in the pans for 10 minutes before transferring them to a wire rack to cool completely.
Step 5: Frosting and Decorating
Stack the layers with a thick coating of vanilla buttercream in between. Apply a “crumb coat” of frosting to the exterior and chill for 15 minutes. Finish with a smooth layer of white frosting. Mix a small portion of frosting with black cocoa powder or black food coloring to create “spooky drips” or pipe small spiders on the sides. Top with extra Halloween sprinkles for the final viral Pinterest look.
Expert Tips for Perfect Halloween Funfetti Dot Cake (Viral Pinterest Recipe)
Always use gel food coloring instead of liquid drops. Gel provides a much more vibrant hue without thinning out your cake batter. When placing your dots, make sure they are chilled or frozen; this prevents them from breaking apart or melting into the main batter while baking. To get those clean, circular dots in your slices, use a sharp serrated knife dipped in hot water and wiped dry between each cut.
Delicious Variations
For a richer flavor, swap the white cake mix for a lemon or almond-flavored cake. If you want a “slimy” surprise, fill the center of the cake with a lime-flavored green ganache. You can also turn this into a “Monster Cake” by adding candy eyes all over the exterior frosting. For a gluten-free version, simply use your favorite gluten-free box mix for both the dots and the main cake layers.
Frequently Asked Questions
Can I make the cake dots ahead of time?
Yes! You can bake and roll the colored cake balls up to two days in advance. Keep them in an airtight container in the refrigerator or freeze them until you are ready to assemble the main cake.
Why did my cake dots sink to the bottom?
This usually happens if the base layer of batter is too thin or if the cake balls are too heavy. Ensure you pour at least half an inch of batter into the pan before adding the dots, and don’t make the balls larger than one inch.
What is the best way to get pitch-black frosting?
Use black cocoa powder rather than just food coloring. It provides a deep charcoal color and a rich chocolate taste without the bitter aftertaste often found in heavy black food dyes.
Can I use this technique for cupcakes?
Absolutely! Place one small colored cake ball into the center of each cupcake liner filled with batter. Reduce the baking time to about 18-20 minutes.
How do I store leftovers?
Store the cake in an airtight container at room temperature for up to three days. If your frosting contains cream cheese or heavy dairy, keep it in the refrigerator for up to five days.
Conclusion
The Halloween Funfetti Dot Cake is more than just a dessert; it’s an experience. This viral recipe proves that you don’t need to be a professional decorator to create something magical and spooky. Whether you are hosting a large bash or just want a fun weekend project with the kids, this cake delivers on both style and taste. Grab your sprinkles and get baking—your Pinterest-perfect Halloween awaits!