Follow Me On Pinterest!
Halloween Foods – Stuffed Mushroom Skulls
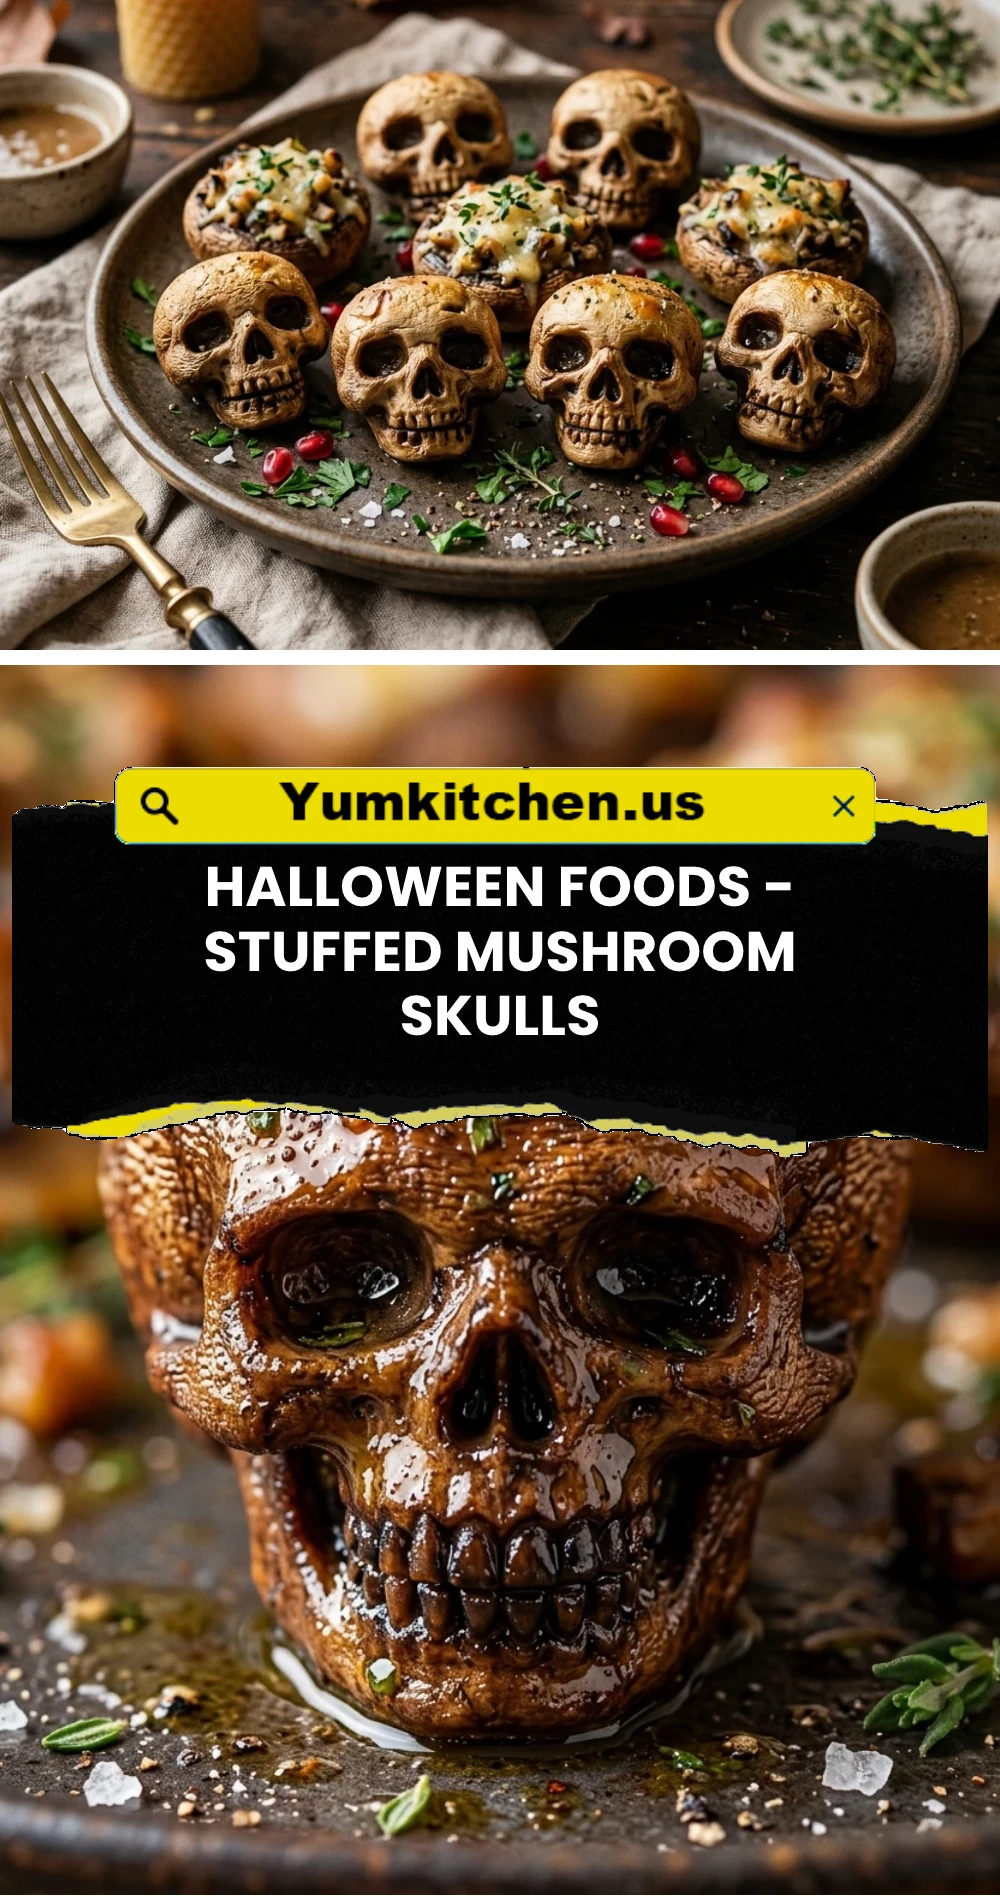
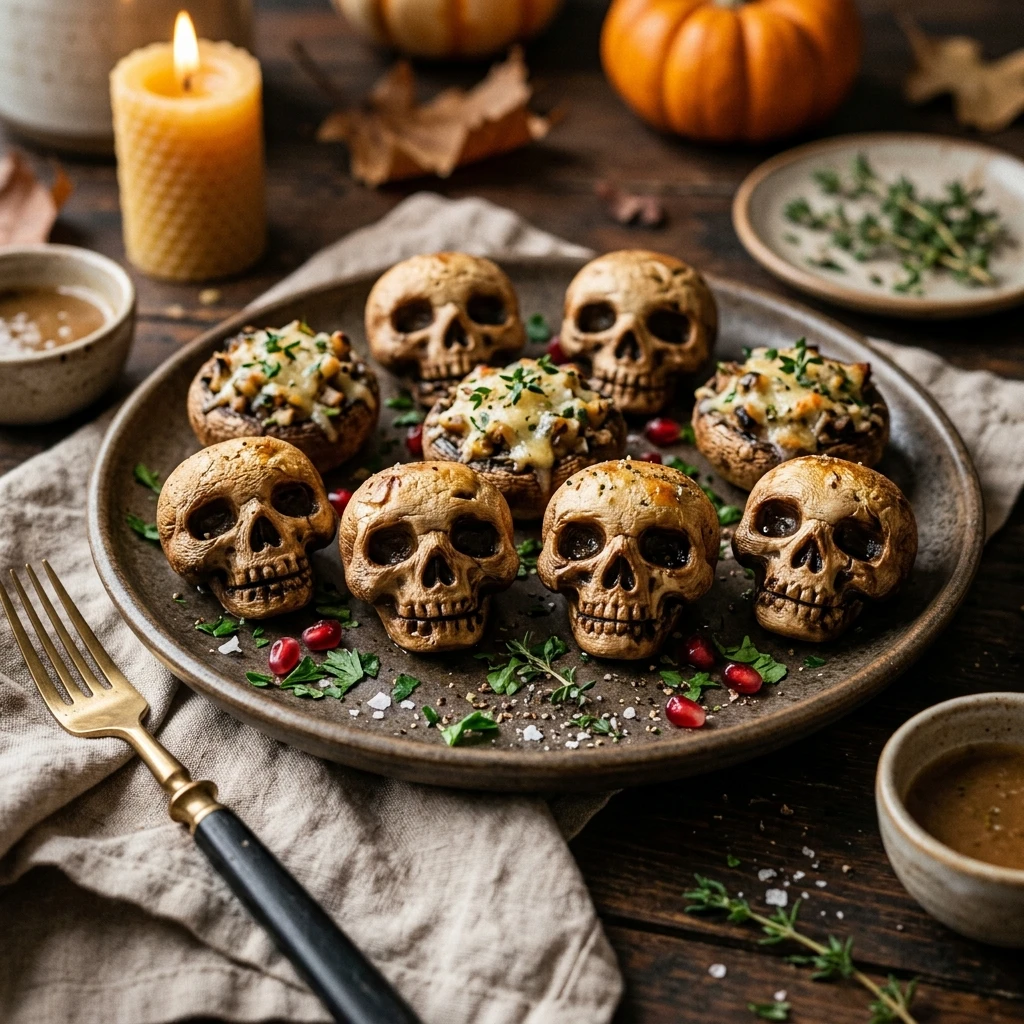
Spooky season is officially here, and nothing sets the mood for a hauntingly good dinner party like these Stuffed Mushroom Skulls. These bite-sized appetizers are the perfect blend of eerie and elegant, featuring tender mushroom caps carved into macabre skeletal faces and filled with a savory, creamy center. Whether you are hosting a full-blown costume gala or just want to surprise the kids with a creepy snack, these “shroomy” skulls are guaranteed to be the talk of the table. They look like they took hours of meticulous work, but with a few simple tricks, you can whip up a graveyard full of them in no time.
Recipe Information
- Prep Time: 25 minutes
- Cook Time: 20 minutes
- Total Time: 45 minutes
- Servings: 12 skulls
- Difficulty: Medium
Nutrition values
- Calories: 65 kcal per skull
- Protein: 3g
- Carbs: 4g
Why Make This Halloween Foods – Stuffed Mushroom Skulls
These stuffed mushrooms are a total game-changer for your Halloween spread. Unlike many holiday treats that rely on sugar and food coloring, these skulls offer a sophisticated, savory flavor profile that adults love. They provide a fantastic low-carb option for guests watching their intake while still looking incredibly festive. The carving process is surprisingly therapeutic, and the end result provides that “wow” factor every host dreams of. Plus, they are naturally vegetarian, making them a versatile choice for any crowd.
Ingredients
- 12 large white button mushrooms or cremini mushrooms
- 4 oz cream cheese, softened
- 1/4 cup grated Parmesan cheese
- 1/4 cup panko breadcrumbs
- 1 clove garlic, minced
- 1 tablespoon fresh parsley, chopped
- 1/4 teaspoon onion powder
- Salt and black pepper to taste
- 1 teaspoon balsamic glaze (for the eye sockets)
- Olive oil for brushing
Directions
Step 1: Prep the Mushroom Bases
Preheat your oven to 375°F (190°C). Clean the mushrooms by wiping them with a damp paper towel to remove any dirt. Gently pop the stems out of the mushroom caps. Finely chop half of the stems to use in the filling later, and discard or save the rest for another recipe. Place the mushroom caps on a clean work surface with the rounded side facing up.
Step 2: Carve the Skull Faces
To create the skull look, use a plastic straw to poke two holes near the top of the mushroom cap for the eyes. Twist the straw slightly to remove the mushroom flesh cleanly. Use a small paring knife to cut a small triangle just below the eyes for the nose. For the mouth, make several small vertical slits along the bottom edge of the cap to resemble teeth. Be careful not to press too hard, or the mushroom might crack.
Step 3: Prepare the Savory Filling
In a medium mixing bowl, combine the softened cream cheese, Parmesan cheese, breadcrumbs, minced garlic, chopped parsley, and onion powder. Fold in the finely chopped mushroom stems you set aside earlier. Season the mixture with a pinch of salt and pepper. Stir until everything is well combined and creamy.
Step 4: Stuff the Skulls
Flip the carved mushroom caps over so the hollow side faces up. Using a small spoon or a piping bag, fill each cavity with the cream cheese mixture. Pack it in tightly but be careful not to damage your carvings on the other side. Place the mushrooms stuffed-side down on a parchment-lined baking sheet, so the “skull” faces are looking up at you.
Step 5: Bake and Finish
Lightly brush the tops of the mushroom skulls with a little olive oil to help them brown and stay moist. Bake for 18–20 minutes, or until the mushrooms are tender and the filling is heated through. Once removed from the oven, let them cool for 5 minutes. To make the eyes pop, use a toothpick or a small dropper to place a tiny dot of balsamic glaze inside each eye socket before serving.
Expert Tips for Perfect Halloween Foods – Stuffed Mushroom Skulls
Always choose mushrooms with a smooth, bright white surface for the most “skeletal” look. When carving the eyes, if the straw gets clogged, blow through it or use a toothpick to clear the mushroom piece out. If you want a more aged, “ancient skull” look, use Cremini mushrooms (Baby Bellas) instead of white button mushrooms. Most importantly, do not wash your mushrooms under running water; they act like sponges and will become soggy in the oven. A damp cloth is all you need for cleaning.
Delicious Variations
- Spicy Skulls: Add a teaspoon of diced jalapeños or a dash of hot sauce to the cream cheese filling for a kick.
- Sausage Stuffed: Mix cooked Italian sausage crumbles into the filling for a heartier, meat-filled appetizer.
- Vegan Version: Use cashew-based cream cheese and nutritional yeast instead of Parmesan for a dairy-free treat.
- Pizza Skulls: Swap the herbs for oregano and add a tiny bit of marinara sauce and mozzarella to the filling.
- Red Eyes: Use sriracha instead of balsamic glaze in the eye sockets for a glowing red effect.
Frequently Asked Questions
Can I make these mushrooms in advance?
You can carve the mushrooms and prepare the filling up to 24 hours in advance. Store them separately in the refrigerator. Assemble and bake them just before you plan to serve to ensure the best texture and appearance.
What is the best way to prevent the mushrooms from getting soggy?
Avoid soaking the mushrooms in water. Wiping them clean is the best method. Additionally, baking them on a wire rack over a baking sheet can help air circulate and keep the bottoms from sitting in released juices.
Can I use an air fryer for this recipe?
Yes! You can air fry these at 350°F (175°C) for about 8–10 minutes. Check them frequently to ensure the faces don’t brown too quickly, as the concentrated heat of an air fryer can cook them faster than a traditional oven.
What should I do if my mushroom caps crack while carving?
Mushrooms are more flexible when they are at room temperature. If they are cracking, let them sit on the counter for 15 minutes before carving. If one does break, simply chop it up and add it to the filling of another mushroom!
Can I freeze these stuffed mushroom skulls?
Freezing is not recommended for this recipe. Mushrooms have a high water content and the texture becomes quite rubbery and mushy once thawed and cooked. These are definitely best served fresh.
Conclusion
These Halloween Stuffed Mushroom Skulls prove that you don’t need sugar to have a “sweet” holiday spread. They are creepy, tasty, and surprisingly easy to customize. By following these simple carving steps, you can turn a basic vegetable into a work of edible art that will haunt your guests’ cravings long after the party ends. Serve them warm, watch them disappear, and enjoy the spooky season with a healthy, savory twist!