Follow Me On Pinterest!
Halloween Desserts Easy – Ghost Meringue Cookies
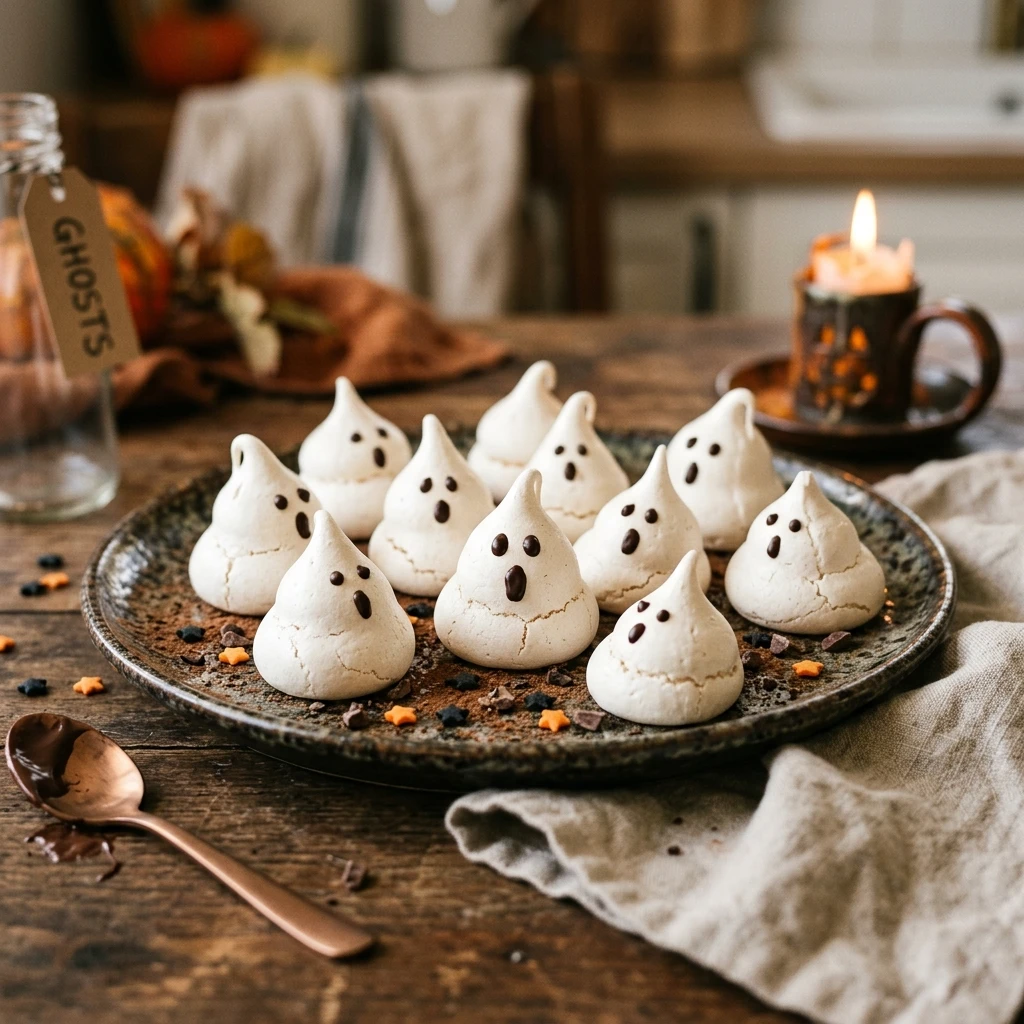
Get ready to spook your guests with these adorable and airy Ghost Meringue Cookies. They are the ultimate easy Halloween dessert that looks professional but requires minimal effort. These sweet little spirits melt in your mouth and add a playful touch to any festive dessert table. Whether you are hosting a haunted house party or looking for a fun project to do with the kids, these ghosts are sure to be a hit. With just a few basic ingredients, you can transform simple egg whites into a hauntingly delicious treat that is as light as a cloud.
Recipe Information
- Prep Time: 20 minutes
- Cook Time: 1 hour
- Total Time: 1 hour 20 minutes (plus cooling time)
- Servings: 24 cookies
- Difficulty: Easy
Nutrition values
- Calories: 35 kcal per cookie
- Protein: 1g
- Carbs: 8g
Why Make This Halloween Desserts Easy – Ghost Meringue Cookies
These ghost meringue cookies are the perfect addition to your Halloween repertoire because they are naturally gluten-free and fat-free. They provide a crisp, sweet crunch that satisfies your sugar cravings without being heavy. Plus, their whimsical appearance makes them a fantastic centerpiece for any snack board. You can customize their expressions to be spooky, silly, or surprised, making each cookie unique. Since you can make them a few days in advance, they help reduce stress when you are preparing for a big holiday bash.
Ingredients
- 4 large egg whites (room temperature)
- 1/2 teaspoon cream of tartar
- 1 cup granulated sugar (extra fine works best)
- 1/2 teaspoon pure vanilla extract
- 1/4 cup mini semi-sweet chocolate chips (or black edible ink marker)
- A pinch of salt
Directions
Step 1: Preparation
Preheat your oven to 225°F (110°C). Line two large baking sheets with parchment paper or silicone baking mats. Ensure your mixing bowl and whisk attachment are completely clean and free of any grease, as even a tiny drop of fat can prevent the egg whites from peaking.
Step 2: Whip the Egg Whites
Place the room temperature egg whites in the bowl of a stand mixer. Add the cream of tartar and a pinch of salt. Beat on medium-low speed until the mixture becomes frothy. Gradually increase the speed to medium-high and continue beating until soft peaks form.
Step 3: Gradually Add Sugar
Continue beating the egg whites while adding the sugar one tablespoon at a time. This slow process ensures the sugar dissolves completely. Once all the sugar is added, increase the speed to high and beat until the meringue is thick, glossy, and holds stiff peaks. Stir in the vanilla extract at the very end.
Step 4: Pipe the Ghost Shapes
Fit a large piping bag with a round tip (or simply snip the corner off a gallon-sized plastic bag). Fill the bag with the meringue. Pipe tall mounds onto the prepared baking sheets, pulling the bag upward as you finish to create a “pointed” ghostly head. Space them about an inch apart.
Step 5: Bake and Dry
Place the baking sheets in the oven and bake for 1 hour. Do not open the oven door during this time. After an hour, turn off the oven and leave the cookies inside with the door closed for at least another hour (or overnight). This slow cooling process prevents the meringues from cracking.
Step 6: Decorate the Faces
Once the cookies are completely cool and crisp, it is time to give them life. Melt the mini chocolate chips in a microwave-safe bowl in 15-second increments. Use a toothpick to dot two eyes and a mouth onto each ghost. Alternatively, use an edible food marker for more precise expressions. Store in an airtight container until serving.
Expert Tips for Perfect Halloween Desserts Easy – Ghost Meringue Cookies
For the best results, always use room temperature eggs; they reach a much higher volume than cold eggs. If you are having trouble with the sugar dissolving, try pulsing your granulated sugar in a blender for a few seconds to create “caster sugar.” Avoid making meringues on a very humid day, as the sugar can absorb moisture from the air, making your ghosts sticky or chewy instead of crisp. Lastly, ensure no yellow yolk gets into your whites, or they will never whip up properly.
Delicious Variations
You can easily put a twist on these classic ghosts. Add a drop of peppermint or almond extract instead of vanilla for a different flavor profile. If you want “colorful ghosts,” add a tiny drop of gel food coloring to the meringue before piping. You can also sprinkle a little edible glitter or sanding sugar on them before baking for a magical, shimmering effect. For a “bloody” version, use a toothpick to dab a little red food coloring around the base of the ghost.
Frequently Asked Questions
Can I make these cookies without cream of tartar?
Yes, you can substitute the cream of tartar with an equal amount of white vinegar or lemon juice. This acid helps stabilize the egg whites so they hold their shape during baking.
How do I store meringue cookies to keep them crisp?
Store your ghosts in a strictly airtight container at room temperature. They can last for up to two weeks if kept away from moisture and humidity. Do not refrigerate them, as the moisture in the fridge will make them soft.
Why did my meringue cookies turn brown?
If your cookies are turning tan or brown, your oven temperature is likely too high. Meringues are meant to “dry out” rather than bake. Check your oven with an external thermometer to ensure it stays at 225°F or lower.
Can I use liquid egg whites from a carton?
It is generally recommended to use fresh egg whites. Many pasteurized carton egg whites have been treated in a way that prevents them from whipping into stiff peaks effectively. For the most reliable results, crack fresh eggs.
How can I tell if the sugar is fully dissolved?
While mixing, rub a small amount of the meringue between your thumb and forefinger. If it feels gritty, the sugar hasn’t dissolved yet. Continue beating until the mixture feels completely smooth.
Conclusion
These Ghost Meringue Cookies prove that you don’t need a lot of ingredients to create a show-stopping Halloween treat. They are light, crisp, and undeniably cute, making them a favorite for both kids and adults. By following these simple steps and tips, you can master the art of meringue and bring some sweet spooky spirit to your next October gathering. Happy haunting and happy baking!