Follow Me On Pinterest!
Halloween Cake Pops – Graveyard Edition
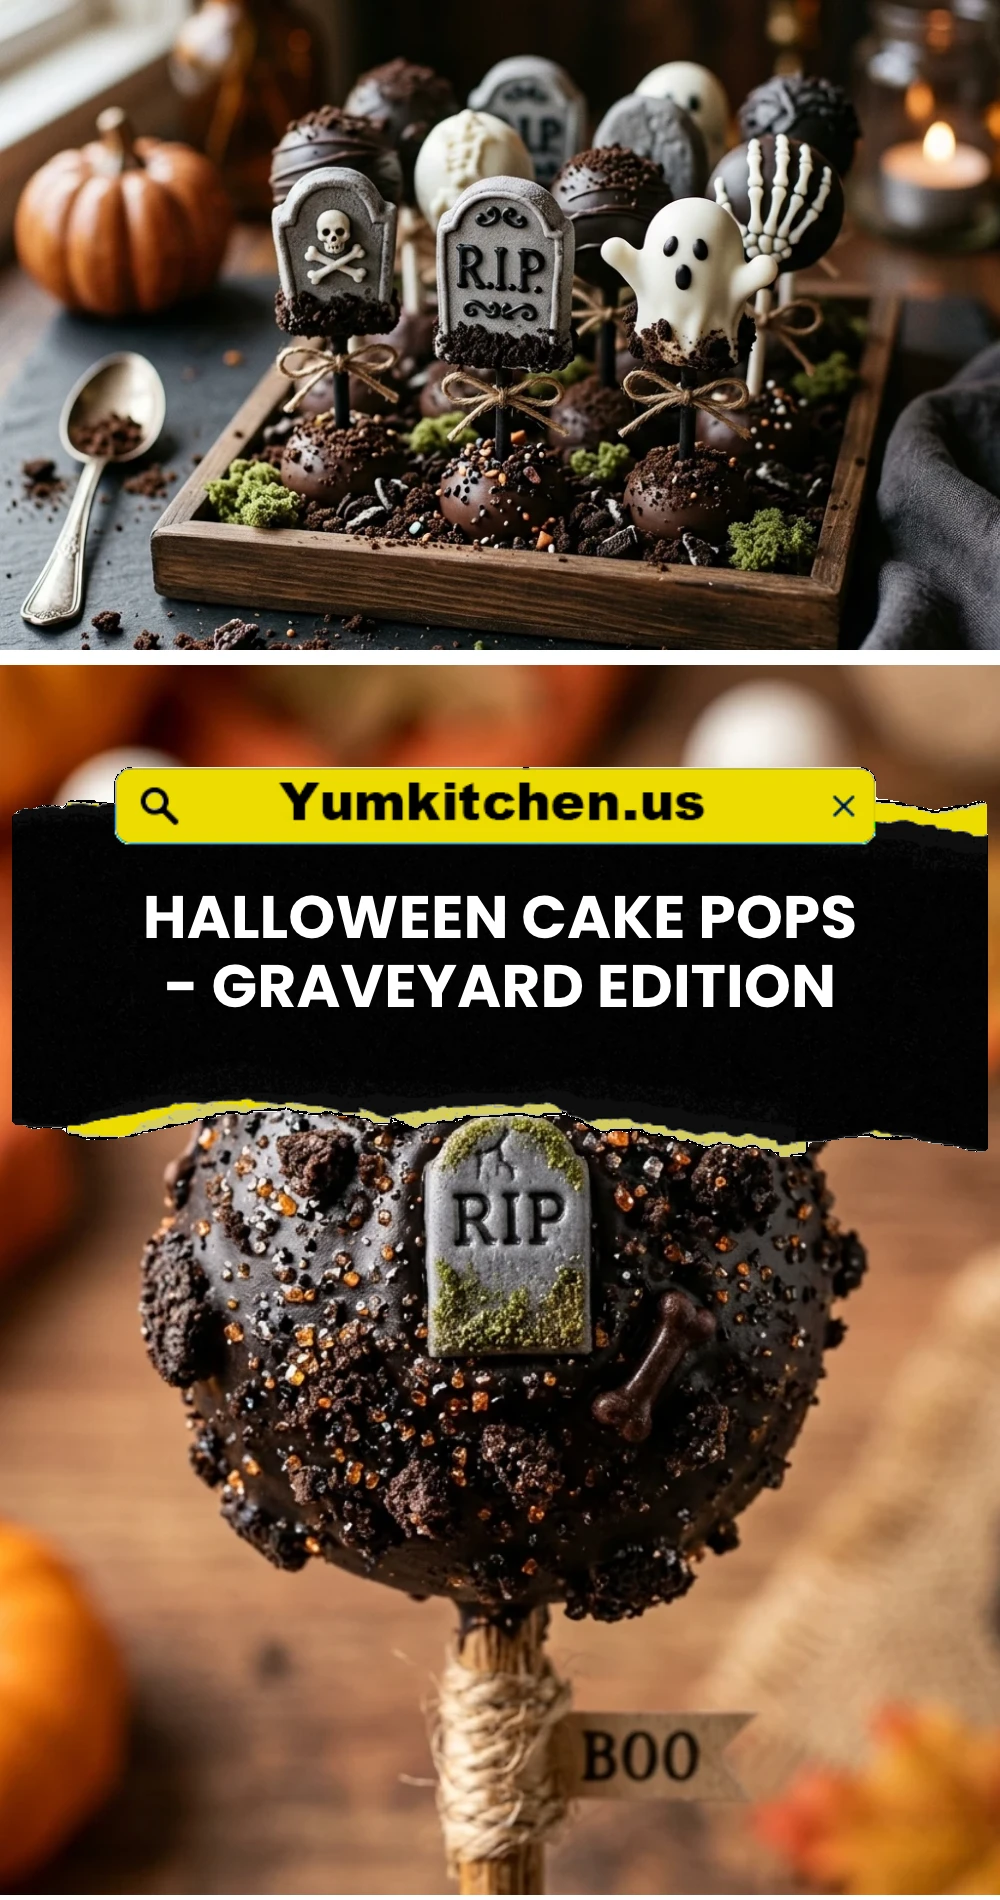
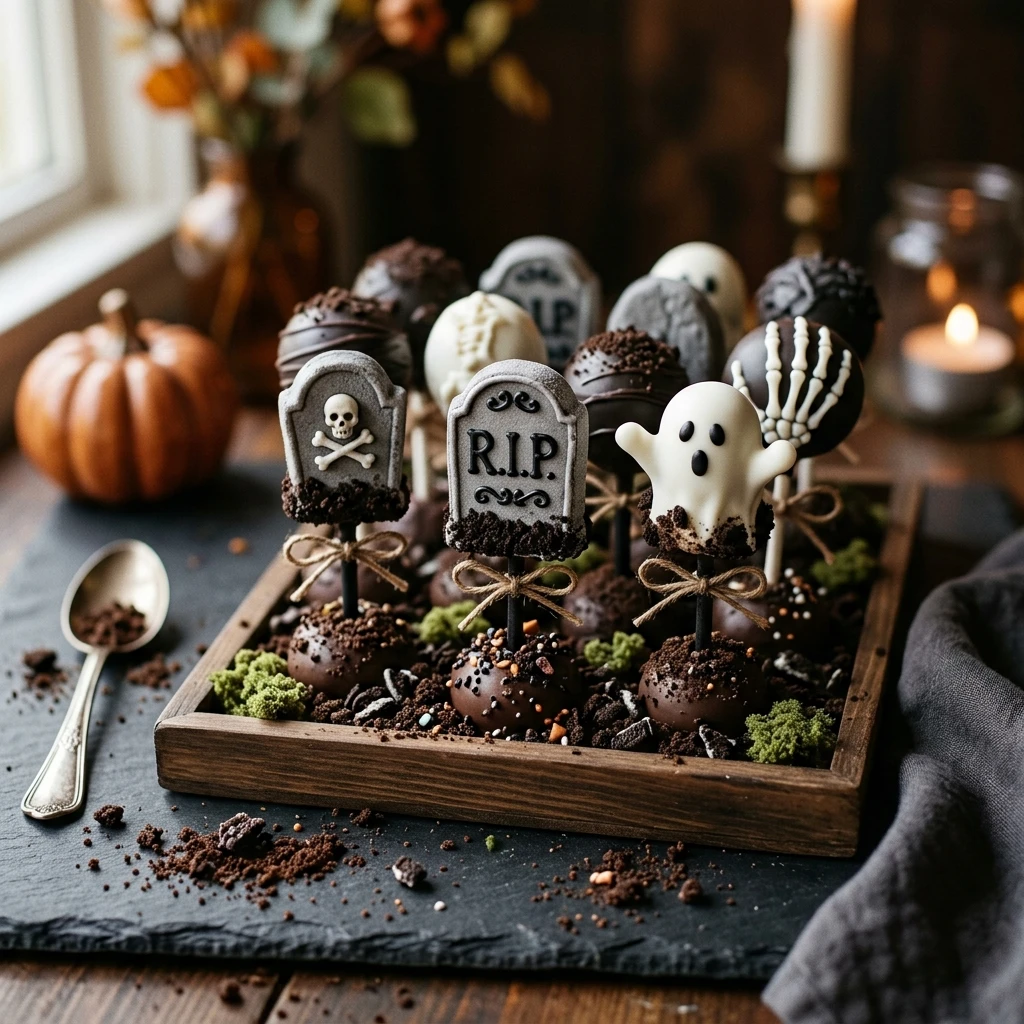
Get ready to spook your guests with the ultimate treats this October! These Halloween Cake Pops – Graveyard Edition are not just incredibly cute; they are a decadent, bite-sized chocolate experience that captures the eerie spirit of the season. Imagine a rich, moist chocolate interior coated in smooth candy shells and decorated like tiny tombstones and ghosts rising from a bed of “dirt.” Whether you are hosting a haunted house party or looking for a fun kitchen project with the kids, these graveyard-themed pops are guaranteed to be the star of your dessert table.
Recipe Information
- Prep Time: 45 minutes
- Cook Time: 30 minutes
- Total Time: 1 hour 15 minutes
- Servings: 24 cake pops
- Difficulty: Medium
Nutrition values
- Calories: 185 kcal
- Protein: 2g
- Carbs: 26g
Why Make This Halloween Cake Pops – Graveyard Edition
These cake pops are the perfect blend of creative artistry and classic dessert flavors. Unlike a standard cake, these are portion-controlled and portable, making them ideal for parties where guests are mingling. The “Graveyard Edition” adds a layer of storytelling to your baking. By using simple ingredients like crushed cookies and grey candy melts, you create a miniature landscape that looks professional but remains achievable for home bakers. Plus, the combination of fudgy chocolate cake and crunchy candy coating is a texture lover’s dream!
Ingredients
- 1 box (15.25 oz) chocolate cake mix (plus ingredients listed on the box: water, oil, eggs)
- 1/2 cup chocolate frosting (store-bought or homemade)
- 12 oz bag grey candy melts (for tombstones)
- 12 oz bag white candy melts (for ghosts)
- 1 cup crushed Oreo cookies (for the “dirt”)
- 24 lollipop sticks
- Black edible ink marker or black decorating gel
- Optional: Green sprinkles or gummy worms for extra graveyard detail
Directions
Step 1: Bake and Cool the Cake
Bake the chocolate cake according to the instructions on the box. Once finished, remove it from the oven and let it cool completely. Do not try to work with a warm cake, as it will melt the frosting and create a soggy mess. For the best results, you can even bake the cake a day in advance.
Step 2: Crumble and Mix
Transfer the cooled cake into a large mixing bowl. Using your hands or a fork, crumble the cake until it resembles fine breadcrumbs. Add the chocolate frosting one tablespoon at a time. Mix with your hands until the crumbs are moist enough to hold a shape when squeezed, but not so wet that they become greasy. You may not need the full half-cup of frosting.
Step 3: Roll and Chill
Scoop about one tablespoon of the mixture and roll it into a smooth ball. For the “tombstone” shapes, flatten the balls slightly into ovals. Place the shapes on a parchment-lined baking sheet. Melt a small amount of candy melts, dip the tip of each lollipop stick into it, and insert the stick into the cake ball. Chill in the freezer for 15-20 minutes to firm up.
Step 4: Dip and Coat
Melt your grey and white candy melts in separate microwave-safe bowls in 30-second intervals, stirring until smooth. Dip the chilled cake pops into the melted candy, ensuring they are fully coated. Gently tap the stick on the edge of the bowl to remove excess coating. Immediately dip the bottom of the pops or the top of your display stand into the crushed Oreo “dirt” before the candy sets.
Step 5: Decorate the Graveyard
Once the coating is completely hard, use your black edible marker to write “RIP” on the grey tombstone pops. For the white ghost pops, draw two small eyes and a mouth. Arrange the finished pops upright in a styrofoam block or a container filled with extra Oreo crumbs to complete the graveyard look.
Expert Tips for Perfect Halloween Cake Pops – Graveyard Edition
- Temperature Control: Ensure your cake balls are chilled but not frozen when you dip them. If they are too cold, the candy coating may crack as it expands.
- Thin the Coating: If your melted candy is too thick, add a teaspoon of coconut oil or vegetable shortening to help it flow more smoothly.
- The Tap Technique: When removing excess candy, tap your wrist rather than the stick itself for a gentler vibration that prevents the cake ball from falling off.
- Uniformity: Use a small cookie scoop to ensure every cake pop is the exact same size for a professional look.
Delicious Variations
- Red Velvet “Bloody” Center: Use red velvet cake mix instead of chocolate for a spooky surprise when guests take a bite.
- Pumpkin Spice: Swap chocolate cake for pumpkin spice cake and use cream cheese frosting for a seasonal flavor twist.
- Vegan Graveyard: Use a vegan cake mix, flax eggs, and dairy-free chocolate chips to make this treat accessible to everyone.
- Glowing Ghosts: Use neon green candy melts for some of the pops to simulate radioactive spirits in your graveyard.
Frequently Asked Questions
How do I store these cake pops?
Store the finished cake pops in an airtight container in the refrigerator for up to 5 days. If you need to stack them, place a layer of parchment paper between them to prevent sticking.
Can I make these in advance?
Yes! You can make the cake balls and freeze them (without the sticks) for up to 6 weeks. You can also complete the entire decorated pop up to 2 days before your event if kept in a cool, dry place.
Why did my candy coating crack?
Cracking usually happens because of a temperature shock. If the cake ball is very cold and the candy melt is very hot, the rapid change causes the coating to expand and crack. Let the cake balls sit at room temperature for 5 minutes after taking them out of the freezer before dipping.
What can I use if I don’t have a styrofoam block?
You can use a cardboard box with small holes poked in it, or even a colander turned upside down. Another great option is filling a jar with dried beans or sugar to hold the sticks upright.
My cake pops keep falling off the stick. What happened?
This usually happens if the cake mixture is too heavy or if you didn’t “glue” the stick. Always dip the stick in melted candy before inserting it into the cake ball, and ensure your mixture isn’t overly saturated with frosting.
Conclusion
These Halloween Cake Pops – Graveyard Edition are the perfect combination of spooky and sweet. While they require a bit of patience during the dipping process, the final result is a stunning dessert that looks like it came straight from a professional bakery. Grab your candy melts and Oreo crumbs, and start building your own edible graveyard today! Your friends and family will be dying to try one.