Follow Me On Pinterest!
Halloween Cake Ideas – Haunted House Layer Cake
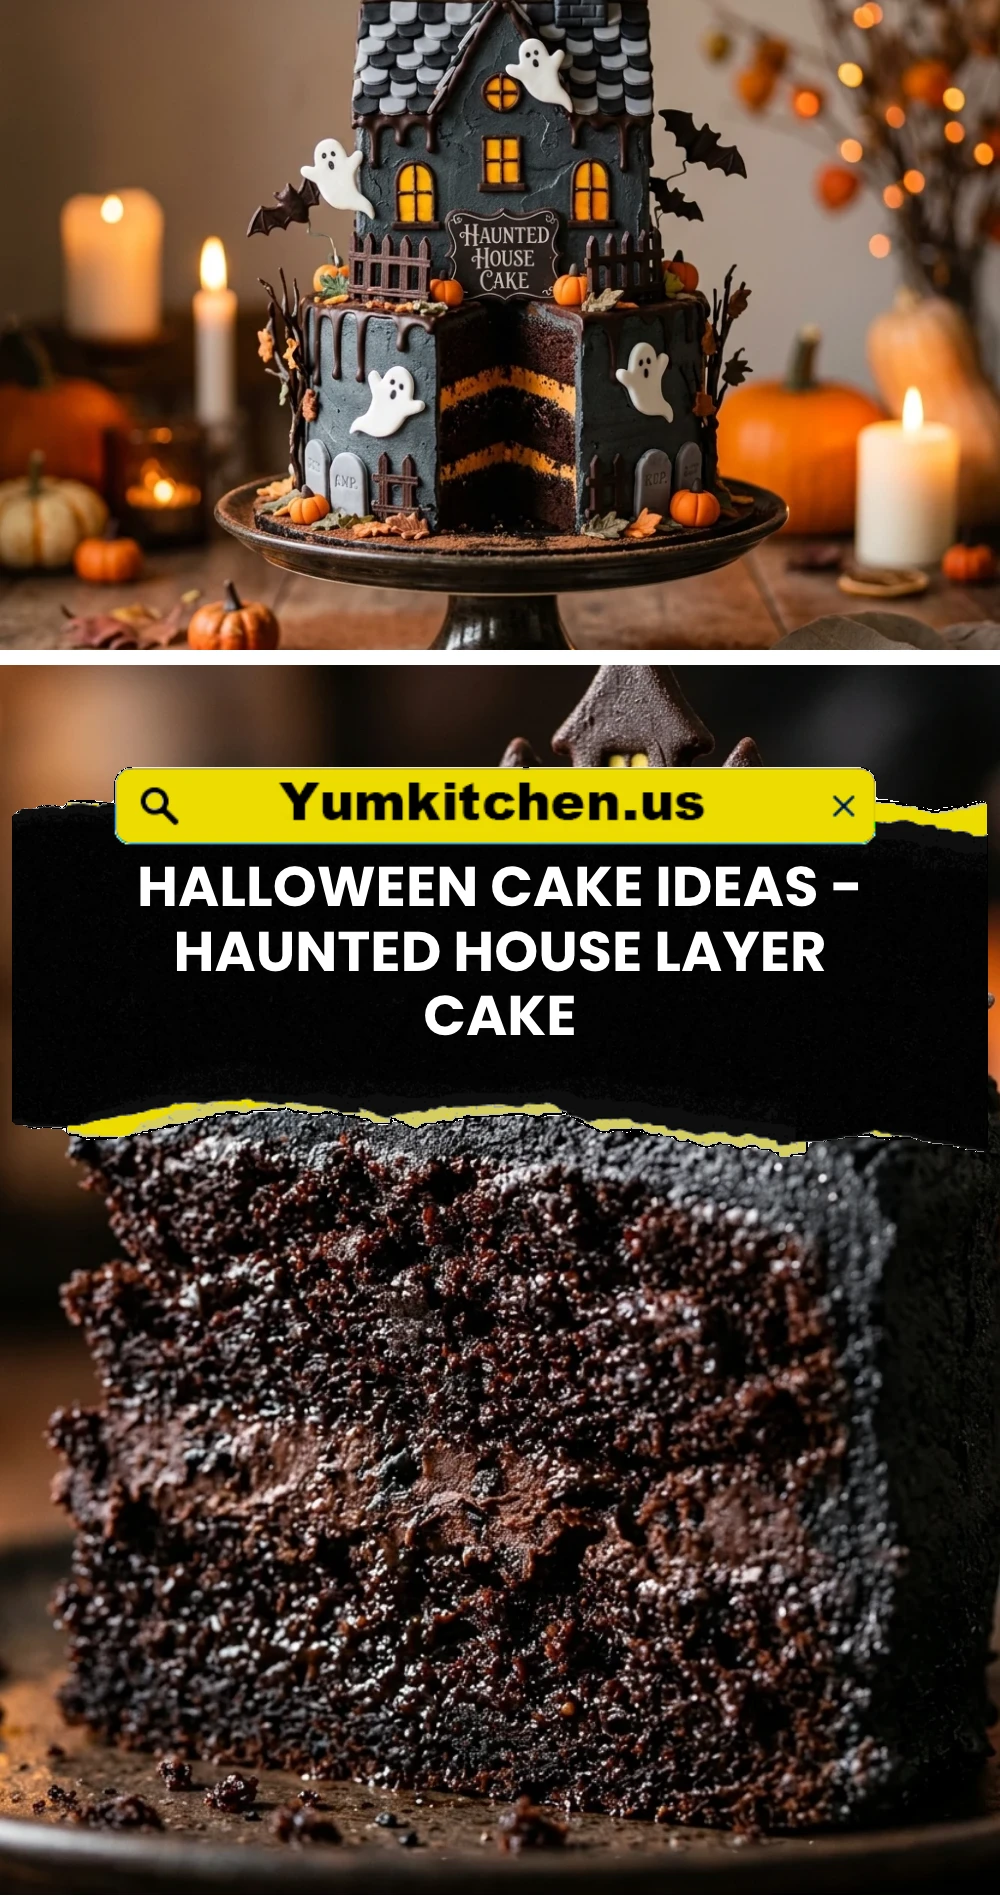
Halloween is the one time of year when your kitchen can transform into a laboratory of delicious horrors. If you are looking for a centerpiece that will stop your guests in their tracks, this Haunted House Layer Cake is the ultimate showstopper. This cake combines deep, dark chocolate flavors with vibrant orange frosting and eerie edible silhouettes to create a scene straight out of a classic ghost story. Whether you are hosting a costume party or just want to treat your family to something spectacular, this cake delivers on both flavor and fright. Get ready to build a masterpiece that is as fun to decorate as it is to eat!
Recipe Information
- Prep Time: 60 minutes
- Cook Time: 35 minutes
- Total Time: 95 minutes
- Servings: 12 servings
- Difficulty: Medium
Nutrition values
- Calories: 540 kcal
- Protein: 6g
- Carbs: 72g
Why Make This Halloween Cake Ideas – Haunted House Layer Cake
This cake is more than just a dessert; it is a creative project that brings the spirit of Halloween to life. Unlike basic cupcakes, this layer cake offers a massive canvas for your imagination. The contrast between the midnight-black frosting and the glowing orange interior creates a stunning visual “wow” factor when you slice into it. It is also surprisingly customizable—you can make your haunted house as simple or as architectural as you like. Plus, using black cocoa powder ensures a rich, Oreo-like flavor that beats standard store-bought chocolate cakes every time.
Ingredients
For the Chocolate Cake Layers:
- 2 cups all-purpose flour
- 2 cups granulated sugar
- 3/4 cup black cocoa powder (for that deep dark color)
- 2 teaspoons baking soda
- 1 teaspoon baking powder
- 1 teaspoon salt
- 1 cup buttermilk, room temperature
- 1/2 cup vegetable oil
- 2 large eggs, room temperature
- 2 teaspoons vanilla extract
- 1 cup hot coffee (to bloom the cocoa)
For the Orange Buttercream & Decorations:
- 2 cups unsalted butter, softened
- 5 cups powdered sugar
- 2 teaspoons vanilla extract
- Orange food coloring gel
- 1 cup dark chocolate melting wafers
- Pretzel sticks (for the “iron” fence)
- Crushed chocolate sandwich cookies (for “dirt”)
Directions
Step 1: Baking the Dark Chocolate Layers
Preheat your oven to 350°F (175°C) and grease three 6-inch or two 8-inch round cake pans. In a large bowl, whisk together the flour, sugar, black cocoa, baking soda, baking powder, and salt. Add the buttermilk, oil, eggs, and vanilla, mixing until smooth. Carefully stir in the hot coffee by hand. The batter will be thin, but do not worry. Pour the batter into the prepared pans and bake for 30–35 minutes or until a toothpick comes out clean. Let the cakes cool completely before frosting.
Step 2: Preparing the Vibrant Orange Frosting
In a stand mixer, beat the softened butter until it is light and fluffy, which usually takes about 3 minutes. Gradually add the powdered sugar one cup at a time, mixing on low speed until incorporated. Add the vanilla and a few drops of orange gel food coloring. Increase the speed to medium-high and whip for another 2 minutes until the frosting is airy and bright. If the frosting is too stiff, add a tablespoon of heavy cream to reach the desired consistency.
Step 3: Creating the Haunted House Silhouettes
Place a piece of parchment paper over a drawing or a printed template of a haunted house and some spooky trees. Melt your chocolate wafers in the microwave in 30-second intervals until smooth. Transfer the melted chocolate to a piping bag with a small round tip. Trace the outlines of the house, trees, and bats onto the parchment paper. Fill in the shapes completely with chocolate. Place the parchment in the freezer for 15 minutes until the shapes are solid and easy to peel off.
Step 4: Assembling the Layer Cake
Level your cooled cake layers by trimming off any domed tops with a serrated knife. Place the first layer on a cake board or plate. Spread a generous layer of orange buttercream over the top. Repeat with the remaining layers. Apply a thin “crumb coat” of frosting over the entire exterior of the cake and chill it in the fridge for 20 minutes. Once set, apply a final, thick layer of orange frosting and smooth it out using a bench scraper.
Step 5: Adding the Spooky Decorations
Press the crushed chocolate cookies around the bottom edge of the cake to create a “dirt” path. Carefully peel your chocolate haunted house and trees off the parchment paper. Gently press the house into the side or top of the cake. Place the trees around the sides. Break the pretzel sticks into uneven pieces and stick them into the base of the cake to create a rickety graveyard fence. Finish by placing small chocolate bats near the top of the cake for a flight of fright.

Expert Tips for Perfect Halloween Cake Ideas – Haunted House Layer Cake
- Use Black Cocoa: Standard cocoa powder will result in a brown cake. Black cocoa powder provides that signature “haunted” look and a deep chocolate taste.
- Chill Your Decorations: Chocolate silhouettes melt quickly from the warmth of your hands. Handle them as little as possible and keep them in the freezer until the very second you are ready to place them.
- Room Temperature Ingredients: Ensure your eggs and buttermilk are at room temperature to prevent the batter from curdling and to ensure a smooth rise.
- The Coffee Trick: Don’t skip the hot coffee. It dissolves the cocoa powder clusters and “blooms” the flavor, making the chocolate taste much more intense without making the cake taste like coffee.
Delicious Variations
- The “Bloody” Interior: Use a red velvet cake recipe instead of chocolate for a gory surprise when guests cut into the house.
- Purple Midnight Version: Swap the orange buttercream for a deep purple frosting and use white chocolate dyed neon green for the silhouettes.
- Glow-in-the-Dark Windows: Use small pieces of yellow fondant or yellow icing to create “lighted” windows on your chocolate haunted house silhouettes.
- Pumpkin Spice Base: If you aren’t a chocolate fan, use a pumpkin spice cake base but keep the black chocolate decorations for that classic Halloween contrast.
Frequently Asked Questions
Can I make the chocolate silhouettes in advance?
Yes! You can make the chocolate shapes up to a week in advance. Store them flat between sheets of parchment paper in an airtight container in a cool, dry place (or the fridge).
What if my orange frosting looks grainy?
Grainy frosting usually means the powdered sugar wasn’t sifted or the butter wasn’t whipped long enough. Try adding a teaspoon of heavy cream and whipping it on high for another minute to smooth it out.
How do I get the frosting perfectly smooth?
Use a metal bench scraper. Dip the scraper in hot water, wipe it dry, and then run it along the sides of the cake. The heat slightly melts the butter in the frosting, creating a glass-like finish.
Can I use store-bought frosting for this?
You can, but store-bought frosting is often softer than homemade buttercream. You may need to add extra powdered sugar to make it stiff enough to hold the weight of the chocolate decorations.
How should I store the finished cake?
Store the cake in the refrigerator due to the butter content in the frosting. However, take it out about 30–60 minutes before serving so the buttercream can soften and the flavors can shine.
Conclusion
Creating a Haunted House Layer Cake is the perfect way to embrace the spooky season with style and flavor. By combining a rich, dark chocolate base with vibrant decorations, you create a dessert that is truly a work of art. Do not be afraid to get messy with the “dirt” or make your chocolate trees look a little extra twisted—imperfection only adds to the haunted charm! Gather your ingredients, put on your favorite Halloween playlist, and start building your delicious house of horrors today.