Follow Me On Pinterest!
Easy Pie With Store Crust No Fancy Tools
Let’s be honest: sometimes you want the comfort of a homemade pie without the stress of chilling butter or measuring flour. Maybe you are short on time, or perhaps you just moved and haven’t unpacked your kitchen gadgets yet. This Easy Pie With Store Crust No Fancy Tools is the ultimate solution. It delivers that golden, flaky crunch and gooey fruit filling using just a few basic ingredients and the simplest items in your kitchen drawer. You do not need a pastry cutter, a marble rolling pin, or even a fancy ceramic dish to make this dessert a total showstopper at your next dinner.
Recipe Information
- Prep Time: 15 minutes
- Cook Time: 45 minutes
- Total Time: 1 hour
- Servings: 8
- Difficulty: Easy
Nutrition values
- Calories: 320 kcal
- Protein: 3g
- Carbs: 48g
Why Make This Easy Pie With Store Crust No Fancy Tools
This recipe is designed for real life. Most of us don’t have hours to spend crimping edges or making dough from scratch on a Tuesday night. By using a high-quality store-bought crust, you skip the hardest part of baking while still getting that “homemade” flavor. Because it requires no specialized equipment, you can bake this in a vacation rental, a dorm, or a minimalist kitchen. It is a foolproof way to satisfy a sweet craving with minimal cleanup and maximum reward.
Ingredients
- 1 box refrigerated pie crusts (contains 2 crusts)
- 2 cans (21 oz each) fruit pie filling (apple, cherry, or blueberry)
- 1 large egg (for egg wash)
- 1 tablespoon water
- 1 tablespoon granulated sugar (for topping)
- 1/2 teaspoon ground cinnamon (optional)
- Butter for greasing the pan
Directions
Step 1: Prep the Oven and Pan
Preheat your oven to 400°F (200°C). Take your refrigerated pie crusts out of the fridge about 15 minutes before you start so they soften slightly and don’t crack. Lightly grease a standard 9-inch pie plate or even a round cake pan with butter or non-stick spray. Gently unroll the first crust and press it into the bottom and up the sides of your pan. Use your fingers to ensure there are no air bubbles trapped underneath.
Step 2: Fill and Cover
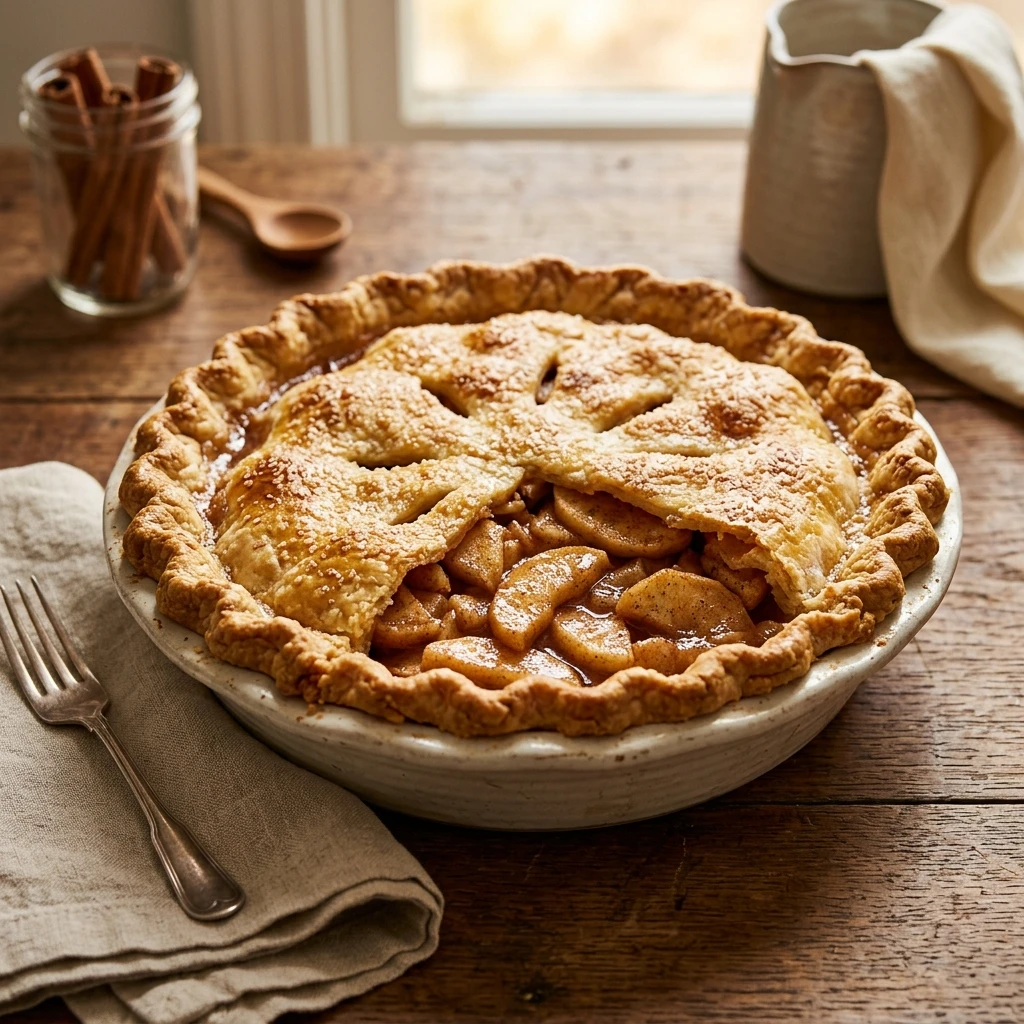
Pour your chosen fruit pie filling into the bottom crust. Use a regular dinner spoon to spread it out evenly. Unroll the second pie crust and place it directly over the top of the filling. If you want a more rustic look, you can cut the top crust into strips with a butter knife to make a simple lattice, or just keep it whole. If keeping it whole, use a fork to press the edges of the top and bottom crusts together to seal the pie.
Step 3: Finish and Bake
Cut four small slits in the center of the top crust with a knife to let steam escape. In a small bowl or mug, beat the egg with one tablespoon of water using a fork. Use the back of a spoon or your fingers to lightly coat the top of the crust with the egg wash. Sprinkle the sugar and cinnamon over the top. Place the pie in the oven and bake for 40 to 45 minutes, or until the crust is a deep golden brown. Let the pie cool for at least 30 minutes before slicing so the filling sets.
Expert Tips for Perfect Easy Pie With Store Crust No Fancy Tools
Always let your store-bought dough sit at room temperature for a few minutes before unrolling; if it is too cold, it will snap and break. If the edges of your pie start to brown too quickly in the oven, simply cover them loosely with small strips of aluminum foil. For the best texture, use a glass pie plate if you have one, as it helps the bottom crust get crispier. Finally, don’t skip the egg wash! That simple step is what creates the professional, shiny, golden finish that makes people think you spent hours in the kitchen.
Delicious Variations
You can easily customize this recipe based on what you have in your pantry. If you prefer a tart flavor, mix half a cup of fresh cranberries into a canned apple filling. For a “Crunch Top” version, replace the top crust with a mixture of oats, brown sugar, and melted butter. You can also turn these into hand pies by cutting the dough into circles, filling one side, folding them over into half-moons, and sealing the edges with a fork. If you want a savory twist, use the same crust method but fill it with a mixture of cooked chicken, frozen veggies, and gravy for an instant pot pie.
Frequently Asked Questions
Can I use frozen pie crusts instead of refrigerated ones?
Yes, but make sure to thaw them completely according to the package directions. Frozen crusts often come already pressed into a tin, so you would just need one for the bottom and perhaps a second one to crumble or lay on top.
What if I don’t have an egg for the wash?
You can substitute the egg wash with a little bit of milk or heavy cream. It won’t be quite as shiny as an egg wash, but it will still help the sugar stick and give the crust a nice brown color.
How do I prevent a soggy bottom crust?
Bake your pie on the lowest rack of the oven for the first 15 minutes. This ensures the heat hits the bottom of the pan directly, crisping the dough before the fruit juices soak in too much.
Can I use fresh fruit instead of canned?
Absolutely. If using fresh fruit, toss about 5 cups of sliced fruit with 1/2 cup of sugar and 2 tablespoons of cornstarch before putting it in the crust. The cornstarch is vital to thicken the natural juices.
How should I store leftovers?
You can keep this pie at room temperature, covered with foil or plastic wrap, for up to two days. For longer storage, keep it in the refrigerator for up to five days. Reheat slices in the oven at 350°F for a few minutes to regain the crust’s crispness.
Conclusion
Baking doesn’t have to be a complicated science project. This Easy Pie With Store Crust No Fancy Tools proves that with a little help from the grocery store and some basic kitchen common sense, anyone can produce a delicious, comforting dessert. Whether you are hosting a holiday or just want a sweet treat after dinner, this recipe delivers every single time. Grab a box of crust and your favorite filling, and get baking today!