Follow Me On Pinterest!
Beginner Sourdough Focaccia With Cold Proof Overnight Easy
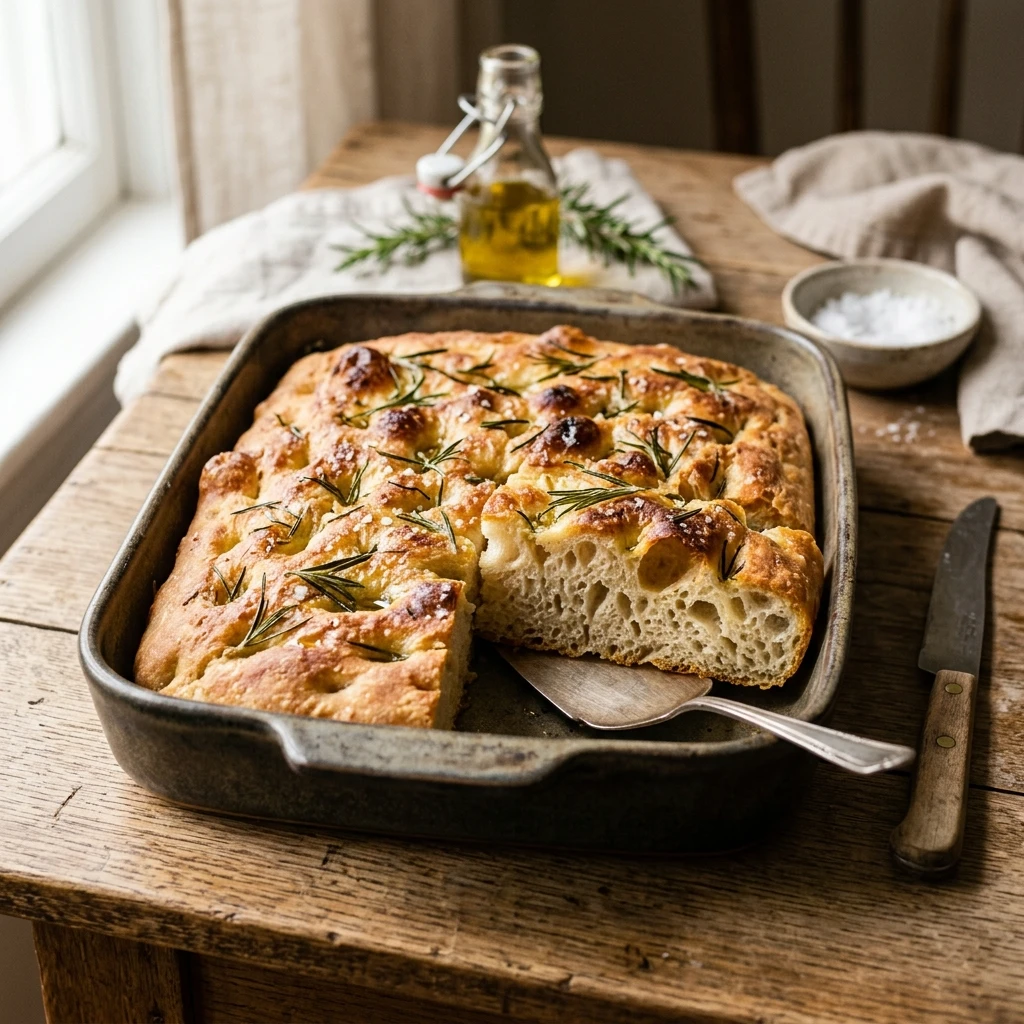
There is nothing quite like the smell of fresh bread wafting through your kitchen, especially when it is a golden, bubbly sourdough focaccia. If you have been intimidated by sourdough in the past, this recipe is your perfect entry point. We use a long, cold proof overnight to do all the hard work for you. By the time you wake up, the dough is fermented, flavorful, and ready to dimple. This method creates a crust that is incredibly crispy and an interior that is light, airy, and full of those iconic sourdough bubbles. Let’s get baking!
Recipe Information
- Prep Time: 20 minutes (active)
- Cook Time: 25 minutes
- Total Time: 18 hours 45 minutes
- Servings: 8 servings
- Difficulty: Easy
Nutrition values
- Calories: 245 kcal
- Protein: 6g
- Carbs: 38g
Why Make This Beginner Sourdough Focaccia With Cold Proof Overnight Easy
This recipe is a game-changer for busy home bakers. The overnight cold proof in the refrigerator serves two main purposes: it develops a complex, tangy flavor that you cannot get from a quick rise, and it makes the dough much easier to handle. Since it is a high-hydration dough, the cold temperature firms up the structure, allowing you to achieve those deep, satisfying dimples without the dough sticking to your fingers. Plus, there is no intense kneading required—just a few simple folds and time will do the rest.
Ingredients
- 100g active sourdough starter (bubbly and fed)
- 375g warm water
- 500g bread flour (all-purpose flour also works)
- 10g fine sea salt
- 20g extra virgin olive oil (for the dough)
- Additional olive oil for the pan and drizzling
- Flaky sea salt for topping
- Optional: Fresh rosemary or garlic cloves
Directions
Step 1: Mixing and Initial Fermentation
In a large mixing bowl, whisk together your active sourdough starter and warm water until the starter is mostly dissolved. Add the flour, 10g of salt, and 20g of olive oil. Mix by hand or with a sturdy spatula until a shaggy dough forms and no dry flour remains. Cover the bowl with a damp cloth and let it rest for 30 minutes. After the rest, perform four sets of “stretch and folds” every 30 minutes. To do this, grab one side of the dough, pull it up, and fold it over the center. Rotate the bowl and repeat until you have gone all the way around. This builds the gluten structure without kneading.
Step 2: The Overnight Cold Proof
Once you finish the folds, transfer the dough into a generously oiled 9×13 inch metal baking pan or a large glass container. Cover the container tightly with plastic wrap or a lid to prevent the dough from drying out. Place the dough in the refrigerator for 12 to 24 hours. This cold fermentation period is where the magic happens, as the yeast works slowly to create gas bubbles and deep flavor profiles. The dough will slowly expand and relax into the corners of the pan during this time.
Step 3: Dimpling and Baking
Remove the dough from the fridge 2 hours before you plan to bake. Let it sit at room temperature to wake up and finish filling the pan. Preheat your oven to 425°F (220°C). Drizzle a generous amount of olive oil over the top of the dough. Grease your fingers and press them straight down into the dough to create deep dimples—don’t be afraid to touch the bottom of the pan! Sprinkle with flaky sea salt and any desired herbs. Bake for 20-25 minutes until the top is deeply golden brown and the bottom is crispy. Move the focaccia to a wire rack immediately to keep the crust crunchy.
Expert Tips for Perfect Beginner Sourdough Focaccia With Cold Proof Overnight Easy
Always ensure your sourdough starter is at its peak activity before mixing. If it hasn’t doubled in size and isn’t bubbly, your focaccia might turn out dense. Use a high-quality extra virgin olive oil, as its flavor will shine through in the final bread. If you find the dough is resisting stretching to the corners of the pan, let it rest for 15 minutes to relax the gluten, then try again. For the best texture, avoid using a glass baking dish if possible; a dark metal pan or a cast-iron skillet conducts heat better and creates a much crispier bottom crust.
Delicious Variations
- Garlic and Rosemary: Press sliced garlic cloves and fresh rosemary sprigs into the dimples before baking.
- Tomato and Basil: Top with halved cherry tomatoes and finish with fresh basil leaves after the bread comes out of the oven.
- Everything Bagel: Sprinkle a generous amount of everything bagel seasoning over the oil before baking.
- Parmesan and Black Pepper: Grate fresh parmesan cheese over the top during the last 5 minutes of baking for a salty, cheesy crust.
Frequently Asked Questions
Can I use sourdough discard for this recipe?
For this specific recipe, it is best to use an active, fed starter. Discard does not have the leavening power required to create the airy, bubbly structure characteristic of focaccia. If you want to use discard, you would need to add a small amount of commercial yeast.
How do I know when the focaccia is finished baking?
The top should be a rich golden brown, and the edges should look crisp and pull away slightly from the pan. You can also carefully lift a corner with a spatula; the bottom should be fried to a golden, crunchy brown color.
What if I don’t have a 9×13 inch pan?
You can use a large cast-iron skillet (12-inch) or a slightly smaller rectangular pan. Just keep in mind that a smaller pan will result in a thicker, taller focaccia that may require a few extra minutes in the oven.
Can I leave the dough in the fridge for longer than 24 hours?
Yes, you can leave it for up to 48 hours. The flavor will become significantly more sour the longer it sits. However, beyond 48 hours, the gluten may start to break down, leading to a flatter loaf.
Why is my focaccia sticking to the pan?
Focaccia requires a surprising amount of olive oil. Ensure you coat the bottom and sides of the pan very well. If you are worried about sticking, you can line the bottom of the pan with parchment paper and then oil the paper heavily.
Conclusion
Mastering beginner sourdough focaccia is an incredibly rewarding experience. By using the overnight cold proof method, you remove the stress of timing and dough handling, leaving you with a foolproof way to enjoy artisanal bread at home. This recipe yields a soft, pillowy crumb and a crust that shatters with every bite. Whether you serve it alongside pasta, use it for sandwiches, or eat it plain with more olive oil, this focaccia is sure to become a staple in your kitchen. Happy baking!