Follow Me On Pinterest!
No Rolling Needed Easy Pie With Store Bought Crust
Forget the flour-dusted counters and the frustration of a sticky rolling pin. This No Rolling Needed Easy Pie uses a clever store-bought crust hack to give you a flaky, professional-looking dessert without the usual kitchen workout. Whether you are a beginner baker or just in a hurry for a weeknight treat, this method ensures a perfectly fitting crust every single time. By utilizing the flexibility of refrigerated dough, we eliminate the stress of tearing and patching, leaving you with more time to enjoy the delicious aroma of a baking pie.
Recipe Information
- Prep Time: 15 minutes
- Cook Time: 45 minutes
- Total Time: 60 minutes
- Servings: 8 servings
- Difficulty: Easy
Nutrition values
- Calories: 310 kcal
- Protein: 3g
- Carbs: 44g
Why Make This No Rolling Needed Easy Pie With Store Bought Crust
This recipe is a game-changer for anyone who loves home-baked treats but hates the cleanup. Since you are not rolling out the dough on a floured surface, your countertops stay spotless. The technique involves pressing the dough directly into the pan, which actually creates a more rustic, “galette-style” texture that many people prefer. It is also incredibly versatile; you can use this method for sweet fruit pies or savory pot pies. It is the ultimate shortcut that does not compromise on flavor or presentation.
Ingredients
- 1 box (14.1 oz) refrigerated pie crusts (contains 2 crusts)
- 4 cups fruit filling (canned or homemade apple, cherry, or blueberry)
- 1 tablespoon unsalted butter, cut into small pieces
- 1 large egg (for egg wash)
- 1 tablespoon water
- 2 tablespoons coarse sugar (optional for topping)
- Non-stick cooking spray
Directions
Step 1: Preparation and Preheating
Preheat your oven to 400°F (200°C). Lightly grease a 9-inch pie plate with non-stick cooking spray. Take your refrigerated pie crusts out of the fridge and let them sit at room temperature for about 15 minutes. This makes the dough pliable and prevents it from cracking when you handle it.
Step 2: Pressing the Bottom Crust
Unroll the first pie crust directly over the pie plate. Instead of rolling it to fit, gently press the dough into the bottom and up the sides of the dish using your fingertips. If the edges hang over, simply fold them inward to create a thick, rustic border. Do not worry about it being perfectly smooth; the texture adds to the charm.
Step 3: Adding the Filling
Pour your chosen fruit filling into the prepared crust. Spread it out evenly with a spoon. Dot the top of the filling with the small pieces of butter. This adds a rich creaminess to the sauce as the fruit bubbles and cooks in the oven.
Step 4: Creating the Top Layer
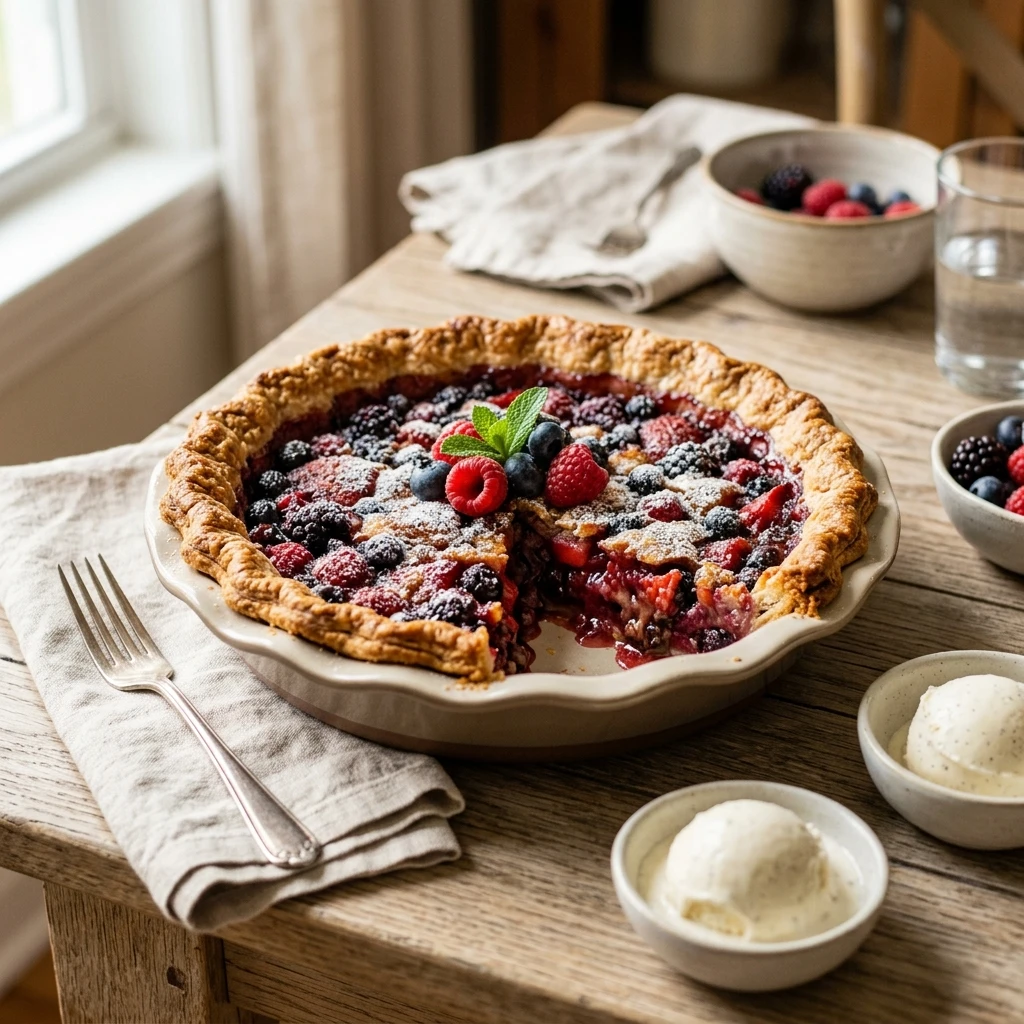
Take the second pie crust and tear it into medium-sized pieces or decorative strips with your hands. Lay these pieces randomly over the top of the filling. This “patchwork” or “crumble” style avoids the need to roll out a flat top and allows steam to escape naturally during baking. In a small bowl, whisk the egg and water together. Brush this egg wash over the visible dough and sprinkle with coarse sugar if desired.
Step 5: Baking and Cooling
Place the pie in the center of the oven. Bake for 40 to 45 minutes, or until the crust is a deep golden brown and the filling is bubbling in the center. If the edges brown too quickly, cover them loosely with aluminum foil. Remove from the oven and let the pie cool for at least 30 minutes before slicing to allow the filling to set.
Expert Tips for Perfect No Rolling Needed Easy Pie With Store Bought Crust
Always let the dough reach room temperature before you start. Cold dough is brittle and will snap rather than mold to your pan. If you find the dough is sticking to your fingers, lightly dust your hands with a tiny bit of flour or sugar. For the best texture, use a glass pie dish; it conducts heat evenly and allows you to see if the bottom crust is fully browned and crisp.
Delicious Variations
You can easily turn this into a “Streusel Pie” by replacing the top crust with a mix of oats, brown sugar, and butter. For a savory twist, fill the bottom crust with a mixture of cooked chicken, peas, carrots, and gravy, then top with the torn dough pieces for an easy chicken pot pie. If you want a citrus kick, zest a lemon or orange directly into your fruit filling before adding the top layer of dough.
Frequently Asked Questions
Can I use frozen pie crusts for this recipe?
Yes, but you must thaw them completely in the refrigerator first. Frozen dough that hasn’t thawed will crumble into dry shards rather than pressing smoothly into the pan.
Do I need to blind bake the bottom crust?
For most fruit pies, blind baking is not necessary with this method. However, if you are using a very “wet” filling like custard, you might want to bake the bottom crust for 8 minutes before adding the filling.
How do I store leftovers?
Cover the pie plate tightly with plastic wrap or foil. It will stay fresh at room temperature for 2 days or in the refrigerator for up to 5 days.
Can I use a metal pan instead of glass?
Yes, a metal pan works fine, but it may cook the crust slightly faster. Keep a close eye on the pie around the 35-minute mark to ensure the bottom doesn’t scorch.
What if I don’t want to use an egg wash?
You can substitute the egg wash with a light brushing of milk or heavy cream. This will still help the crust brown, though it won’t have the same shiny finish as an egg wash.
Conclusion
This No Rolling Needed Easy Pie is the perfect solution for busy bakers who crave the comfort of a home-cooked dessert without the fuss. By embracing the “press and patch” technique, you create a beautiful, rustic pie that looks like it came from a high-end bakery. Serve it warm with a scoop of vanilla ice cream, and your guests will never guess you skipped the rolling pin!