Follow Me On Pinterest!
Sourdough Focaccia Troubleshooting Big Bubbles No Fail
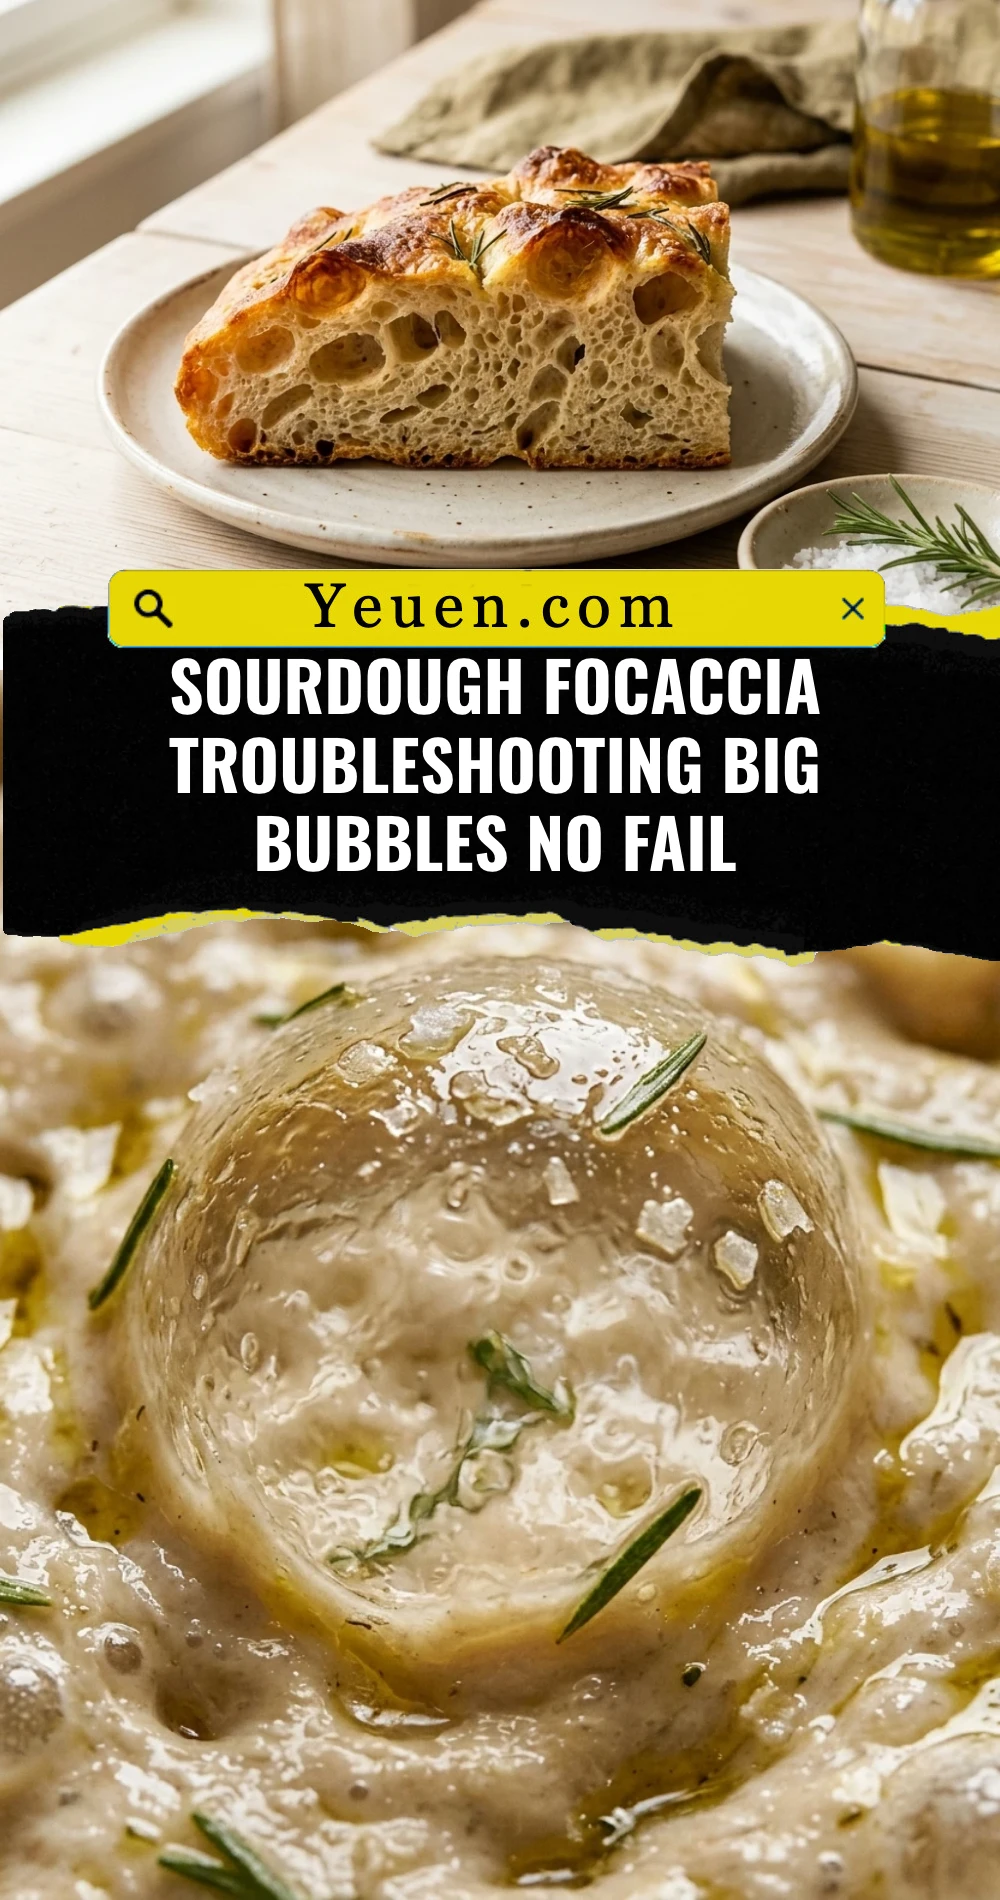
There is nothing quite as satisfying as pressing your fingers into a pillowy mound of dough and seeing giant, wobbly bubbles rise to the surface. Sourdough focaccia is the ultimate comfort bread, but achieving those elusive “big bubbles” can feel like a game of chance. If you have ever pulled a flat, dense slab of bread out of the oven, you know the heartbreak. This guide eliminates the guesswork. We are diving deep into the science of fermentation and hydration to ensure you get a high-rise, airy, and crispy-bottomed focaccia every single time. Get your starter ready, because we are about to bake the most impressive loaf of your life.
Recipe Information
- Prep Time: 18 hours (includes fermentation)
- Cook Time: 25 minutes
- Total Time: 18 hours 25 minutes
- Servings: 10 servings
- Difficulty: Medium
Nutrition values
- Calories: 245 kcal
- Protein: 7g
- Carbs: 42g
Why Make This Sourdough Focaccia Troubleshooting Big Bubbles No Fail
This recipe focuses on the “No Fail” aspect by prioritizing dough strength and temperature control. Unlike standard recipes, this version uses a high-hydration technique specifically designed to trap carbon dioxide, which creates those massive bubbles. It is incredibly forgiving if you understand the “why” behind the steps. Plus, the long cold ferment develops a complex, tangy flavor that store-bought yeast simply cannot replicate. You will gain the confidence to read your dough rather than just following a clock.
Ingredients
- 100g active, bubbly sourdough starter (fed within 4-6 hours)
- 375g warm water (filtered is best)
- 500g high-protein bread flour
- 12g sea salt
- 20g extra virgin olive oil (for the dough)
- Additional olive oil for the pan and drizzling
- Flaky sea salt for topping
- Optional: Fresh rosemary or garlic cloves
Directions
Step 1: Mixing the Dough
In a large glass bowl, whisk together your active sourdough starter and warm water until the starter mostly dissolves. Add the bread flour and the 20g of olive oil. Mix by hand or with a sturdy spatula until a shaggy dough forms and no dry flour remains. Cover the bowl with a damp cloth and let it rest for 30 minutes. This rest period, known as autolyse, allows the flour to hydrate fully and makes the dough easier to work with.
Step 2: Adding Salt and Strengthening
Sprinkle the sea salt over the top of the rested dough. Wet your hand and begin “stretch and folds.” Reach under one side of the dough, pull it up high, and fold it over the center. Rotate the bowl and repeat this four times. Perform three more sets of stretch and folds every 30 minutes. You will notice the dough transforming from a lumpy mess into a smooth, elastic ball. This building of gluten is what holds the big bubbles later.
Step 3: Bulk Fermentation and Cold Proof
Cover the bowl tightly with plastic wrap. Let the dough sit at room temperature until it increases in size by about 50% and looks jiggly. This usually takes 4 to 6 hours depending on your kitchen’s warmth. Once it has puffed up, place the bowl in the refrigerator for 12 to 24 hours. This cold ferment is the “secret sauce” for big bubbles; it slows down the yeast while allowing the gases to build up pressure within the cold, firm gluten structure.
Step 4: The Final Proof in the Pan
Generously coat a 9×13 inch metal baking pan with olive oil. Gently tip the cold dough into the pan. Do not force it to the corners yet. Let it sit at room temperature for 2 to 4 hours. Every hour, gently pull the corners of the dough toward the edges of the pan. It will naturally spread as it warms up. The dough is ready when it is full of visible air bubbles and looks like a shimmering marshmallow.
Step 5: Dimpling and Baking
Preheat your oven to 425°F (220°C). Drizzle more olive oil over the top of the dough. Grease your fingers and press them straight down into the dough to the bottom of the pan. Move across the entire surface to create deep craters. This action pushes air into specific pockets, creating those iconic big bubbles. Sprinkle with flaky salt. Bake for 20 to 25 minutes until the top is golden brown and the bottom is fried crisp by the oil. Transfer to a wire rack immediately to keep the crust crunchy.
Expert Tips for Perfect Sourdough Focaccia Troubleshooting Big Bubbles No Fail
The biggest mistake bakers make is using a weak starter. Ensure your starter has at least doubled in size before using it. If your dough isn’t bubbling, your kitchen might be too cold; try placing it in a turned-off oven with the light on. Always use a metal pan rather than glass or ceramic; metal conducts heat faster, which creates a better “oven spring” to push those bubbles upward. Finally, do not be afraid of the olive oil. The oil essentially fries the bottom of the bread, providing that essential contrast to the airy interior.

Delicious Variations
- Garlic Confit: Press soft, slow-roasted garlic cloves into the dimples before baking.
- Tomato and Pesto: Dot the surface with halved cherry tomatoes and swirls of basil pesto.
- Sweet & Salty: Top with sliced peaches, goat cheese, and a drizzle of honey after baking.
- Everything Bagel: Sprinkle a generous amount of everything bagel seasoning over the oil before dimpling.
Frequently Asked Questions
Why is my focaccia flat with no bubbles? This usually happens due to under-fermentation or a weak starter. If the dough doesn’t have enough gas trapped inside before it hits the oven, it won’t rise. Ensure your dough looks jiggly and bubbly before you start dimpling.
How do I stop the dough from sticking to the pan? Use more olive oil than you think you need. A well-seasoned non-stick metal pan or a parchment-lined pan (heavily oiled) works best. Avoid glass pans as they tend to cause sticking.
Can I use all-purpose flour instead of bread flour? You can, but bread flour has a higher protein content which creates a stronger gluten network. Strong gluten is necessary to hold the weight of those massive air bubbles without collapsing.
What if my dough is too sticky to handle? High hydration dough is naturally sticky. Instead of adding more flour, wet your hands with water or coat them in olive oil when handling the dough. This prevents sticking without altering the recipe’s hydration.
Why is the bottom of my bread soggy? This occurs if the bread sits in the pan for too long after baking. The steam gets trapped and softens the crust. Always move your focaccia to a wire cooling rack within two minutes of taking it out of the oven.
Conclusion
Mastering sourdough focaccia is a journey of patience and observation. Once you see those giant bubbles emerging from the oven, you will realize the 18-hour wait was worth every second. This “no-fail” approach ensures that even beginners can achieve professional-level results. Remember to trust the process, watch the dough rather than the clock, and never skimp on the olive oil. Happy baking!