Follow Me On Pinterest!
Halloween Pancake Bar Party Food
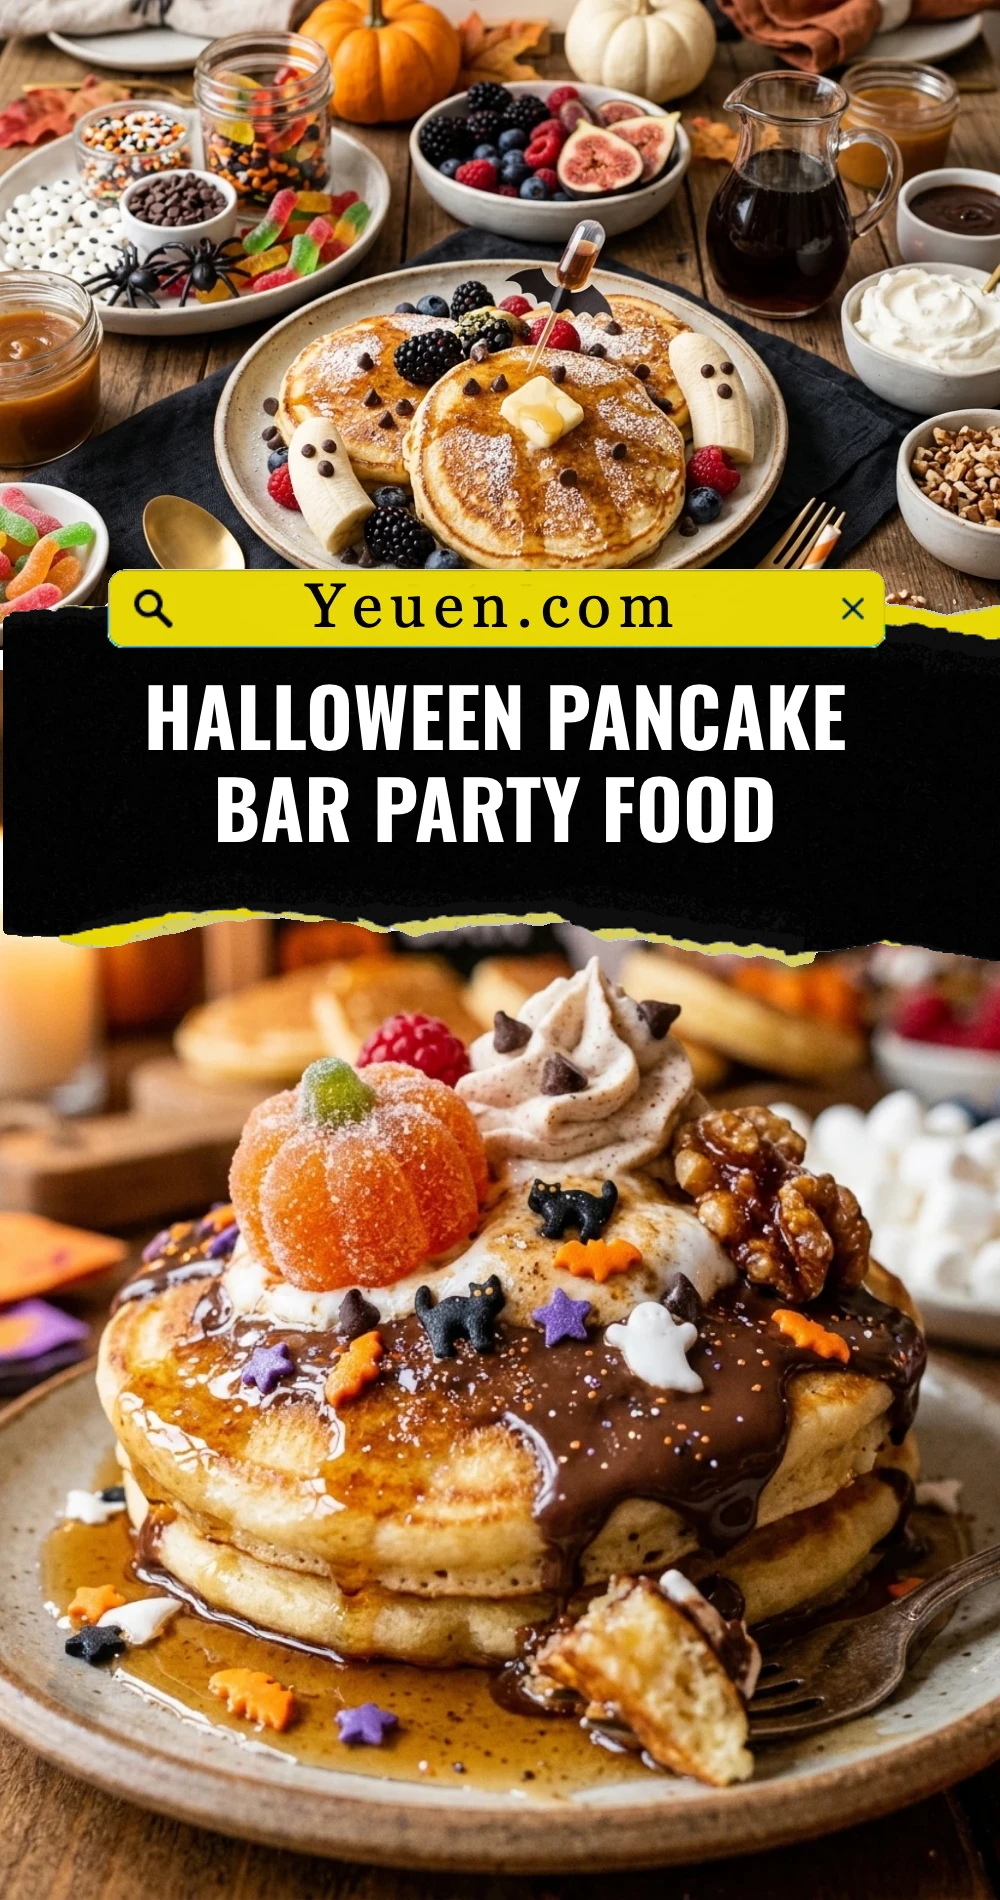
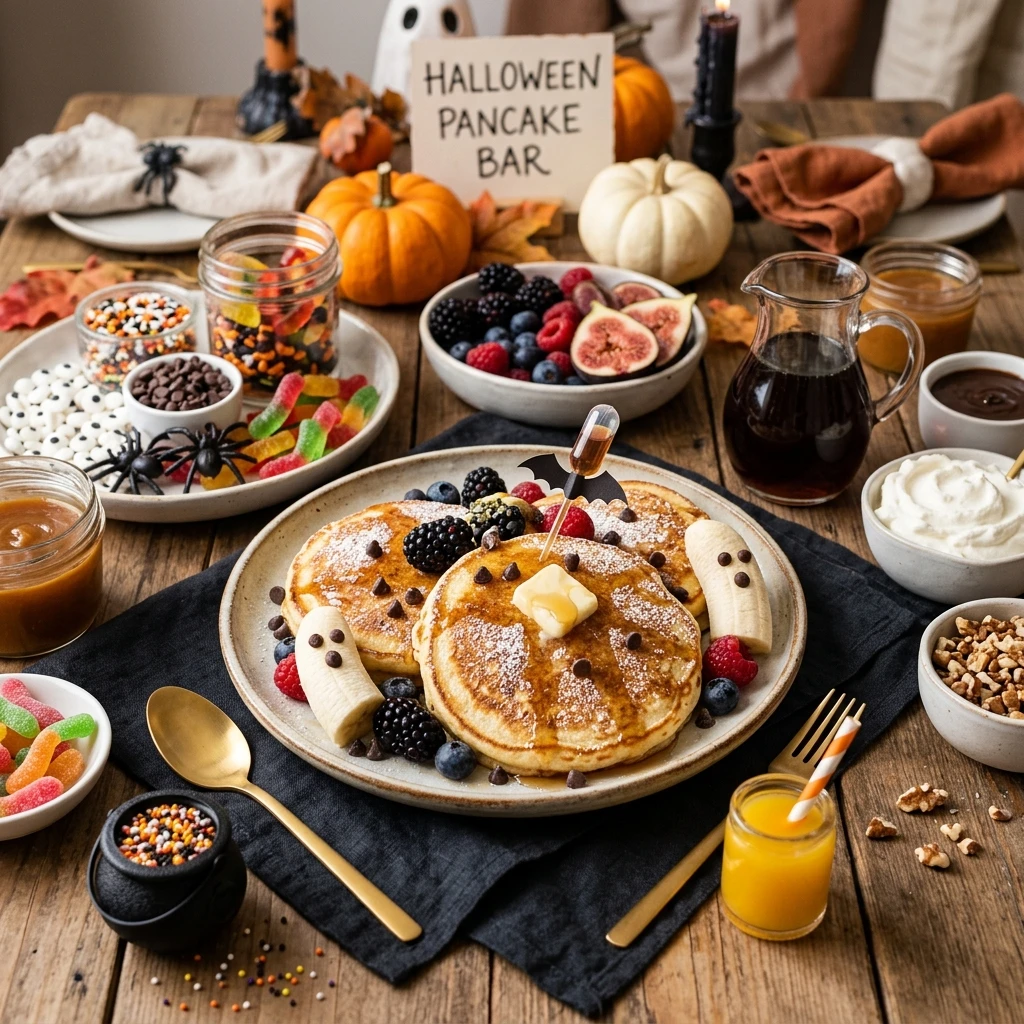
Get ready to host the spookiest breakfast on the block with a Halloween Pancake Bar. This interactive party food setup turns a standard morning meal into a creative, festive celebration that guests of all ages will love. Whether you are hosting a neighborhood brunch, a kids’ sleepover, or a family morning before trick-or-treating, this spread allows everyone to play with their food in the best way possible. From pumpkin-shaped flapjacks to “blood” red berry syrups and candy googly eyes, the possibilities for edible art are endless. It is easy to assemble, visually stunning, and guaranteed to create lasting holiday memories.
Recipe Information
- Prep Time: 20 minutes
- Cook Time: 15 minutes
- Total Time: 35 minutes
- Servings: 8 people
- Difficulty: Easy
Nutrition values
- Calories: 340 kcal
- Protein: 7g
- Carbs: 58g
Why Make This Halloween Pancake Bar Party Food
This pancake bar is the ultimate stress-free party solution. You do most of the work before the guests arrive, allowing you to enjoy the festivities rather than being stuck at the stove. It encourages creativity as children and adults alike build monsters, spiders, and jack-o’-lanterns on their plates. Plus, it is incredibly budget-friendly. Using simple pantry staples like flour, sugar, and food coloring, you can create a high-impact visual display that looks like it was professionally catered. It also accommodates picky eaters effortlessly since every guest chooses their own toppings.
Ingredients
- 4 cups all-purpose pancake mix (or your favorite homemade recipe)
- 3 cups milk (or water, as per mix instructions)
- 2 large eggs
- 4 tablespoons melted butter
- Orange and purple gel food coloring
- 1 teaspoon pumpkin pie spice
- 1 cup chocolate chips (mini and regular)
- 1 cup candy eyeballs
- 1 cup whipped cream (in a piping can)
- 1 cup fresh blueberries and sliced strawberries
- 1/2 cup gummy worms or spiders
- Maple syrup and chocolate syrup
- 1/2 cup green sprinkles or “monster” sprinkles
Directions
Step 1: Organize the Toppings Station
Begin by setting the stage for your bar. Place various toppings into small, festive bowls or a large muffin tin for easy access. Arrange the candy eyeballs, chocolate chips, fruit, and gummy candies in a central location. Pour syrups into small pitchers and place the whipped cream on ice if the party will last a while. Setting the table first ensures the pancakes stay warm once they hit the serving platter.
Step 2: Prepare the Colored Batters
Whisk together the pancake mix, milk, eggs, melted butter, and pumpkin pie spice in a large bowl until just combined. Divide the batter into three separate bowls. Leave one bowl plain, add orange gel food coloring to the second, and purple gel food coloring to the third. Stir gently until the colors are vibrant and streak-free. Transfer the batters into squeeze bottles if you want to make specific shapes like spiders or ghosts.
Step 3: Cook the Pancakes
Heat a large non-stick griddle or skillet over medium heat and lightly grease with butter or cooking spray. Pour small amounts of batter to create 3-inch to 4-inch circles. If you are feeling adventurous, use the squeeze bottles to draw spider webs or pumpkins. Cook until bubbles form on the surface and the edges look set, then flip and cook for another minute until golden. Keep the finished pancakes warm in a 200°F oven until all the batter is used.
Step 4: Set the Bar and Serve
Stack the colorful pancakes on a large platter in the center of your table. Instruct guests to grab a plate and start building their Halloween masterpieces. Encourage them to use whipped cream for ghost bodies, blueberries for spider legs, and candy eyes to bring their monsters to life. Provide plenty of napkins for the inevitable sticky fingers!
Expert Tips for Perfect Halloween Pancake Bar Party Food
- Use Gel Coloring: Use gel food coloring instead of liquid drops. Gels provide much more vibrant colors without thinning out your pancake batter.
- Keep it Warm: Use a warming tray or a slow cooker on the lowest setting to keep the pancakes at the perfect temperature throughout the party.
- Squeeze Bottles are Key: If you want to make intricate shapes like bat wings or skeleton bones, squeeze bottles give you the precision that a ladle cannot.
- Prep Ahead: You can wash and cut the fruit and fill the topping bowls the night before to save time on the morning of the event.
- Avoid Overmixing: When adding your colors, fold them in gently. Overmixing the batter leads to tough, flat pancakes rather than fluffy ones.
Delicious Variations
- Pumpkin Puree Pancakes: Mix half a cup of canned pumpkin puree into the orange batter for a true autumnal flavor and extra nutrients.
- Gluten-Free Option: Simply swap the standard mix for a high-quality gluten-free pancake blend to accommodate sensitive guests.
- Savory Spooky Bar: Include “severed finger” sausages (hot dogs with a fingernail notch cut out) and green-dyed scrambled eggs for a savory twist.
- Chocolate Overload: Add cocoa powder to one portion of the batter to create black/dark brown pancakes, perfect for bats or spiders.
- Vegan Friendly: Use flax eggs and almond milk to create a vegan-friendly batter that everyone can enjoy.
Frequently Asked Questions
Can I make the pancake batter the night before?
It is best to make the batter fresh for the fluffiest results. However, you can mix the dry ingredients ahead of time. If you must make it early, store it in the fridge but realize the leavening agents may lose some of their power, resulting in flatter pancakes.
What is the best way to keep pancakes warm for a crowd?
Place a wire rack over a baking sheet and put it in the oven at 200°F (95°C). The wire rack prevents the bottom of the pancakes from getting soggy by allowing air to circulate.
How do I make the syrup look like blood?
Mix a few drops of red food coloring into light-colored corn syrup or a clear fruit syrup. You can also blend raspberries and strain them to create a natural, deep red “blood” sauce.
Can I freeze leftover pancakes?
Yes! Let the pancakes cool completely, then stack them with parchment paper between each layer. Place them in a freezer bag for up to two months. Reheat them in the toaster or microwave for a quick weekday breakfast.
Do I need special molds for the shapes?
Molds are helpful but not necessary. You can use metal cookie cutters directly on the griddle (grease them well!) or simply use a squeeze bottle to freehand your designs.
Conclusion
A Halloween Pancake Bar is more than just a meal; it is an experience that brings people together through food and fun. By providing a variety of colors, textures, and flavors, you give your guests the tools to celebrate the season in a delicious way. It is a flexible, easy-to-manage concept that works for any group size. So, grab your spatulas, put on your favorite spooky playlist, and get ready to flip some festive flapjacks that will be the talk of the town!