Follow Me On Pinterest!
Witch Finger Pretzel Rods – Halloween Treats for Kids
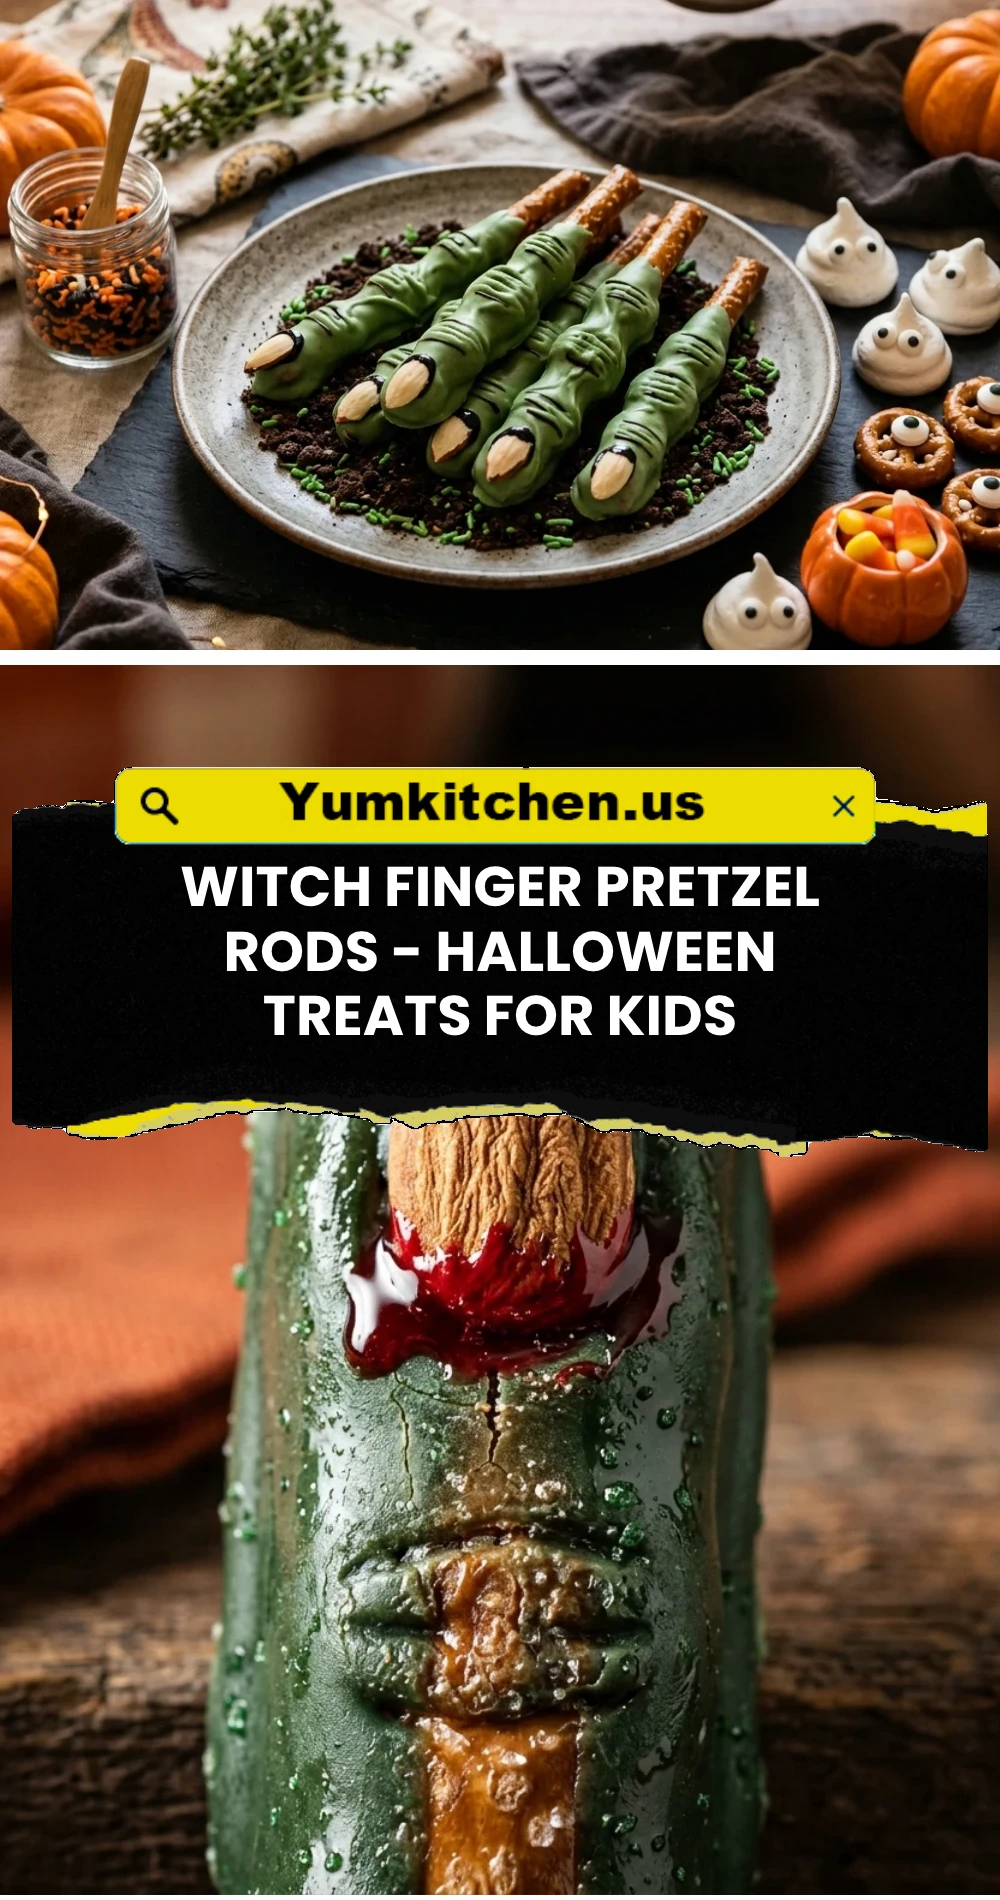
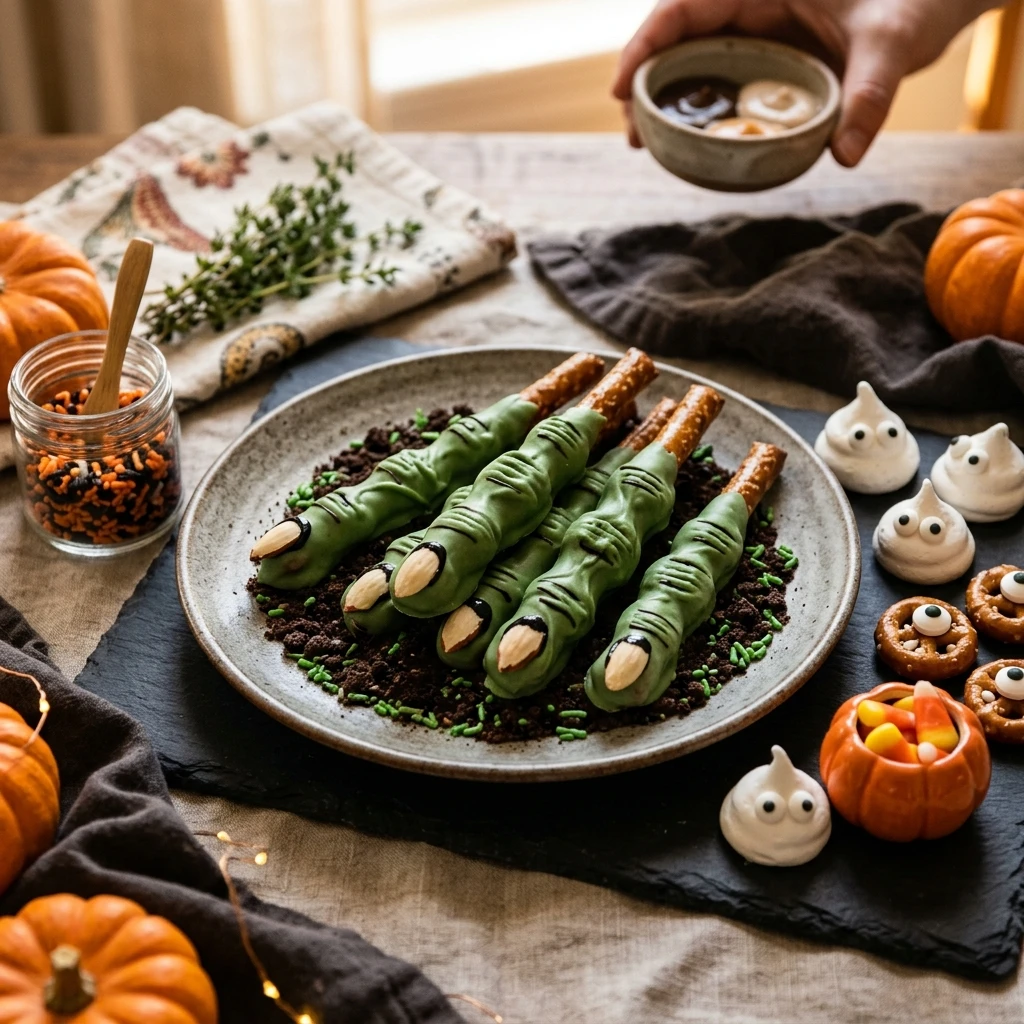
Get ready to cast a spell on your Halloween dessert table with these spooky and delicious Witch Finger Pretzel Rods! This treat is the ultimate combination of salty and sweet, making it a guaranteed hit for kids and adults alike. These “fingers” look incredibly creepy with their wrinkled knuckles and almond fingernails, but they taste like a dream. Best of all, this is a no-bake recipe that you can whip up in less than half an hour. Whether you are hosting a haunted house party or looking for a fun kitchen activity with the little ones, these edible witch fingers are the perfect addition to your October festivities.
Recipe Information
- Prep Time: 20 minutes
- Cook Time: 5 minutes
- Total Time: 25 minutes
- Servings: 24 rods
- Difficulty: Easy
Nutrition values
- Calories: 115 kcal
- Protein: 1.5g
- Carbs: 19g
Why Make This Witch Finger Pretzel Rods – Halloween Treats for Kids
Making these pretzel rods is a fantastic way to celebrate the spooky season without spending hours in the kitchen. They require only a handful of ingredients and zero actual baking time. Since they are sturdy, they make excellent party favors or school treats. Kids love the “gross-out” factor of eating a green finger, and you will love how the salty crunch of the pretzel perfectly balances the creamy sweetness of the candy coating. They are also highly customizable, allowing you to get as creative (and creepy) as you want!
Ingredients
- 1 bag (12 oz) Large Pretzel Rods
- 1 bag (12 oz) Green Candy Melts
- 1/2 cup Sliced Almonds (to use as fingernails)
- 1 teaspoon Coconut Oil or Vegetable Shortening (optional, for thinning chocolate)
- Black or Red Decorating Gel (optional, for “blood” or detail)
Directions
Step 1: Preparation of the Dipping Station
Line two large baking sheets with parchment paper or silicone baking mats. This prevents the candy coating from sticking to the surface. Set your sliced almonds in a small bowl for easy access. If your candy melts are thick, have your coconut oil ready to help smooth the texture during the melting process.
Step 2: Melting the Candy Coating
Place the green candy melts in a microwave-safe bowl. Microwave on medium power for 30-second intervals, stirring thoroughly between each session. Continue this until the candy is completely smooth and liquid. If the mixture feels too thick to dip, stir in a teaspoon of coconut oil until it reaches a silky consistency. Pour the melted candy into a tall, narrow glass to make dipping easier.
Step 3: Dipping the Pretzel Rods
Take one pretzel rod and dip it about two-thirds of the way into the melted green candy. Let the excess candy drip back into the glass. Lay the coated pretzel onto the prepared parchment paper. Repeat this process for each rod, working in small batches so the candy doesn’t set before you add the details.
Step 4: Adding the Fingernails and Knuckles
While the candy coating is still wet, press a sliced almond onto the tip of the pretzel rod to create the “fingernail.” To make the finger look realistic, use a toothpick or a butter knife to gently press three horizontal lines into the middle of the rod. These lines mimic the look of wrinkled knuckles. Do this once the candy has slightly thickened but hasn’t fully hardened.
Step 5: Setting and Finishing
Allow the witch fingers to sit at room temperature for about 30 minutes until they are completely firm. If you are in a rush, place the baking sheets in the refrigerator for 10 minutes. For an extra spooky effect, dab a little red decorating gel around the base of the almond nail or at the bottom of the “finger” to look like blood.
Expert Tips for Perfect Witch Finger Pretzel Rods – Halloween Treats for Kids
- Use a Tall Glass: Dipping the rods into a tall, narrow glass ensures an even coat and uses less candy melt than a wide bowl.
- Watch the Temperature: If the candy melts start to harden while you are working, pop them back in the microwave for 15 seconds to loosen them up.
- Almond Placement: Place the almond slightly below the very tip of the pretzel to leave a small “skin” ridge at the top for a more realistic look.
- Avoid Bubbles: Tap the pretzel gently against the side of the glass after dipping to remove any air bubbles for a smooth finish.
Delicious Variations
- Gory Fingers: Dip the almond in red food coloring or jam before pressing it onto the pretzel to create a “bloody” nail bed.
- Warty Fingers: Mix a few chopped peanuts into the melted candy to create “warts” or bumps on the witch’s skin.
- Different Colors: While green is classic, try using purple or bright orange candy melts for a different monster vibe.
- Peanut Butter Fill: Use peanut-butter-filled pretzel nuggets instead of rods to make “short” witch thumbs.
Frequently Asked Questions
Can I use white chocolate instead of candy melts?
Yes, you can use white chocolate chips or bark. Simply add a few drops of green oil-based food coloring. Avoid water-based coloring as it will cause the chocolate to seize.
How should I store these treats?
Store the finished pretzel rods in an airtight container at room temperature for up to two weeks. Avoid the fridge for long-term storage, as the pretzels can become soft or “sweat.”
Can I make these ahead of time?
Absolutely! These are perfect for making 2-3 days before a party. They hold their shape and flavor very well.
What if I have a nut allergy?
If you cannot use almonds, substitute them with a green pumpkin seed (pepita) or a small piece of dried fruit shaped like a nail.
Why is my candy coating clumping?
This usually happens if the candy gets too hot or if a drop of water gets into the bowl. Melt in short bursts and ensure all your utensils are completely dry.
Conclusion
These Witch Finger Pretzel Rods are the perfect blend of spooky creativity and simple snacking. They make a striking visual impact on any Halloween spread and provide that satisfying crunch everyone loves. With just a few ingredients and a little imagination, you can create a memorable treat that kids will be talking about long after the trick-or-treating is over. Happy haunting and happy snacking!